

There’s something about gingerbread at Christmas that feels like a warm hug. It’s sweet, simple, and a little bit nostalgic, like a charming Christmas tree filled with homemade decorations straight out of a storybook.

These air dry clay gingerbread ornaments give you that cozy gingerbread look without baking a single cookie. And the best part? You can pack them away and use them year after year.
Step-by-Step: How to Make Air Dry Clay Gingerbread Ornaments
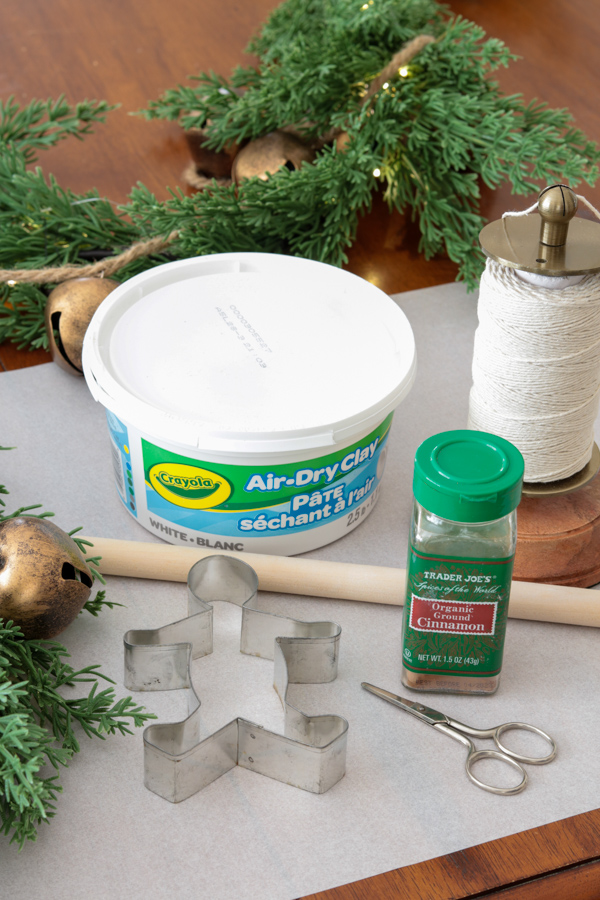
Supplies You’ll Need
Here’s what to gather before you start:
- Air dry clay (white color works best)
- Rolling pin (or a smooth glass jar)
- Cookie cutters (gingerbread people, stars, hearts, trees—anything!)
- Cinnamon (optional for scent + color)
- Ground cloves or nutmeg (optional, tiny amount for extra spice scent)
- Toothpick, skewer, or straw (to make hanging holes)
- Parchment paper or wax paper (optional, but personally I find it easier without paper under it. I use a sewing mat or nice flat surface)
- Twine, ribbon, or jute for hanging
- Scissors
- Sponge for smoothing edges
- Paint brush (soft for applying cinnamon and possibly other herbs)
- Sealer (optional: Mod Podge, matte spray sealer, or clear acrylic sealer)
Take your time with these steps. The little details are what make them look like real gingerbread.
Step 1: Prep Your Workspace
Cover your table with parchment paper or use a mat. This keeps the clay from sticking and makes cleanup easy. But again I prefer not use paper because it makes marks on my air dry clay, which means more smoothing time. Make sure you have a nice flat surface, and you're good.
Step 2: Roll out the Clay
Next, take a ball of clay in your hand. If your clay is stiff, knead it in your hands for 1–2 minutes. It should feel soft and smooth, like cookie dough.
Step 3: Roll the Clay Evenly
Once the clay is warmed, press and pat it to a pancake thickness.
Next, place the air-dry clay on your work surface and roll it out with a roller, working from the center out. Roll to about ¼ inch thick. That thickness is the sweet spot—sturdy without being bulky.
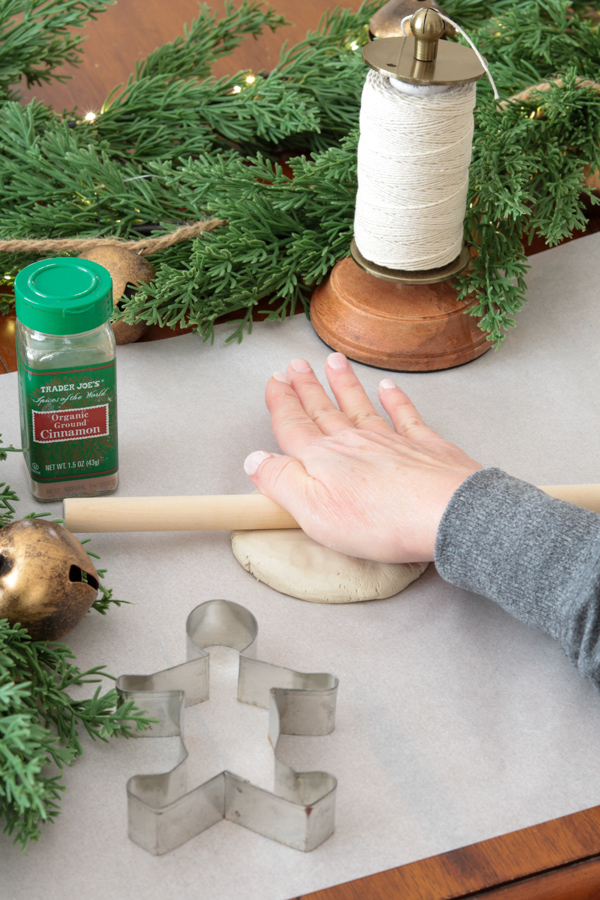
Designer tip:
If your ornaments are too thin, they can warp and break.
If they’re too thick, they can take a long time to dry.
Step 4: Cut Out the Shapes
Now use your cookie cutters.
- Press the cutter straight down.
- Wiggle just a tiny bit.
- Lift carefully.
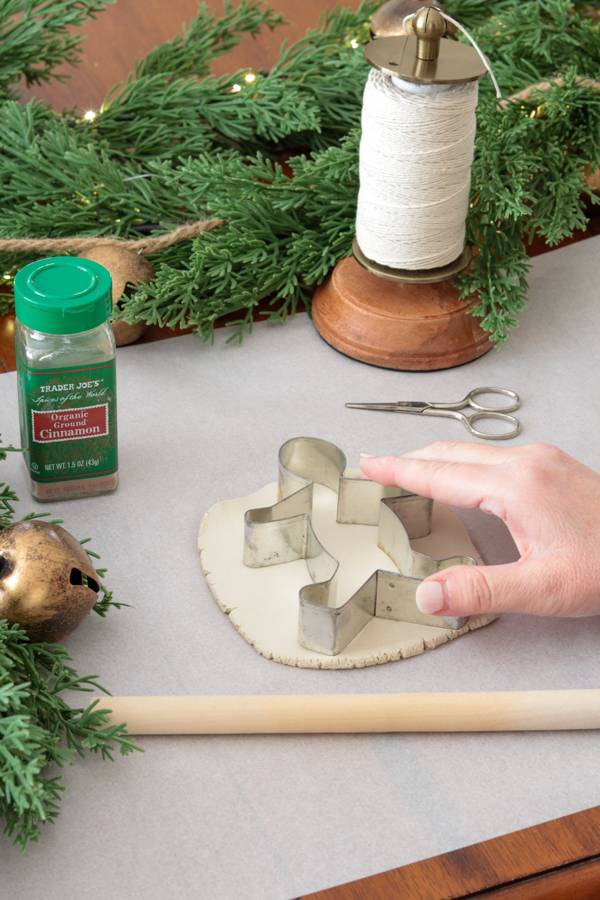
Tip: Peel away any excess clay around the cookie cutter before removing it. Then gently lift your ornament.
If the edges look rough, smooth them with your fingertip. A tiny dab of water on your finger helps like magic.
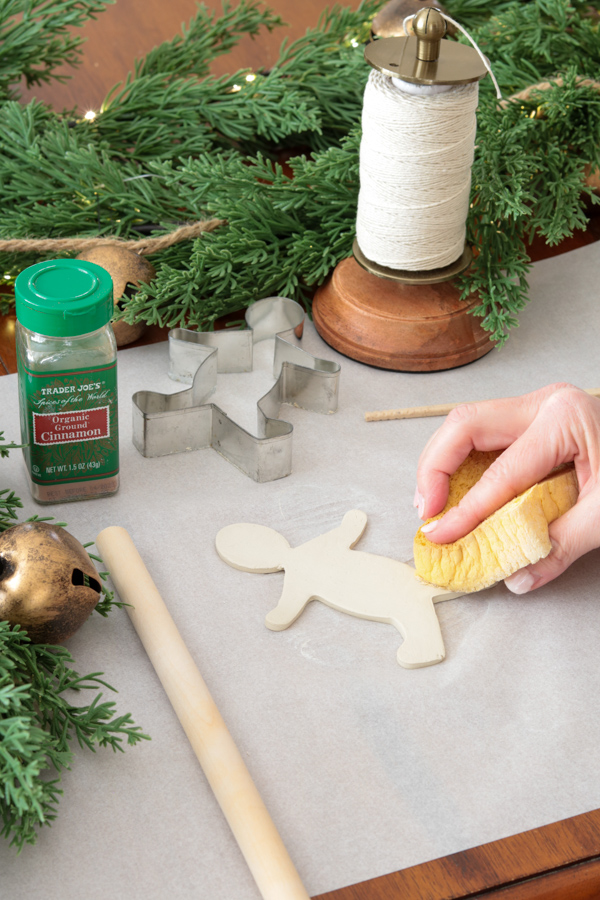
Step 5: Smooth Edges
While the clay is still soft, lightly dampen a sponge with water and smooth the edges and any blemishes on the top and bottom. If you are going for a more handmade cookie look, remember that imperfections are your friend; if it is not perfect, that is okay too.
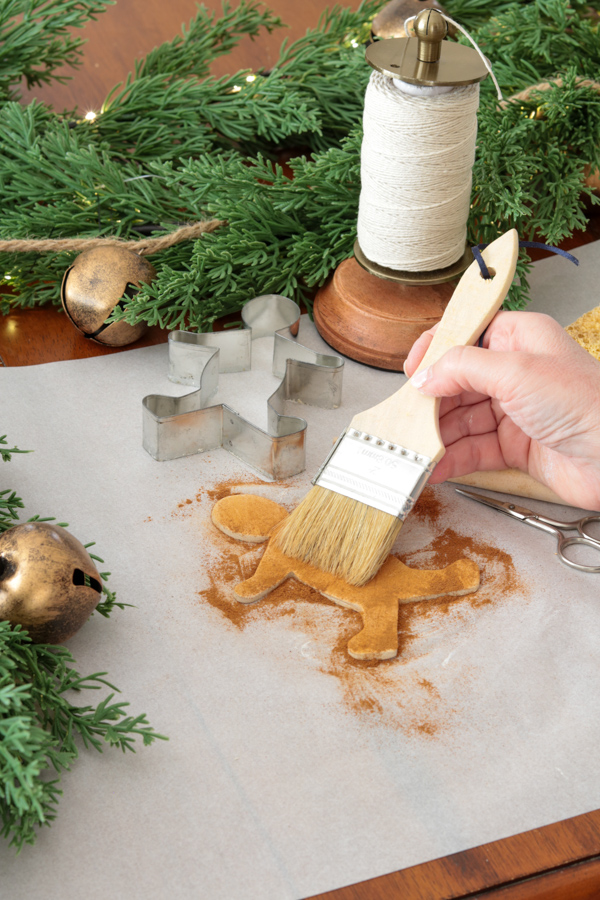
Step 5: Add “Gingerbread” Color and Scent
Follow these easy steps to get beautiful scented gingerbread ornaments. Note: Using nutmeg and or clove with cinnamon will produce a darker color. I used cinnamon only for a light toasty gingerbread cookie color.
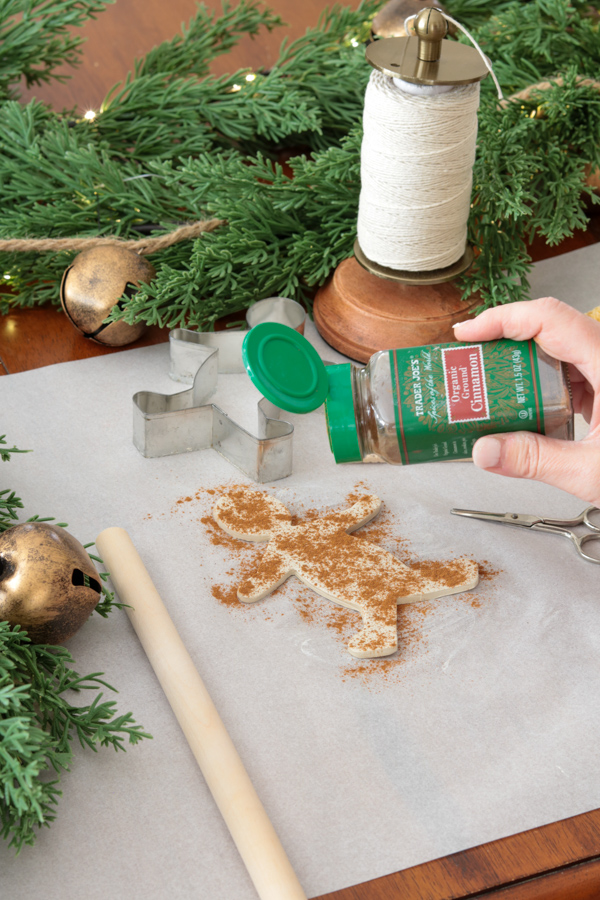
- Sprinkle cinnamon all over your clay
- Brush the cinnamon to cover the clay
- Roll the cinnamon into the clay (If you do this after you cut the shape, roll gingerly to keep the shape of the gingerbread ornament)
- You can do this before or after you cut the clay with a cookie cutter, but I prefer after so the cinnamon dusts the edges too.
Start with a little cinnamon first. You can always add more, but you can’t take it out once it’s mixed. Repeat this step to make it darker or to get your desired color.
Remember, if you want a stronger “spice shop” scent, add a pinch of cloves or nutmeg to the cinnamon before applying. Just a pinch—those spices are powerful.
Now repeat the process on the other side of the gingerbread ornament.
Step 6: Make the Hanging Hole
Do this before drying. Use a straw, toothpick, chopstick or skewer and make the hole about:
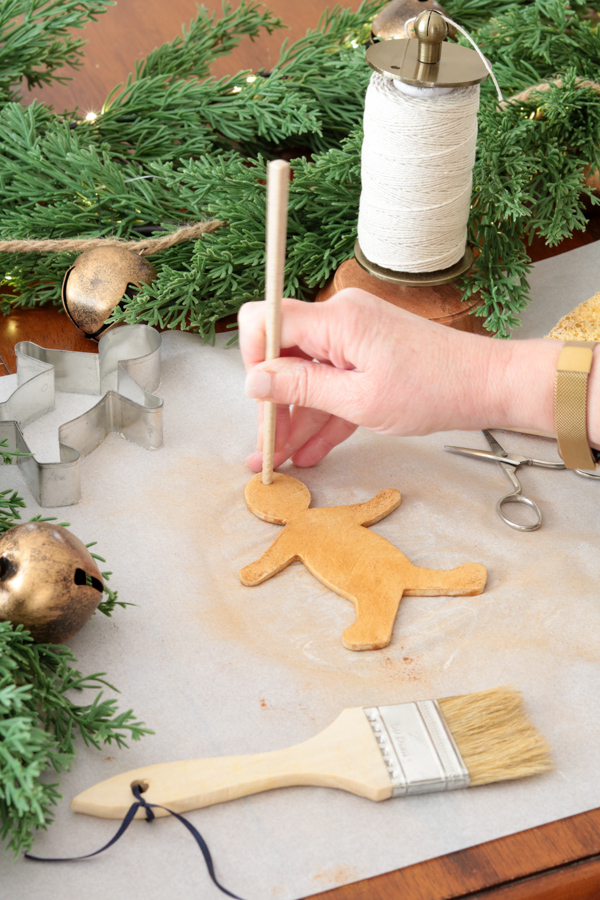
Important:
If the hole is too close to the edge, it can crack later. Give it a little breathing room.
Step 7: Prevent Warping While Drying
Lay the ornaments flat on parchment paper. Let them dry overnight (8-12 hours), depending on thickness and humidity.
If your home is humid, they may need the full 48 hours. Don’t rush them—this is where cracks happen.
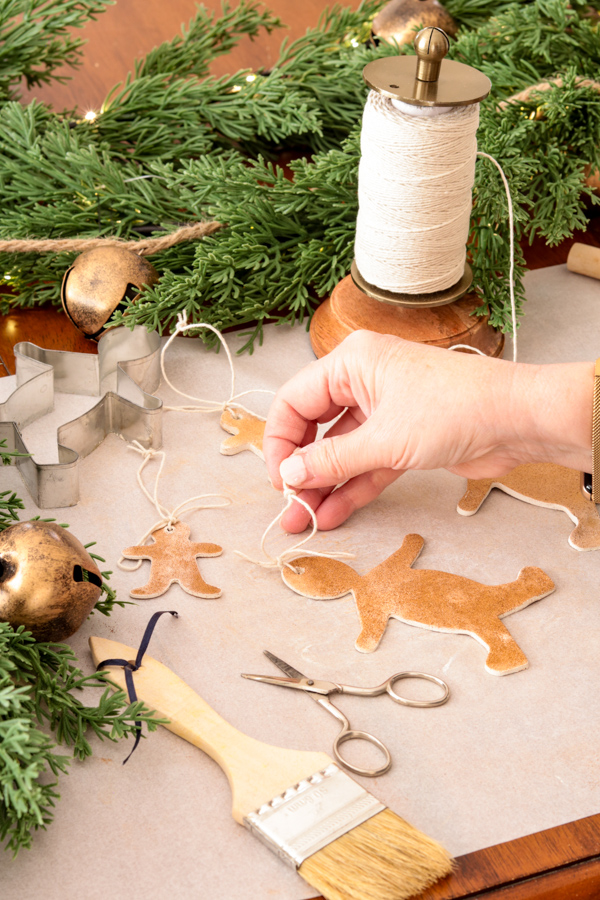
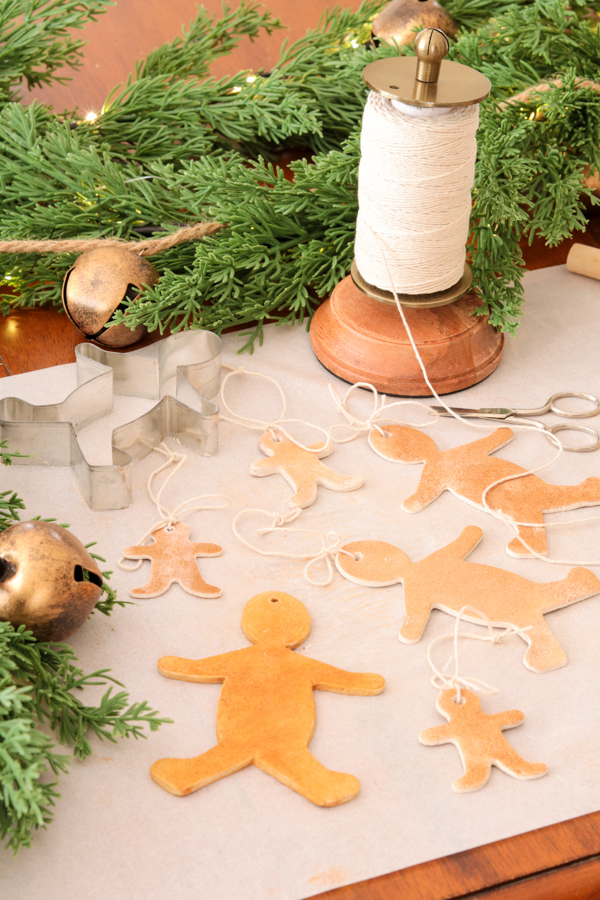
Step 8: String and Hang
Cut ribbon or twine, thread it through the hole, and tie a knot or bow on the top of the head. Then take the tails and tie them into a knot to make a hanger.
Now your air dry clay gingerbread ornaments are ready for the tree.
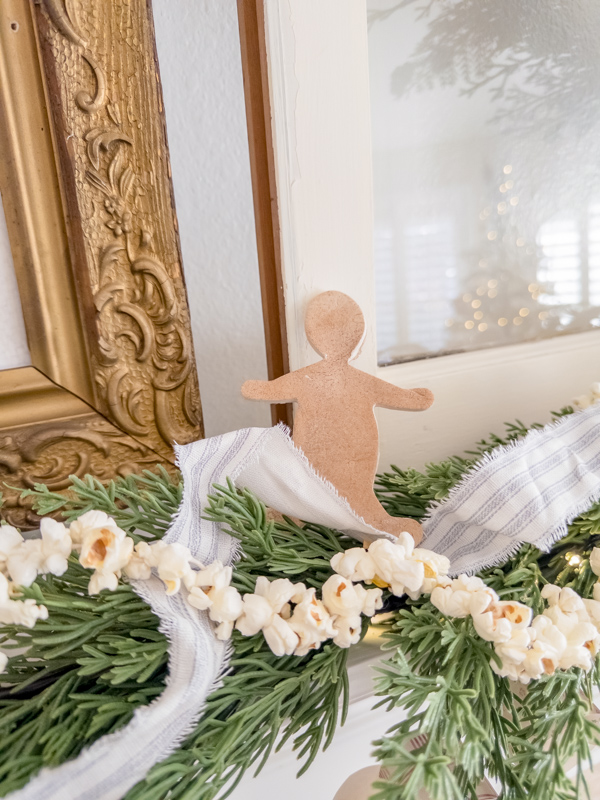
They look especially charming on a Little House on the Prairie Christmas tree with popcorn garland, dried oranges, and warm white lights.

Simple Decorating Ideas
These DIY gingerbread ornaments are cute in more places than just the tree.
Try them:
- On a wreath (tie them right onto the greenery)
- On stocking hooks
- On your china cabinet or furniture knob in the kitchen or any room
- On gifts as a jumbo gift tag
- On a garland across a mantel
- Made into a garland like this
- On a Christmas tree
Tips for the Best Results
- Roll evenly so everything dries the same speed
- Make holes a little bigger than you think you need
- Store flat in a box with tissue paper between layers
Why You’ll Love These Air Dry Clay Gingerbread Ornaments
Real gingerbread ornaments are adorable… but they crumble, crack, and attract curious pets. These air dry clay gingerbread ornaments look like the real thing and last so much longer. Plus, they smell amazing!
They’re also a perfect “slow craft.” The kind you make with a mug of tea nearby and Christmas music in the background, or while watching your favorite holiday show.
Final Thoughts
These air dry clay gingerbread ornaments bring that warm gingerbread feeling without the mess of baking. They’re charming, simple, and the kind of decoration that makes a home feel loved.
For more pioneer Christmas tree decor DIYs check out these posts:
- How to Make Popcorn Garland
- How to Decorate a Little House on the Prairie Christmas Tree
- Little House on the Prairie Christmas Decorating & Home Tour
Happy Decorating!
