

Here is a tutorial on how to paint with milk paint using the best milk paint brand on the market. Do you know that yummy old fashioned milk paint finish on furniture at Grandma's house? Well, that look is achieved with real milk paint furniture look.

HOW TO PAINT WITH MILK PAINT
How to paint with milk paint is much easier than it looks.
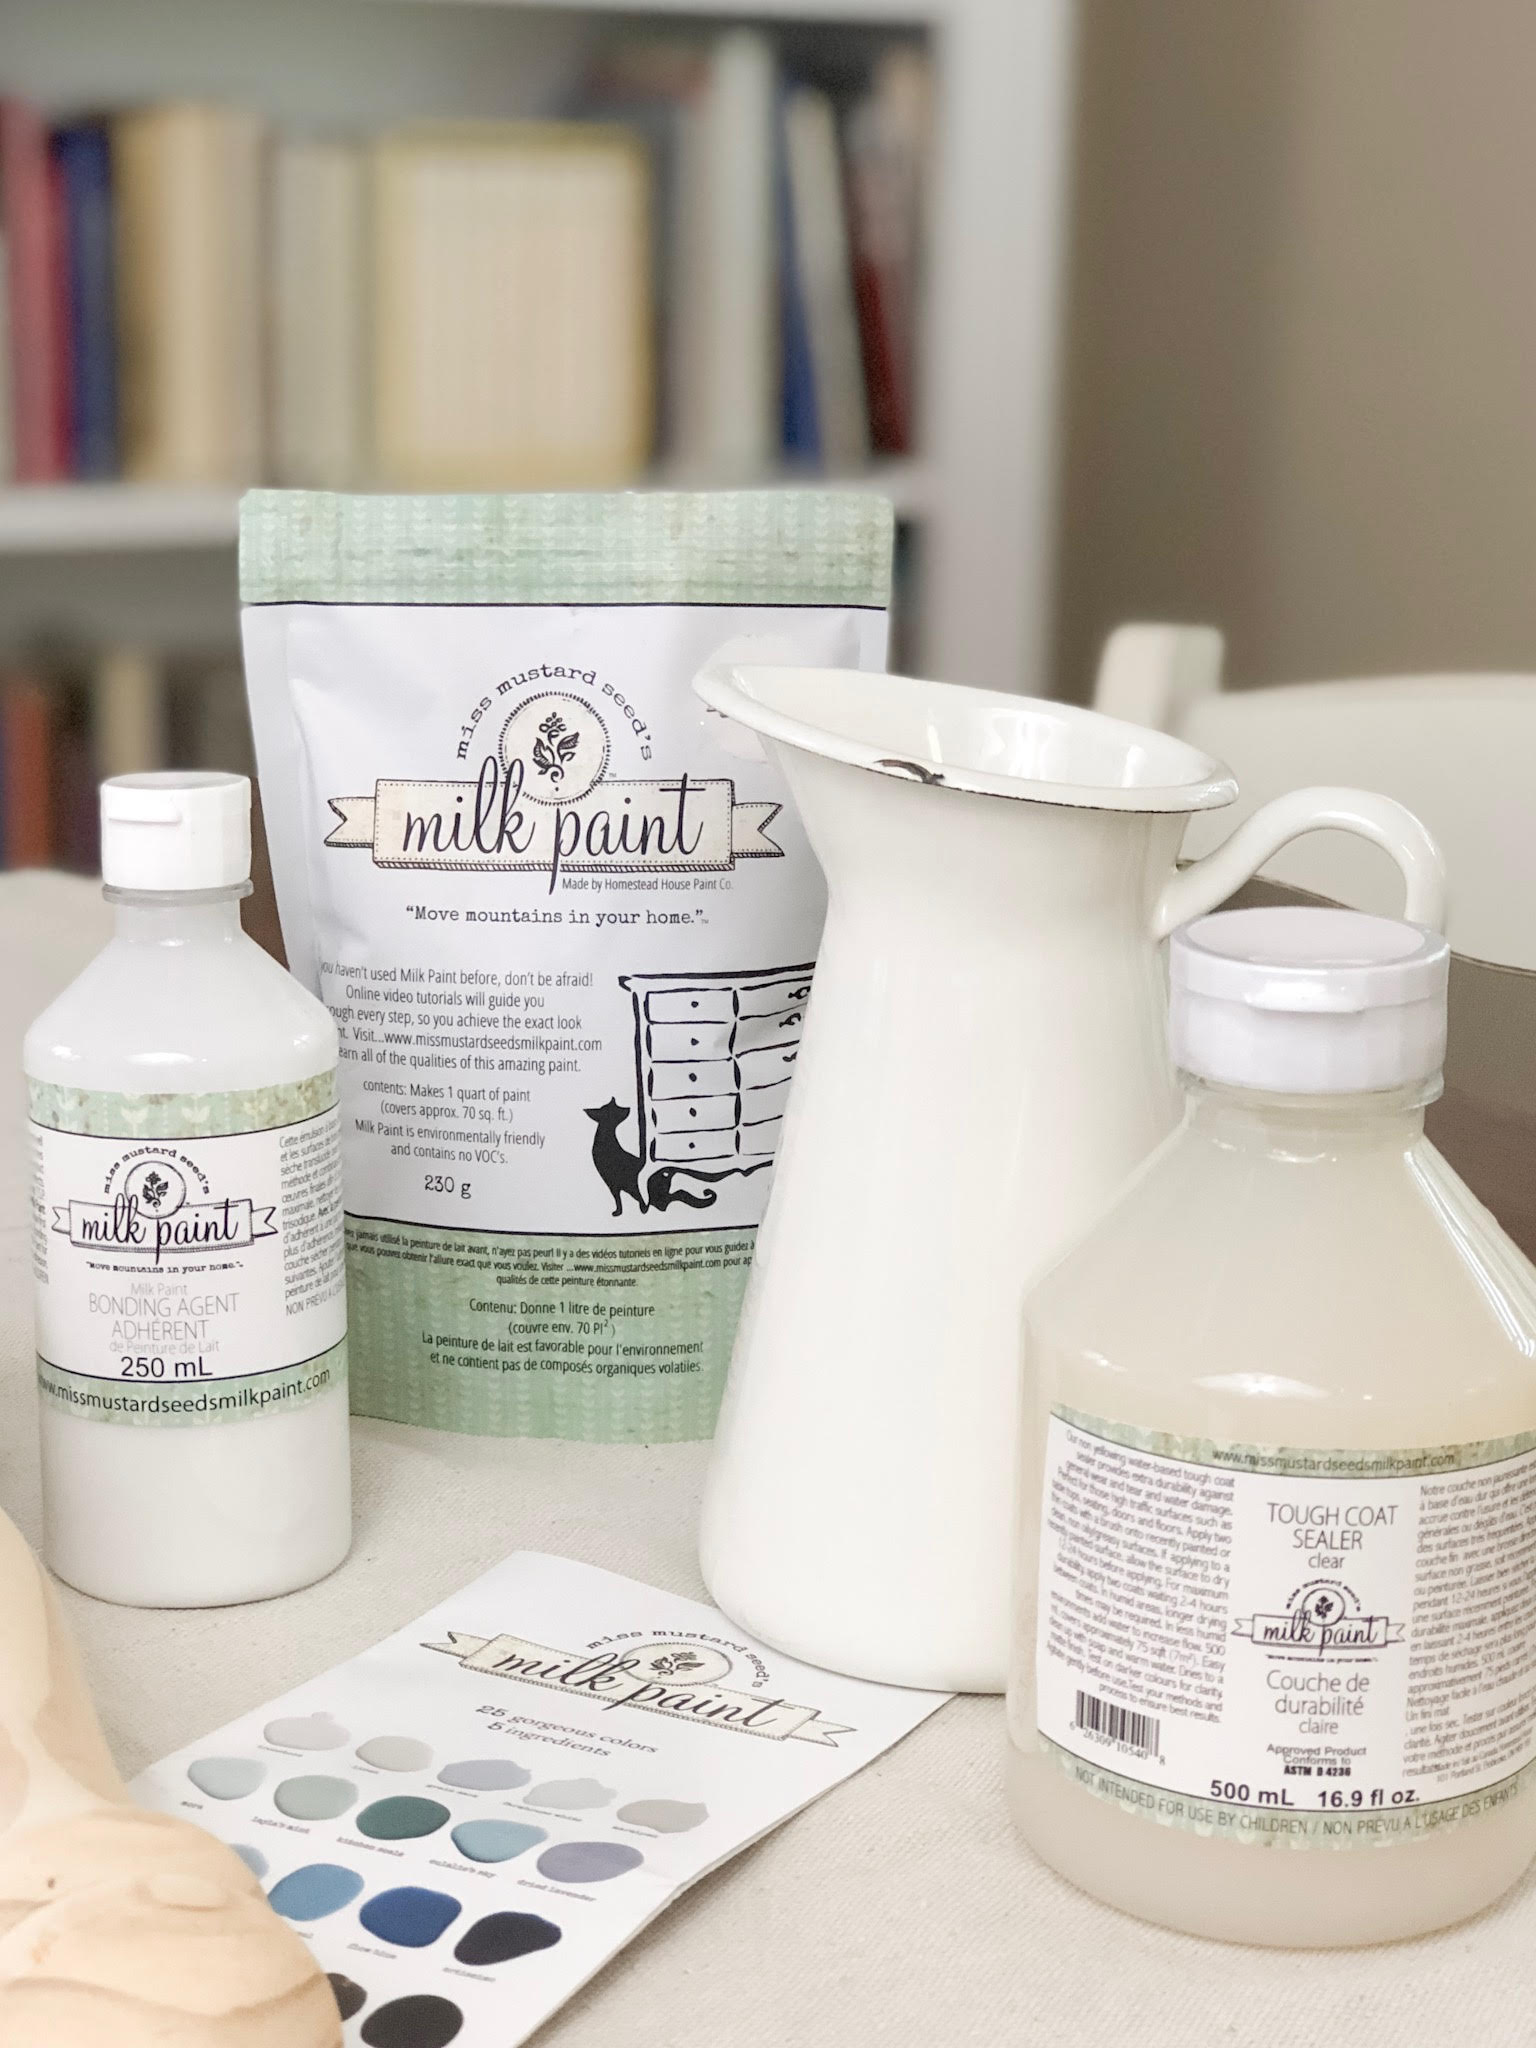
There are so many milk paint brands out in the world, but I like Miss Mustard Seed's paint over others. I will share more about why I think it is the best milk paint brand on the market at the bottom of this post.
Update: Three years have passed since I painted this chair and the finish has not chipped and still looks beautiful.
Her paint has a long shelf life because it comes in natural paint powder form and is nontoxic. And her milk paint colors are AMAZING! There is a variety of colors to choose from that create that farmhouse vibe. Make sure to store this powder form paint at room temperature.
Check out this roundup we did of furniture transformed with Miss Mustard Seed milk paint colors for some great ideas.
But instead of me trying to convince you about MMS paint follow along as I take you through a tutorial on how to paint with milk paint.
WINDSOR CHAIR STORY
Long before I decided to try out natural paint, I found this beat-up Windsor chair on the side of the road along with its twin sister. One chair gave its life for the other by giving up some of its parts to make the other one whole.
So now it is going to get a natural paint transformation and here are the steps, so you too can transform a piece of furniture with milk paint.
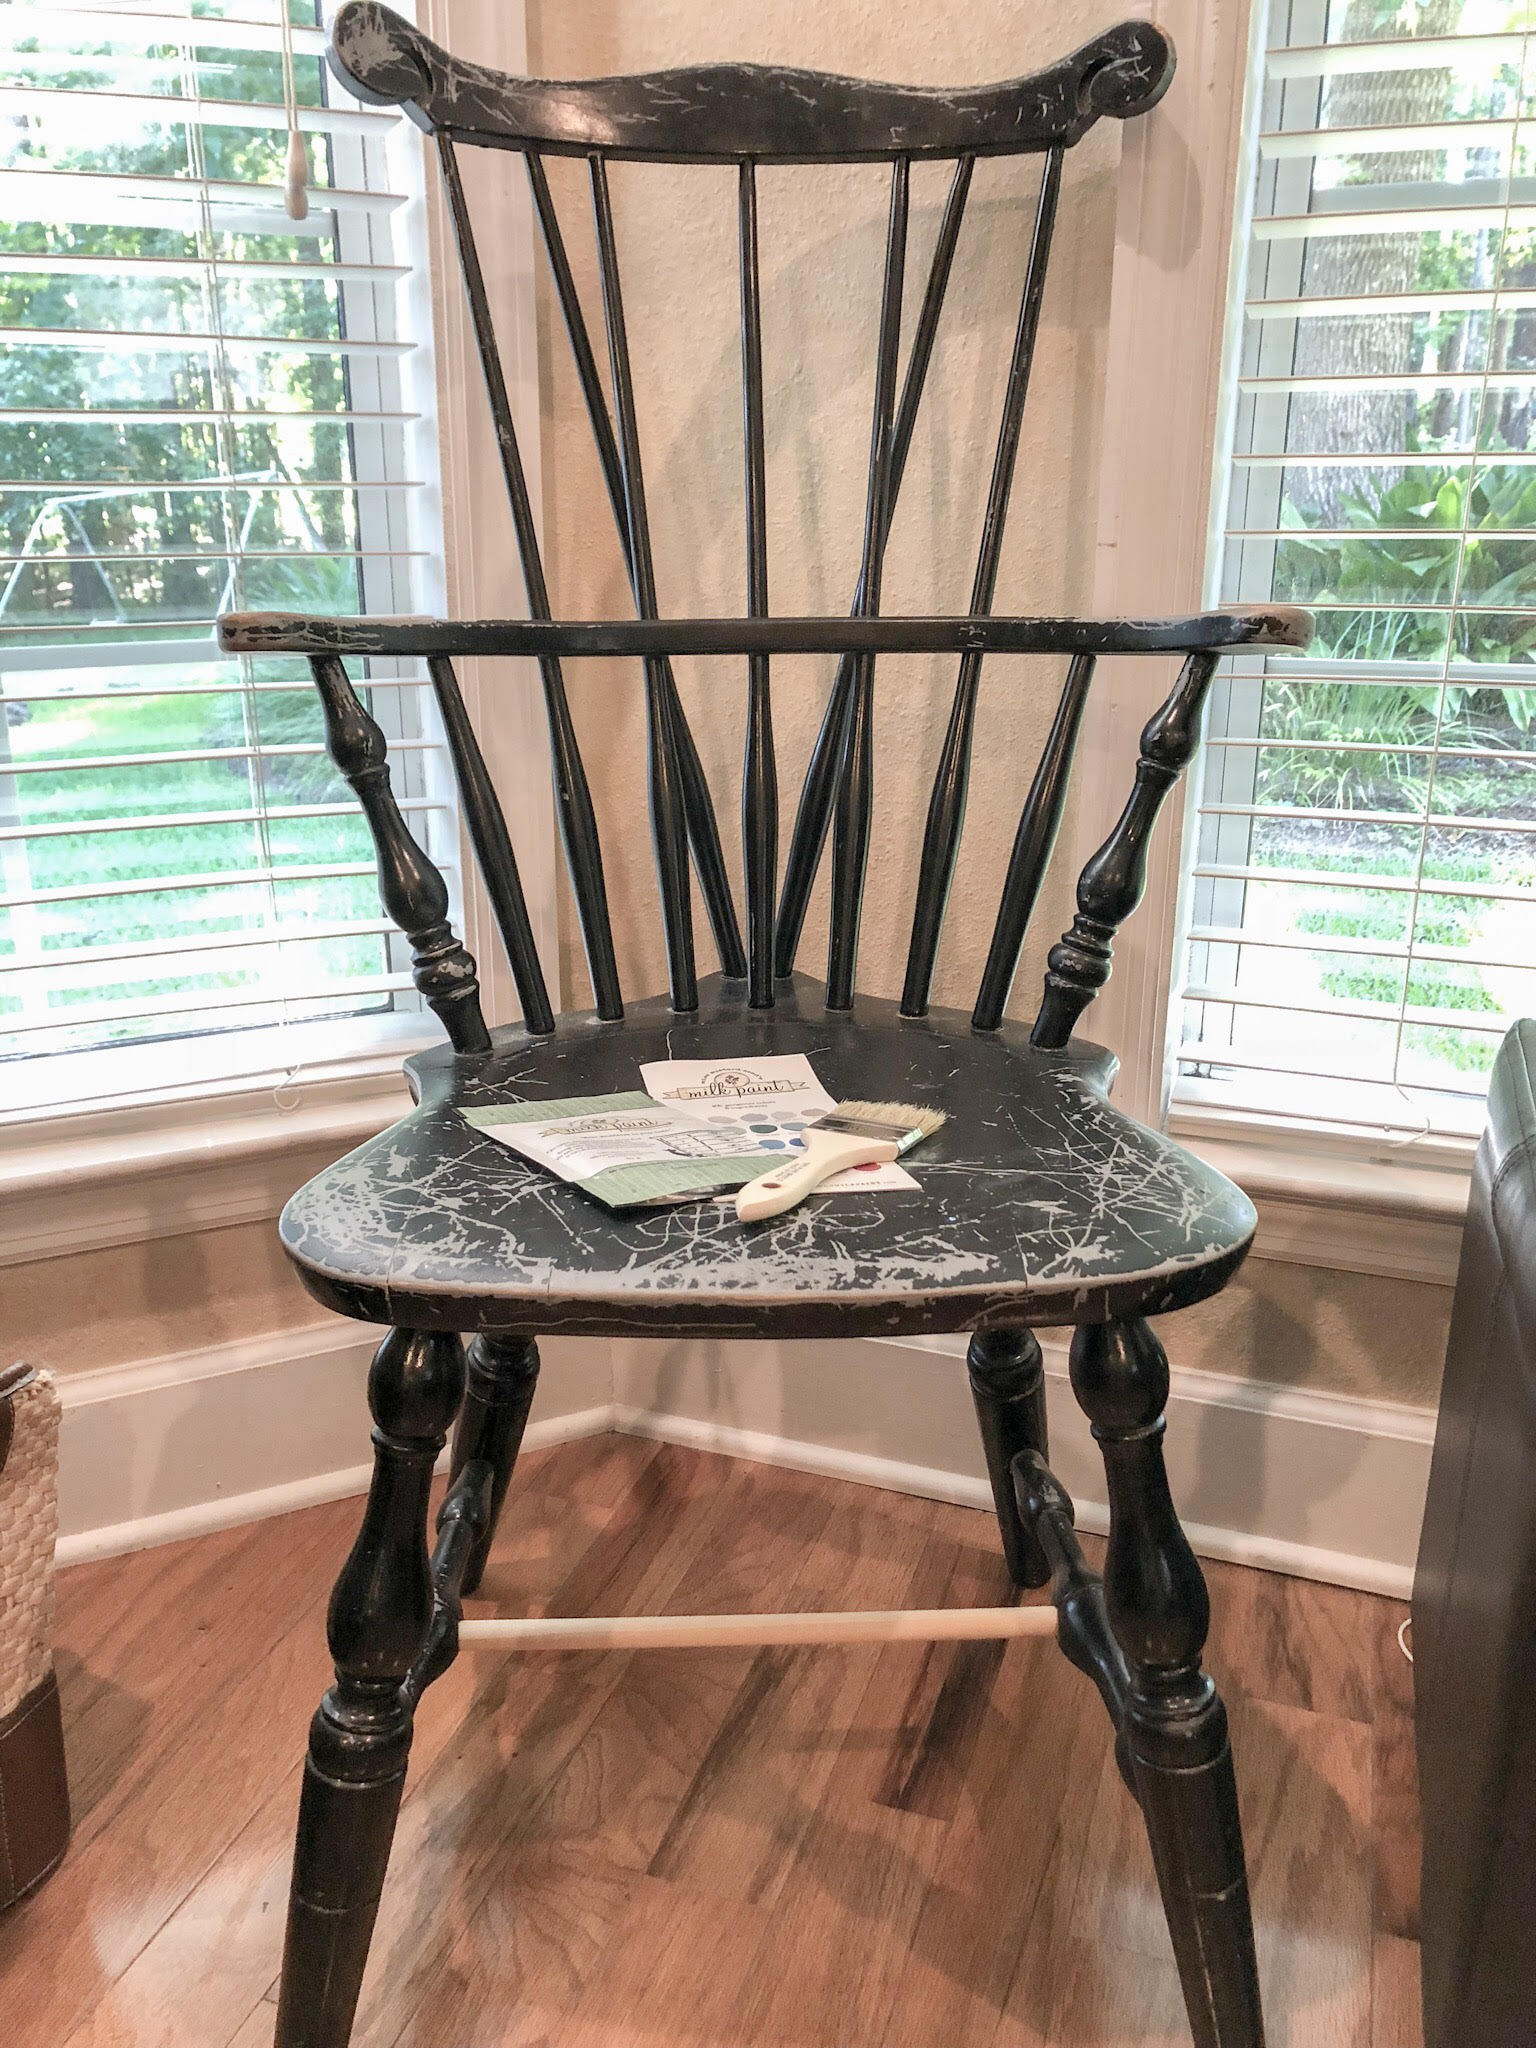
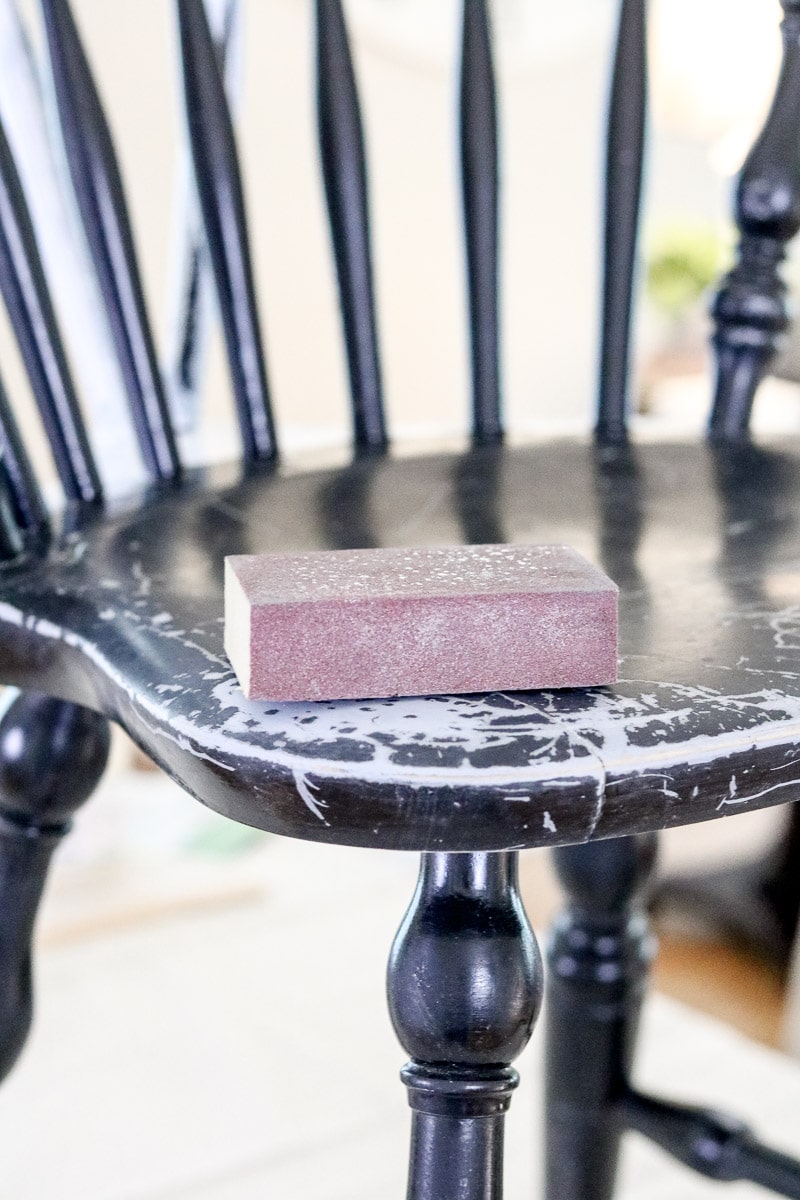
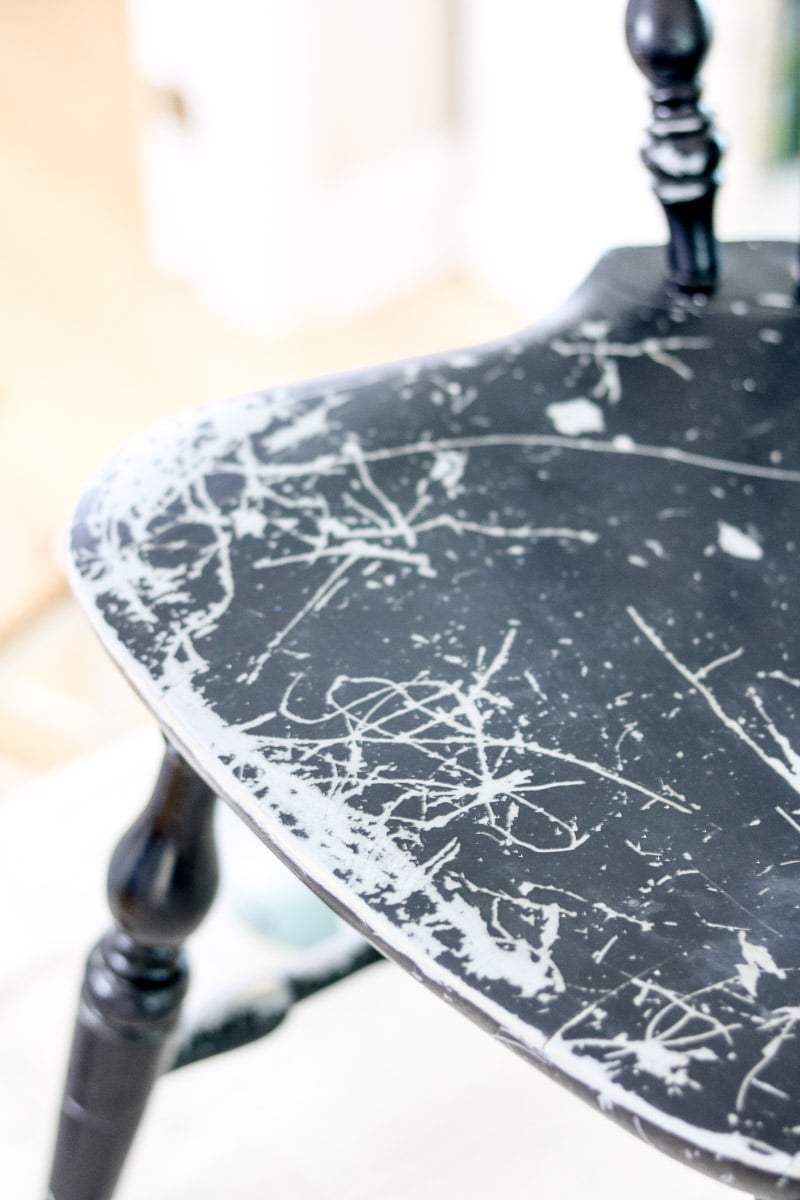
1. SANDING THE CHAIR
The old finish on this chair is not level and needs a little prep work. If your old furniture is like mine start with sanding. I like to use180-200 grit sandpaper on a sponge block. A sponge block allows the sandpaper to mold around the edges. And boy, there are many edges on a Windsor chair.
The most important thing is to sand any areas where the paint is coming up. Make sure to get the area smooth. I like to run my hand across it and feel it to see if it is smooth after I sand it. It helps me to determine if I have it level.
2. WIPING OFF THE GRIT FROM THE SANDPAPER
Now the next step is relatively easy. Just dampen a paper towel and wipe down the chair. Make sure the paper towel is barely damp.
Also, if your chair is dirty go ahead and give it a washing. Then let it dry real good before the next step.

3. PRIMER
In the world of milk paint, you do not always have to do prep work or use primer, but in my case, this chair's existing finish was peeling and shiny. It was recommended to me by Jennifer at Eight Hundred Furniture to add in a primer step.
I am so glad she recommended this because not only did it help the paint adhere to the chair but the primer helped block the black color from running through the natural paint.
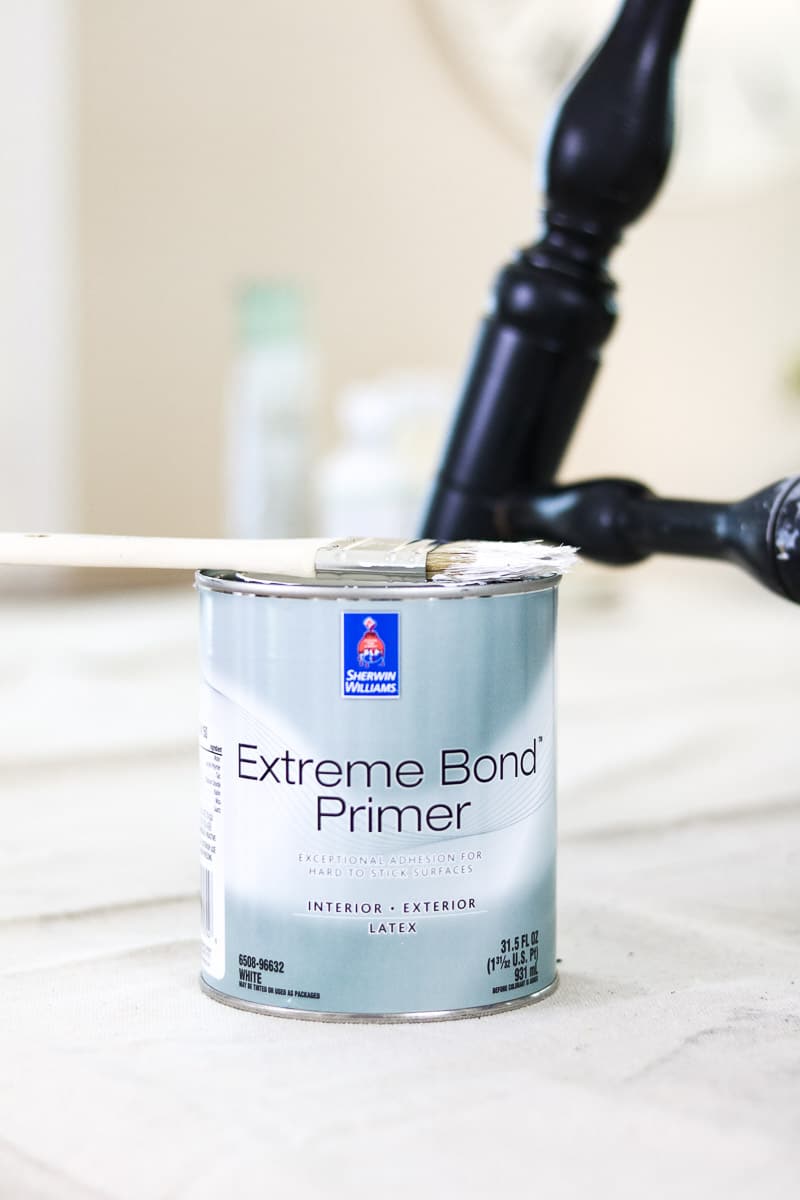
So if you need a primer to consider look at Kilz 2 or Extreme Bond Primer by Sherwin Williams, I have to say the Extreme Bond Primer worked like a charm.
Because this chair is black and milk paint is thin, you will probably need to add two coats of primer.
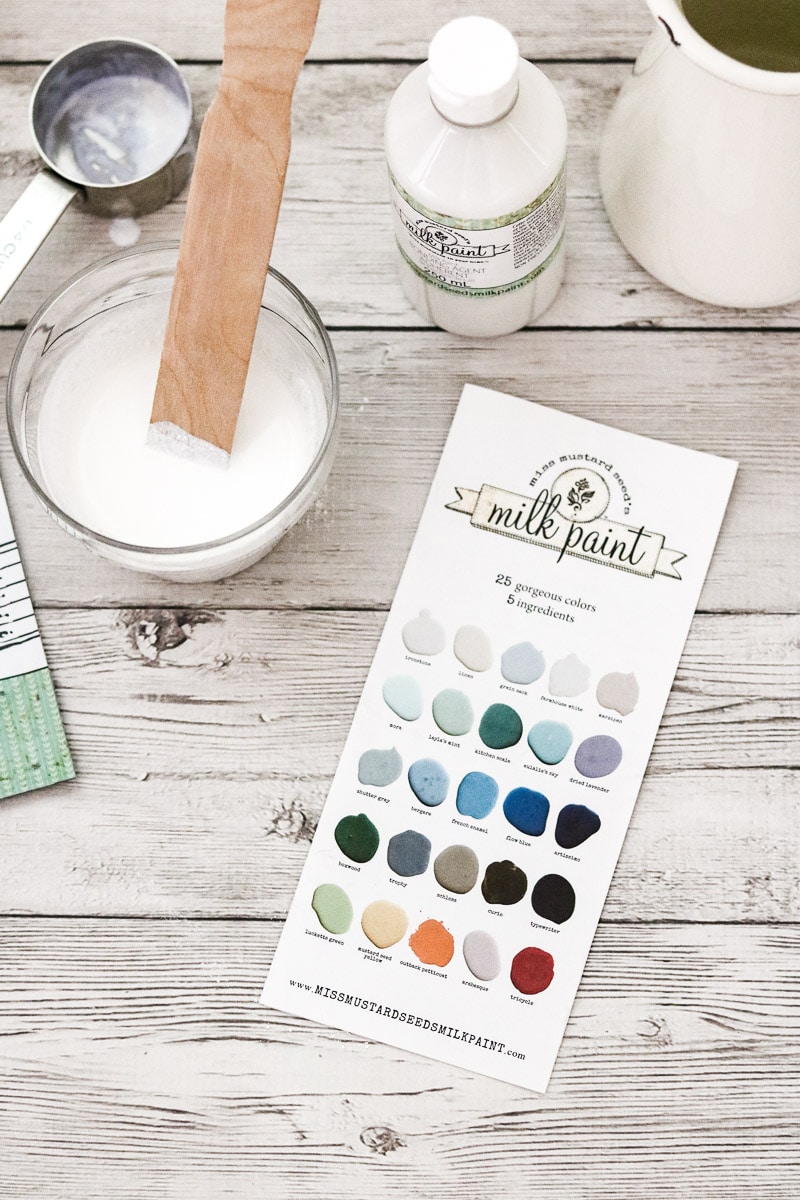
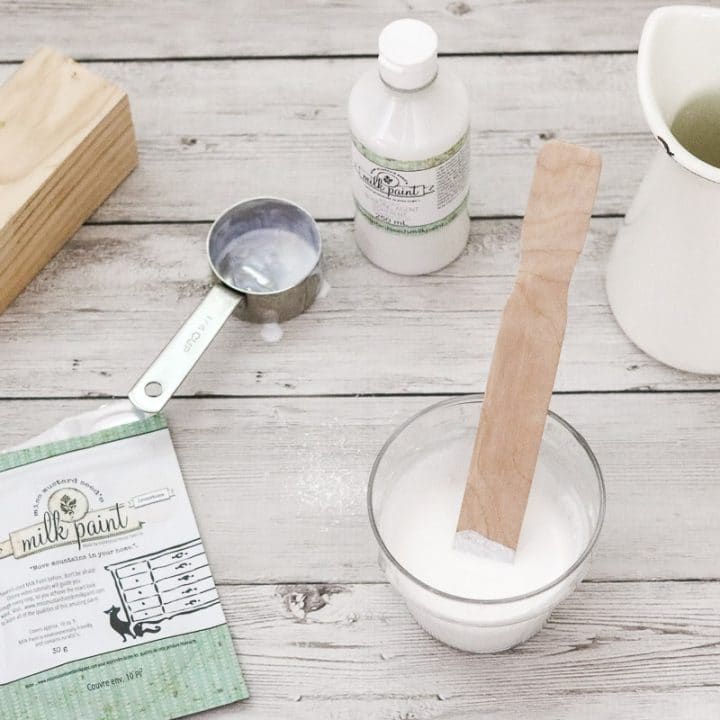
4. MIXING MILK PAINT
Before we dive into mixing the paint, you're probably asking where to buy milk paint? Well, you can purchase it on Amazon or go to Miss Mustard Seeds Website to find a list of retailers that might be close to you.
Okay, so now on to mixing the paint. Remember me saying that MMS paint has a long shelf life. Well, it comes in powder form, so you need to mix it. But please don't procrastinate on this step because it is super, super easy.
For my chair, I mixed a 1/4 cup of Ironstone milk powder, 1/4 cup of water and 1/4 cup of bonding agent.
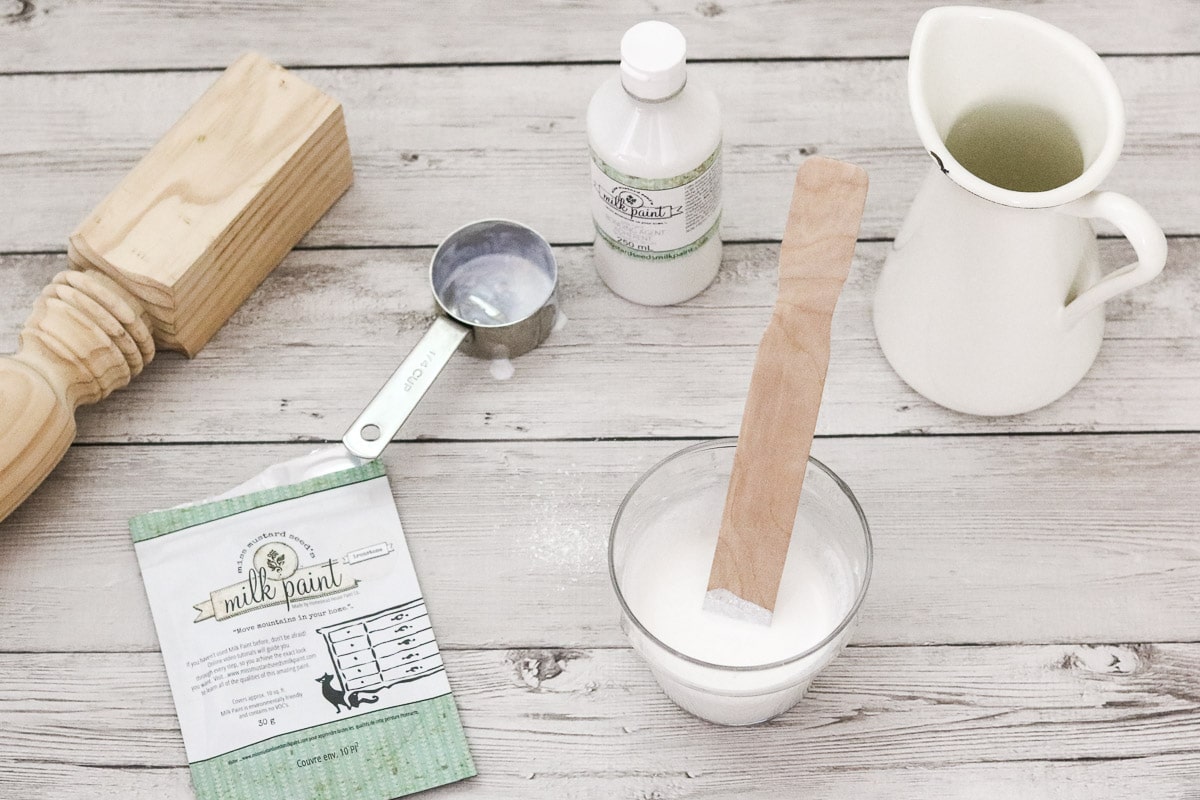
Start mixing the milk powder and a small amount of water first and as you stir keep adding water. Give it a good stir until you feel like all the clumps have dissolved. Then add your bonding agent. It is kind of like a runny glue and mixes in very easily.
See learning how to paint with natural paint is pretty easy.
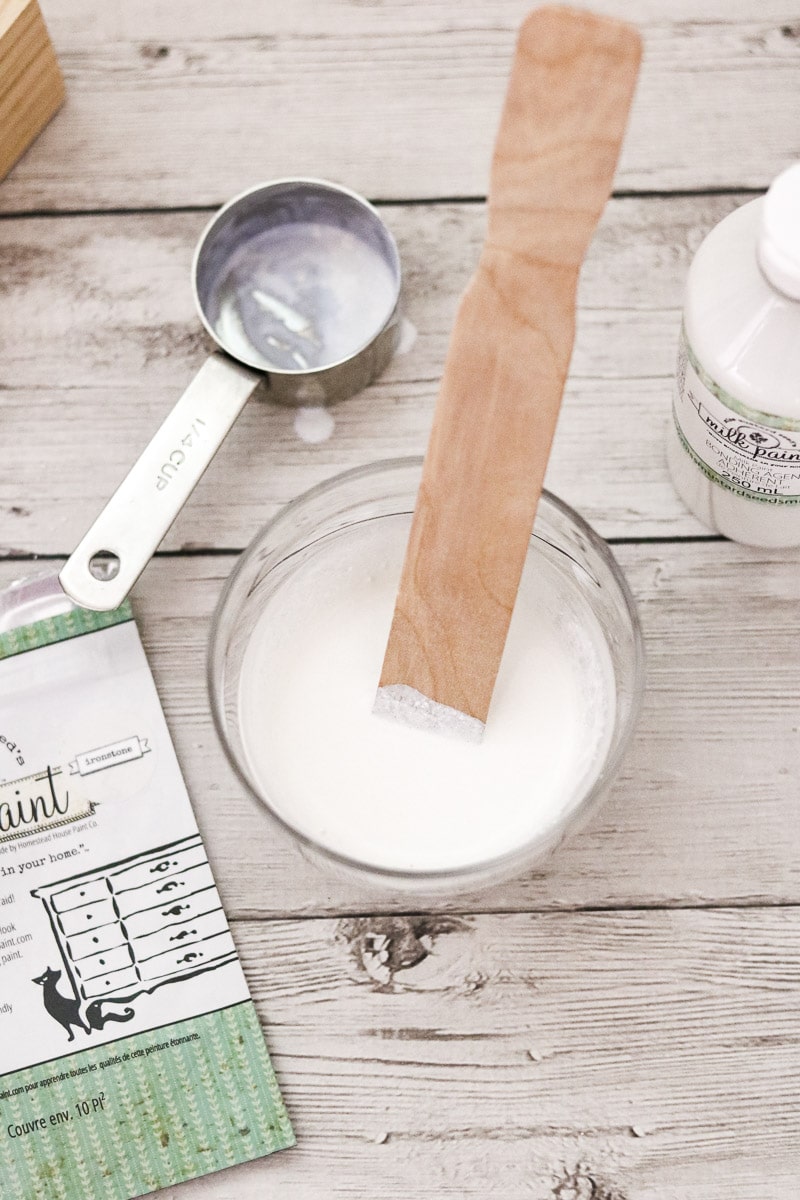
Now let the paint sit for about 5 minutes. The paint sitting helps it to thicken a little, and now you are ready to paint.
5. PAINTING WITH MILK PAINT
Painting the natural paint was a little more tricky than expected. For the first coat of paint lightly add some paint to the end of your brush and tap it on the edge of the cup to move the paint downward.
Then apply it to the chair working from the top and moving your way down. Make sure to check for drips as you go. I worked on the drips with a dryer brush.
Natural paint is pretty forgiving so if you miss a drip go back over it with no problem. However, if you let the drip sit too long, it will want to stay for a while. So continually give all the edges a good look for those pesky drips.
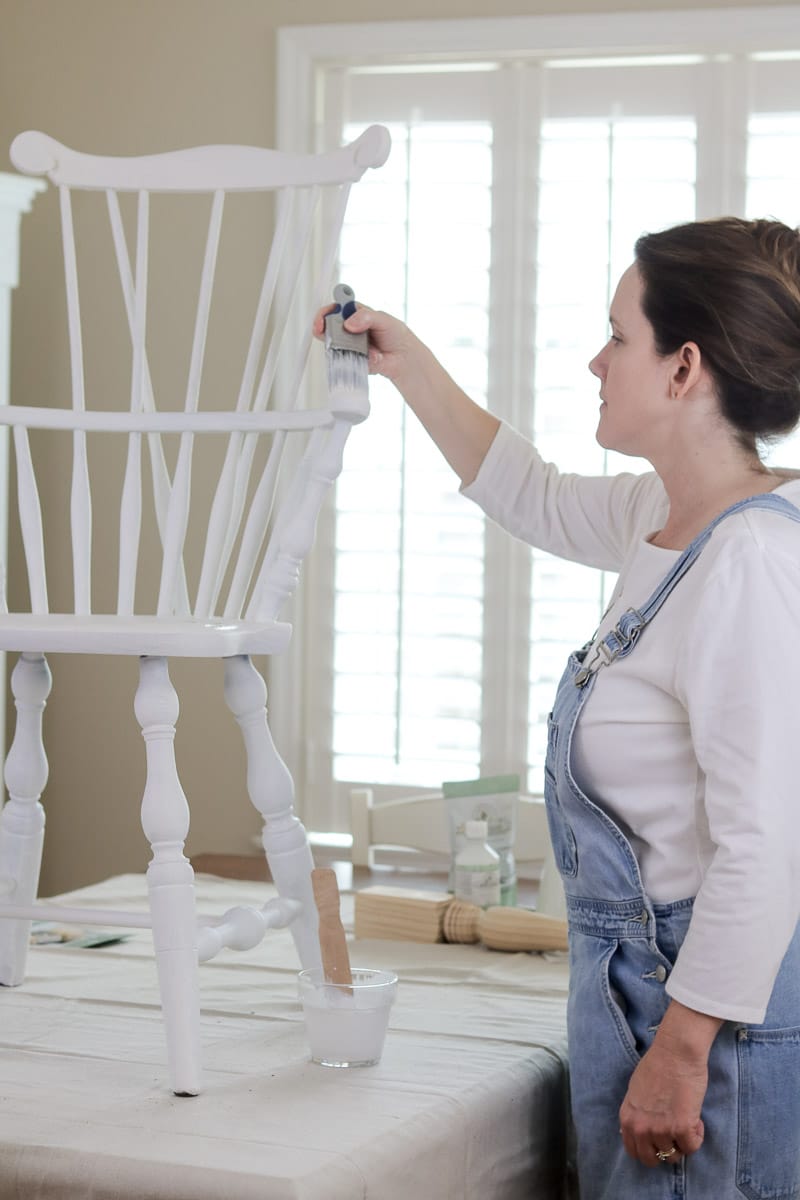
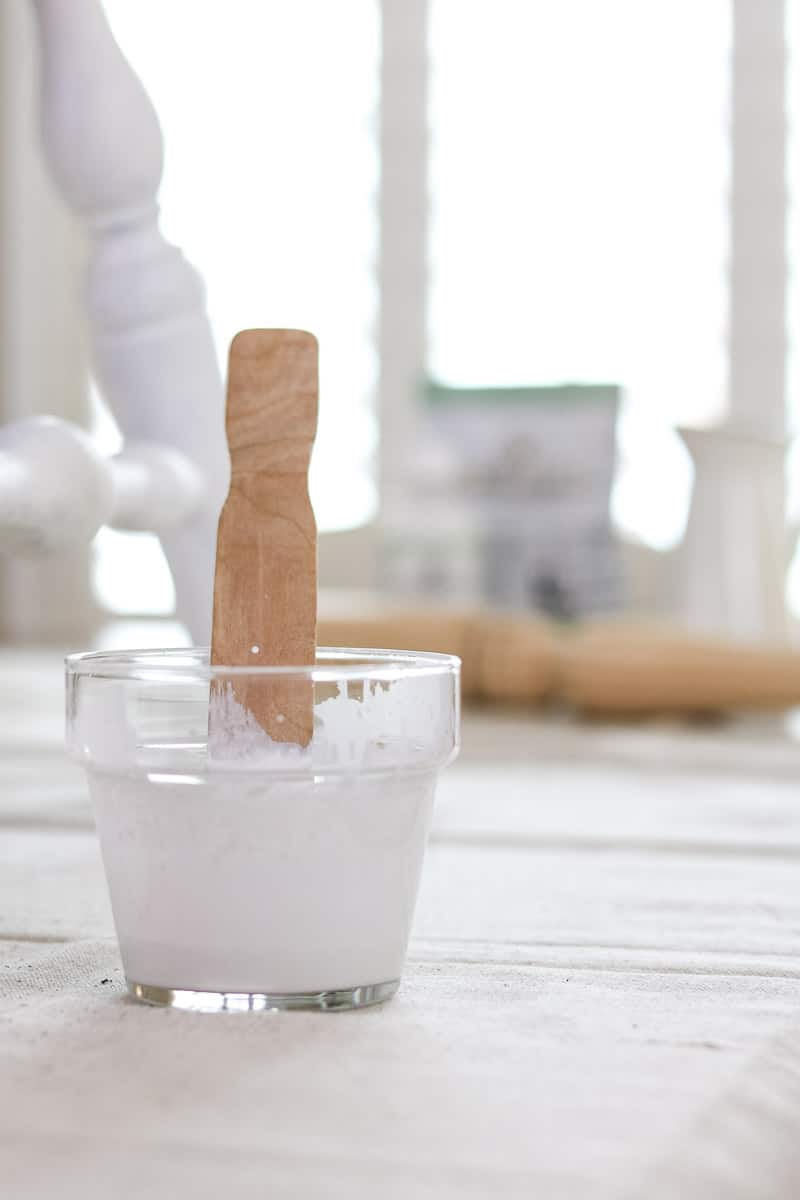
Also, keep your stir stick in the cup while you are painting and stir it now and then to keep it blended.
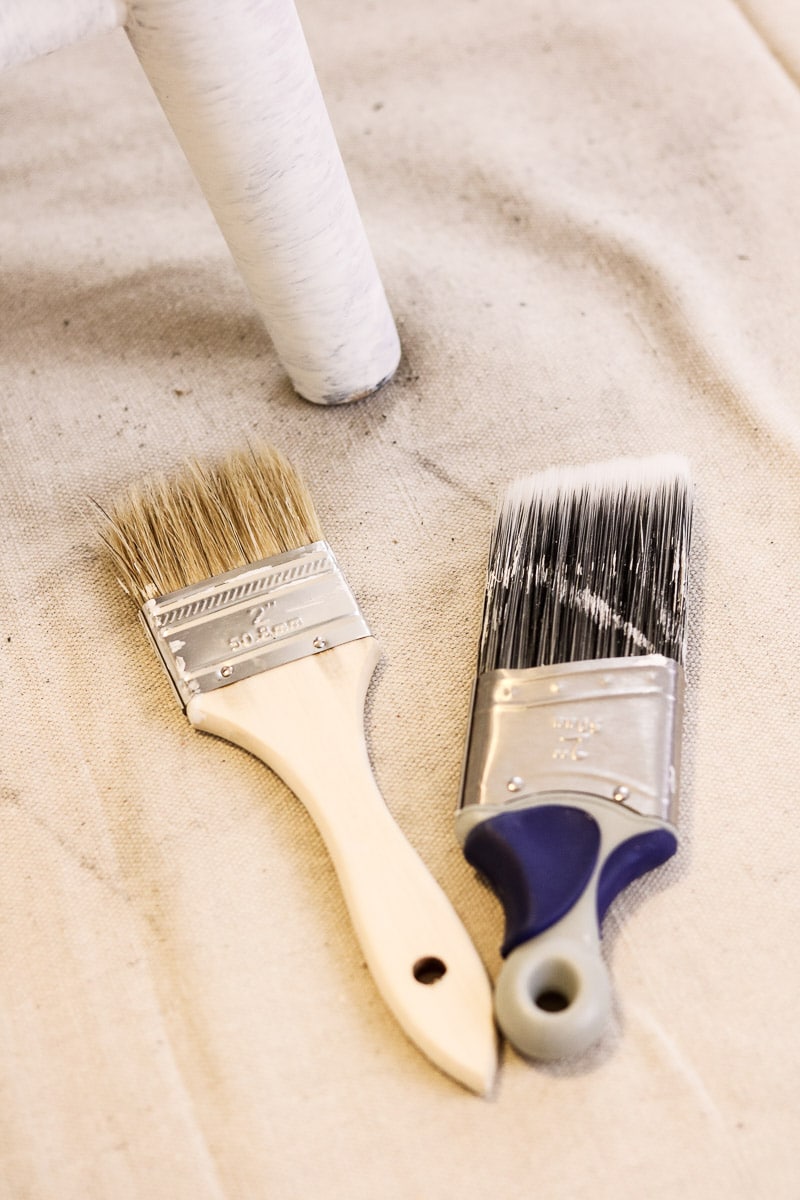
Another detail I want to share is the brush I used. For the primer, I used the cheap wood handle brush. But for the paint, I went with the short handle Wooster synthetic brush. I found it help onto the paint easier and moved the paint onto the chair nicely.
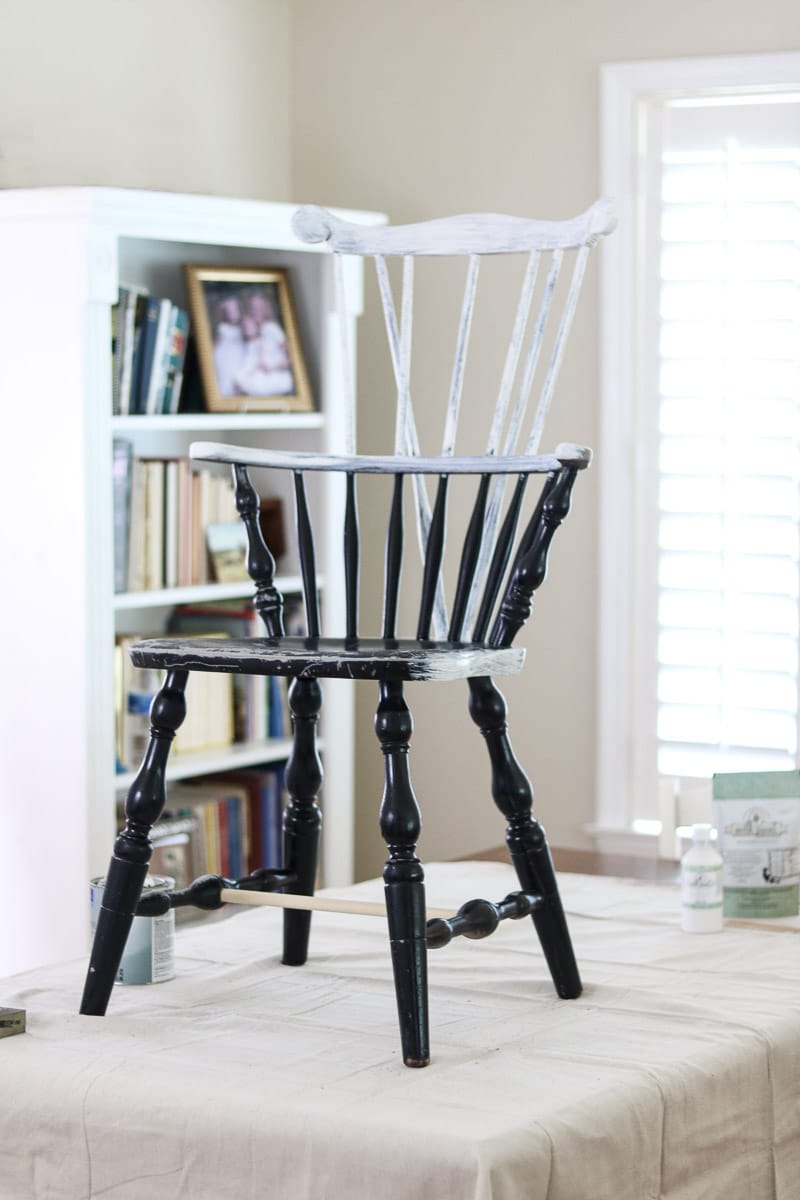
6. ONE COAT OF MILK PAINT
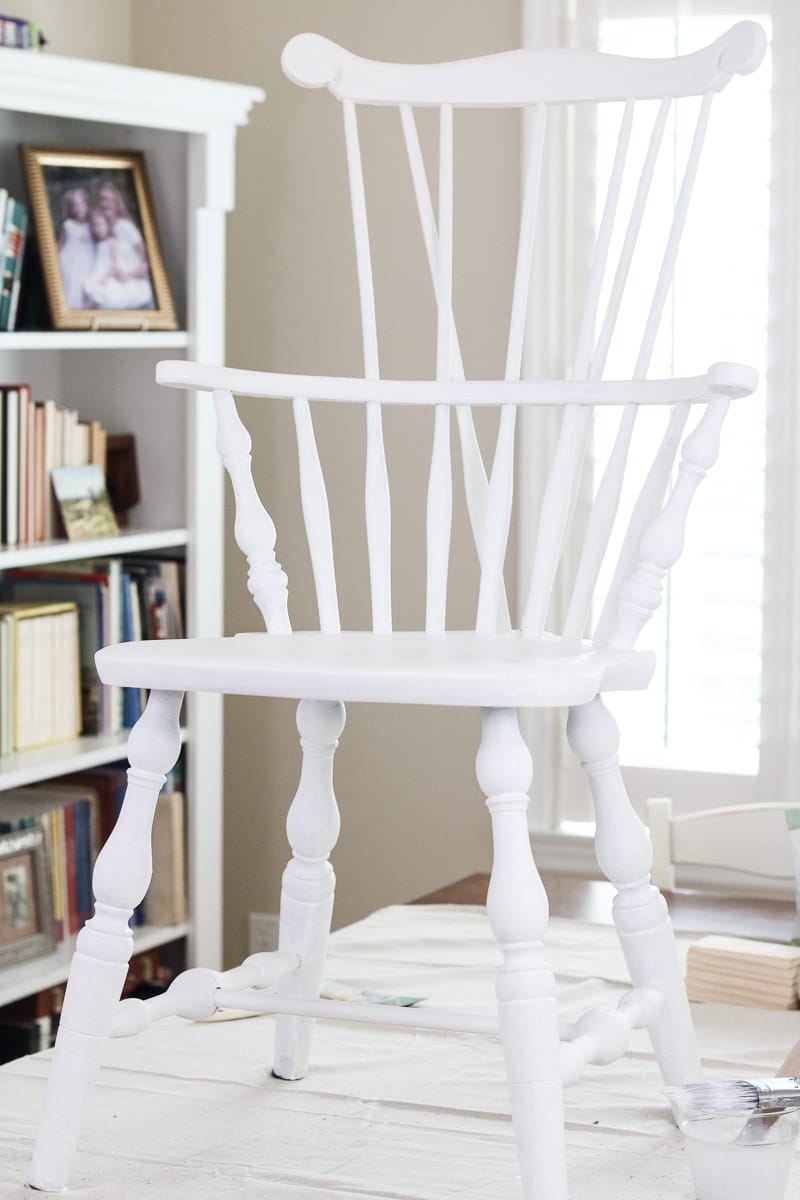
Here is an example of how one coat of Ironstone paint looks. It is a lovely matte finish. As you can see I need to add another layer.
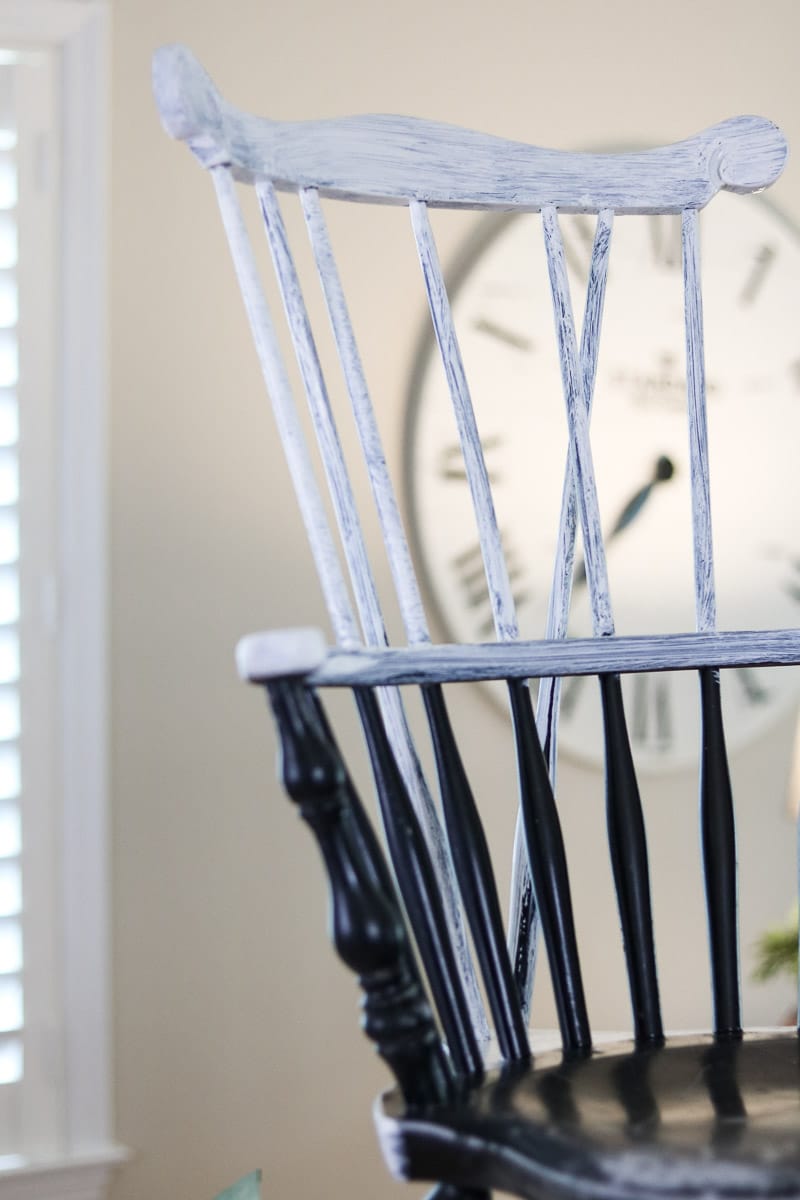
7. SECOND COAT OF MILK PAINT
Now add another coat of paint after letting the first coat dry for an hour or so. It doesn't take long for the paint to dry so you can add another layer. Here is a photo of the second coat and honestly I think it dries less and less transparent. How to paint with milk paint is truly so easy!

8. Apply Top Coat (optional)
After you finish you can add a top coat of furniture wax or tough coat liquid form in a thin layer. This will give it a harder smooth finish and make the chair more water-resistant. The more thin layers you add the tougher the finish.
I added the tough coat to my chair. Tough Coat is a much harder finish and is even more durable. I love this tough coat product because it is self-leveling and non-yellowing.
Once I added this top coat I let it dry for 24 hours before I sat anything on the piece of furniture.
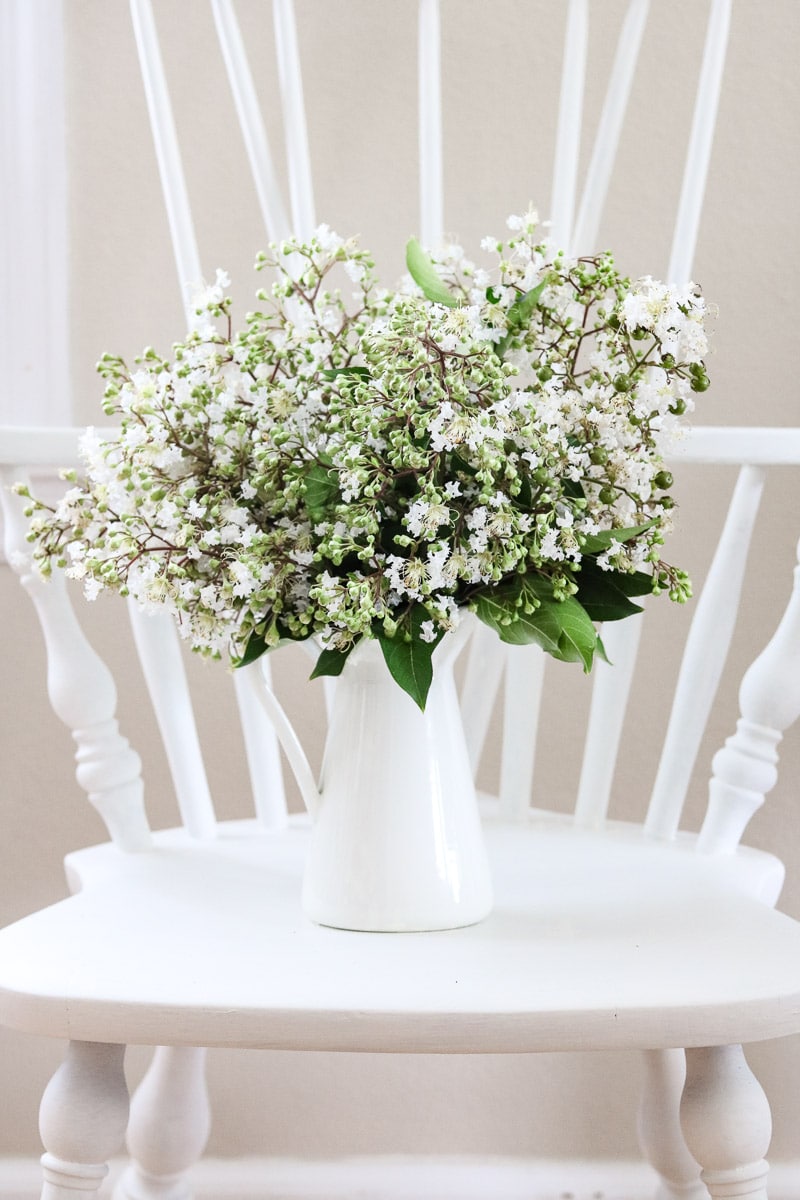
FINISHED PRODUCT
I have to say I have fallen in love with the Miss Mustard Seed milk paint. Teaching you all how to paint with milk paint was so easy thanks to Jennifer and Miss Mustard Seeds videos on YouTube.
I cannot get over how beautiful this chair is now.
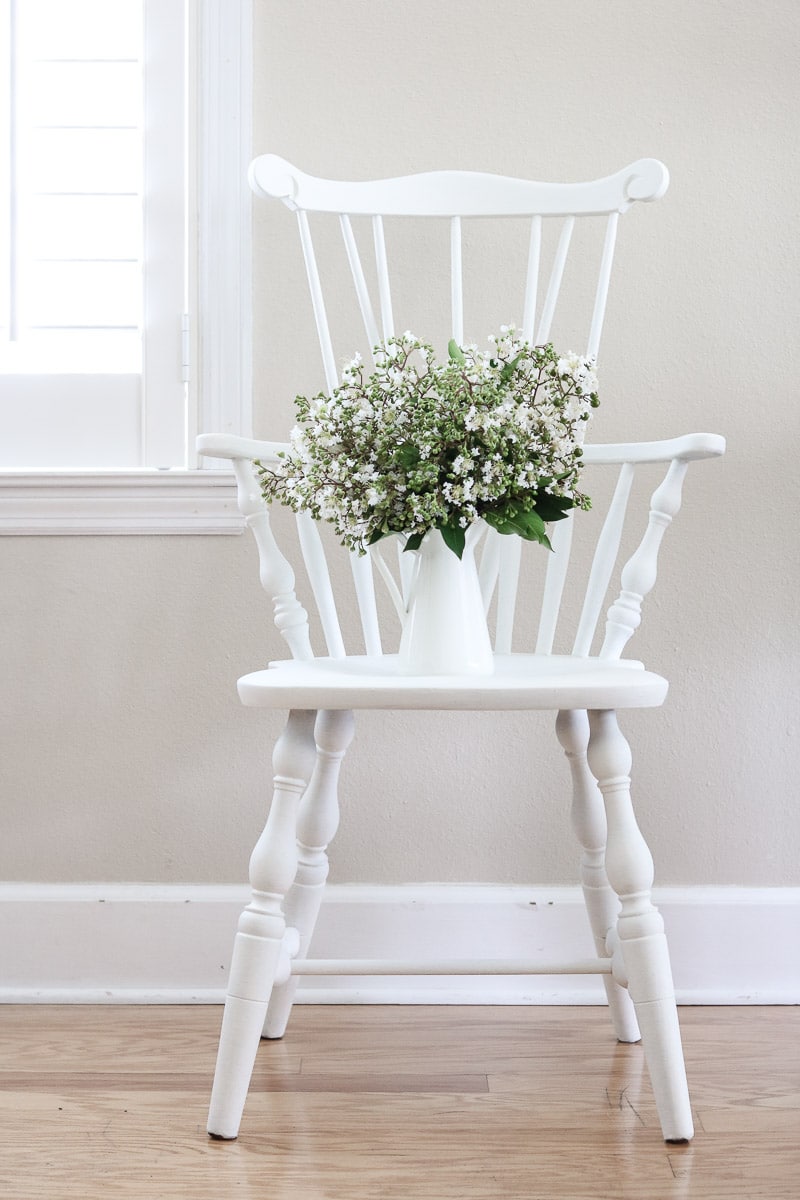
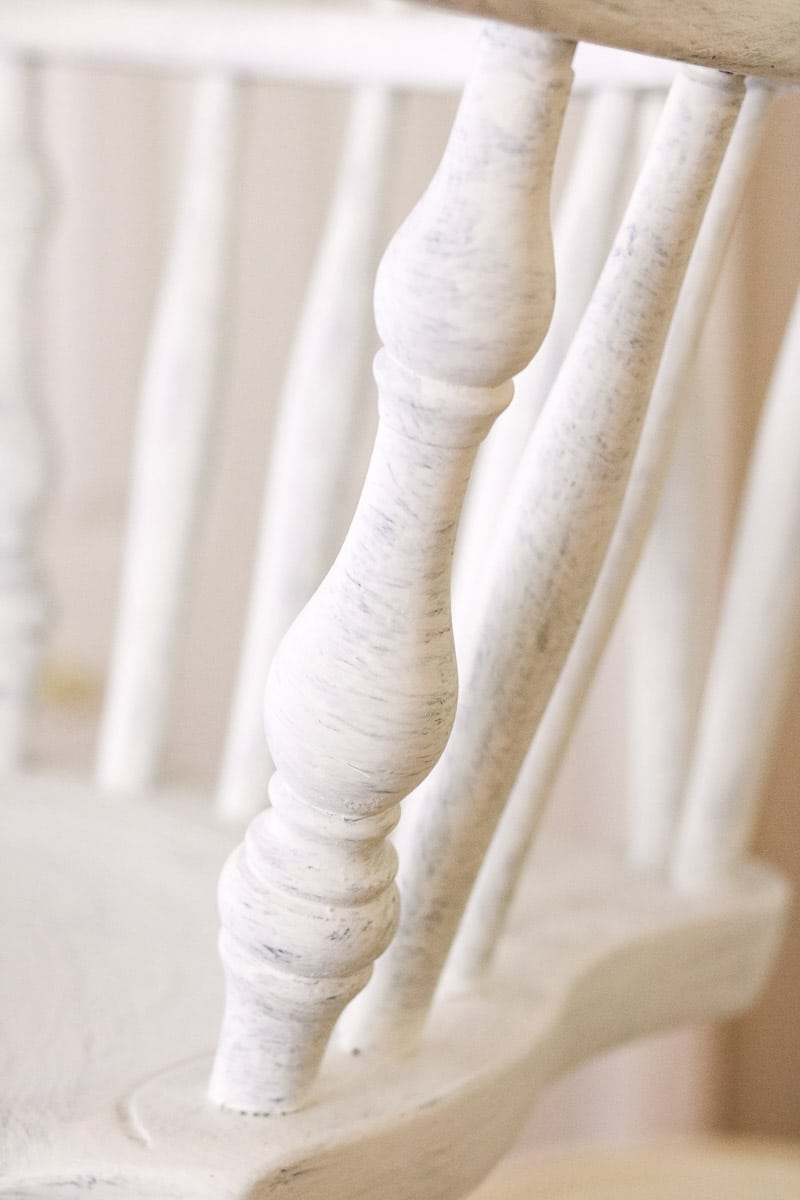
The natural paint color we used is Ironstone. It is a beautiful creamy white!
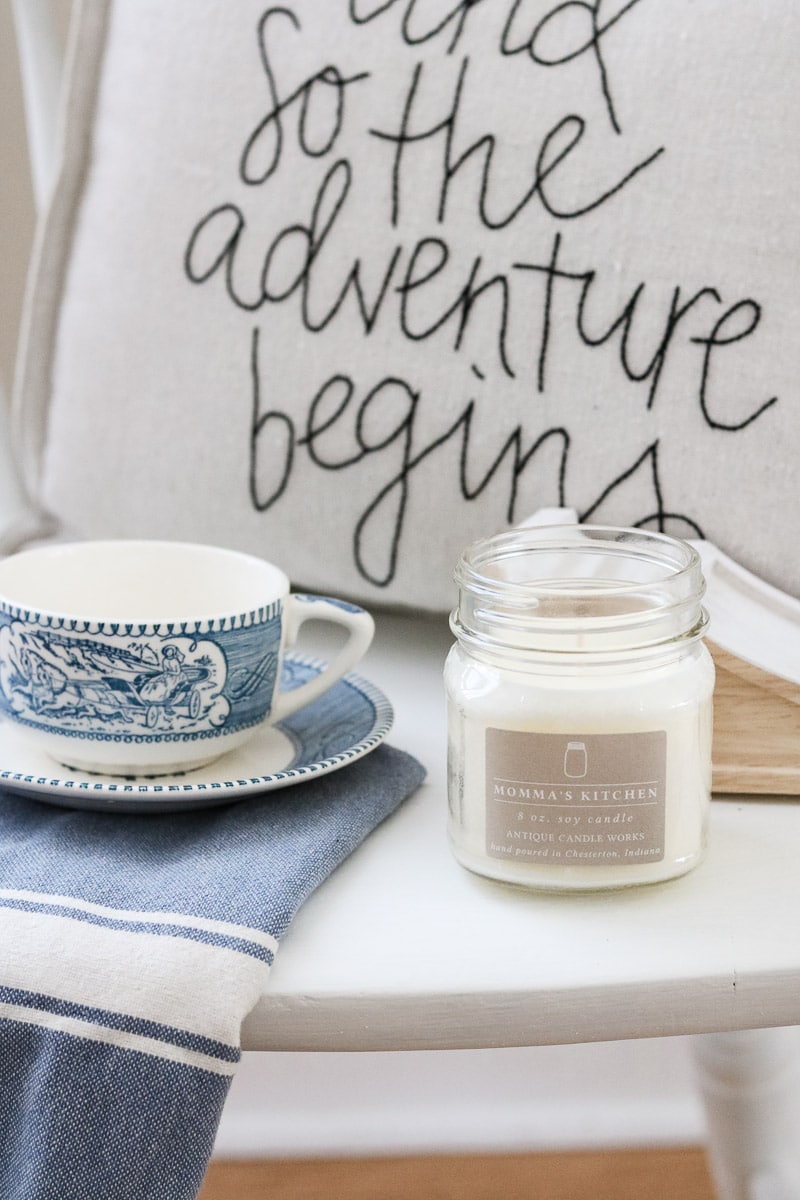
The chair is so pretty until all I wanted to do was style it instead of sitting in it. Just happens I got this candle and pillow recently so I think it has found a new home for a while until the chair will end up at my daughters' desk.
Last I said I would share more about this wonderful paint. Here are common questions I get about milk paint.
What ingredients are in milk paint?
The main ingredients in milk paint consist of milk protein, lime (calcium carbonate), pigments (pigment powders), and borax as a preservative but Miss Mustard Seed's milk paint has natural ingredients of milk protein, chalk, clay, limestone, and natural pigments. Her paint is true natural paint and has a very long shelf life because it comes in powder form. Milk paints are generally non-toxic but check your ingredients just in case.
What is easier to use milk paint or chalk paint?
Chalk paint is easier to use because you don't have to mix it and it has self-leveling qualities. However, milk paint gives a gorgeous finish and is much easier to get a farmhouse chippy look. I recommend making sure your surface is sanded smooth first and primed if you use natural paint.
If you want to learn more about chalk paint try my how to paint with chalk paint post. And if you are looking for more farmhouse paint colors try these paint colors at Life on Summerhill.
Is milk paint good for furniture?
Milk paint is great for furniture. You can paint it directly on raw wood or over a painted finish. I do recommend sanding and priming first to get a more flawless finish but if you are wanting an aged look skip the sanding and primer. Milk paint furniture gives the most beautiful look!
CONCLUSION
Overall I highly recommend the Miss Mustard Seed's milk paint. There are many beautiful paint colors to choose from like Eulalie's Sky, French Enamel, Layla's Mint, and Aviary. I have not tried other milkpaint brands, but MMS seems to be of good quality and I have heard General Finishes milk paint is good too. And it's the best milk paint furniture brand.
MILK PAINT FURNITURE PAINTING TIPS
I did run out of paint towards the end. I grabbed a tablespoon of powder, water and bonding agent and mixed up some more right in the jar I was using.
Also, let me encourage you to put the piece of furniture on a table. It saves your back and because the chair is elevated it is easier to see the drips.
And last, don't forget a drop cloth. You will for sure need it for this project because this paint is drippy. Or at least my paint was drippy. Haha!
Here is a recap of the steps on how to paint with milk paint over a painted piece of furniture.
- Begin by sanding over the existing paint. Paint carefully in areas where the existing paint is coming up
- Remove dust from sanding with a damp paper towel or tack cloth (clean the chair if needed at this step)
- Brush on primer starting at the top and move your way down
- Add another coat of primer if the first coat of milk paint doesn't cover well
- Mix paint and add the bonding agent
- Brush first layer milk paint onto chair working from the top and move down (watch for drips)
- Brush the second layer of milk paint if needed. Most likely you will need two unless you like the look
I hope you have enjoyed this DIY and I hope you try out milk-paint to get that delicious vintage painted look. What are you considering painting?
Since this post went live we have lived with our natural painted chair for a while now. The paint has stayed on the piece of furniture beautifully. I have no complaints and only good things to say about MMS paint. I do believe it is the best milk paint brand.
Happy Decorating!

If you enjoyed these ideas, please sign up for emails, so you don’t miss out on more fun decorating tips and ideas HERE.
How to Paint with Milk Paint
Painting with milk paint is much easier than it looks. Here is a tutorial on how to paint with milk paint using the best milk paint brand on the market.
Materials
- Milk Paint
- Primer
- Bonding agent
- Furniture wax or tough coat liquid form
Tools
Instructions
- Sand any areas where the paint is coming up. Make sure to get the area smooth.
- Dampen a paper towel and wipe down the chair. Make sure the paper towel is barely damp.
- If your chair is dirty go ahead and give it a washing. Then let it dry real good before the next step.
- You do not always have to do prep work or use primer, but if the surface finish is peeling and shiny you may want to. Apply one or two coats using an inexpensive wood handle paint brush.
- Next, you'll mix the milk paint. Start mixing the milk powder and a small amount of water first and as you stir keep adding water. Give it a good stir until you feel like all the clumps have dissolved. Then add your bonding agent. It is kind of like a runny glue and mixes in very easily. Let the paint sit for about 5 minutes to thicken.
- For the first coat of paint, lightly add some paint to the end of your brush and tap it on the edge of the cup to move the paint downward. I recommend using a synthetic paint brush which will be easier and move the paint onto the furniture nicely.
- Apply the paint working from the top and moving your way down. Make sure to check for drips as you go.
- Keep your stir stick in the cup while you are painting and stir it now and then to keep it blended.
- Let the first coat dry for an hour and add another coat of paint if desired.
- After you finish you can add a top coat of furniture wax or tough coat liquid form in a thin layer.
- Let it dry for 24 hours before placing anything on the furniture.
Notes
- Put the piece of furniture on a table. It saves your back and because the chair is elevated it is easier to see the drips.
- If you let a drip sit too long, it will want to stay for a while. So continually give all the edges a good look for those pesky drips.
- Don't forget a drop cloth. You will for sure need it for this project because this paint is drippy.
Fascinating! Didn’t even know there was such a thing as milk paint – thank you. Beautiful photography 🙂
Thank you!
I have had issues with clumps. It is so bad I now use a collanderto take out the nasty finish ruining clumps.
I am sorry to hear you are having trouble with clumps. Are you using the same brand — Miss Mustard Seed and getting clumps? It is funny you mentioned this because just yesterday when I was on Instagram I noticed someone using a frother, for coffee cream, to mix their Miss Mustard Seed milk paint. If you are not familiar with what a frother is here is a link to check it out. https://amzn.to/3Nwnslf. Try a frother and see if it helps. And good luck!
I love posts like this. What a lovely result. I have purchased milk paint and used it, but I bought Annie’s which did not require mixing powder. It was all ready to go. Loved all your tips.
So, the furniture I have has already been painted with dark-grey milk paint. I want to repaint it with white milk paint, should I sand it and prime it? Or is that not necessary?
Great questions. I have never painted over milk paint so I asked a friend who has painted over milk paint. This is what she suggests.
“If she doesn’t want the gray to show underneath, then she should scuff sand, and use our bonding agent to ensure that the white does not chip away and reveal the gray underneath.
If she starts to get bleed through, then she will need to stop the process and prime.
It’s kind of a touch and go situation. She needs to see what works and adjust if necessary.”
I hope this helps.
What is Tough Coat? I am wanting something like this but I’m not sure what I’m looking for. Thank you for the tips!
Hi Beth! That is a very good question. Tough Coat is a sealer. Here is an article that will tell you all about it. https://www.mmsmilkpaint.com/blog/mmsmp-finishes-tough-coat