
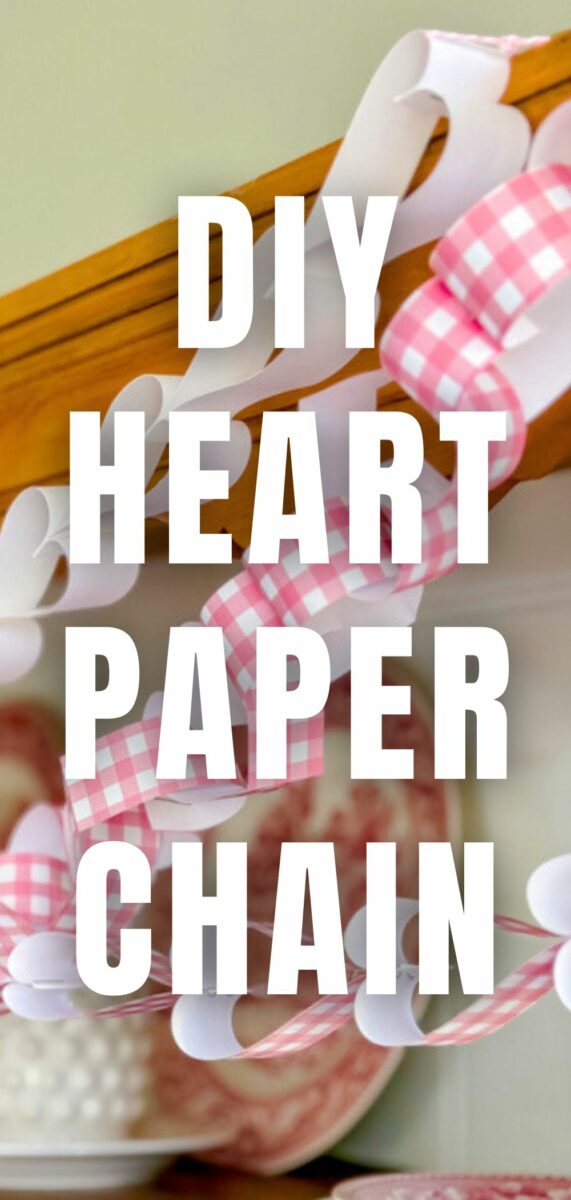
A Heart Paper Chain is one of those simple projects that feels extra special once it’s hanging up. It’s easy to make. It uses basic supplies. And it instantly adds a soft, handmade touch to Valentine’s Day decorating.
In this tutorial, you’ll learn two different ways to make a heart paper chain garland. One style keeps the hearts perfectly lined up and facing the same direction. The other is a more playful, traditional chain where the hearts alternate directions.
Both are beginner-friendly. Both are perfect for kids, friends, or a cozy afternoon craft.
Heart Paper Chain Supplies
You’ll use the same supplies for both styles.
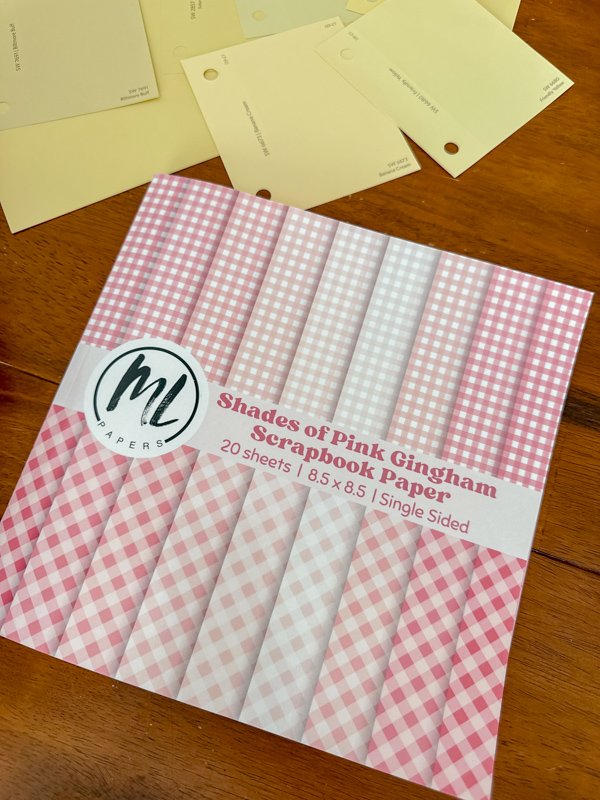
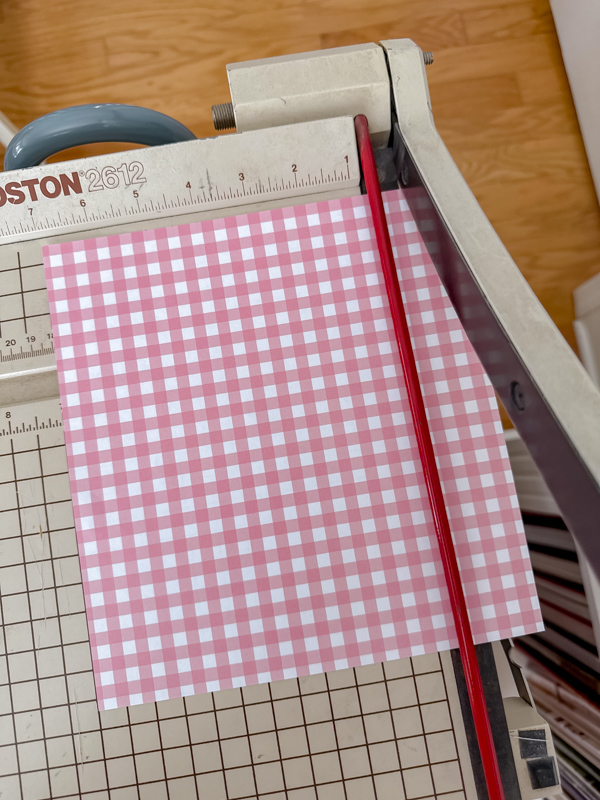
- Cardstock paper or decorative paper, like patterned paper (I used a pink gingham paper booklet in 8.5 x 8.5 inches)
- Paper cutter or scissors
- Stapler (a small, slim stapler works best)
- Twine for hanging
- Tape, nails, or command hooks for hanging
That’s it. If you have paper and a stapler, you’re already halfway there.
How to Make a Linear Heart Paper Chain
(Hearts perfectly lined up and facing the same direction)
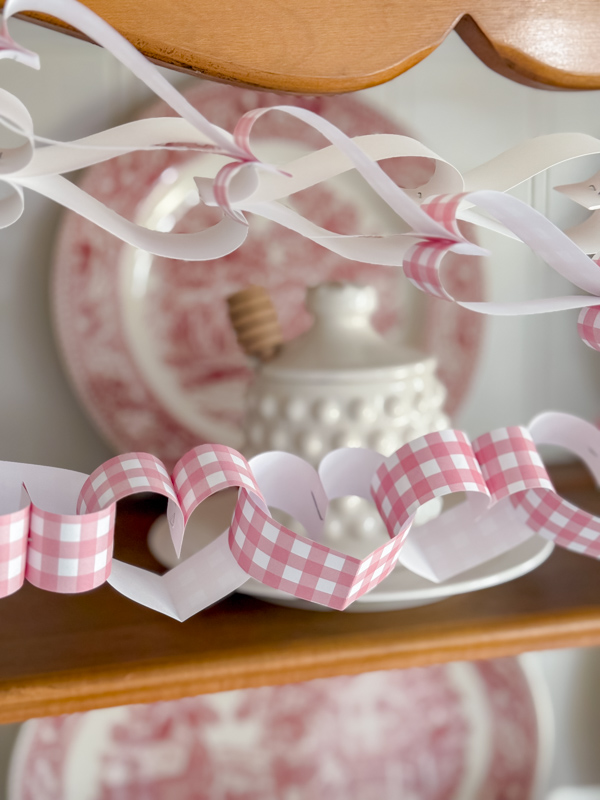
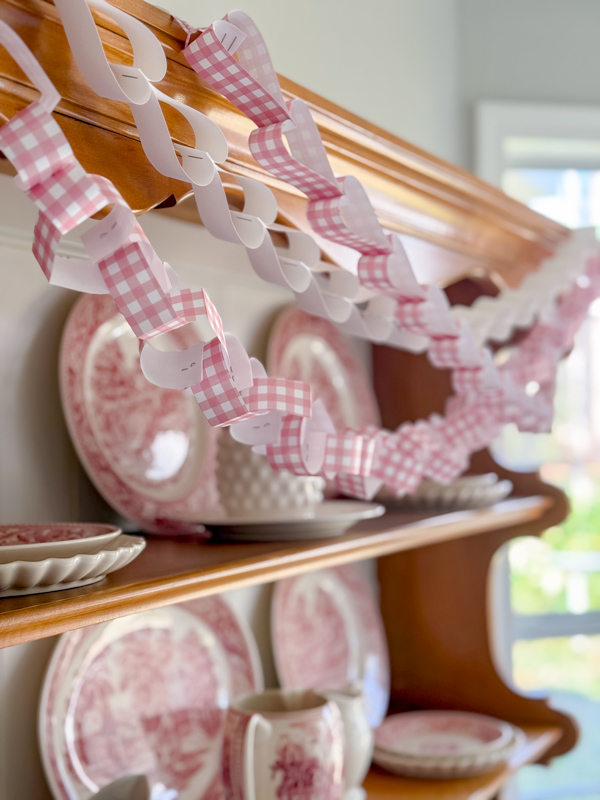
This version looks neat and classic. All the hearts line up in order, making it especially pretty when layered with other garlands.
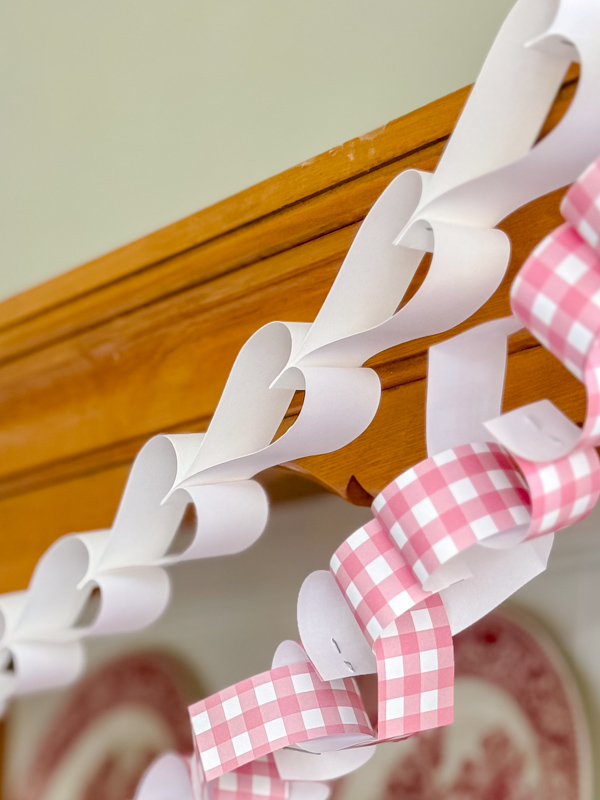
Note: I did this type of heart garland in white and gingham. Only the white one is shown above.
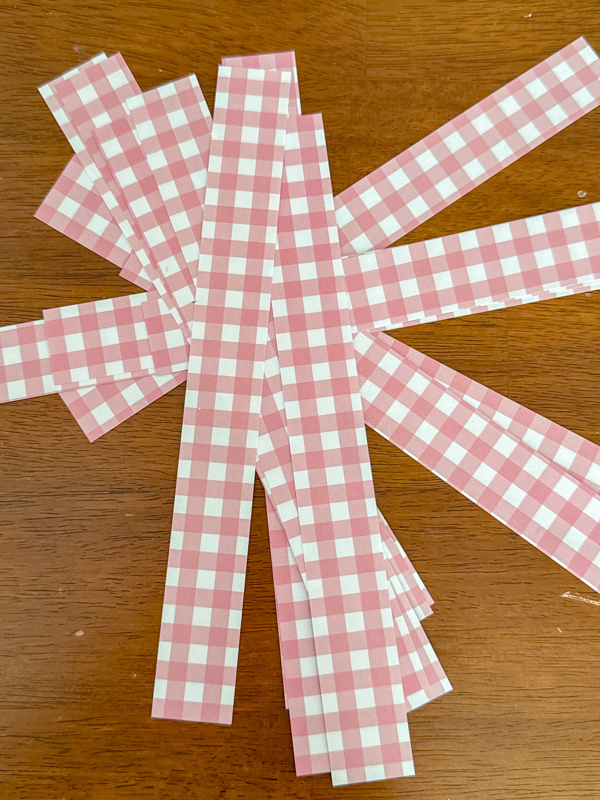
Step 1: Cut Strips of Paper
Start by cutting your paper into 1-inch strips. If you use standard 8.5 x 11 paper or the 8.5 x 8.5 pieces in the booklet listed above, make sure your stripes are 8.5 long.
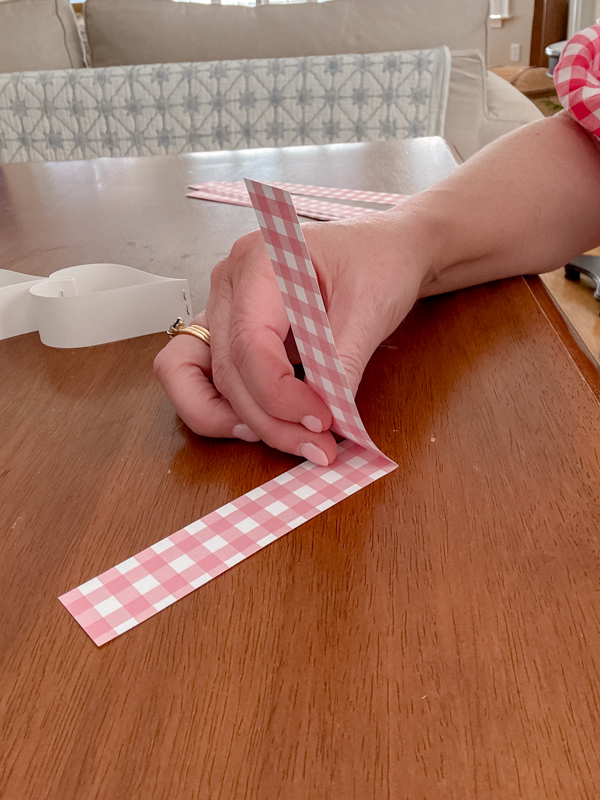
Step 2: Fold Strips
Next, fold each strip in half. If your paper has a pattern on only one side, fold one strip with the design on the outside. Fold the remaining strips with the design on the inside.
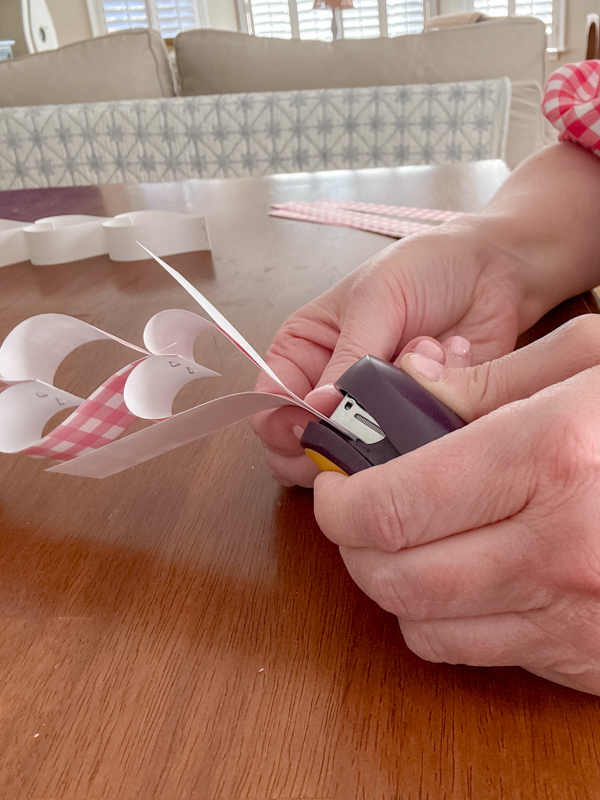
Step 3: Make First Heart
To make the first heart, take that folded strip (the one with the pattern on the outside) and bend both ends inward. Bring them together inside and staple to form the heart shape.
Step 4: Make Second Heart
Now slide the next folded strip over the bottom of the first heart until it fits snugly. Staple it about ¼ inch up, keeping the staple straight and lined up with the bottom fold.
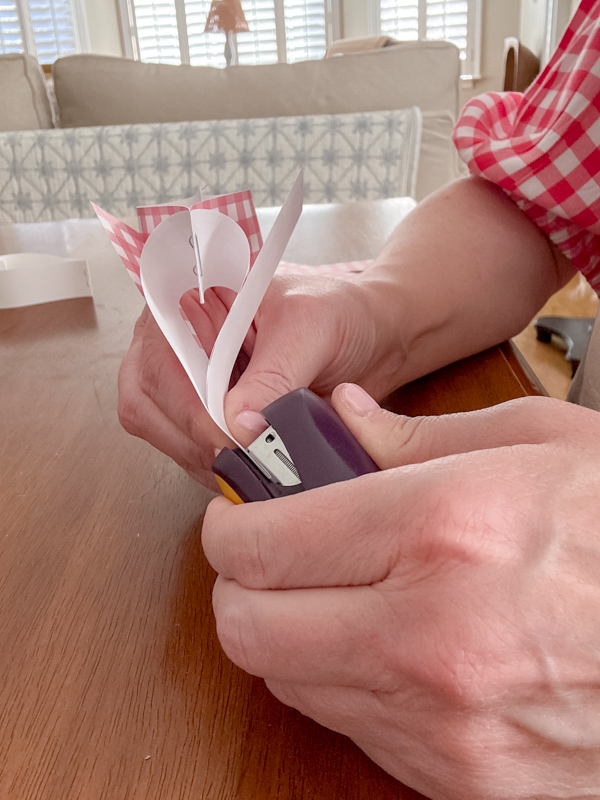
Once it’s stapled, bring the folded ends of that strip around and line them up at the bottom to form the next heart.
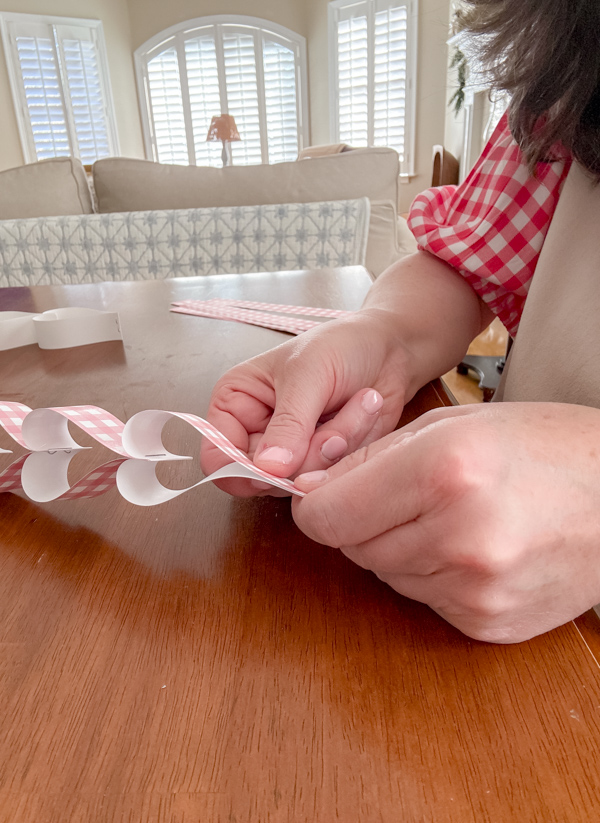
Step 5: Repeat the Steps
To continue the chain, grab another folded strip, slide it onto the bottom of the last heart, and staple it in place.
Repeat this process until your heart paper chain is long enough to hang where you plan.
Now, if you are completely lost at this point and would rather watch than read, check out my YouTube video.
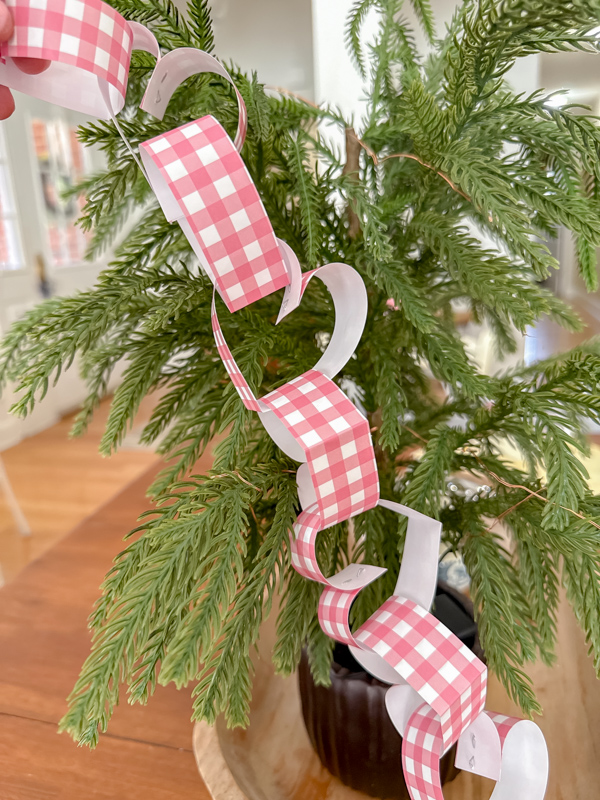
How to Make an Alternating Heart Paper Chain
(Traditional paper chain style)
This style feels more whimsical and playful. The hearts alternate directions, much like a classic paper chain.
Step 1: Cut Paper Strips
Begin by cutting your paper into 1-inch strips.
Step 2: Fold Strips
Fold all the strips in half with the pattern or color on the outside.
Step 3: Make Heart
Take one folded strip, bend the ends inward, and staple them together on the inside of the heart, about ¼ inch from the bottom. Make sure the staple stays straight and even.
Step 4: Chain Second Heart
Next, take another folded strip and slide it through the first heart.
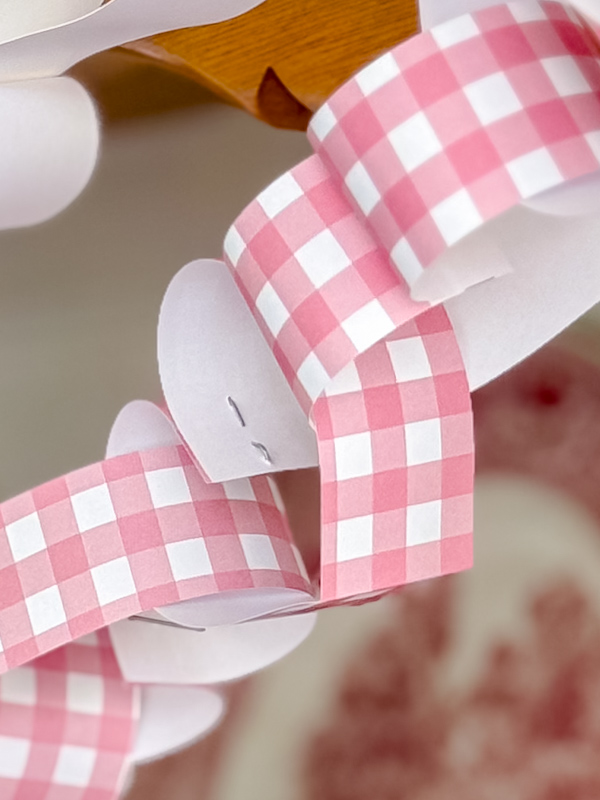
Fold the ends of this second strip inward to form another heart and staple it on the inside.
Step 5: Repeat the Steps
Keep sliding the next folded strip through the last heart, folding, and stapling until your garland reaches the length you want.
How to Hang a Heart Paper Chain
To hang the garlands, use twine in a soft color that complements your paper. Pale pink and white work beautifully.
Cut the twine into 6-inch pieces. Thread each piece through the ends of the heart paper chain and tie it.
Hanging with Tape
If you plan to tape the twine in place, tie the knot close to the paper chain and leave longer tails for taping.

Hanging with Nail or Command Hook
If you’re using a nail or Command hook, tie the knot closer to the end so you create a loop that slips easily over the hook.
I used a tiny nail on the top, but this one piece sat beautifully on the side, so I only used a piece of tape to fasten it.
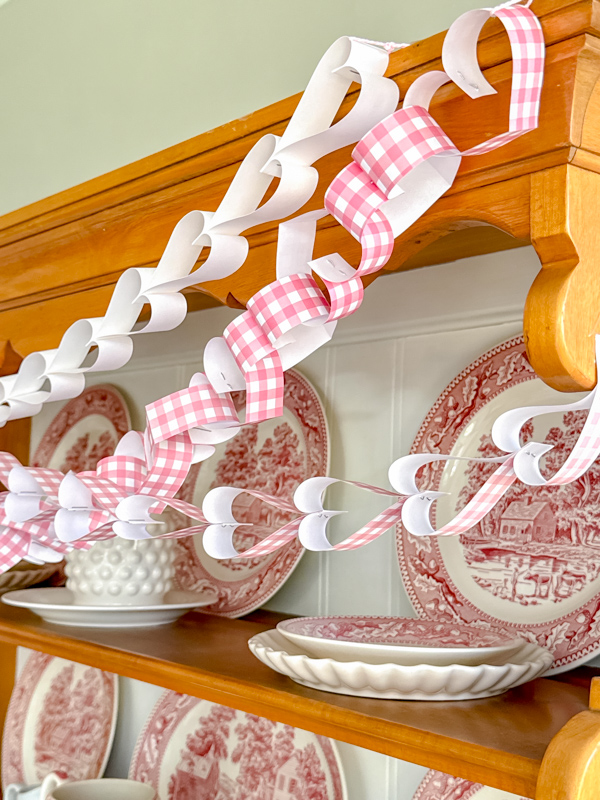
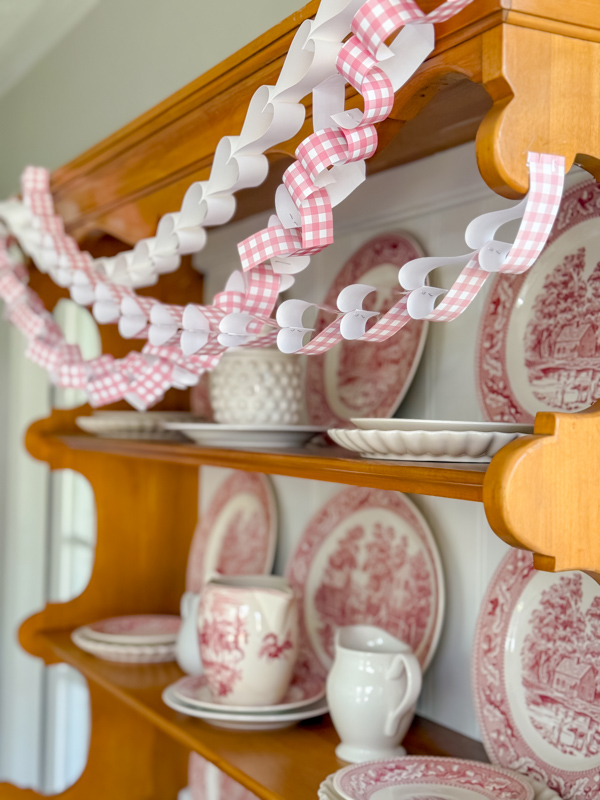
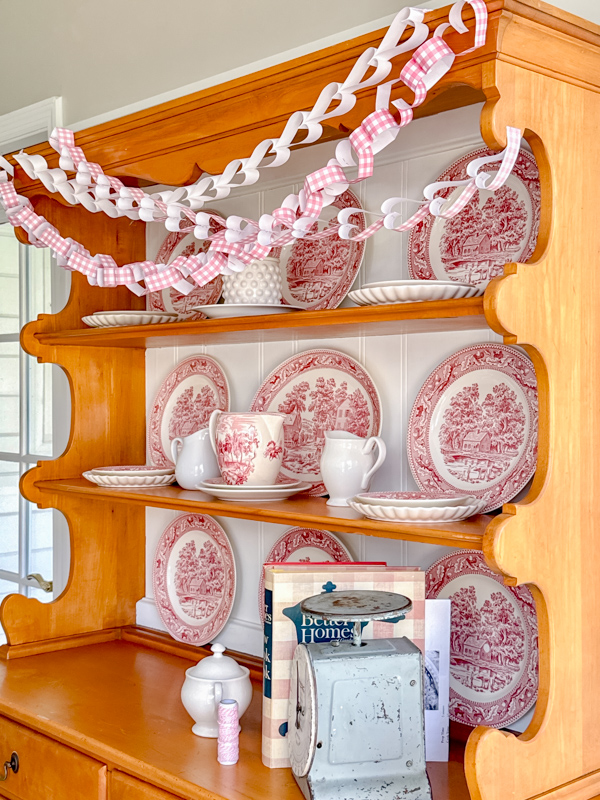
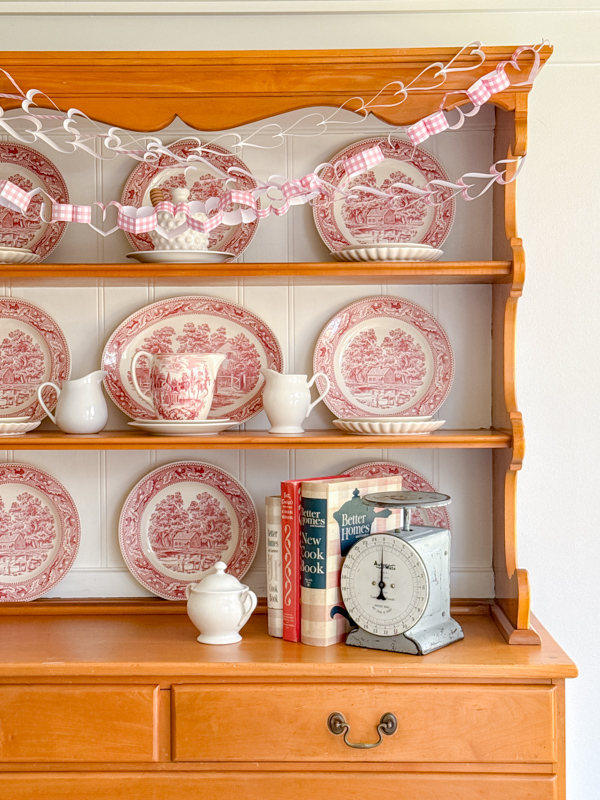
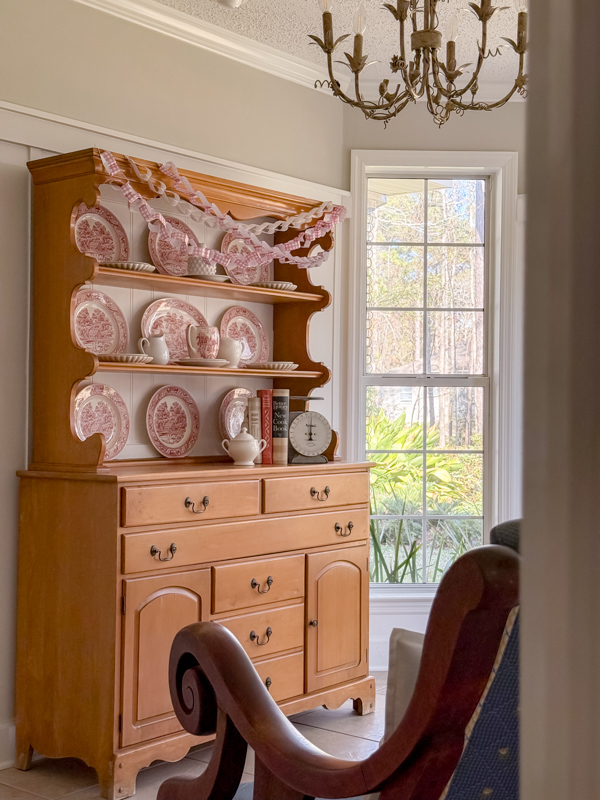
Decorating with a Heart Paper Chain
Heart paper chains are easy to layer and fun to mix. They look lovely on a hutch, bookcase, or mantel. You can hang one on its own or combine several for a fuller look.
I decided to decorate our hutch with these paper chains. To give it a new twist, I layered the heart paper chains.
First, I hung the alternating heart paper chain, then added a linear white heart paper chain above it. Crossing a third garland over the others adds a soft, whimsical feel.
Other Places to Hang a Heart Paper Chain
- Fireplace mantels
- Bookcases
- Over doorways
- Over a bed (kids especially love this)
- Hooks in any room
- Along the ceiling (this is particularly fun in a classroom)
You can also layer them with fairy lights. This gives the heart paper chain an even more whimsical and magical touch.
Once you start decorating with them, you’ll see how versatile they are.
Final Thoughts
A Heart Paper Chain is proof that decorating doesn’t have to be complicated or expensive to be meaningful.
Paper crafts bring warmth, charm, and a little nostalgia into a home. This is the kind of project that invites people to slow down, create something by hand, and enjoy the process just as much as the finished result.
And the best part is that when you are done, you have a new decoration. Isn't that wonderful?
If you enjoyed this heart paper chain DIY, you might also love:
Happy Decorating!
