

If you have been looking for a fun and easy way to add some patriotic charm to your home this summer, these DIY patriotic decoupage balls are exactly what you need.
All it takes is a printable American flag sheet, a bag of craft balls, and a little Mod Podge, and in an afternoon, you will have the most charming bowl filler, vignette accent, or even a set of Christmas ornaments for America's 250th anniversary this year.
Let me show you exactly how to make them.
What You Need to Make DIY Patriotic Decoupage Ball
One of the best things about this project is how simple the supply list is. You do not need any special crafting skills or fancy tools. If you can use a pair of scissors and a foam brush, you can absolutely make these.
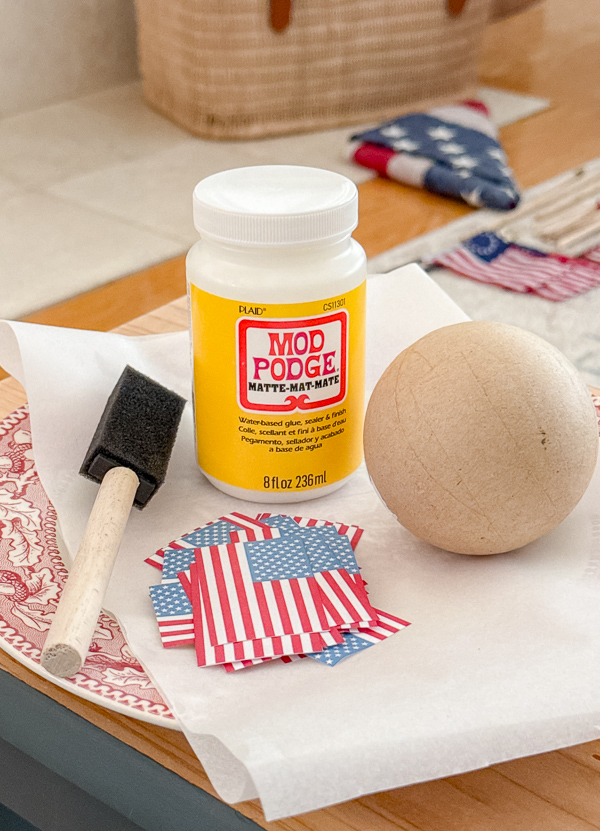
Supply List
- Printable American flag mini flags — [grab them from my Etsy shop here] — these are sized perfectly for small craft balls and print right on regular printer paper
- Regular printer paper — no cardstock needed, regular copy paper works beautifully for this
- Craft scissors — small, sharp scissors make cutting the flags easier
- Mod Podge, Matte Finish — this is the only decoupage medium I use and trust for projects like this
- Foam brush — a small one, around one inch wide, is perfect
- Paper mache craft balls — I found mine at Hobby Lobby in a variety of sizes [similar ones on Amazon]
- Paper ball ornaments — if your craft store is out of plain balls, grab these. The gold string tucks right down into a dough bowl and disappears completely, and I will show you a bonus idea for these later
- Small bowl of water — having a little water nearby helps you smooth edges and keep things from getting too sticky too fast
That is truly it. Nothing complicated. Nothing expensive. Just a few simple supplies and a free afternoon.
How to Make Patriotic Decoupage Balls — Step by Step
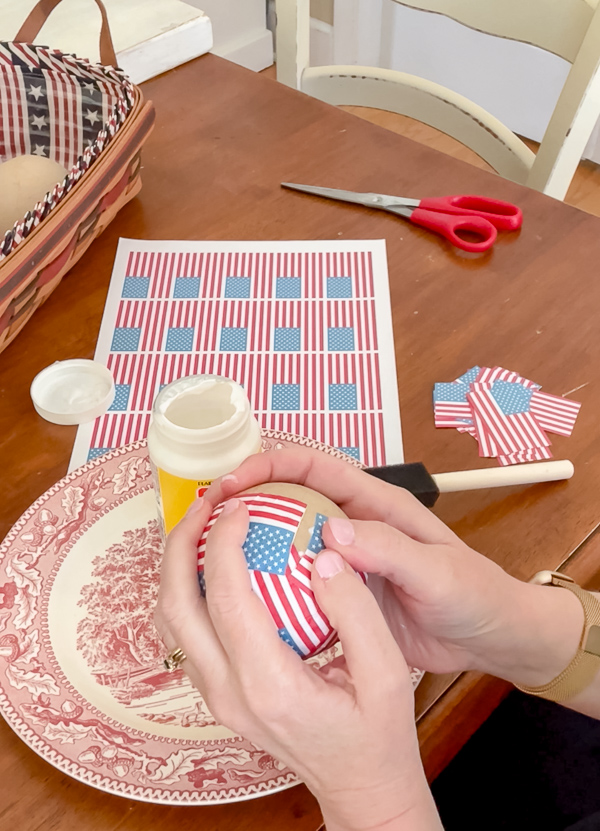
Step 1 — Print and Cut Your Mini Flags
Print your mini flag sheet from the Etsy printable on regular copy paper. Do not worry about using fancy paper — the Mod Podge will seal everything, and the flags will look beautiful on plain printer paper.
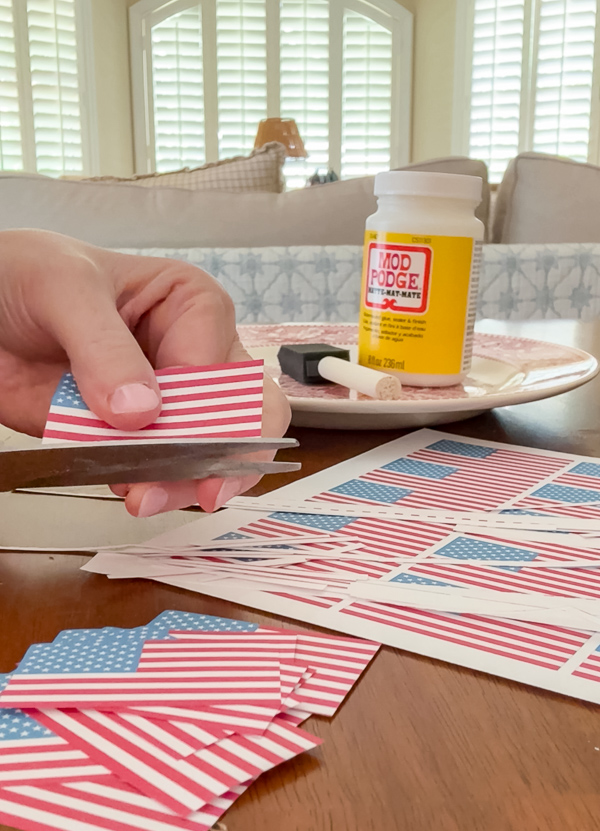
Once printed, cut out each flag carefully with your scissors. Take your time with the edges. The flags are small — about one and a half inches tall by three inches wide — so small scissors or even craft scissors with a fine tip will give you the cleanest cuts. Set your cut flags aside in a little pile and you are ready to go.
Step 2 — Prep Your Balls
Give your craft balls a quick look over before you start. If any have rough spots or bumps, you can lightly sand them with a piece of fine-grit sandpaper. This step is optional, but it does give you a smoother surface to work on.
Set up your workspace with a piece of parchment paper or a silicone mat underneath so your balls do not stick to your table as they dry. Trust me on this one — it saves a lot of frustration.
Step 3 — Apply the Mod Podge
Dip your foam brush into your Mod Podge and apply a thin, even layer to one mini American flag on the back. I found adding the decoupage to the back of the flag works better than applying it to the ball. It is cleaner and easier to manage.
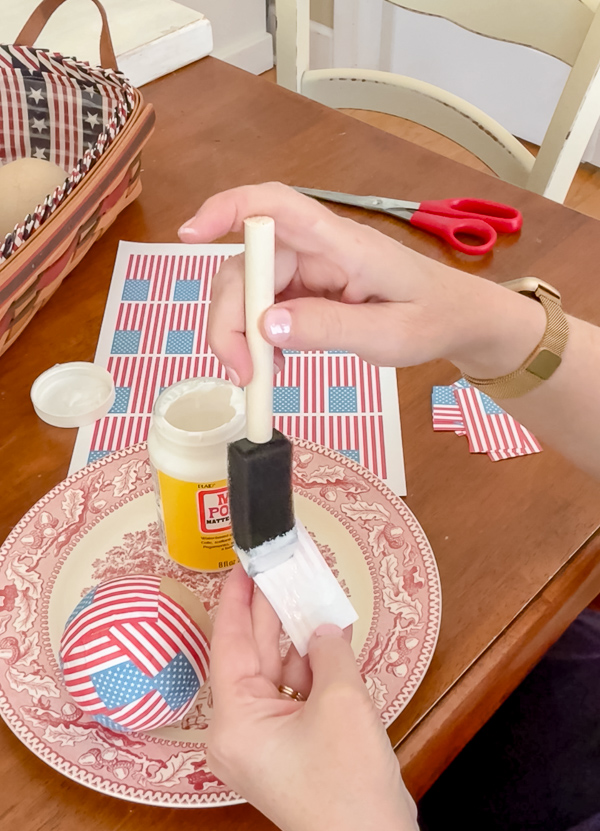
The Mod Podge goes on white and dries clear, so do not panic when it looks milky on your ball. It will disappear completely as it dries.
Step 4 — Place the Flags and Smooth Them Down
While the Mod Podge is still wet, press a flag onto the ball and smooth it gently with your fingers. Work from the center of the flag outward, pressing out any air bubbles or wrinkles as you go.
Pro tip: I found placing my hand over the flag and conforming it to the ball works great! Once the flag is gently pressed into the ball then use your fingers to work the wrinkels out.
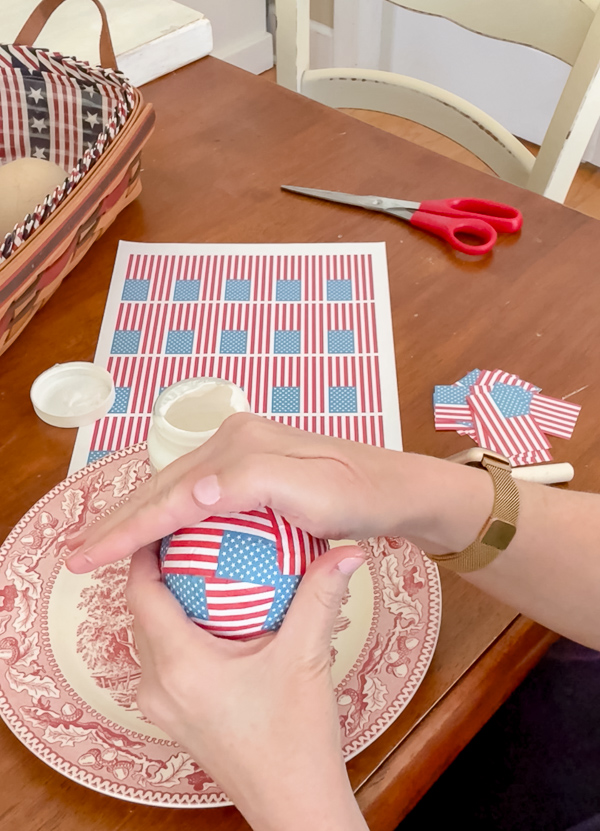
Here is the thing about working on a curved surface — the paper will want to wrinkle and pucker at the edges. Just fold and tuck the excess paper as neatly as you can, like you are wrapping a tiny little gift.
Continue working your way around the ball, section by section, until it is fully covered with flags. You will find a rhythm pretty quickly, and it goes faster than you might expect.
A few things that will make your life easier:
- Each ball takes approximately 8 to 12 flags, depending on the size of your ball
- Work in small sections — do not try to Mod Podge the whole ball at once
- Bubbles will smooth out as the Mod Podge dries, so do not stress over every little imperfection. A few folds and creases here and there still look okay.
- Your fingers will get messy, so wash your hands often to keep them clean
- Let each section dry for a few minutes before rotating the ball, so you are not smearing your work
Step 5 — Seal and Let Dry
Once your entire ball is covered in flags and you are happy with how it looks, brush a final top coat of Mod Podge over the whole ball or spray with sealer. This seals everything in and gives it a nice finished look.
Note: I printed my flags on my home printer, so I found spraying the flag orbs with clear sealer didn't make the ink run. Decoupage made it smear.
Set your ball on your parchment paper and let it dry completely — at least an hour, or longer if you are working in a humid environment. I live in Florida, where humidity is always a factor, so I like to let mine dry overnight just to be safe.
Once dry, your ball will feel firm, smooth, and completely sealed. The flags will not peel, they will not smear, and the whole thing will hold up beautifully.
Tips for Getting Beautiful Results
A few extra little things I learned while making mine that will save you time and frustration.
Work in small sections every time. I know I already said this in the steps, but it is worth repeating because it's the key to achieving smooth, beautiful results on a curved surface.
Smooth as you go. The temptation is to slap a flag on and move quickly, but taking thirty extra seconds to really smooth each flag down while the Mod Podge is wet makes a huge difference in the finished result.
Let them dry completely before you move or stack them. If you try to move them too soon, the flags will smear. Give them real drying time.
These will last for years. Once fully sealed with Mod Podge, these balls are surprisingly durable. Store them in a box between layers of tissue paper after the holiday, and they will come right back out next summer looking just as good.
Tip: Can't find plain craft balls? Paper ball ornaments work just as well. Tuck the gold string down into your bowl and it disappears completely. And keep reading — those ornament balls lead to the most darling Christmas tree idea.
Fun Ways to Display Your Patriotic Decoupage Balls
Once your balls are finished and fully dry, the fun part begins: figuring out where to put them. Here are my favorite ideas.
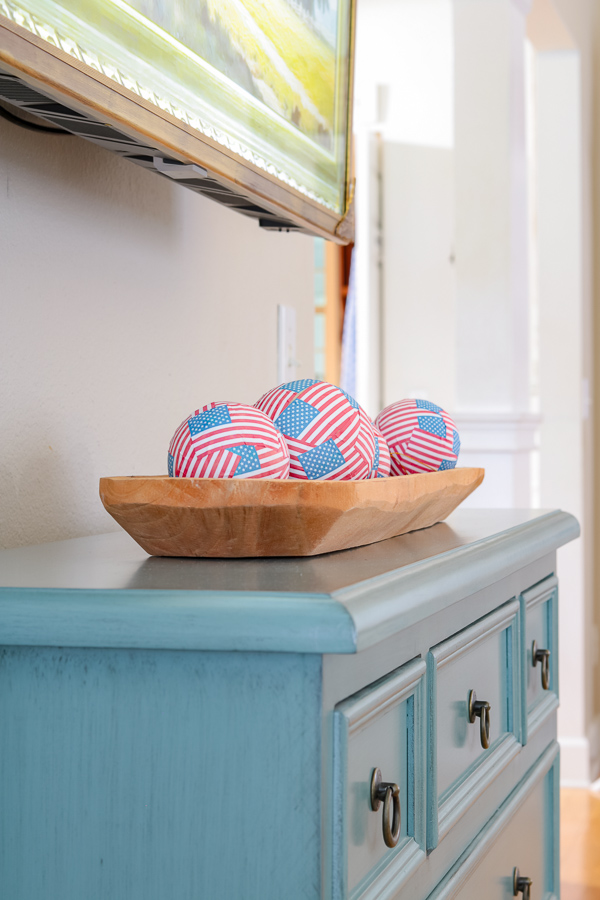
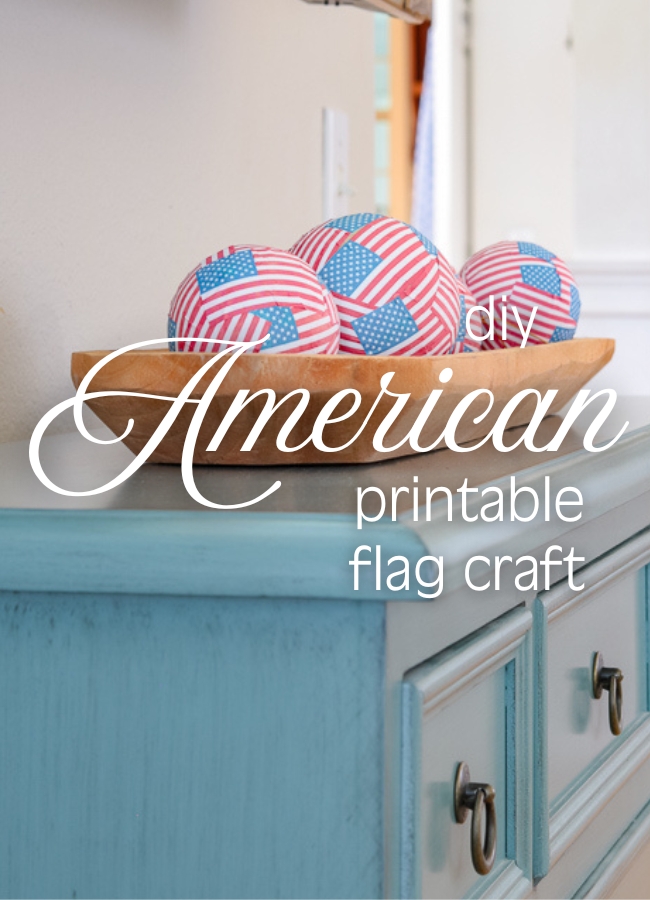
Fill a Dough Bowl for Summer Americana Decorating
This is exactly how my project started, and it is still my favorite way to display these.
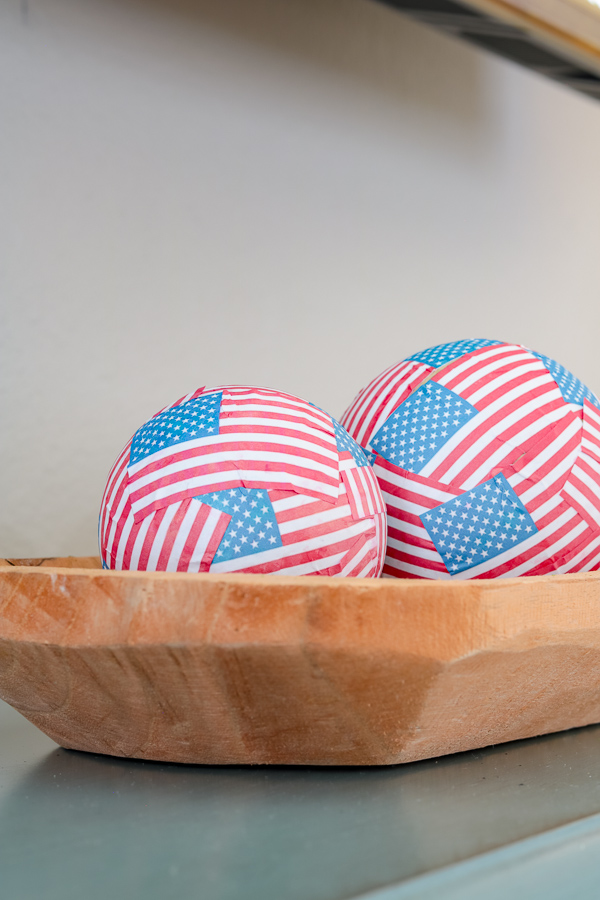
I filled my large trencher dough bowl, the one that lives under my television, with a big pile of the patriotic decoupage balls, and it is absolutely charming. The red, white, and blue against the warm wood of the dough bowl is just so perfectly American and summery.
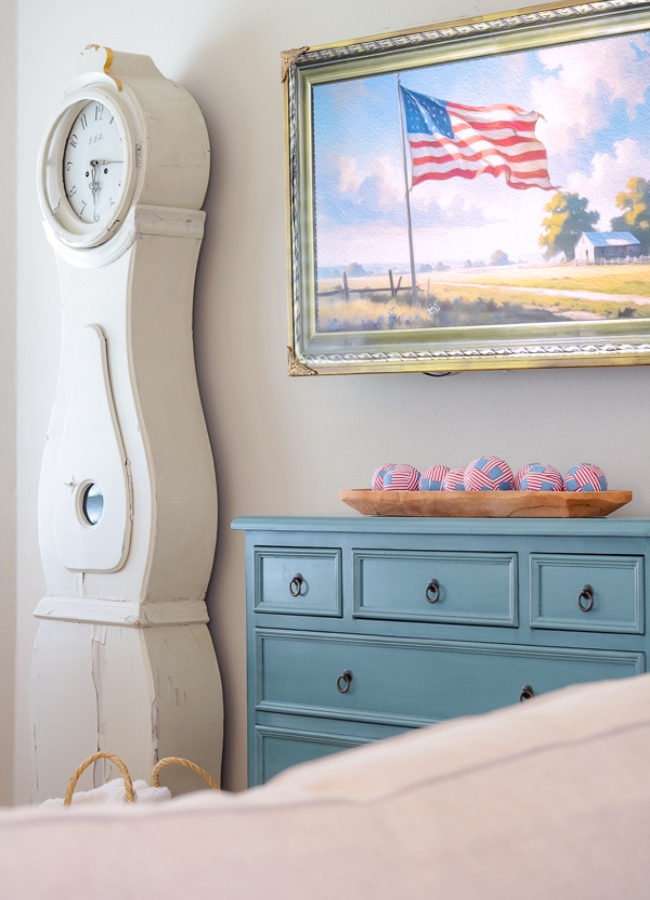
For the ornament balls with gold strings, I simply tucked each string down between the other balls so it was hidden completely. The finished bowl looks like a collection of little hand-decorated orbs, and nobody would ever guess some of them were ornament balls in disguise.
You can add a few small picks, a sprig of greenery, or mini flags for a little extra height in your arrangement, but honestly, the balls on their own are statement enough.
Hang Them on a Christmas Tree for America's 250th Anniversary
Here is the idea I am most excited about. In 2026, America celebrates her 250th birthday — the big semiquincentennial. And I cannot think of a more meaningful or beautiful way to mark that milestone than a small patriotic Christmas tree decorated with these handmade flag balls.
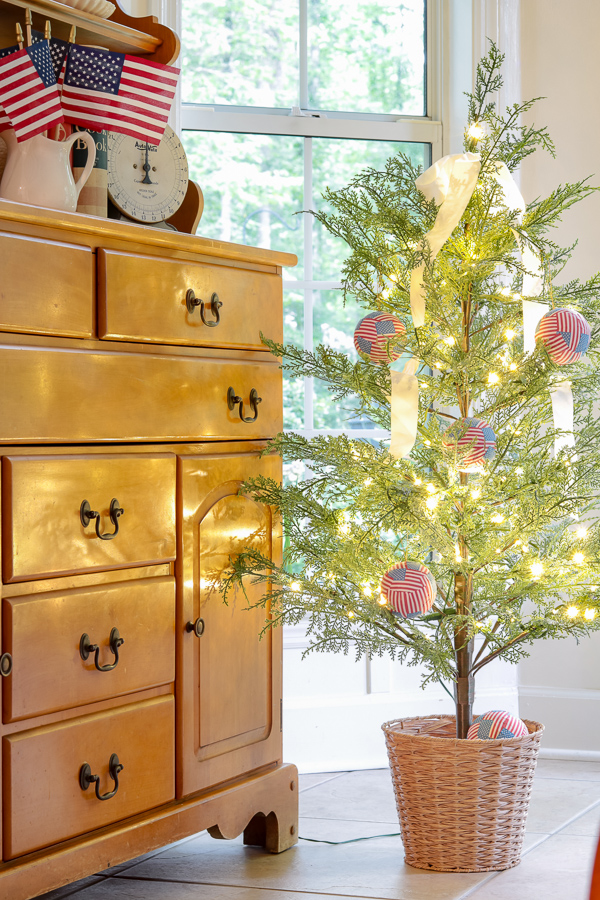
I placed my American flag ornaments on my three-foot Christmas tree. The paper ball ornaments already have the gold string attached, so hanging them is effortless.
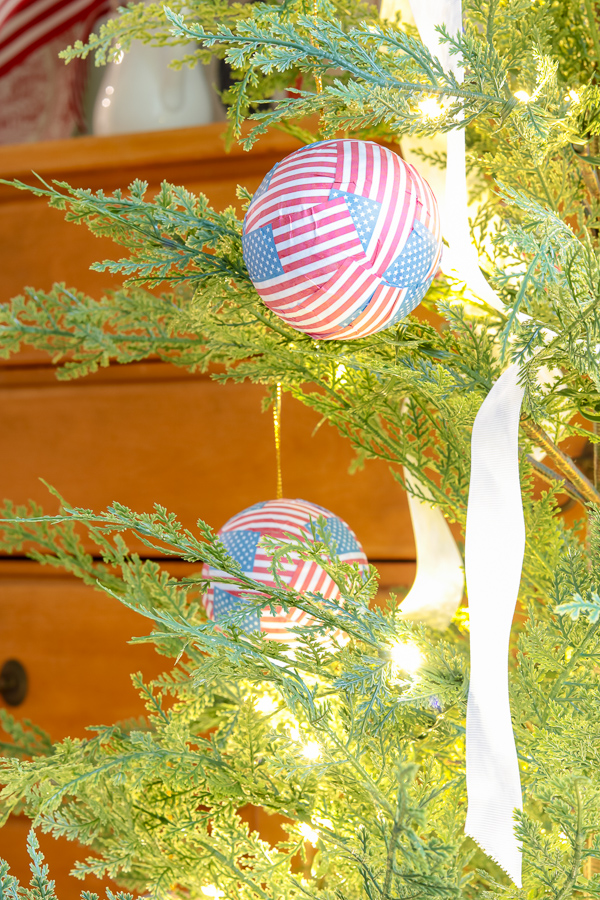
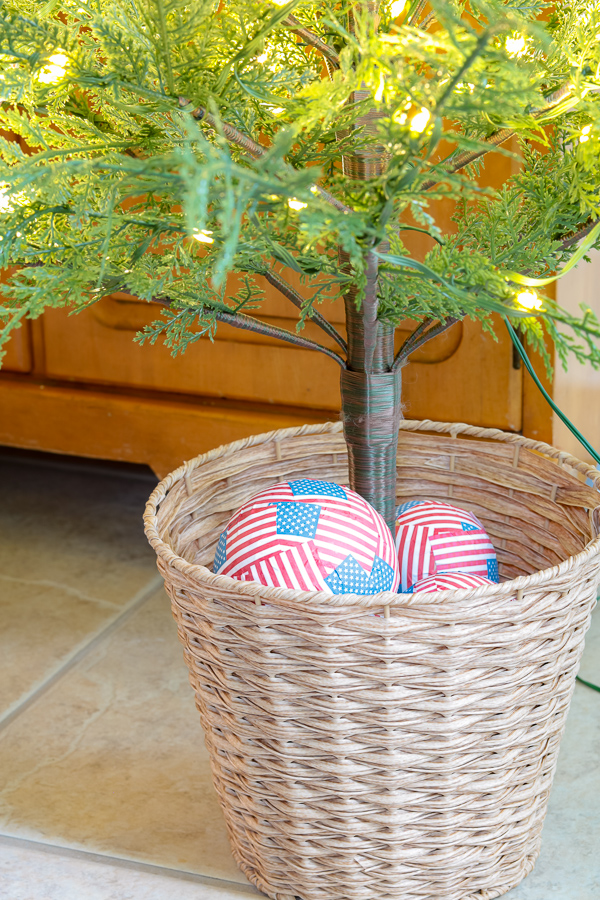
Add the orbs that don't have hanging twine to the base or pot of your tree. It adds more character and color.
I tied a cute, big white ribbon bow to the very top of the tree as the tree topper, letting it drape down through the branches. Simple, meaningful, and completely one of a kind.
Imagine this little tree on a console table, a mantel, or in an entry. Kids will love it too in their bedrooms, playroom, or classroom. I placed mine in our kitchen sitting room by the hutch.
This will be the most special nod to our country's history you can put in your home this Christmas. And because you made the ornaments yourself with a printable you can print again and again, you could make extras to give as gifts.
A Few More Decorating Ideas
These little balls are so versatile. Once you have made a batch, you will find yourself wanting to put them everywhere.
A tiered tray is a natural home for a few patriotic decoupage balls tucked in among small flags, a little sign, and some simple red and white ribbon. They add great texture and dimension.
A glass cloche or apothecary jar filled with the balls makes an instant and elegant patriotic vignette on a mantel or bookshelf. The glass lets you see all that beautiful red, white, and blue.
A basket or wooden bowl on a console table or coffee table works beautifully too — just fill it up and set it out. No arranging required.
Scattered down the center of a 4th of July tablescape, the balls add charm and texture without competing with your plates and glasses. Mix in some greenery, a few flags, and a candle or two and you have a table that looks like it took hours.
There are so many ideas that the list can go on. For more ideas, check out my Pinterest 4th of July decorating board.
Where to Get the Printable American Flag for This Project
I designed the mini flag printable specifically for this project, and it is available right now in my Etsy shop. The flags are approximately 1 inch tall by 1.5 inches wide, just right for wrapping around small to medium craft balls.
You just print on regular copy paper, cut them out, and you are ready to start decoupaging. No special paper, no special printer, nothing fancy required. That is always my goal: beautiful results with the simplest possible supplies.
Download your DIY Printable Mini American Flags here.
Frequently Asked Questions
What size balls work best for this project? I used a mix of sizes, and they all worked beautifully. Smaller balls, around three inches in diameter, are sweet and delicately looking. Larger balls, around four inches, make more of a statement and are easier to work with because they have more surface area. A mix of sizes in your bowl looks the most natural and collected.
Which Mod Podge finish is best for decoupage balls? I always use Matte Finish Mod Podge for this type of project. It dries completely clear without any shine, which lets the flags really be the star. If you prefer a little sheen, you could use a Satin finish, but I would avoid the Gloss finish because it can look a little plasticky on paper crafts.
How do I store my patriotic decoupage balls after the holiday? Once they are fully dry and cured, these hold up really well in storage. I wrap mine individually in tissue paper and store them in ziplock bags and then a box. They come right back out the next year looking just as good as the day I made them.
Can kids make these? Yes, with supervision. The Mod Podge is non-toxic, and the cutting is really the only part that requires adult help for younger children. Older kids and teenagers can absolutely make these from start to finish and would love to have their own set to display in their room.
Can the ornament balls go on a real Christmas tree? Absolutely. The paper ball ornaments already have a built-in gold string hanger, so they are ready to go right on the tree. Because they are sealed with Mod Podge, they are fairly durable, but I would keep them on an indoor tree away from moisture or direct outdoor elements.
Ready to Make Your Own?
There is something so satisfying about making your own seasonal decor from scratch — especially when it starts with a printable you can print right at home on regular paper.
These DIY patriotic decoupage balls are exactly the kind of project I love most: simple supplies, easy steps, beautiful results, and a finished piece that looks like it came from a boutique shop.
Whether you fill a dough bowl for your summer Americana decorating, hang them on a little tree for America's 250th anniversary Christmas, or tuck them into a tiered tray or cloche, they will make your home feel warm, festive, and completely charming.
Grab the printable mini flag sheet from my Etsy shop, pick up a bag of craft balls, and make yourself a bowl full this weekend. I think you are going to love them every bit as much as I do.
For more fun paper DIY with an Americana vibe, check out these posts:
Happy Decorating!
