
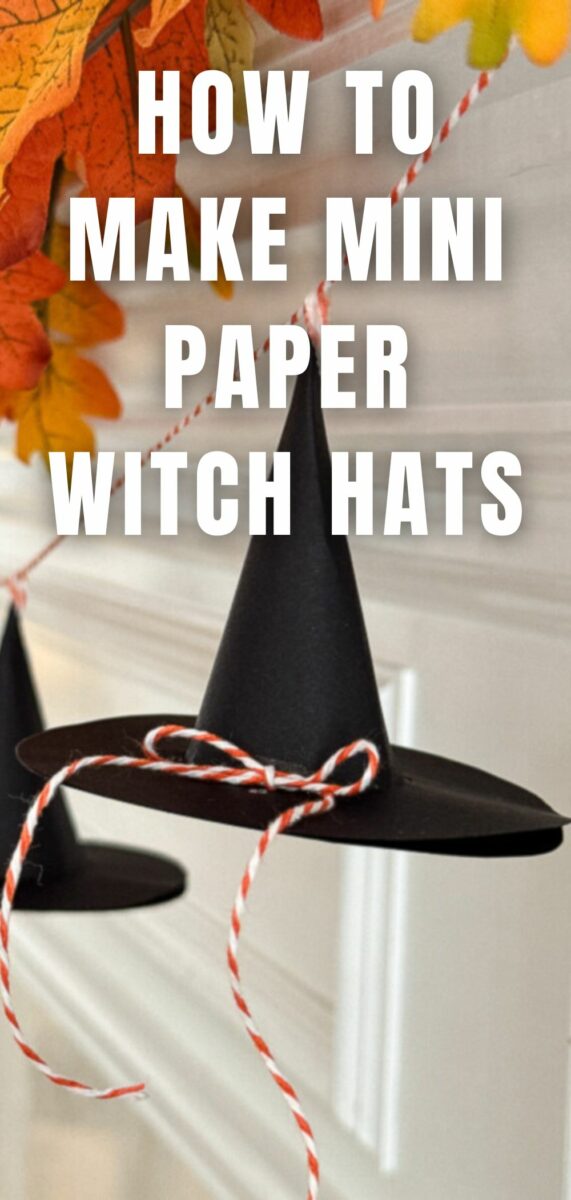
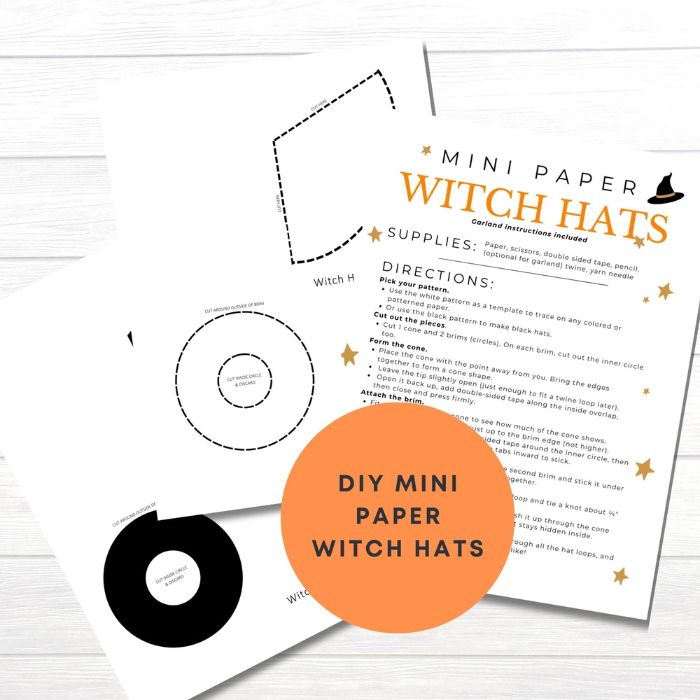
Today, I’ll show you how to make mini paper witch hats — the sweetest little DIY Halloween craft that can be used in so many ways. I turned mine into a garland for our mantel, but you can use yours for table decor, party favors, or even cake toppers.
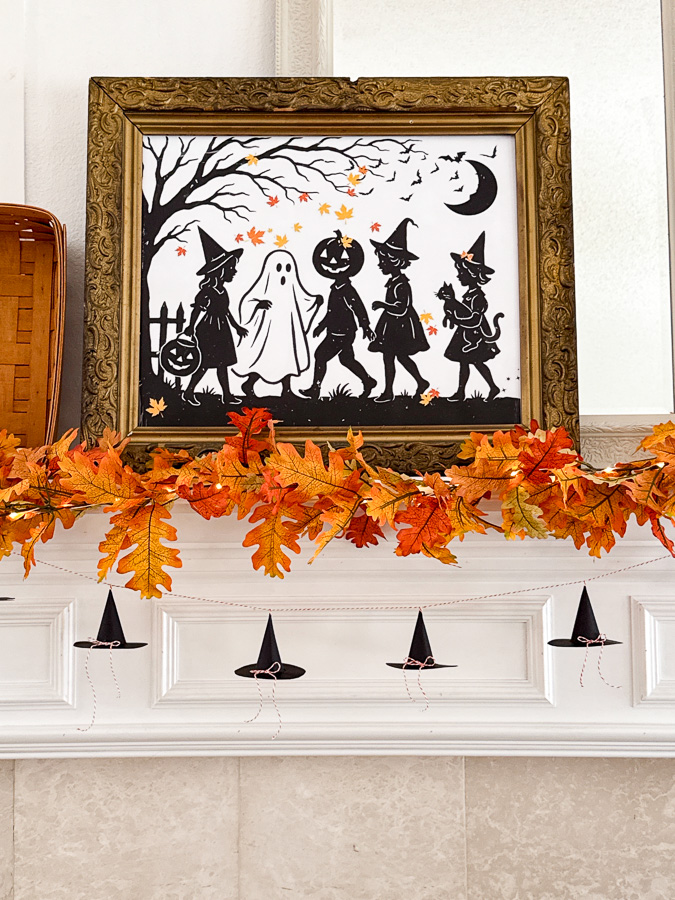
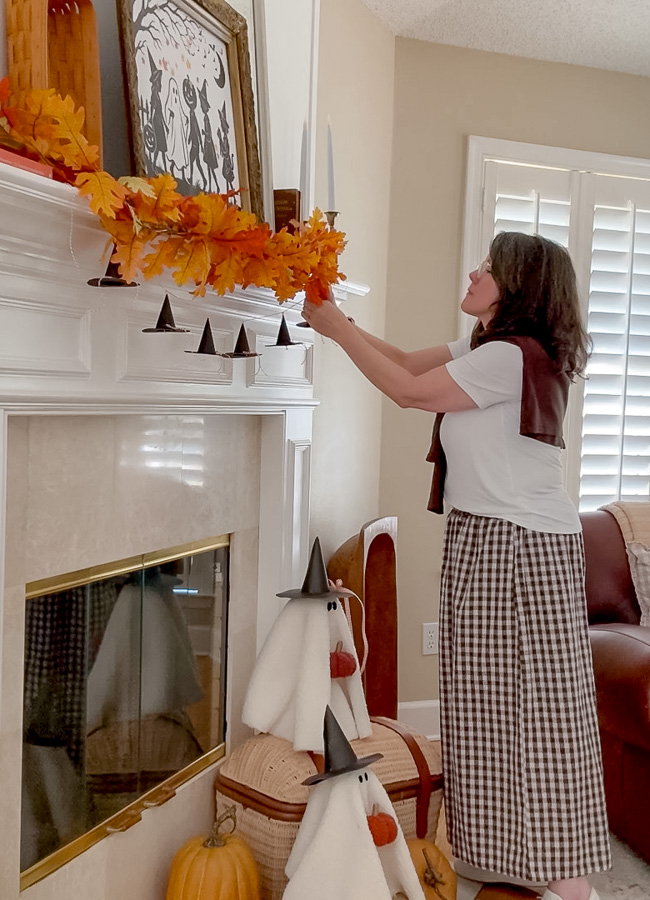
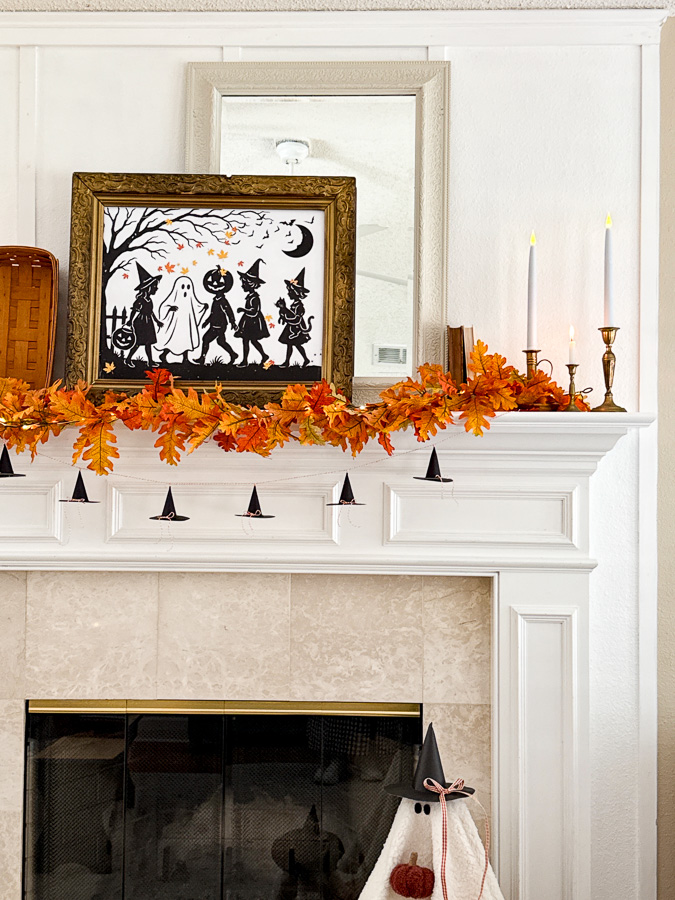
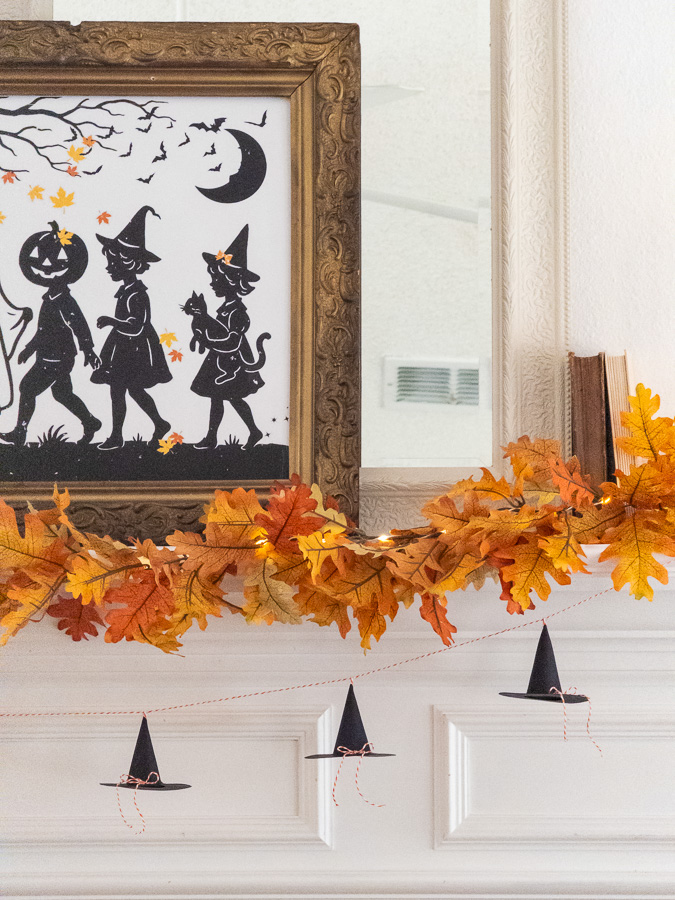
Every year, I decorate our mantel for Halloween, but this time, something felt different. I had just created the cutest silhouette Halloween art; little trick-or-treaters in costume, including a ghost, a kid with a jack-o’-lantern head, and three tiny witches. It looked so sweet all on its own, but when I stepped back, something seemed missing.
That’s when it hit me; the mantel needed a garland! And what could be better than a strand of tiny paper witch hats?
Since I already had paper witch hat patterns in my Etsy shop, I decided to scale them down to mini size and turn them into a garland. It was such a simple idea, but once it was hanging under my silhouette art, the whole space came to life.
Supplies You’ll Need to Make Mini Paper Witch Hats
You don’t need much for this project, and you might already have some of these supplies on hand.
- Printable download pattern available on Etsy
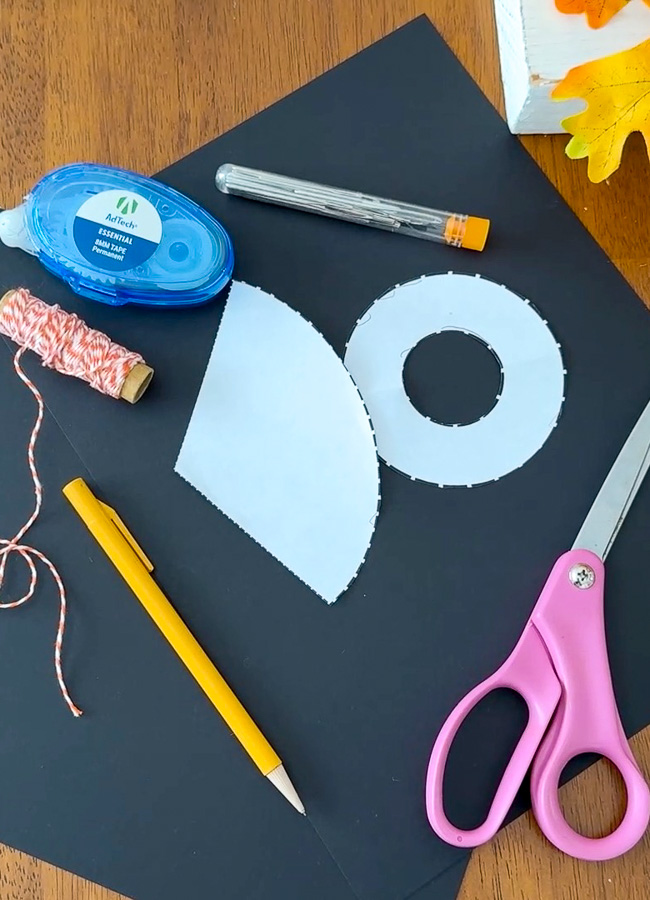
- Paper (white, black, patterned, or colored)
- Scissors
- Double-sided tape (I like Scotch the best because it holds better)
- Pencil
- Twine (optional if you're making the garland or bow)
- Yarn needle (optional if you're making the garland or bow)
You can grab the printable mini paper witch hat pattern in my Etsy shop here. It’s the same one I used for my larger witch hats, just scaled down to make this sweet garland.
Step-by-Step: How to Make Mini Paper Witch Hats
This project comes together quickly with a little practice, and once you have your pieces cut. Here’s how to do it step by step.
Step 1 – Pick Your Pattern
Start by choosing your pattern color.
Use the white printable pattern as a template to trace onto any colored or patterned paper.
Or, if you want classic black hats, use the black version of the pattern.
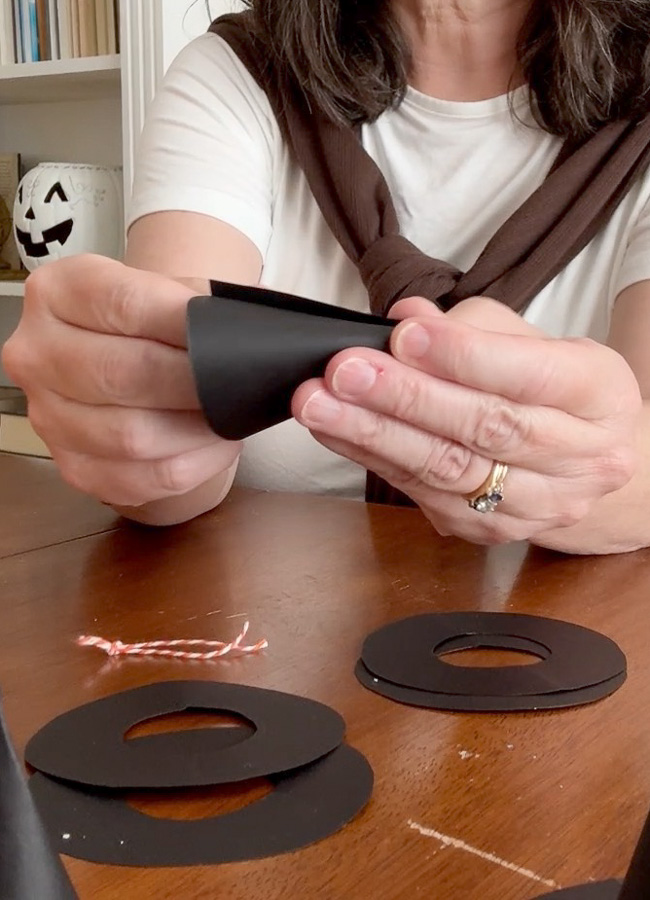
Step 2 – Cut the Pieces
Cut out one cone and two brims (circles) for each hat.
On both brims, be sure to cut out the smaller inner circle, too.

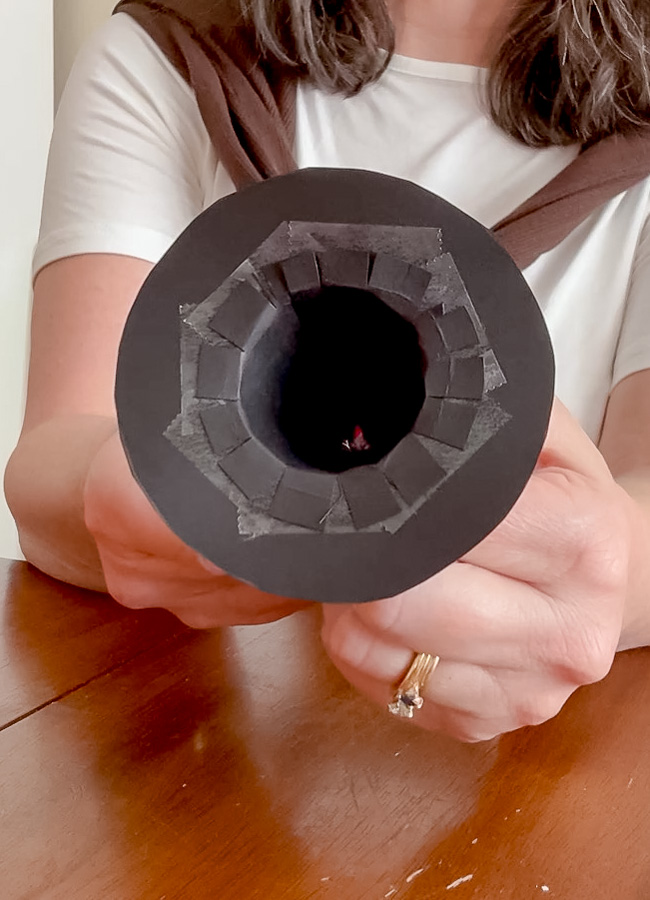
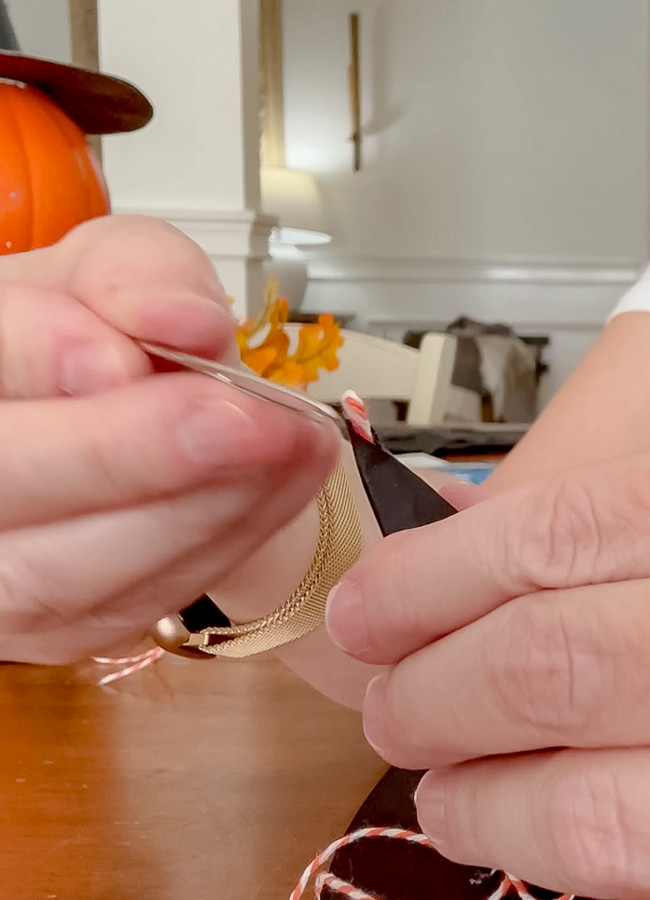
Step 3 – Form the Cone
Place the cone piece with the point away from you. Bring the edges together to form a cone shape, leaving the tip slightly open, just enough space to fit a small twine loop later if you do the garland.
Open it back up, add double-sided tape along the inside overlap, then close and press firmly.
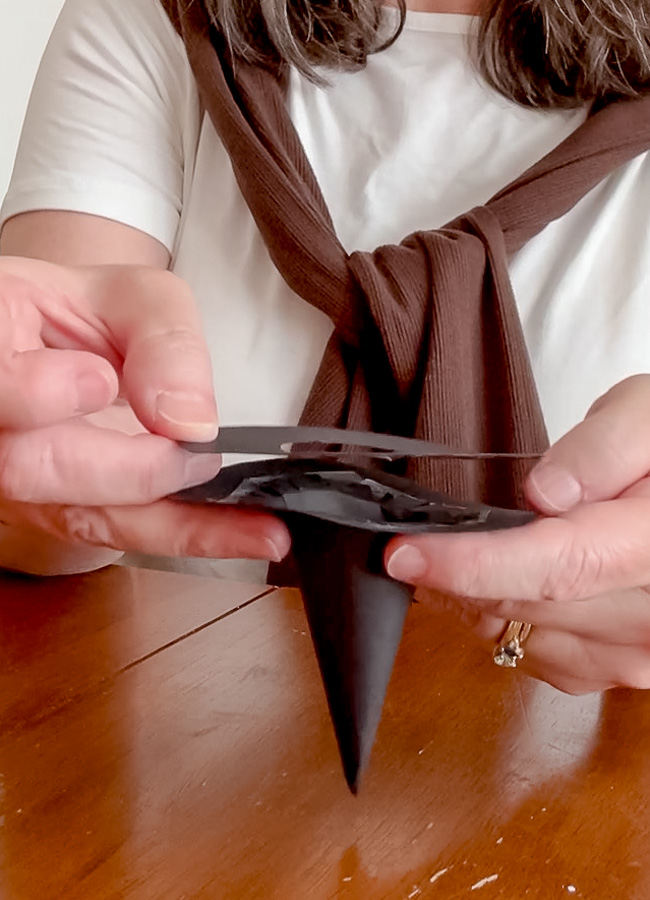
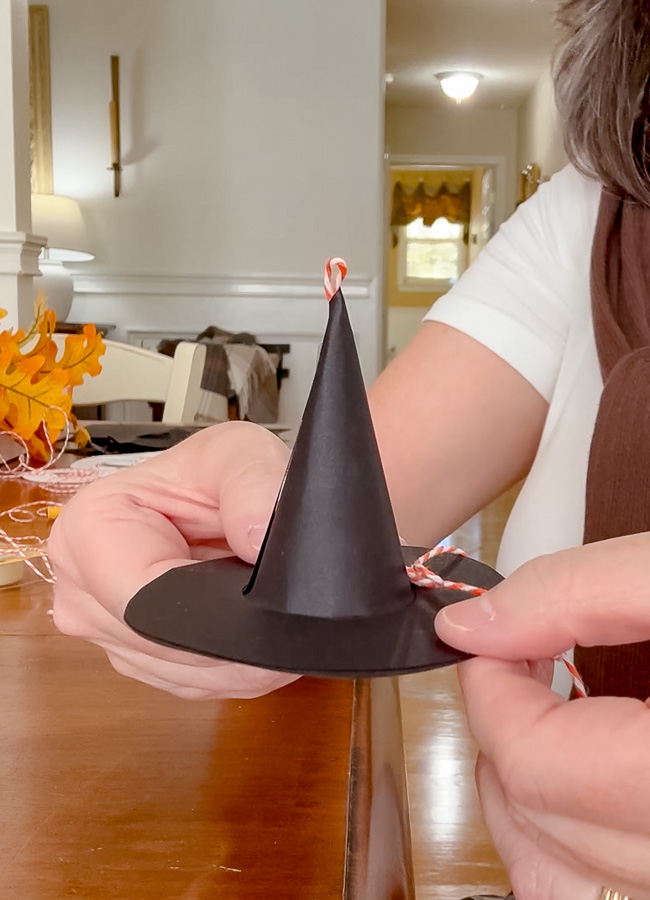
Step 4 – Attach the Brim
Fit one brim over the cone to see how much of the cone will show at the bottom.
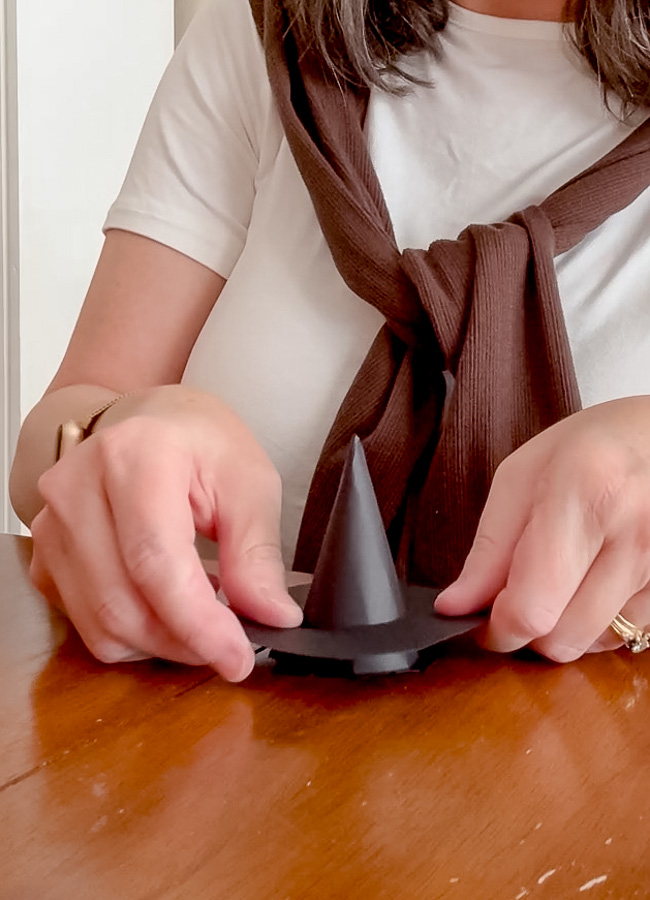
Cut small slits in the cone, just up to where the brim will sit (not higher).
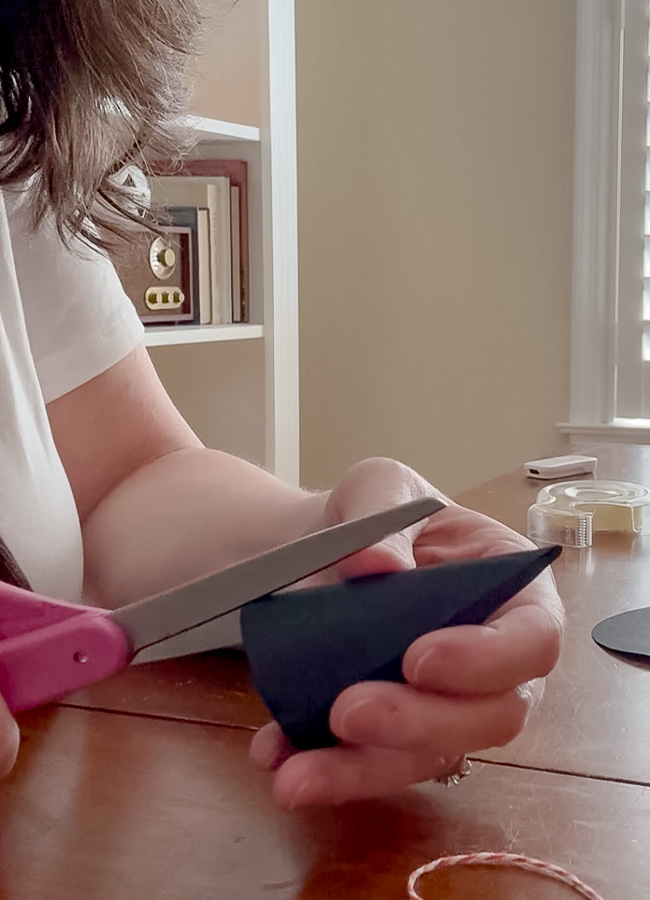
Next, fold the slits to make it easier to apply to the brim.
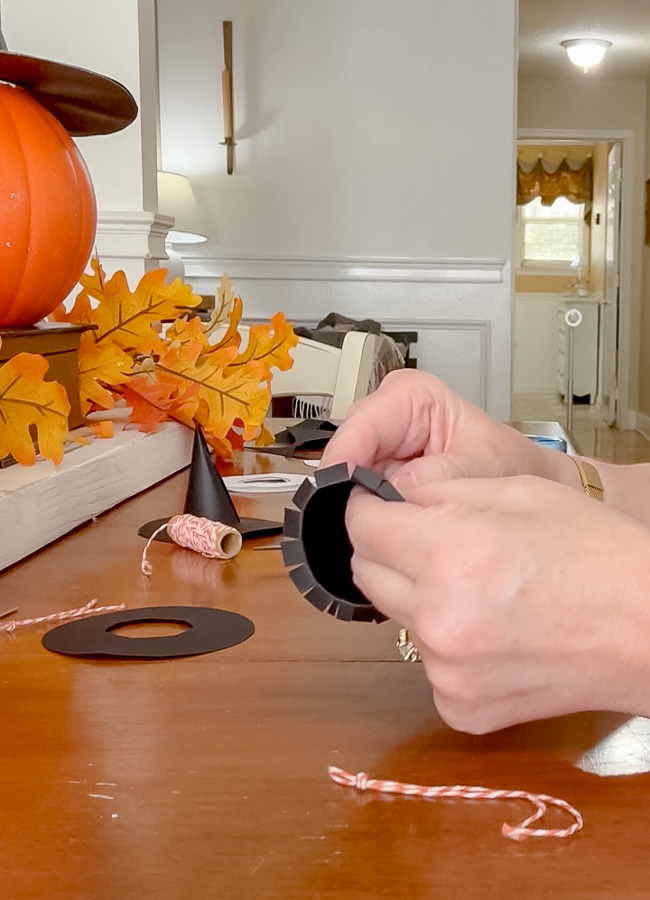
Remove the brim, add double-sided tape around the inner circle, place it back on, and fold the cone tabs inward to secure it.
Add tape around the outer edge of the second brim and stick it under the first brim. This sandwiches everything together neatly for a finished look.
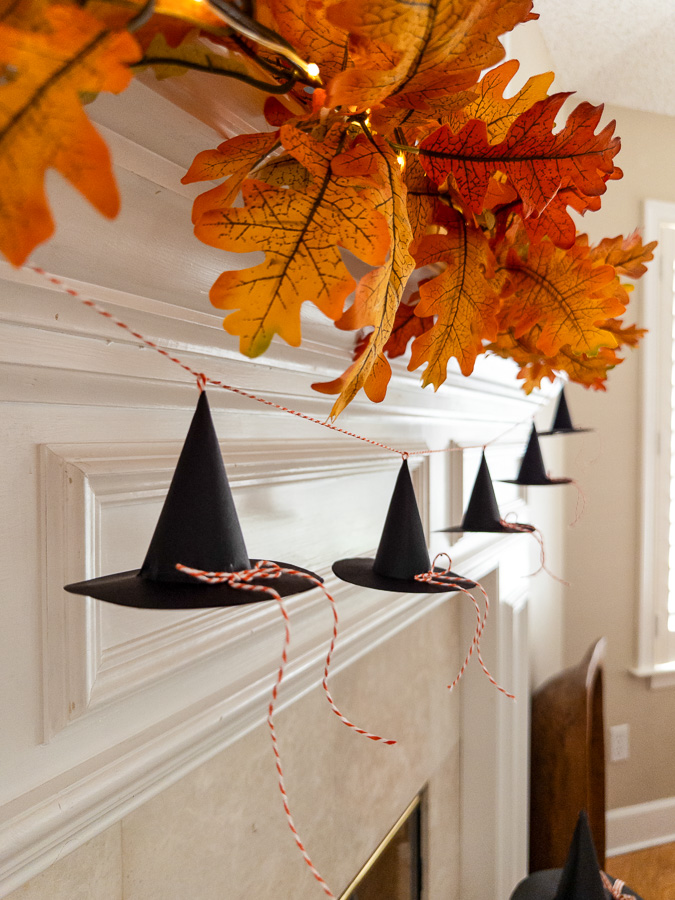
Please note if you are making the garland: I added bows to my hats before hanging the garland, but after seeing how it looked, I recommend waiting until it’s hung. That way, you can place each bow exactly where you want it once the garland is hanging.
Fun Ways to Display Your Mini Witch Hats
There are so many creative ways to show off your tiny paper witch hats.
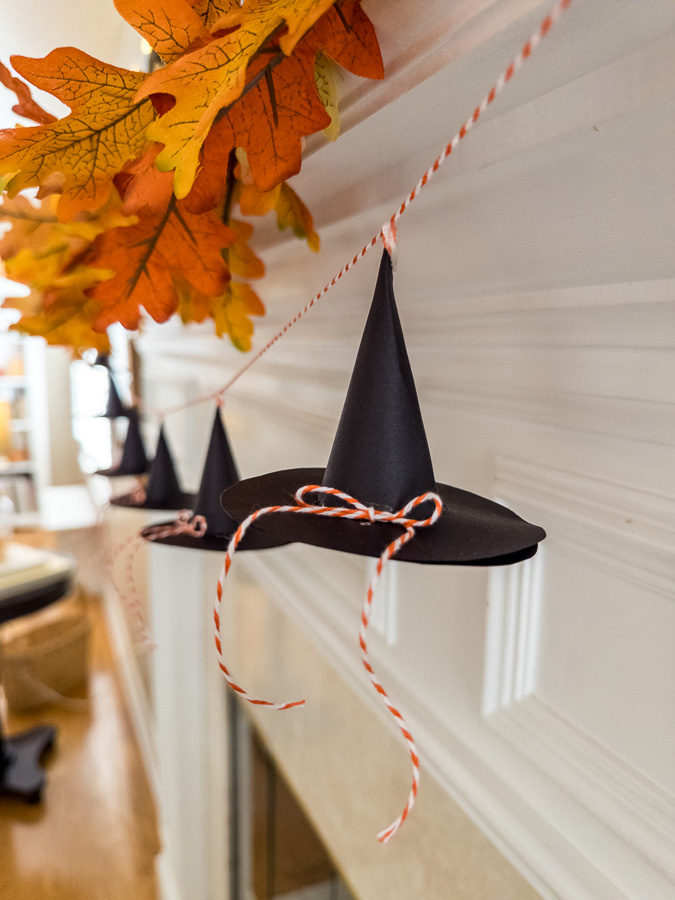
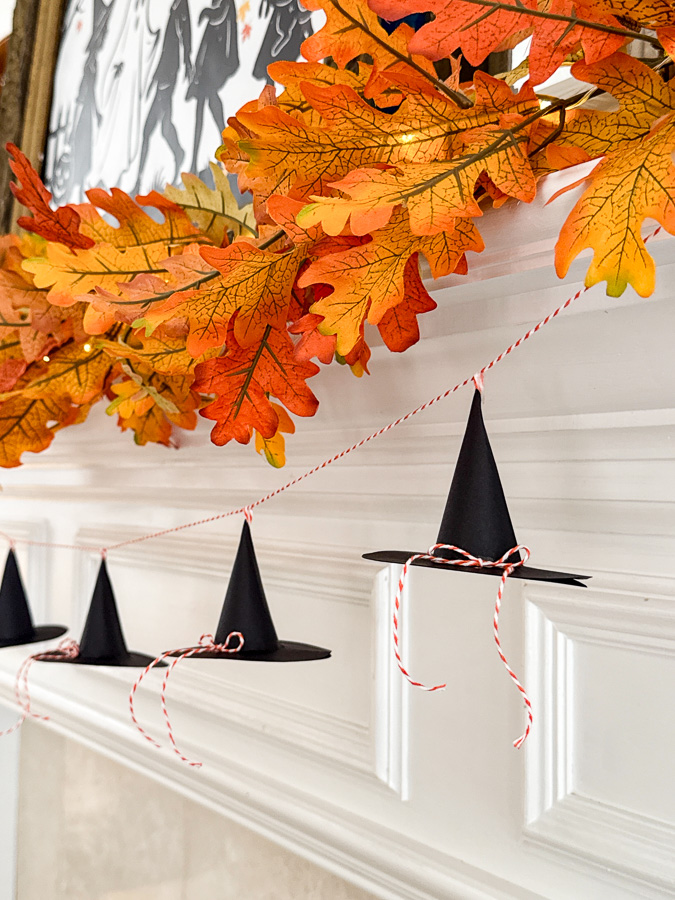
I turned mine into a garland and hung it across my mantel just below my fall leaf garland; it added the sweetest layered look.
But you can use your mini hats in other fun ways, too:
- Line them across a bookshelf or hutch
- Add one to a mirror or picture frame
- Use them as cake toppers or party favors
- Scatter them on a Halloween buffet or tiered tray
These little hats are full of charm and can tuck almost anywhere in your home for a playful Halloween touch.
Mini Paper Witch Garland
String the Garland
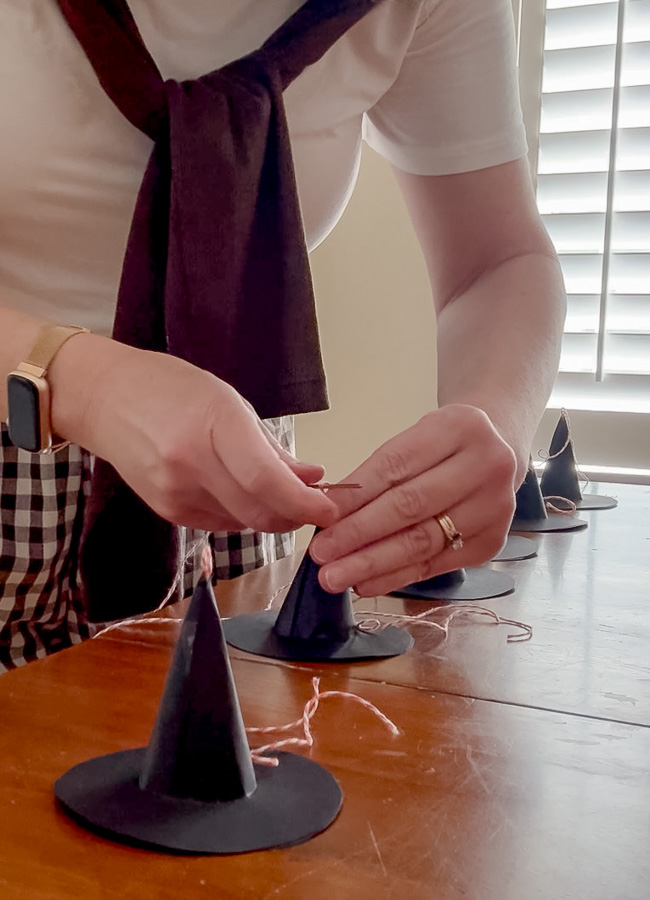
After you make your mini paper witch hat's you can turn them into the cutest Halloween garland.
Cut a short piece of twine. Make a small loop at one end and tie a knot about ¼ inch below the loop.
Thread a yarn needle with the loop.
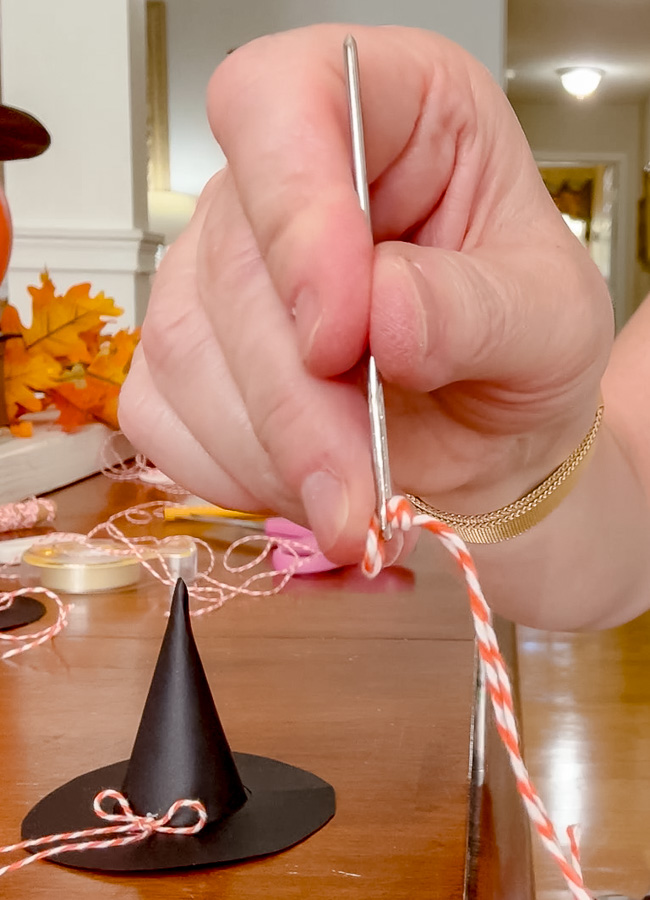
Now gently push it up through the cone tip, pulling the loop out the top so the knot stays hidden inside.
Repeat for each hat.
Then cut a long piece of twine, thread it through all the hat loops, and you’re ready to hang your garland.
Add Finishing Touches
After you hang your garland, add little bows if you’d like.
I used orange and white baker’s twine to make mine, securing each bow with a tiny piece of double-sided tape.
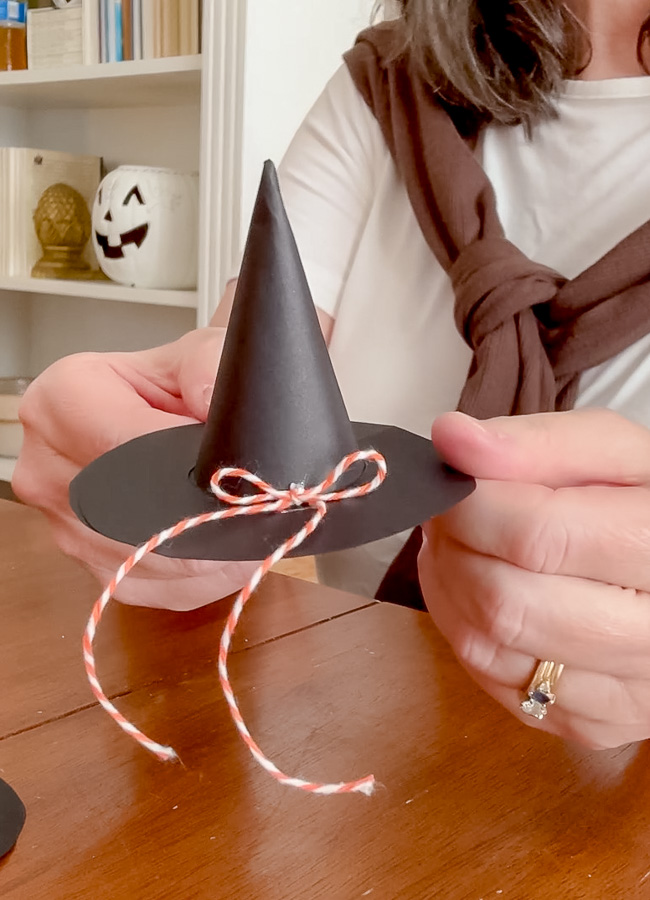
Doing this after the garland is hung helps you place the bows exactly where you want them.
Where to Hang Your Tiny Paper Witch Hat Garland
There are so many fun ways to decorate with this garland.
I hung mine along the mantel, just under my fall leaf garland, and it added the sweetest layered look.
You can also hang your paper witch hat garland on:
- A hutch or open shelf
- Across a mirror
- Over a bookcase
- Along a Halloween party buffet
And if you want to see the silhouette Halloween art that inspired this project, you can check it out here.
For even more witchy crafts, take a peek at these tutorials:
Final Look: Halloween Mantel Decor
Here’s a peek at how it turned out on my mantel, soft candlelight, fall leaves, and tiny witch hats all dancing together. The garland adds just enough Halloween charm without taking away from the cozy fall feel.
It is amazing how some paper, scissors, and tape can create the cutest of decorations.
And I love how the hats tie into the Halloween silhouette art.
Shop the Pattern
Ready to make your own tiny witch hats?
You can grab my printable paper witch hat pattern from my Etsy shop here.
It includes all the templates and instructions you need to create your own whimsical string of tiny witch hats.
Final Thoughts
This little garland was the finishing touch my Halloween mantel needed. Sometimes, the simplest ideas, like scaling down a pattern and stringing it together, make the biggest difference.
I hope this DIY paper witch hat tutorial brings a sprinkle of magic to your home this Halloween.
If you make one, I’d love to see it; tag me on Instagram or share it in the comments!
Happy Crafting!
