
Halloween is the perfect time to let your creative spirit run wild and decorate your home with eerie and enchanting elements. One classic symbol of Halloween is the witch's hat, and making your own out of paper is a fun way to add a personal and whimsical touch to your decorations.
So I will teach you how to make a witches hat out of paper.
In this guide, we will walk you through the step-by-step process of creating paper witch hats and share decorating ideas to elevate your Halloween decor to a whole new level.
This year, we finished decorating our Halloween fireplace and then decided witch hats would be a funny addition, but we didn't want to go shopping and we wanted something inexpensive, so we made a template and crafted a witch hat.
It turned out so great that we decided to share the pattern and step-by-step guide with you.
Gathering Your Craft Supplies
Before you embark on this crafting adventure, the first thing I recommend is gathering all the necessary materials. In this case, they are very basic supplies. Whatever you don't have on hand can be found at your local craft store or dollar tree. Here are the essentials you'll need:
- Printable Template/Pattern: You can find a suitable witch hat pattern in our Etsy shop. Choose between classic white or mysterious black paper for your project or you can print the white page onto black construction paper to save ink.
- Scissors: A good pair of scissors is crucial for precise cutting.
- Double-Sided Tape: This will be your trusty adhesive for securing the hat's shape and more.
- Black Card Stock Paper
How to Make Witches Hat Out of Paper
Step 1: Print and Cut Witch Hat Pattern
Start by downloading the witch hat pattern from our Etsy shop. Once you have the pattern in hand, decide whether you prefer a classic white or a mysterious black paper for your witch hat.
The template will ensure you have a perfectly circular shape and cone for the hat. The white pattern also works great for printing on black paper. You can still see the lines and save yourself a lot of printer ink.
Carefully cut out the pattern using sharp scissors. The precision of your cutting will determine the final look of your witch hat.
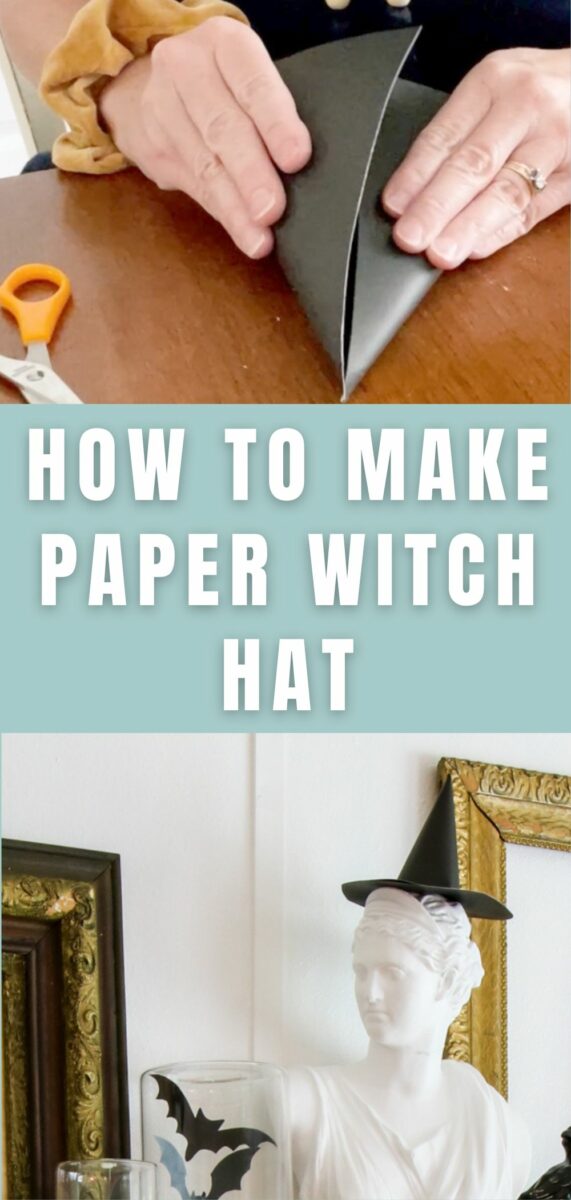
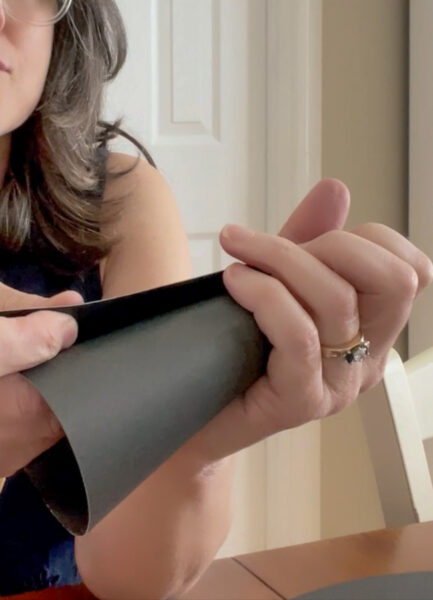
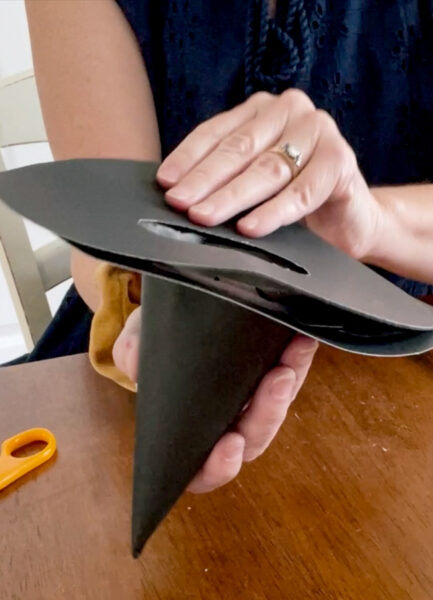
Step 2: Building the Witch Hat Cone
The heart of your witch hat lies in forming the cone shape. You can begin by rolling the paper into a cone, making sure the pointed tip rests at the top of the hat and the base of the cone lines up.
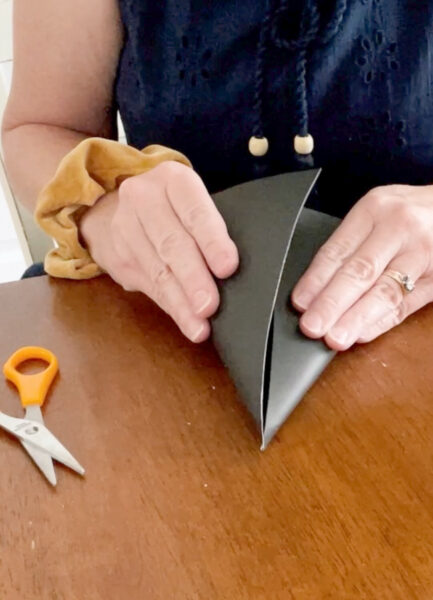
Then use double-sided tape to secure the cone's shape; this is an easy way to stabilize your hat's structure.
And follow by fastening the ends together to make the cone. Be careful not to crush the top point.
Decorating the Cone Creatively (Optional)
If you're feeling particularly creative, it's a good idea to take this opportunity to add your personal touch to the witch hat. Consider embellishing it with ribbons, stickers, or even a splash of paint to make it truly unique.
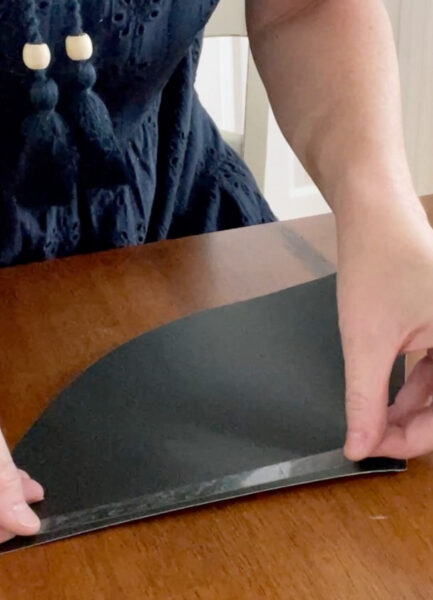
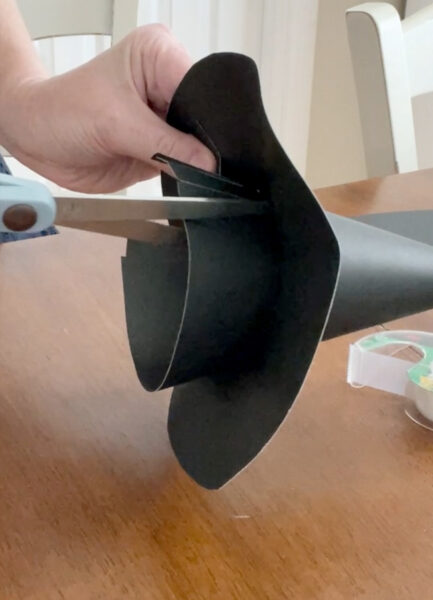
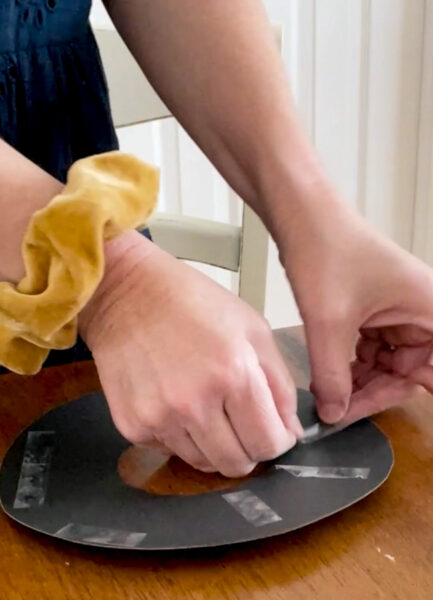
Step 3: Assemble Brim onto the Cone
In the next step, to complete your paper witch hat, you'll need to attach the brim of the hat. Position the center of the brim over the cone, ensuring it aligns with your vision. Use a pencil to mark the underside of the brim to ensure precise placement.
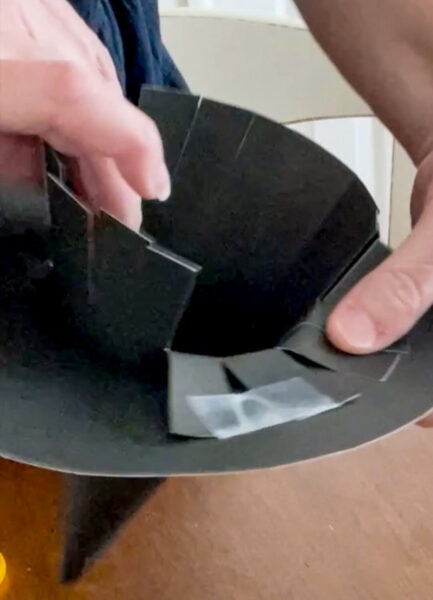
After marking, cut slices into the bottom edge of the cone up to your designated point.
Then, fold the cut pieces and secure them under the brim with tape. This not only enhances the hat's structural integrity but also conceals any visible tape, giving it a polished appearance.
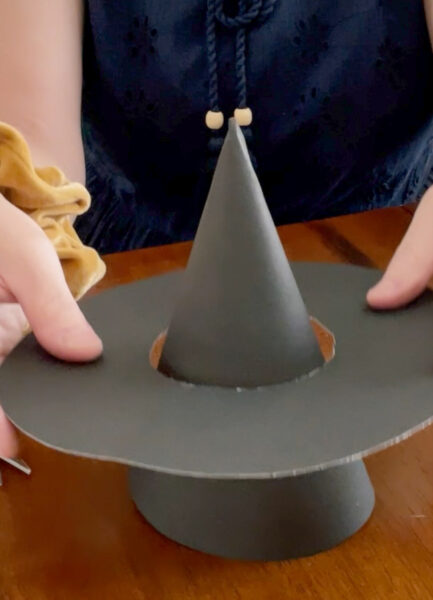
Step 4: Attach Second Brim
Your DIY witch hat is almost done. For the last step, to achieve a seamless finish, use double-sided tape to attach the second brim to the bottom of the hat.
This step not only secures the brim in place but also hides any tape, providing a polished and professional look for your paper witch hat. And the base of the hat will be steady, wherever you decorate with it.
And your great Halloween craft is complete and ready to make a little witch out of just about any decoration.
Decorating Ideas with Witch Hat
Time for the really fun part. Now that you've successfully crafted your paper witch hats, it's time to explore creative decorating ideas to showcase your enchanting creations. Here are some innovative suggestions:
Personalize Your Witch Hats for Party Decorations
Give your witch hats a personal touch by adding names or spooky designs. This is perfect for Halloween party decorations, adding a unique element to your Halloween event. Here are a few ideas I found on Pinterest.
This is looks like a fun DIY. Paper bag witch hat! After you make the hat here is a retro Halloween printable you can use on the hat, only have it printed smaller.
Illuminated Floating Witch Hats from the Ceiling
For a touch of eerie ambiance, hang your paper witch hats from the ceiling using clear fishing line and add battery powered lights that come with a remote. They'll appear as if they're floating in mid-air, creating a captivating atmosphere.
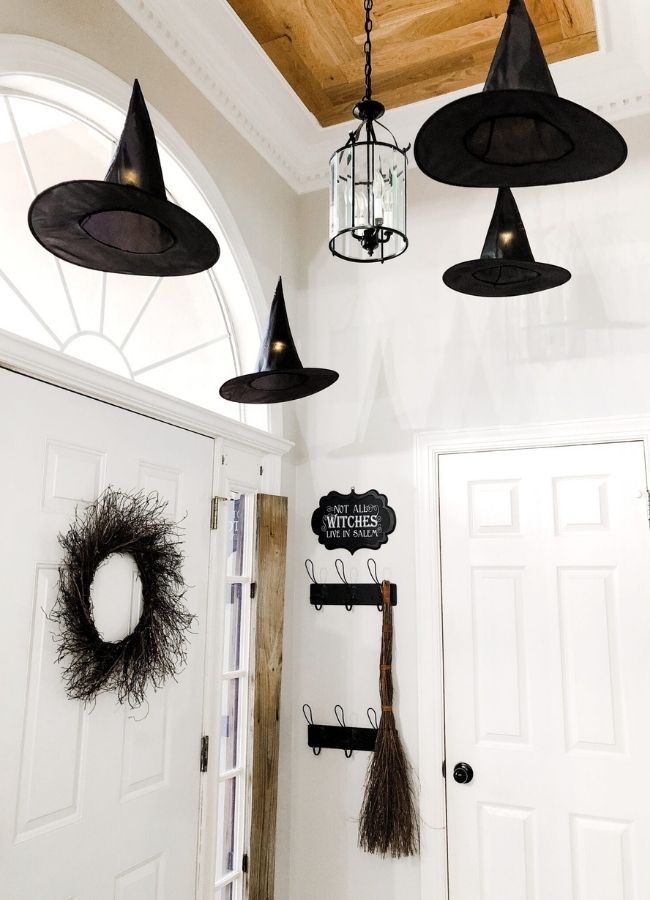
Here is where my friend Luci created floating witch hats with store-bought hats, but you can easily do this with DIY paper witch hats.
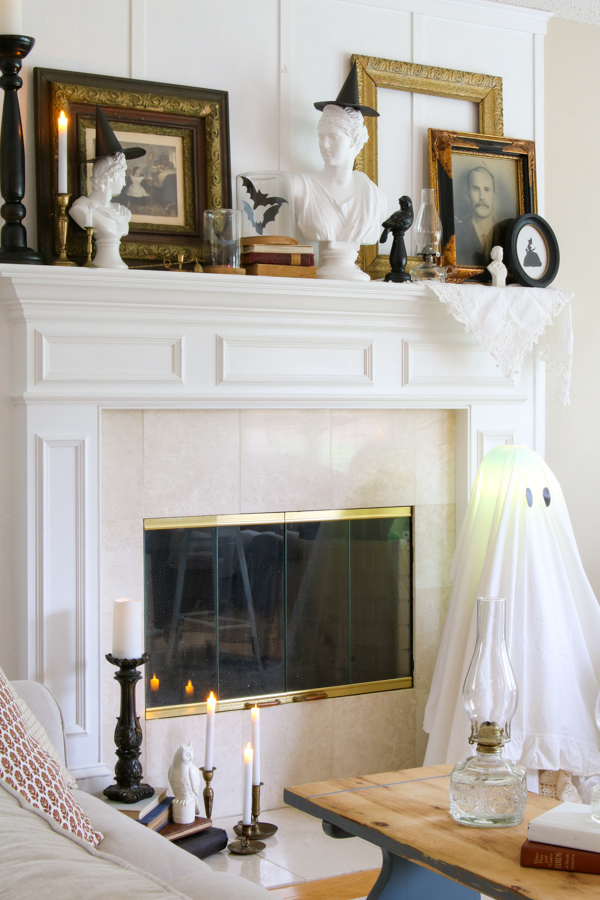
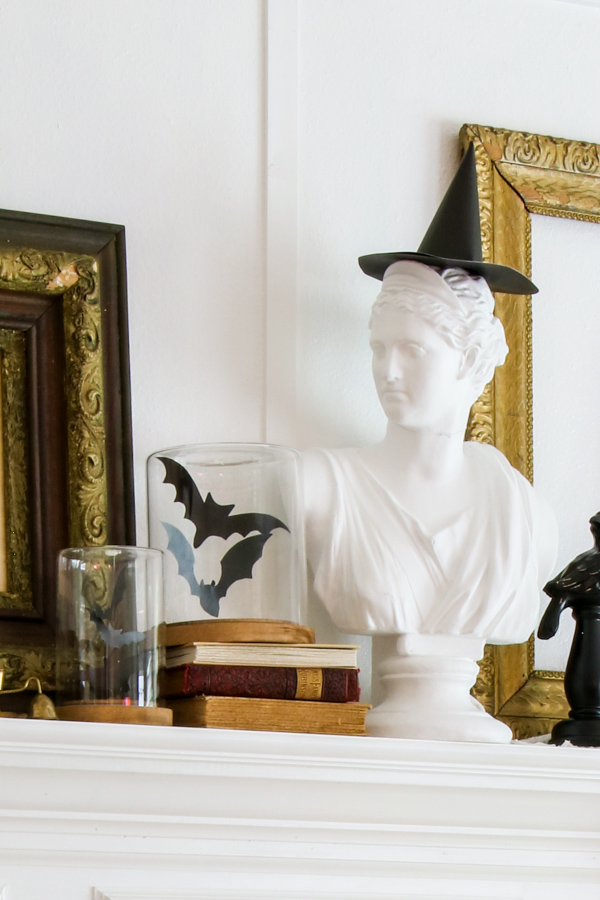
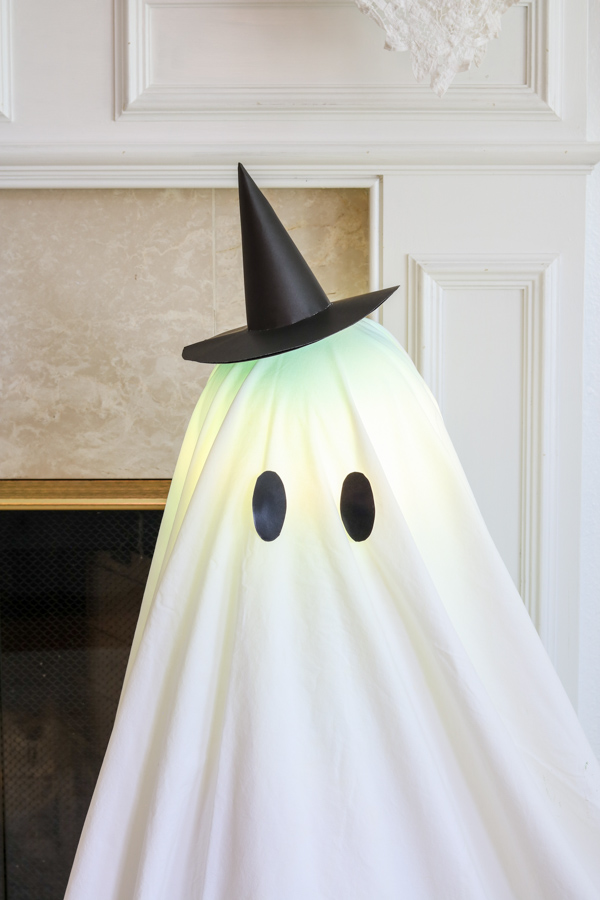
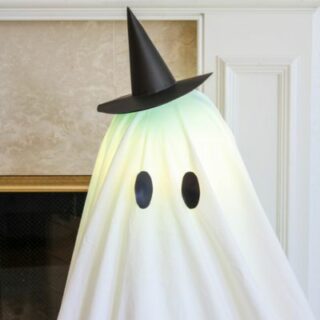
Add Witch Hats to Decorations like Ghosts and Sculptures
Incorporate your paper witch hats into other Halloween decorations, such as ghostly figures or sculptures. This fusion will enhance the thematic appeal of your overall decor.
We had so much fun decorating with our paper witches hats. Here is where we added one to a sculpture.
Our DIY sheet ghost wanted its own witch hat.
If you’d like to take your witch hat craft a step further, try turning them into a garland!
It’s such a fun way to decorate mantels, hutches, or mirrors.
Take a peek at my full tutorial here: DIY Mini Paper Witch Hat Garland
If you’re looking for even more ways to decorate for Halloween, I rounded up some of my favorite Halloween garland DIYs from spooky to sweet!
You can find them all here Halloween Garland DIYs
FAQs
We understand that you may have some questions, so here are answers to some of the most common inquiries:
Can I Use the Witches Hat Template for Other Projects?
Absolutely! Another fun idea is to print the hat template on blue paper and use foil or metallic craft paper to make a wizard's hat. Or print it on pink paper, add some tassels or tule to the tip of the hat, and you have a princess hat. You can have a “make your own party hat” table at a little kid's birthday party or print the pattern and use on any paper or fabric.
Can I Reuse the Witches Hat?
Yes, it's a great idea to store and reuse the paper witches hat as part of your Halloween decor year after year. Be sure to use a nice thick card stock and store it out of direct sunlight.
Conclusion
I hope you found some fun ideas how to make and decorate with a witches hat. Now that you know how to make witches hat out of paper, are you excited about learning more Halloween DIY ideas? I have some fun ideas I think you'll love:
- How to Make a Witch Broom for Vintage Halloween Decorations
- Glowing DIY Air Dry Clay Ghosts for Halloween
- DIY Dollar Store Halloween Decoration (Painted Jack o Lanterns)
- Retro Halloween Porch Decor Ideas: Vintage 50s Fun
Do you have any fun DIY Halloween crafts ideas? I'd love to hear about them in the comments! Happy Halloween!
Happy Decorating!

How to Make a Witches Hat Out of Paper (4 Easy Steps)
In this guide, we will walk you through the step-by-step process of creating paper witch hats.
Tools
Instructions
- Start by downloading the witch hat pattern from our Etsy shop. Once you have the pattern in hand, decide whether you prefer a classic white or a mysterious black paper for your witch hat. The template will ensure you have a perfectly circular shape. The white pattern also works great for printing on black paper. You can still see the lines and save yourself a lot of printer ink.
- Carefully cut out the pattern using sharp scissors. The precision of your cutting will determine the final look of your witch hat.
- The heart of your witch hat lies in forming the cone shape. You can begin by rolling the paper into a cone, making sure the pointed tip rests at the top of the hat and the base of the cone lines up. Then use double-sided tape to secure the cone's shape; this is an easy way to stabilize your hat's structure. Follow by fastening the ends together to make the cone.
- To complete your paper witch hat, you'll need to attach the brim of the hat. Position the center of the brim over the cone, ensuring it aligns with your vision. Use a pencil to mark the underside of the brim to ensure precise placement.
- After marking, cut slices into the bottom edge of the cone up to your designated point. Then, fold the cut pieces and secure them under the brim with tape. This not only enhances the hat's structural integrity but also conceals any visible tape, giving it a polished appearance.
- To achieve a seamless finish, use double-sided tape to attach the second brim to the bottom of the hat. This step not only secures the brim in place but also hides any tape, providing a polished and professional look for your paper witch hat.
Notes
After you finish making the hat, if you're feeling particularly creative, it's a good idea to take this opportunity to add your personal touch to the witch hat. Consider embellishing it with ribbons, stickers, or even a splash of paint to make it truly unique.