

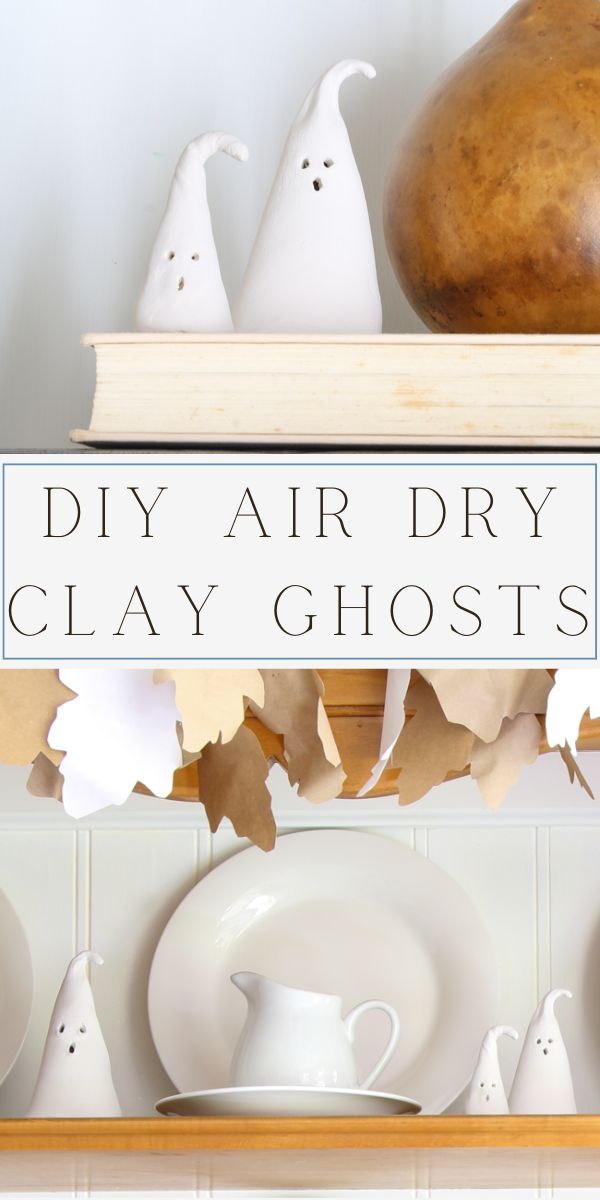
As the leaves turn and the chill of autumn fills the air, it can mean only one thing – Halloween is just around the corner! It's the season of ghouls, ghosts, and all things eerie, and what better way to embrace the spooky spirit than by creating your own adorable air dry clay ghosts that light up the night?
In this step-by-step tutorial, we'll guide you through the enchanting world of crafting these charming DIY clay ghost decorations that are sure to cast a ghostly glow over your Halloween festivities.
So grab your air dry clay, a battery-powered tea light, and let's get ready to bring some ghostly charm to your Halloween decor!
About a month ago, my daughter, Hannah, and I had a crafting night, and I created these adorable air dry clay ghosts for the Halloween season. I had the idea of making them light up, and after making the first one too small, I kept rolling out the dough over and over until I finally figured out the easiest way to make these adorable ghosts.
So, without further ado, let's start with a supply list for this fun craft activity and end with a few ideas of how you can decorate clay ghosts.
DIY Air Dry Clay Ghosts
What Do I Need to Make Air Dry Clay Ghosts?
With all good DIY projects, I recommend gathering your supplies first. Here is a list of what I used to make air dry clay ghosts for Halloween.
- Air Dry Clay
- Rolling pin
- Long popsicle sticks
- Thin ruler
- Cup of water
- Wax paper
- Toothpicks
- Battery powered tea light candles
- White chalk paint (optional)
Now that you have all your supplies, here are the directions on how to make an air dry clay ghost.
Is Making Air Dry Clay Ghosts Complicated?
Making air-dry clay ghosts is not complicated at all. And it only requires a few craft supplies, many of which you probably have on-hand. I've broken it down into a seven-simple-step craft tutorial that will be a great activity for the whole family during the Halloween holiday season.
How to Make a Clay Ghost
To begin, you will need to warm up the clay in your hand. I get a hand full of clay a little bigger than a golf ball and smaller than a baseball and start squeezing it in my hands. Then, I roll it into a perfect ball in between my palms.
Now that the clay is warmed up, here is how to roll it out where it will be perfectly smooth.
Step 1: Roll out the Clay
For this step, I press a piece of air dry clay into a pancake between my hands, turning it a few times. Then, I place it on top of the wax paper on a hard surface.
Next, I place two extra long popsicle sticks on each side and begin rolling out clay just like rolling out dough with a rolling pin.
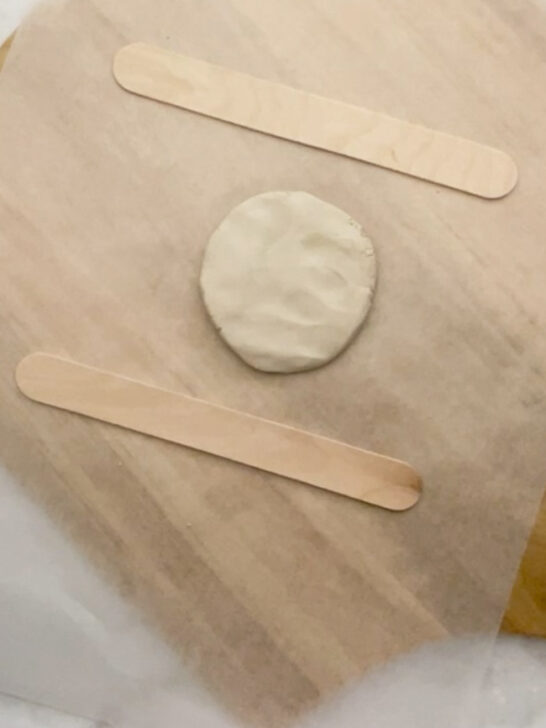
Turn the paper and sticks every so often to keep working the clay into an even layer round shape.
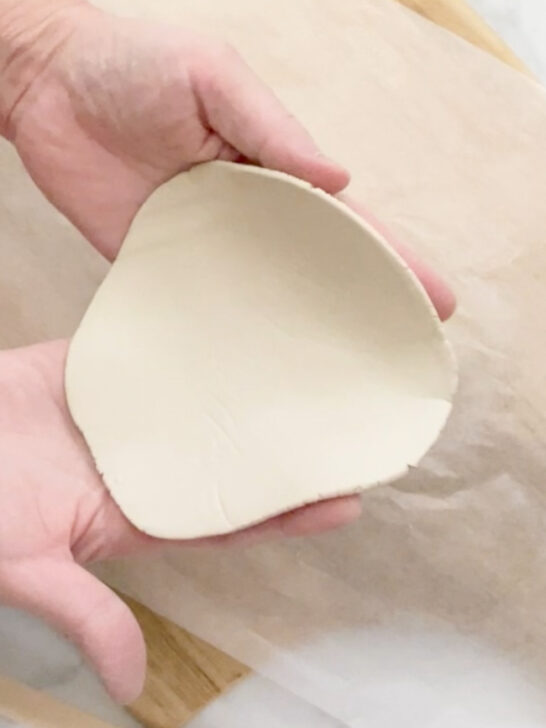
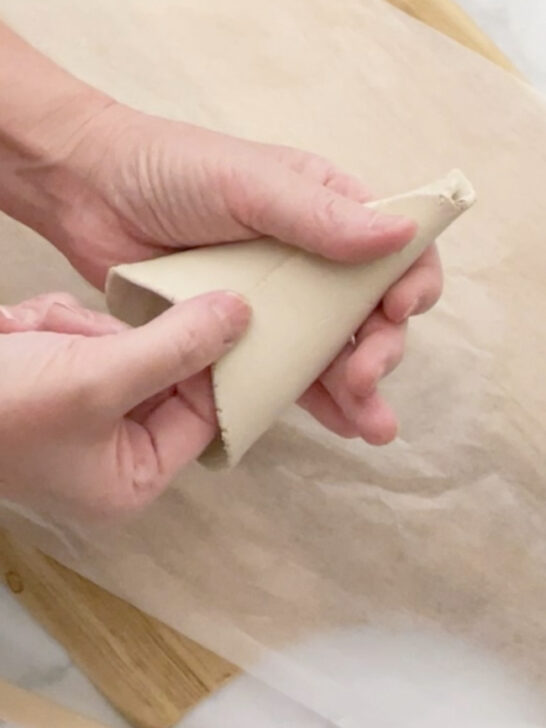
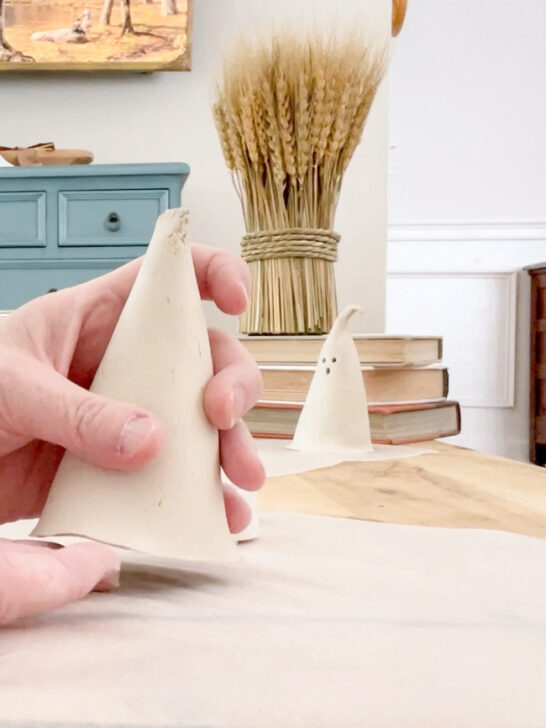
Step 2: Fold the Clay into a Cone
Next, pick up the clay in your hand carefully. I do this by picking up the wax paper and placing the clay in one hand while pulling apart the clay and paper with the other hand.

Once the clay is resting in your hand, simply fold it in on each side into a cone. Tip: Place your hands under the clay with your fingers touching at 12 o'clock and the palms down at 4 and 8 o'clock.
If this doesn't make sense, watch my YouTube video on how to make clay ghosts to see how I hold my hands and fold the clay.
Next where the pieces come together on the back press the seam together to seal it so it won't come apart.
Now that your clay is in a cone shape, let's mold the top into a nightcap shape.
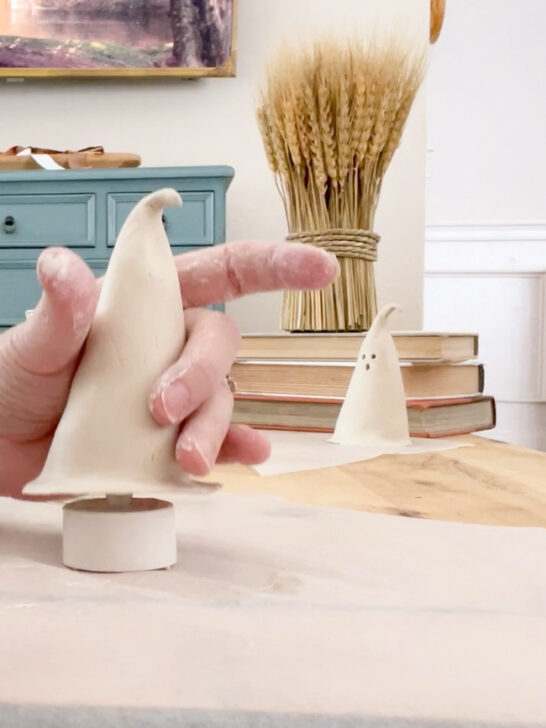
Step 3: Mold Ghost Nightcap
This is where the project gets fun and creative and you can do this now or wait until you have the ghost standing up. It is really up to you.
Simply use your finger to pinch the top of the ghost together and gently rub it into a point. Use slightly damp fingers if needed, but do not use too much water.
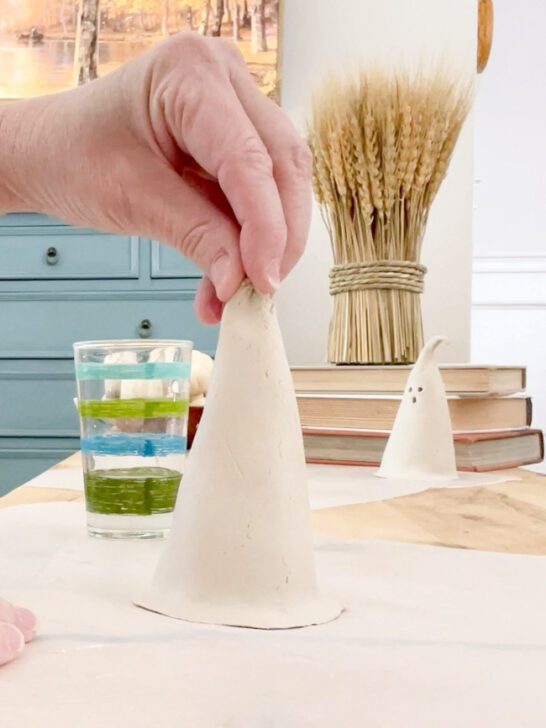
Continue to smooth and gently pull, stretching the clay but not so much you pull the point of the nightcap off. Once you get it long enough, start tipping the cap over on one side.
If you get any cracks, you can use slightly damp fingers to smooth them out the cracks.
You can really see the ghost shape coming together.
Step 4: Cut the Base of the Clay Ghost
Now, it is time to get your clay ghost to stand straight by shaping the bottom of the ghost. I use a straight tool like a knife or a thin ruler to do this. Lay the ghost cone on his side where you can see where the excess lay is sticking out past the back of the ghost. Take your ruler or knife and with a gentle press, cut it straight down.
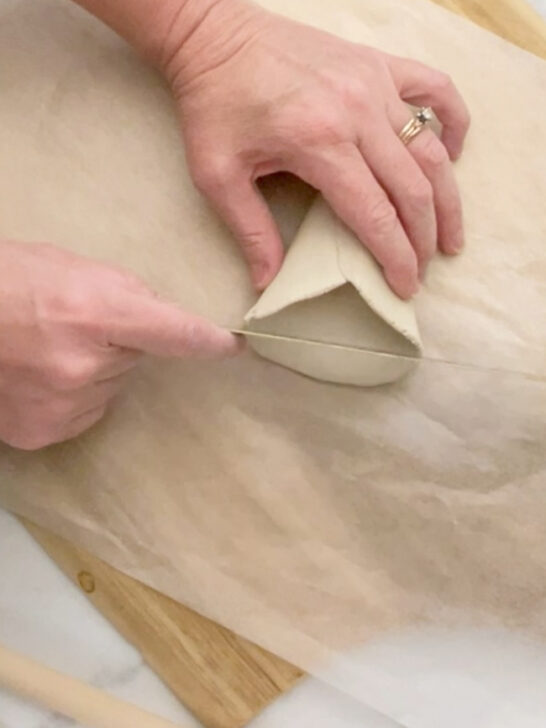
After you have the back cut, turn him on his sides and trim the excess clay off, too.
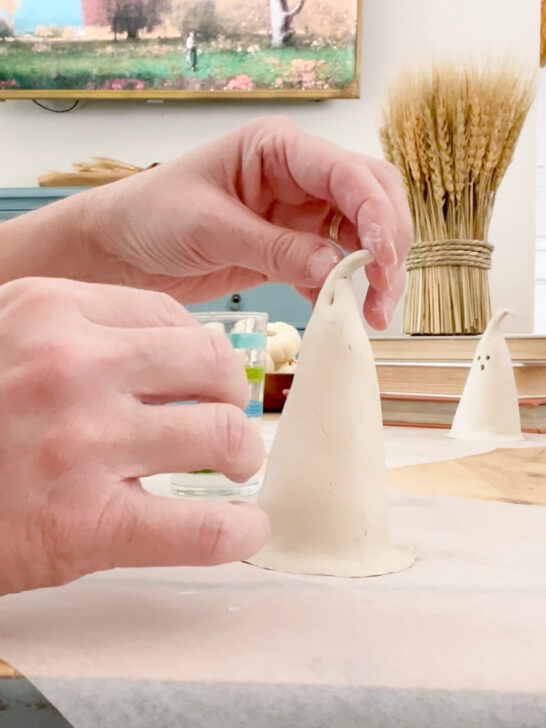
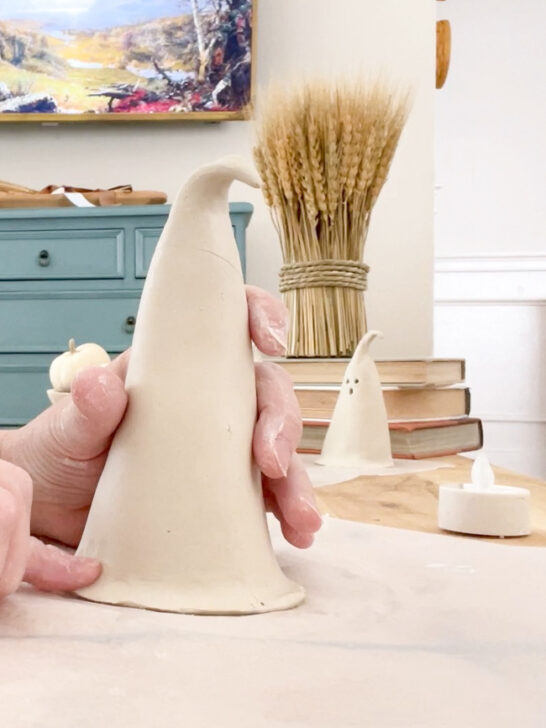
Step 5: Mold the Clay Ghost
Stand him up and place him over the tea light. This will help keep his insides open where the tea light will fit when you are done.
Use your moist fingers to smooth his skirt onto the wax paper.
I keep doing this until he is standing straight up. If there is enough clay on the bottom, you can make it into a ruffle for a girl ghost.
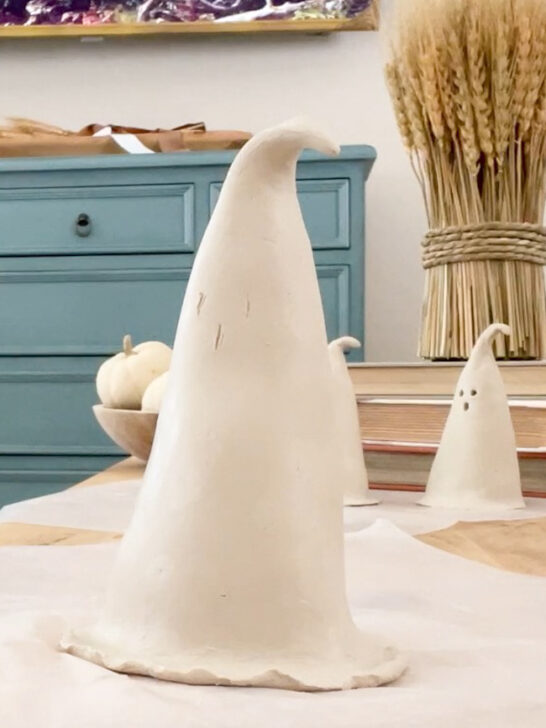
The main thing is that this ghost's sheet drags or puddles onto the floor. You can cut it off if you like and make him without any puddles.
Take your time on this part and keep working until you get it just like you want and when you are done, moisten your fingers again and smooth out any imperfections unless you want him to be a more rustic ghost.
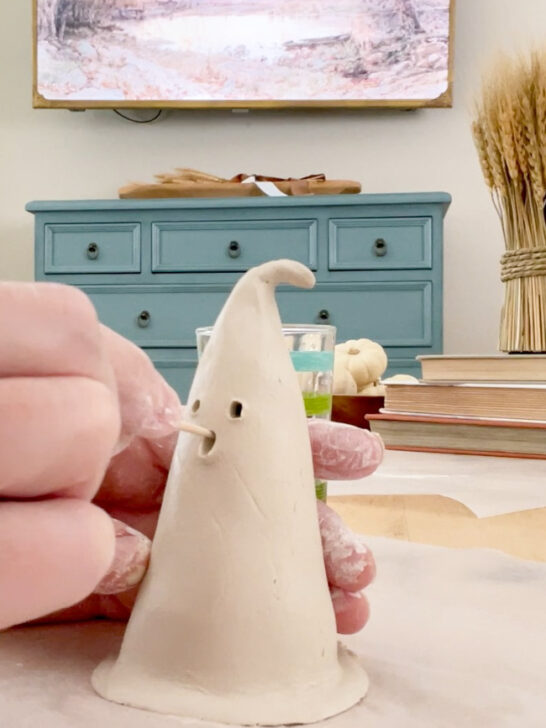
Step 6: How to Add Eyes & Mouth to Air Dry Clay Ghost
There are many ways to add eyes and a mouth to a clay ghost, but my favorite is using a toothpick. I first tap the toothpick into the spots where I want the eyes and mouth to go. Then, I roll and push the toothpick into the markings. You can even make different eye shapes if you like. If I want bigger eye holes, I do this in several spots.
Next, I place the toothpick inside the hold and bore it out, moving round and round. Once I am done, I moisten my fingers and smooth out any imperfections.
Step 7: Let Your Polymer Clay Ghost Dry
We are almost finished, but you will need some time for your ghost to dry. Set them in a dry, safe place and leave them overnight to fully dry. They should be hard enough to pick up the next day without handing them gingerly.
You can paint your ghosts at this step or leave them with their beautiful chalky white finish. I painted mine with chalk paint in a warm white color. It closed in any cracks which made them look more even and smooth.

Guess what? You are done making your clay ghosts. Now let's look at some ideas on decorating with clay ghosts.
Decorating with Clay Ghosts
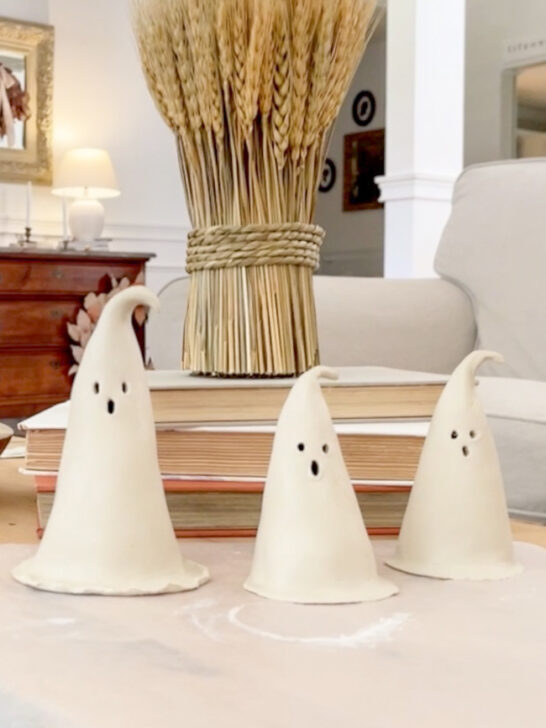
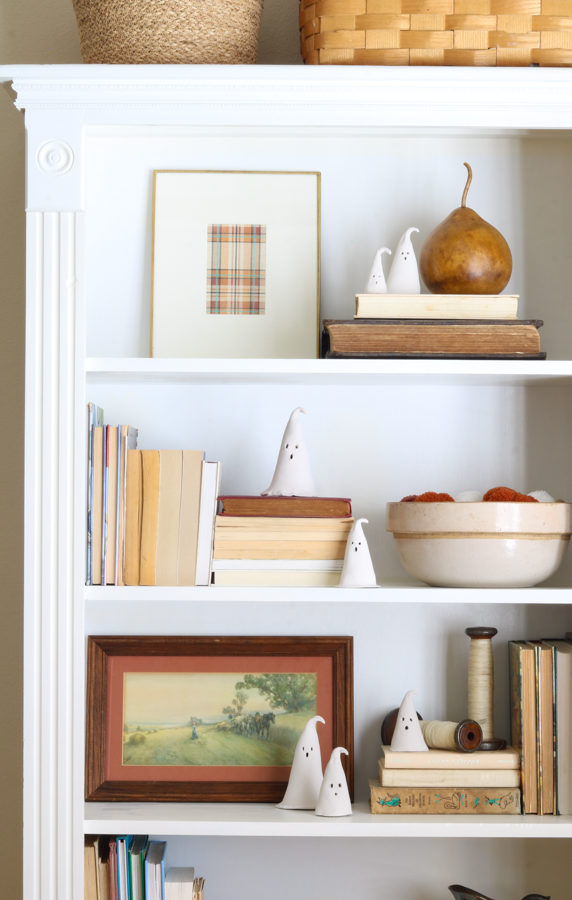
I ended up making a total of seven clay ghosts. I love decorating with them for Halloween on our bookcase.
Decorating with Clay Ghosts on Bookcases
Decorating with Air Dry Clay Ghost in the Kitchen
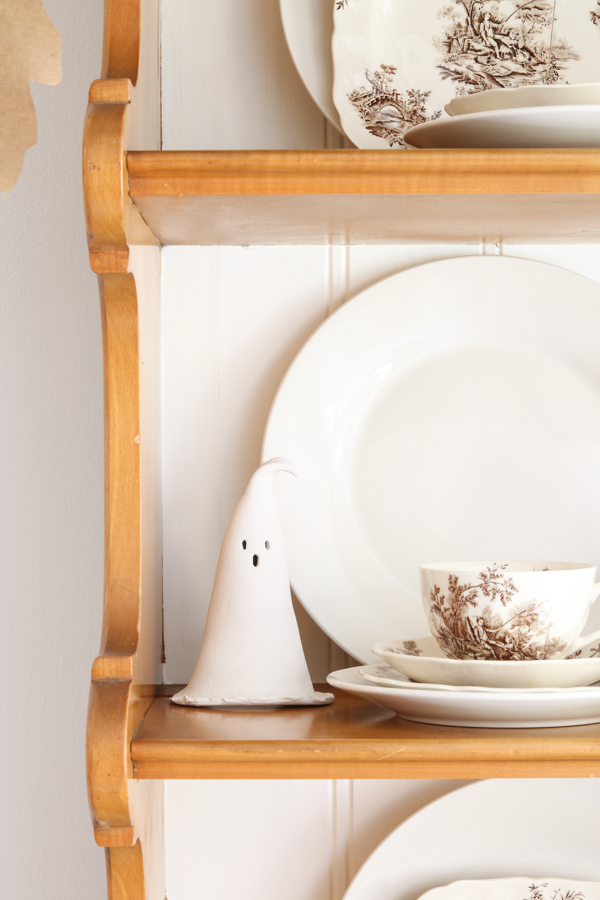
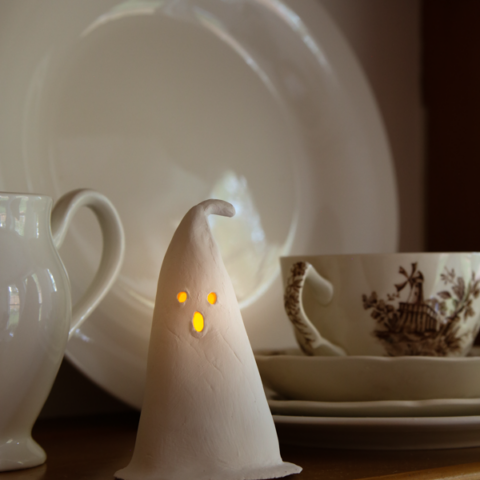
Another fun place to add them to your decor is in your kitchen. Here is where I sat the small cute clay ghost that won't fit a light on my cutting board decoration on the range.

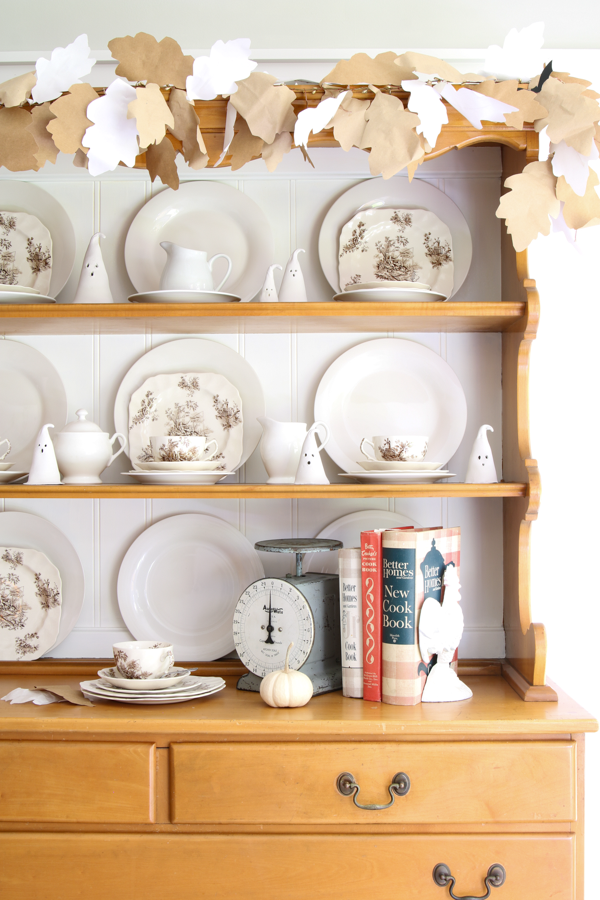
Decorate your Hutch with Clay Ghosts
Another fun place to decorate with clay ghosts is on your hutch. Simply arrange them here and there between your dishes for a spooktacular decoration.
This is my favorite place I decorated with these fun clay ghosts. I added a mum on the floor and my old dollar store painted jack o lanterns. I have a tutorial on how I made the Jack family in this DIY dollar store jack o lantern decoration.
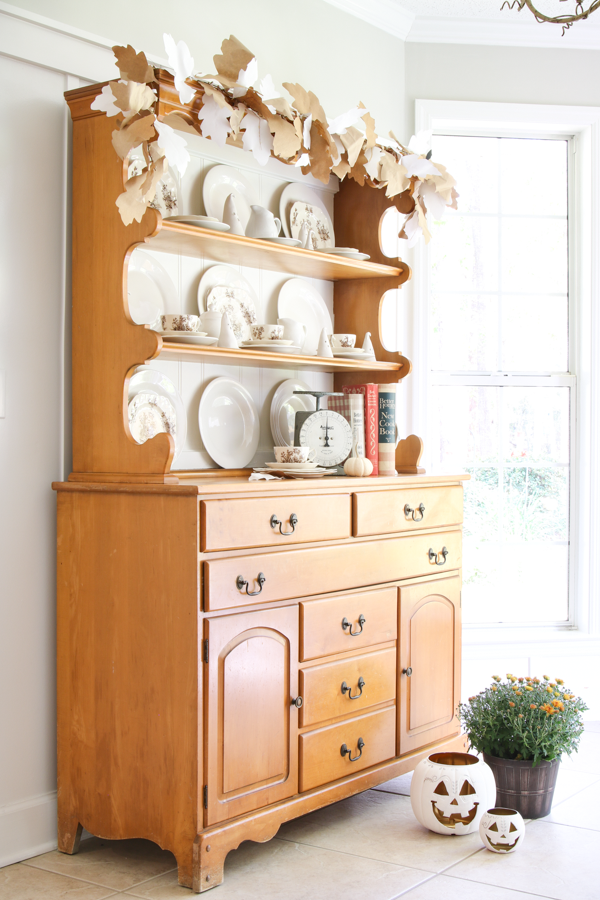
But my daughter, Hannah, suggested I add my old paper leaf garland to the top. The texture of the garland was the icing on the cake. Here is how to make a paper leaf garland.
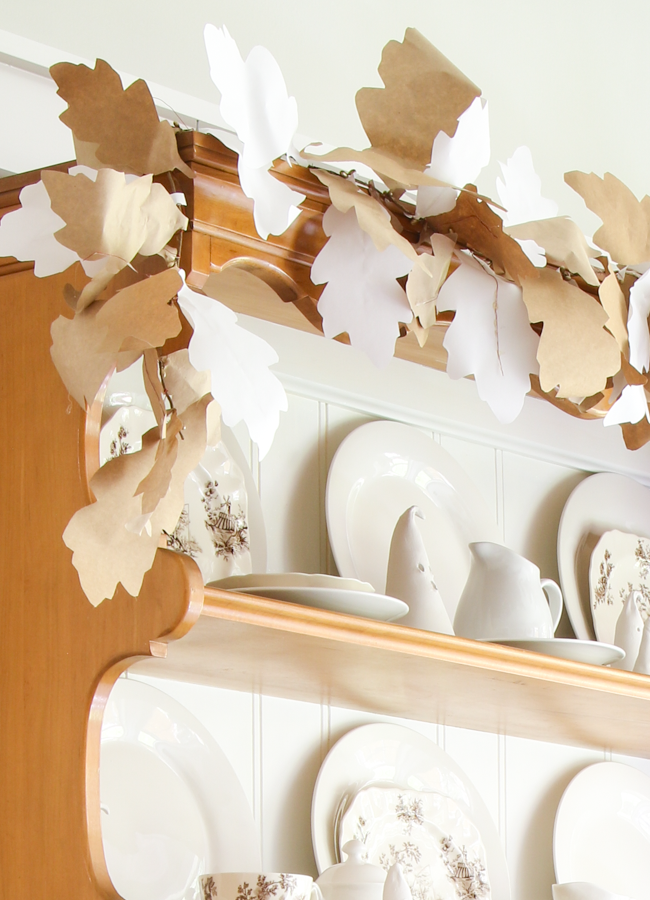
Last, do you spy a black bat? Look real close. Not long ago, I decorated the hutch with black silhouette bats we offer as a printable in our Etsy shop. After removing all the bats, I decided to tuck one away as a fun “where is dracula” game.
Do you see him?
Look up at the top right in the paper leaf garland.
Want more Halloween ghost ideas? Don’t miss my DIY Ghost Decoration Ideas!
Final Thoughts
Well, there you have it. A fun Halloween craft and ideas for decorating with air-dry clay ghosts.
I really love making decorations for Halloween. How about you? Do you love crafting decor for Halloween?
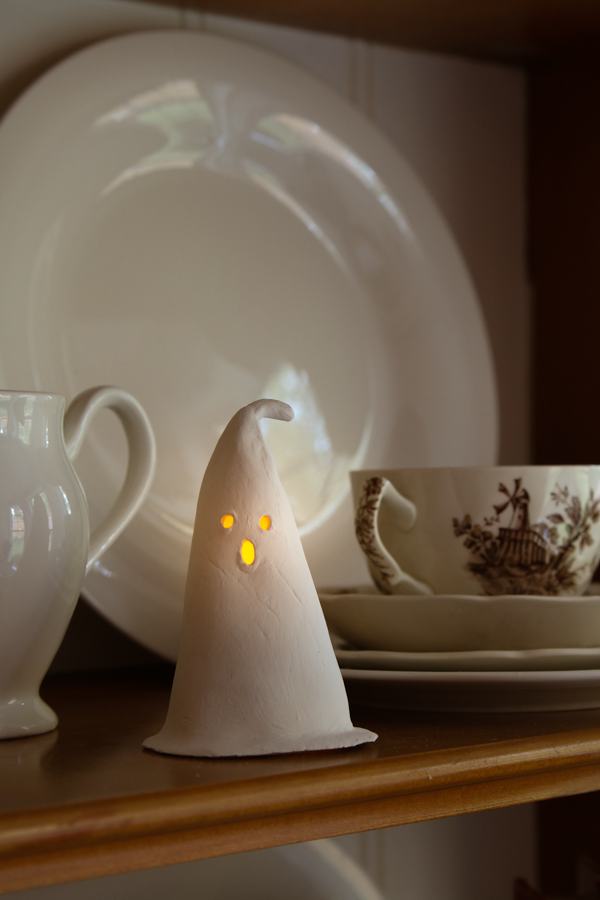
I cannot get over how cute these little ghost figures turned out, and here is a photo of them at night when they are all lit up. Talk about magical!
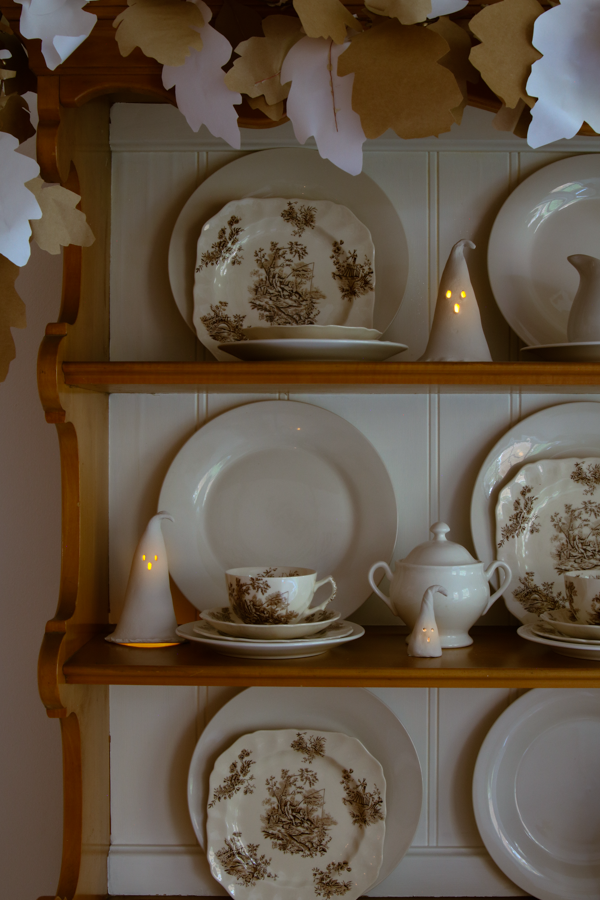
They are even more fun at night! The great thing about battery-powered tea lights is you don't have to worry about dripping wax or burning your DIY clay ghosts. We enjoyed sitting in dim light and watching them flicker.
I hope you have enjoyed this DIY clay ghost project but most of all I hope you give this craft a try this Halloween. These little guys will look cute anywhere in your home and kids will love them in their bedroom too.
Here are few more Halloween decor crafts you might be interested in:
- How to Paint a Ghost
- DIY Sheet Ghost Halloween Decoration
- How to Make a Witch Broom
- How to Make a Witches Hat Out of Paper (4 Easy Steps)
- The Magic of Decorating with Printable Bat Templates
Do you have any go-to DIY Halloween crafts? I'd love to hear about them in the comments. Thank you for stopping by and reading this post. I hope you have a good day!
Happy Decorating!

How to Make Glowing DIY Air Dry Clay Ghosts for Halloween
In this step-by-step tutorial, we'll guide you through the enchanting world of crafting these charming DIY clay ghost decorations that are sure to cast a ghostly glow over your Halloween festivities.
Materials
Tools
- Rolling Pin
- Long Popsicle Sticks
- Thin Ruler
- Cup of Water
- Wax Paper
- Toothpicks
Instructions
- Press the clay into a pancake between my hands, turning it a few times. Then, I place it on a hard surface on top of the wax paper sitting on a hard surface. Next, place two extra long popsicle sticks on each side and begin rolling out clay, just like rolling out dough with a rolling pin. Turn the paper and sticks every so often to keep working the clay into a round shape.
- Pick up the clay in your hand carefully. I do this by picking up the wax paper and placing the clay in one hand while pulling apart the clay and paper with the other hand. Once the clay is resting in your hand, simply fold it in on each side into a cone. Where the pieces come together on the back press the seam together to seal it so it won't come apart.
- Use your finger to pinch the top together, forming a "nightcap" and gently rub it into a point. Use slightly damp fingers if needed, but do not use too much water. Continue to smooth and gently pull, stretching the clay but not so much you pull the point of the nightcap off. Once you get it long enough, start tipping the cap over on one side.
- Use a knife or a thin ruler to cut the base of the clay ghost. Lay him on his side where you can see where the excess lay is sticking out past the back of the ghost. Take your ruler or knife and cut it straight down. After you have the back cut, turn him on his sides and trim the excess off, too.
- Stand him up and place him over the tea light. This will help keep his insides open where the tea light will fit when you are done. Use your moist fingers to smooth his skirt onto the wax paper. Keep doing this until he is standing straight up. If there is enough clay on the bottom, you can make it into a ruffle for a girl ghost.
- Tap a toothpick into the spots where you want the eyes and mouth to go. Then, roll and push the toothpick into the markings. If you want a bigger eye, do this in several spots. Place the toothpick inside the hold and bore it out, moving round and round. Once done, moisten your fingers and smooth out any imperfections.
- Set them in a dry, safe place and leave them overnight to fully dry. They should be hard enough to pick up the next day without handing them gingerly. You can paint your ghosts at this step or leave them with their beautiful chalky white finish.
Notes
- In step 2: Place your hands under the clay with your fingers touching at 12 o'clock and the palms down at 4 and 8 o'clock.
- While working with the clay, if you get any cracks, you can use slightly damp fingers to smooth them out the cracks.