
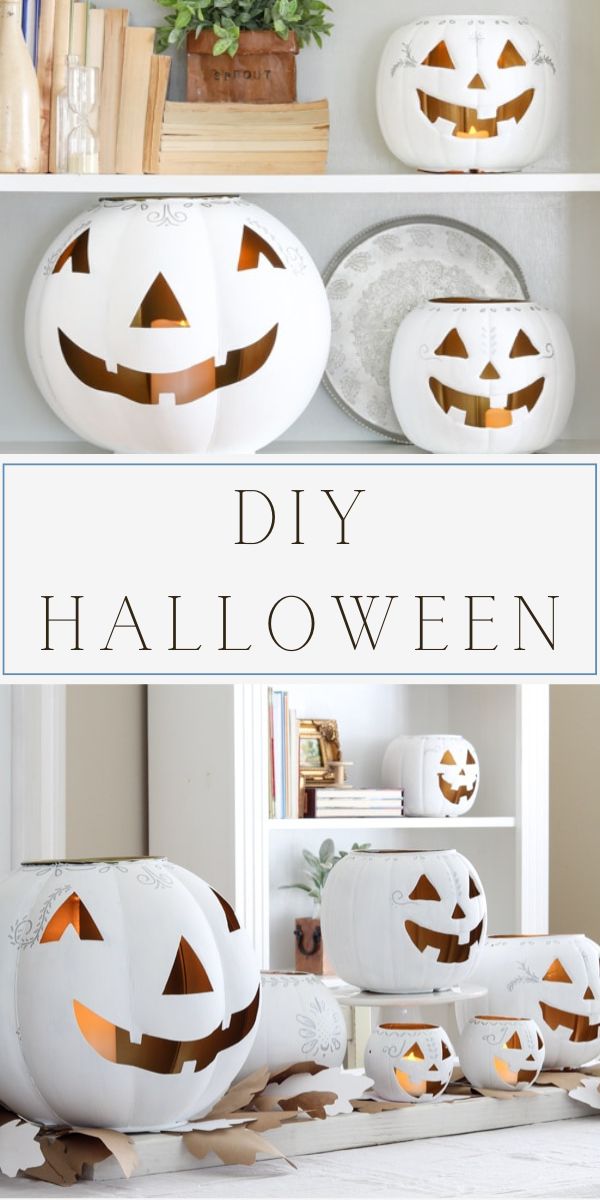
These DIY Dollar Store Halloween decoration ideas of painted jack o lanterns are simple to make and inexpensive. When we are done carving and painting these adorable plastic jack o lanterns, it will look like you paid high end on your holiday decor. Easy Halloween decorations and fun Halloween craft ideas to decorate your home.
I am excited to show you this simple DIY Dollar store Halloween decoration idea of painted jack o lanterns but let's time travel back to August to where it started and where the inspiration came from.
While traveling to my niece's house before the Halloween season began, I stopped at a store to take a break. The dollar store Halloween decorations drew me to them even though it was August. LOL! The first thing I saw was those adorable cheap jack o lanterns. But this time, I noticed tiny ones along with the regular size ones. They were so cute!
Then I remembered Liz Marie Galvan's white jack-o-lantern mantel last year and my creative juices started flowing. I started imagining chalk-painted happy pumpkin faces on my bookcases. So before I knew it, I had a back seat full of cheesy smiling pumpkin heads. And that is how it all began.
As the months went on, I found another plastic pumpkin jack o lanterns at thrift stores. This one was old and had Dracula fangs. So I adopted him too, and he came home with us.
Now that I have a family of Jack's I started experimenting to get a high-end vintage farmhouse bright and moody look to them. And that is how the new family of Jacks came to live here for Halloween.
DIY Painted Jack-o-lanterns
Let's get started by gathering dollar store supplies and making you these white jack o lantern decor with grey painted tattoos. With all projects, I recommend collecting all your materials first. It makes your Halloween jack o lantern craft so much more enjoyable when you have everything you need when you start.
Here is a list of what you need to make this farmhouse vintage white jack-o-lantern decor.
- Dollar store plastic jack-o-lanterns (I found most at Walmart, one at a vintage/antique store, but you may also find plastic pumpkin buckets Dollar Tree)
- X-acto knife
- Sharpie marker
- Gold spray paint
- White chalk paint (I used Dixie Belle color cotton)
- Artist paint brush
- Scissors or wire cutters (this is to cut the handle off)
All these items can be found online, in a craft store, or at your local dollar store. Now that you have all your craft supplies let me encourage you to read all the directions first. It will help you see the big picture of how to make these and make the jack o lantern craft decoration so much better.
Shop Supplies:

DIY Jack o lanterns
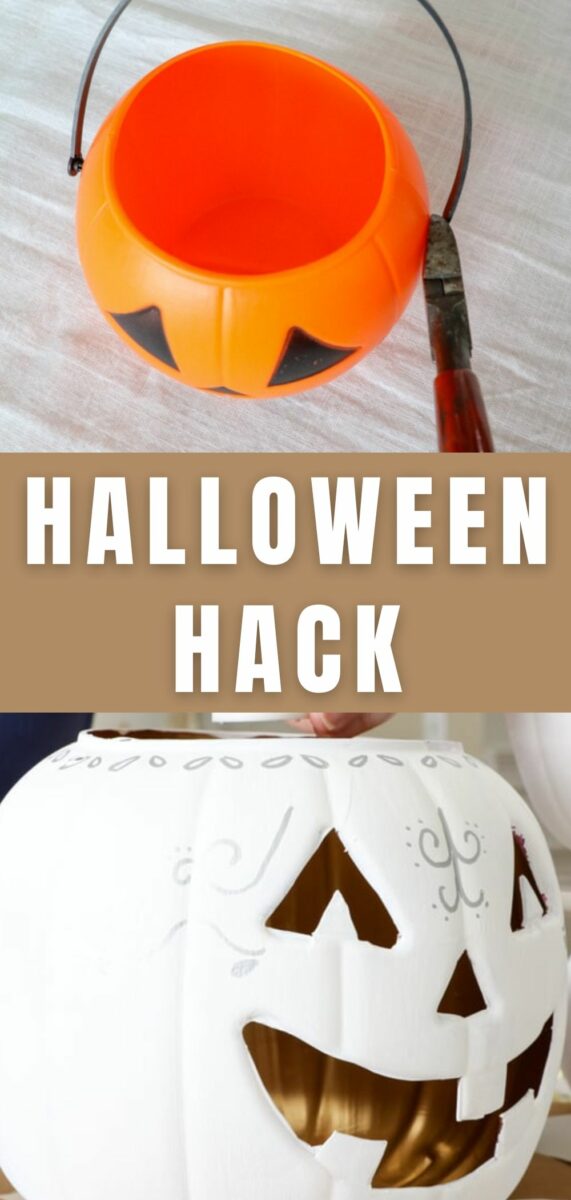
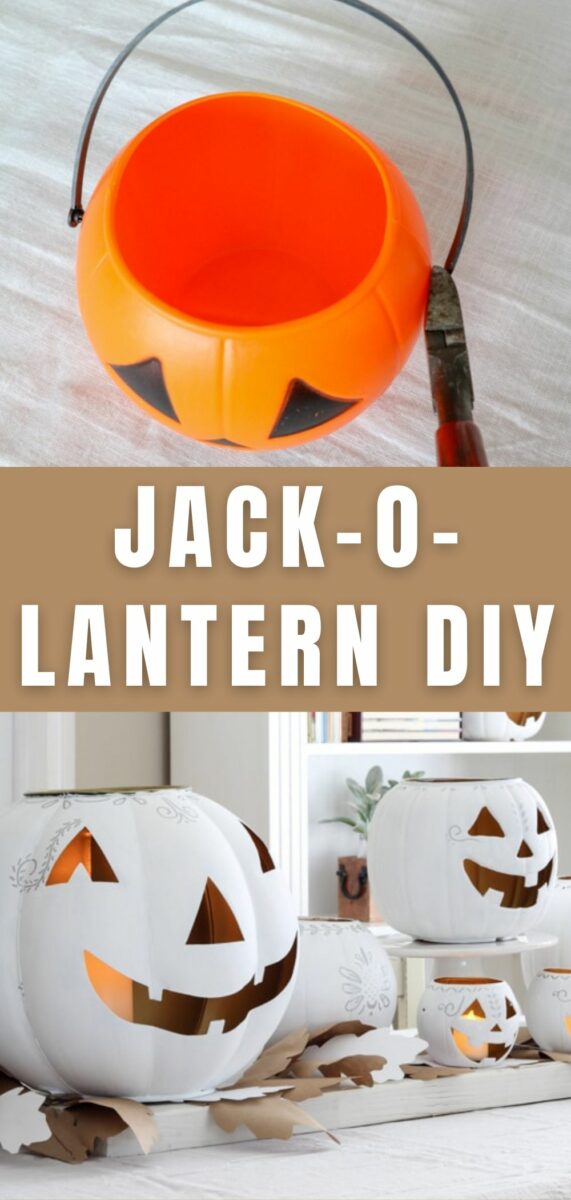
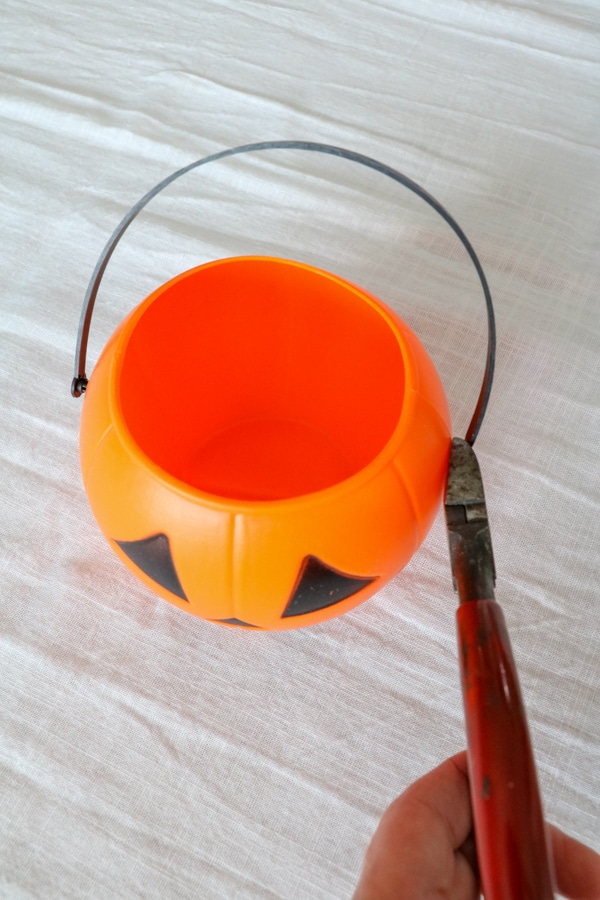
Have you noticed this project is inexpensive? I love adding decorations to my home where it cost no or little money. To begin let's start by removing the handles. This is a very easy step.
Remove Plastic Handle on Jack-o-lantern
Simply take your scissors or wire cutters and snip the plastic handle off. If you have a vintage pumpkin like my little Dracula it may be more challenging.
This Dracula pumpkin has a metal pin in the plastic handle and head. That thing was a booger to get out. I had to work and work with the wire cutters but I finally succeeded. I removed the plastic handle and left the pin in the head. LOL! I figured the pin could stay and I could paint over it.
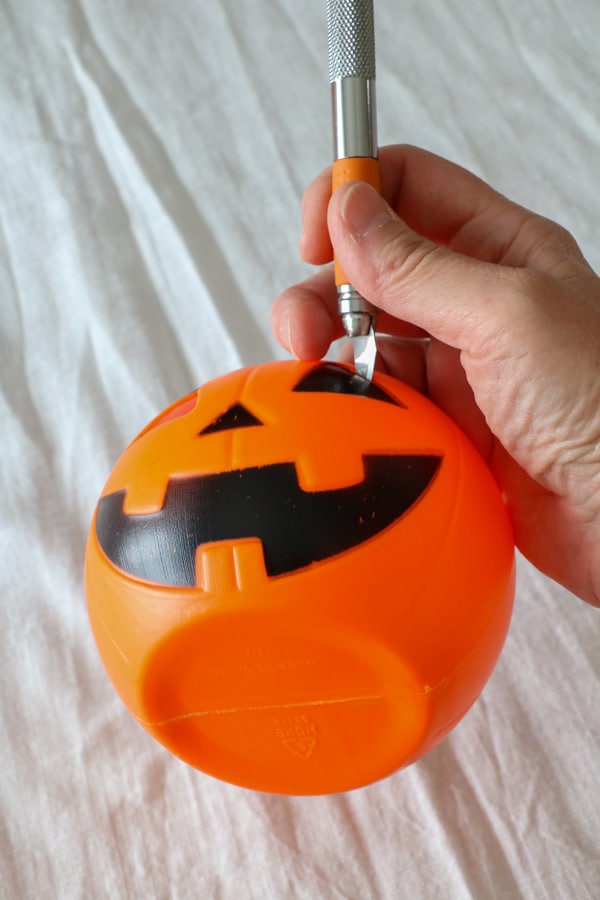
How to Carve a Plastic Jack-o-lanterns
This is probably the most challenging part, but it is manageable. Begin by pushing your x-acto knife down into one corner of the eye, nose, or mouth and then grab your knife with your fist and draw it towards you keeping it inside the plastic. It should slice right through the plastic.
Some areas were fussier and then others were like cutting butter. I am not sure why but maybe the plastic was thinner there. Anyways, I had to use a little muscle but not much.
Make sure any little slivers of plastic are not left behind. You want the cutouts to look clean and smooth. Now let's paint the inside.

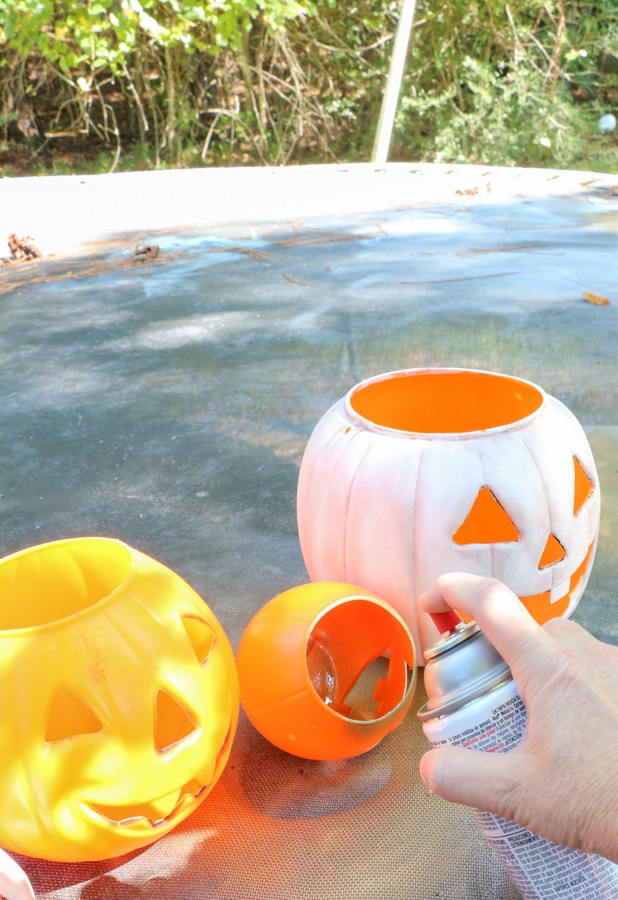
Spray Paint Inside Plastic Jack-o-lantern
Next, let's spray paint the inside of the head. The easiest way to do this is to set the buckets on their side between two other objects. If you don't have anything extra you can use two of the other jacks.
First, shake your can of paint well. Then, start by spraying straight inside the middle. Spray lightly because you can always add more but you don't want too much. I did a short spritz of spray at a time. After you cover the center bottom then start spraying around the inside edges. Rotate the head as you spray.
Go ahead and bring all your plastic pumpkins inside to dry. The spray paint will dry quickly.
Chalk Paint Outside Plastic Jack-o-lanterns
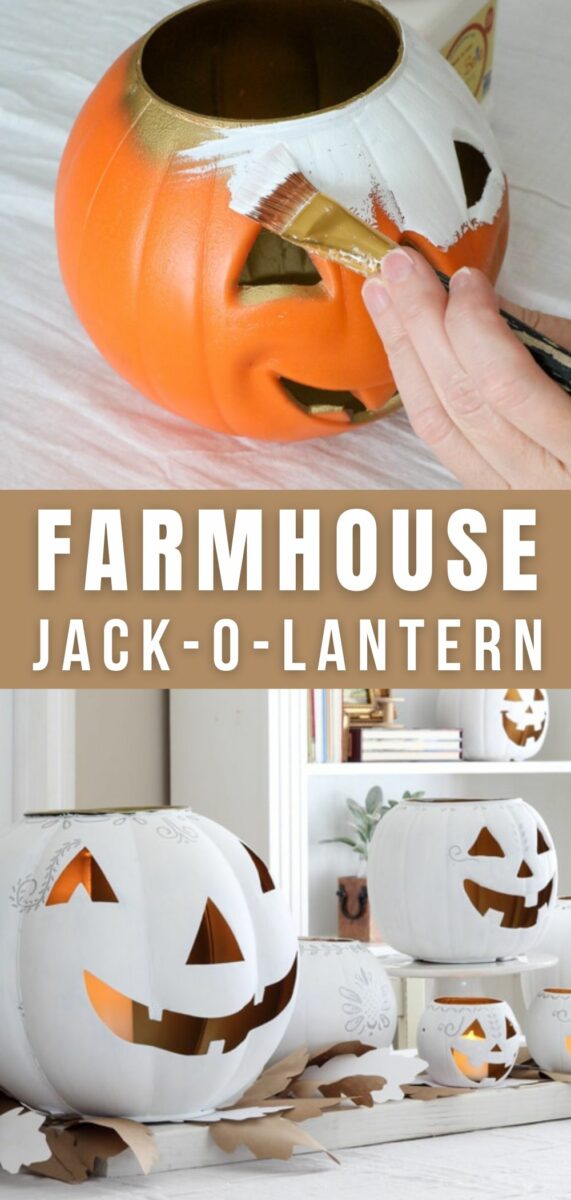
Next, let's paint the outside of the pumpkins. I love the look of a chalky vintage paint, so I went with Dixie Belle chalk paint. Begin by using your artist's paintbrush and dipping it in a little water and the paint. A wet brush will help make the chalk paint no drag when painting.
Now start at the top or bottom and make a long stroke of white chalk paint from one end to the other. Keep repeating this, moving all the way around the jack o lantern.
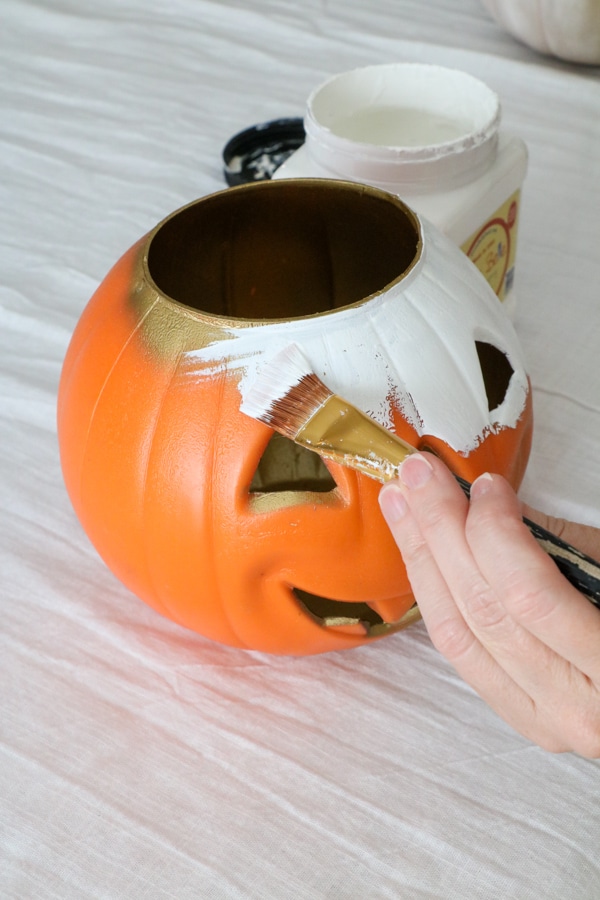
When you get to the eyes, nose, and mouth, make sure to brush in the plastic edge. And I painted the rim at the top. I started to leave it gold but it looked cleaner to paint it white. You don't have to paint the bottom of the pumpkin.
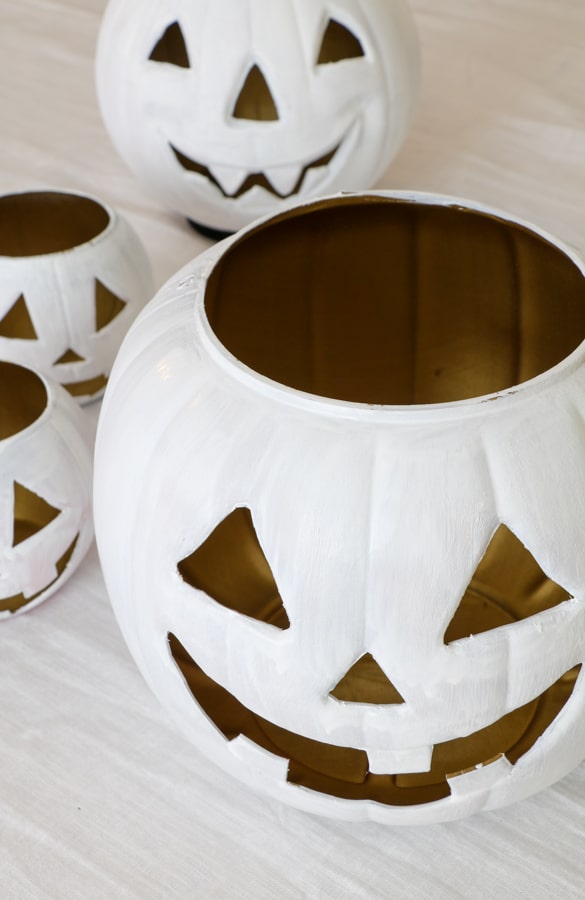
Next, add a second coat of paint and then let them dry for about an hour, and then you are ready to decorate your home with these adorable jack o lanterns.
Easy Jack o' Lantern Art
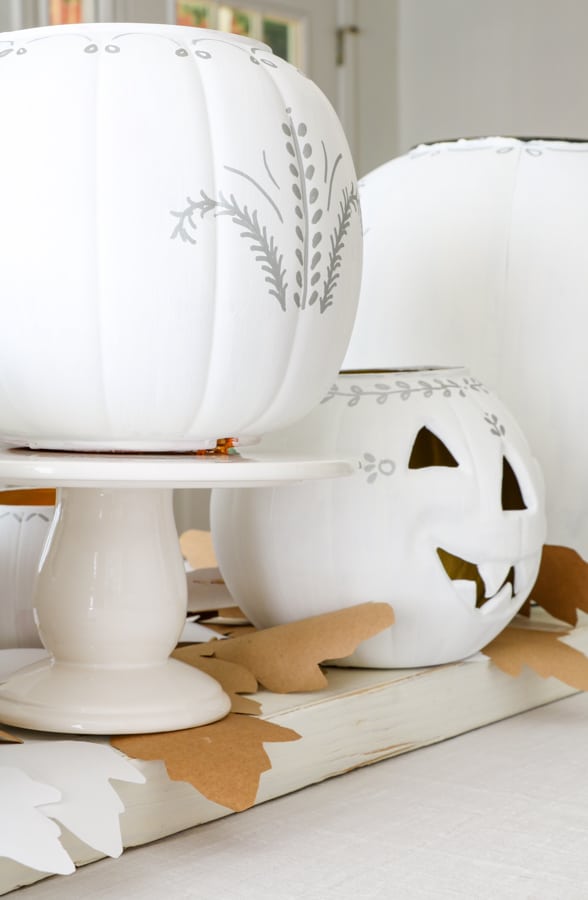
Now if you want to add a little creativity to your jack o lantern let's paint a little art to their head or to be fun we can call it a tattoo. LOL! Simply use a silver metallic sharpie permanent marker and start creating a design. I did a search on Pinterest for designs as inspiration and when I found one I used the shapes to create a tattoo for the pumpkin. No art lesson required!
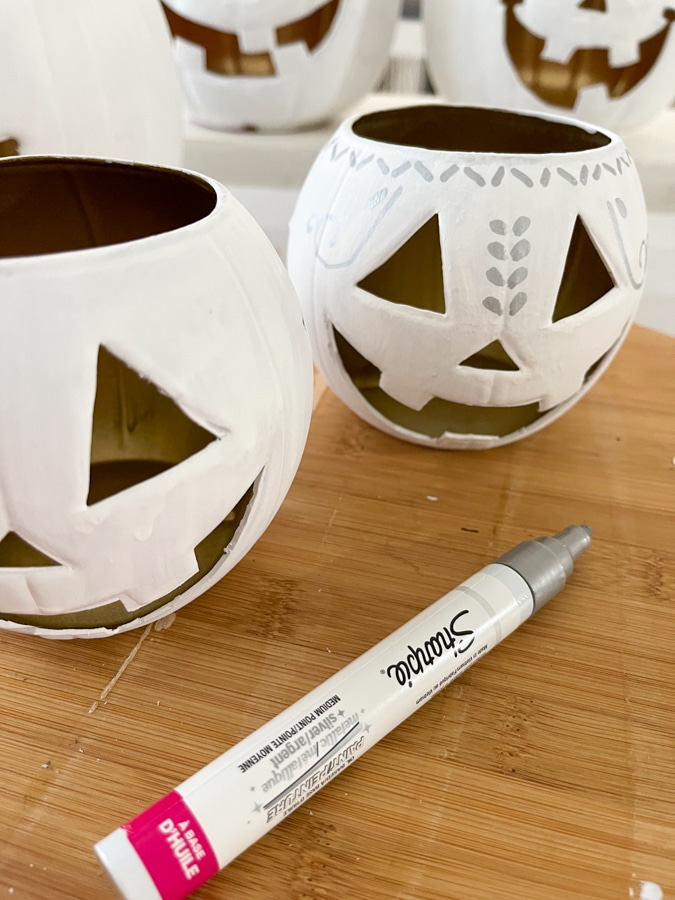
I think it gives Jack a classy look and makes him more decorative during the day when you can see his tattoos.
Lighting your White Jack-o'-lantern
Now for the fun part, and that is adding a candle. Use a battery-powered candle like this one I found at Target. I got two different sizes for the pumpkin heads.
I used a larger candle for the large Jack's. If you get the same candle, you will need batteries for this one. For the small pumpkins, I bought a pack of smaller candles like tea lights. They came with a nice battery.
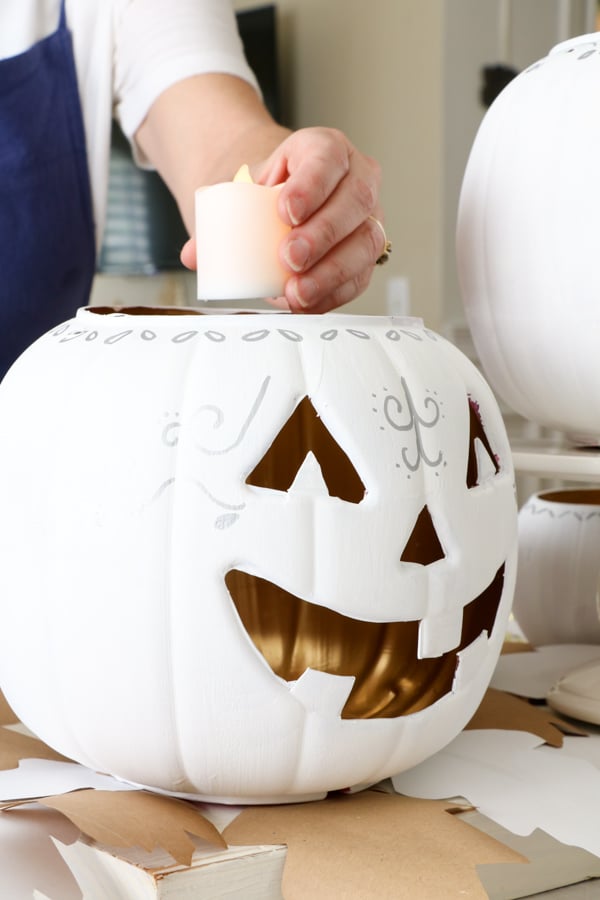
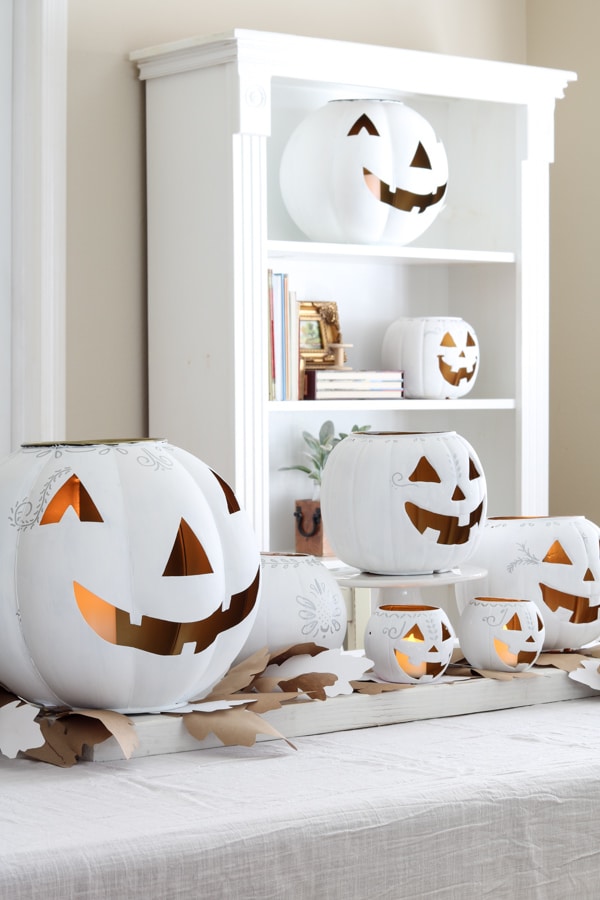
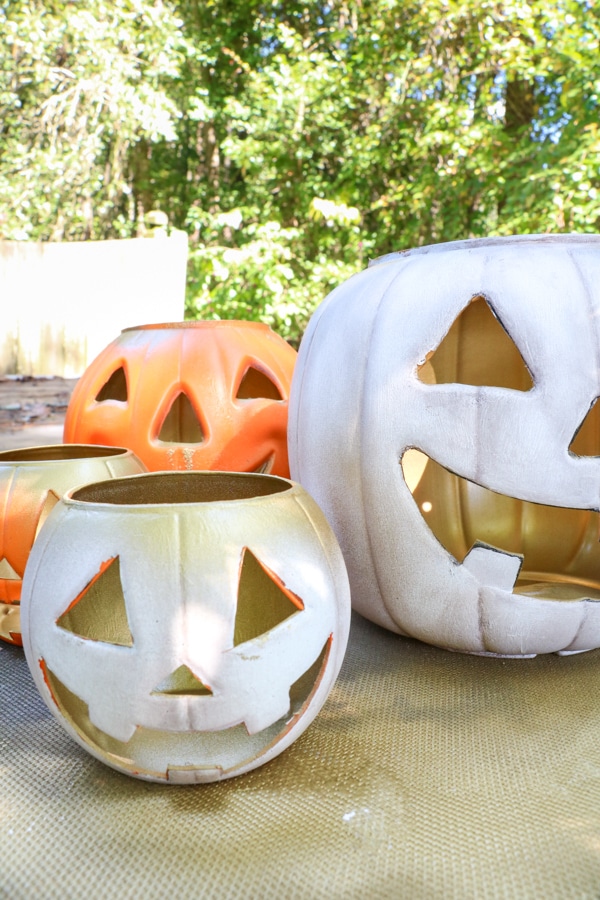
Simply place your candles inside the pumpkins. When nighttime comes, turn on the switch at the bottom and sit the candle back down inside. The lighted jack-o'-lanterns add such a beautiful glow with the gold inside.
Decorating with Your Painted Jack o Lanterns
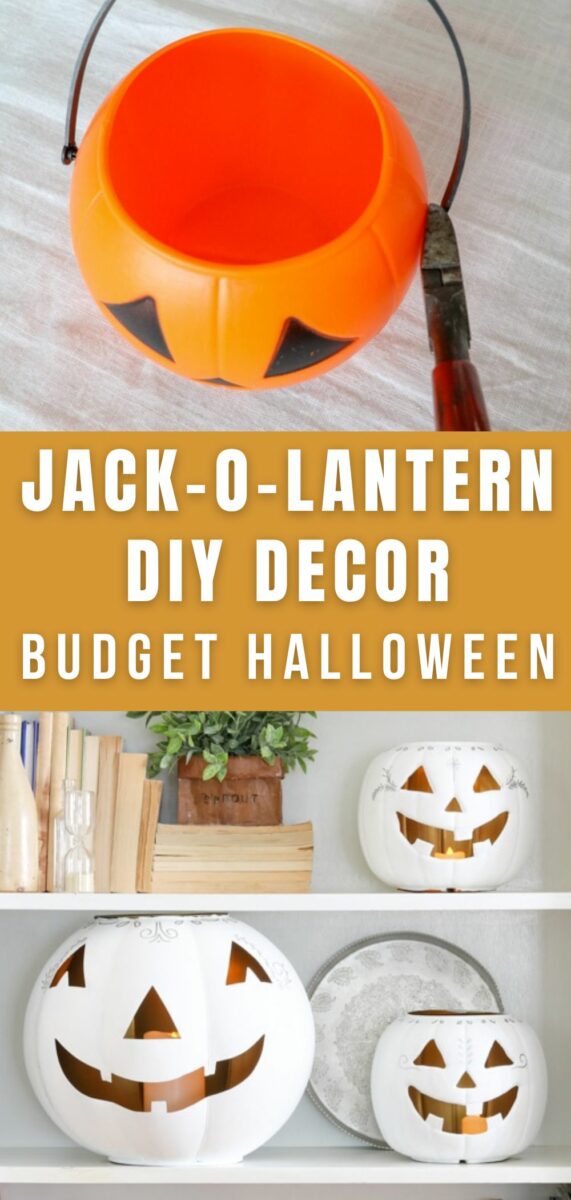
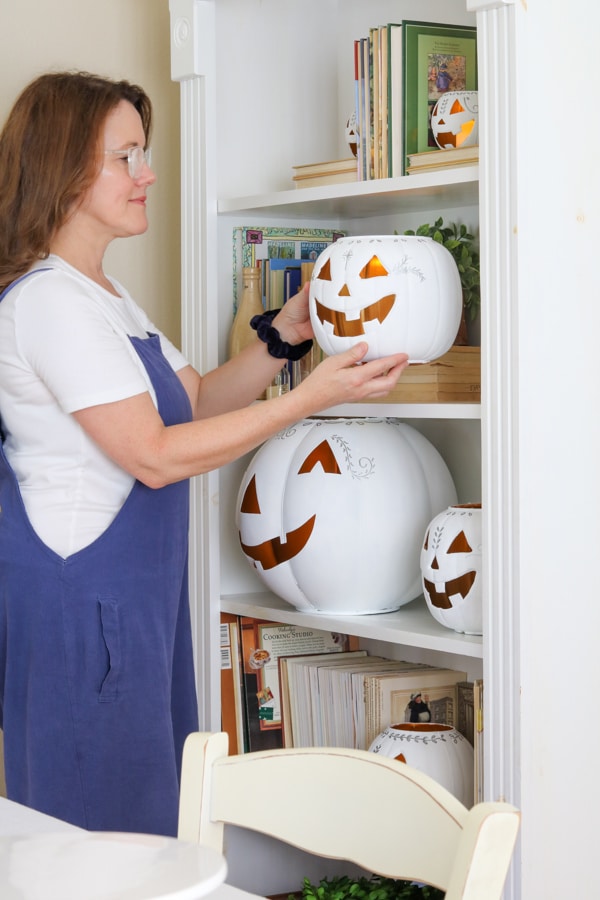
Can you believe how easy this DIY dollar store Halloween decoration turned out? I want to share a few creative DIY Halloween decorations you can do with your chalk-painted Jack-o-lantern lanterns.
First, add them to your bookcases. It's a great way to get in the Halloween spirit. They look so cute, all lit up with battery-powered white candles at night while watching a Halloween movie.
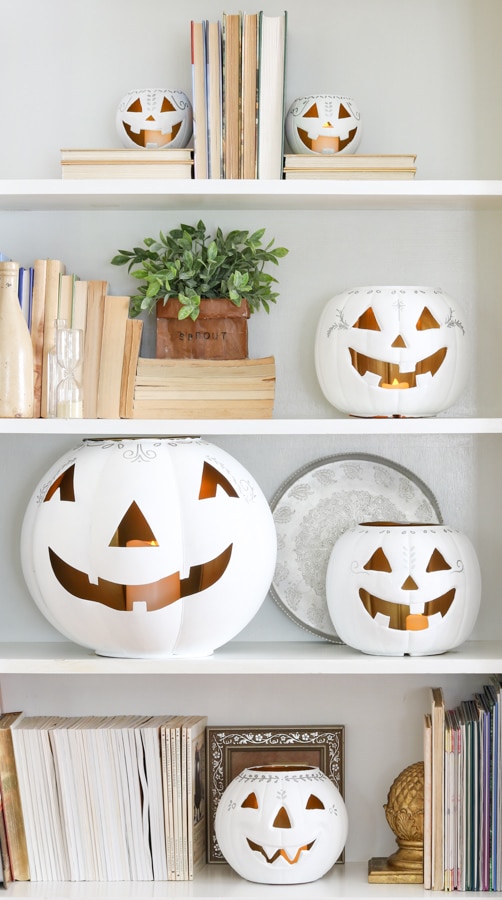
Another fun all Hallows Eve easy idea is adding them to your fireplace mantel. Liz decorated her living room mantel with white jack-o-lanterns and it looked so cute. They are the perfect addition to decorate your front door or entryway.
You can also make a tablescape for a Halloween party with them. We share how to use it in this DIY outdoor Halloween party table decorations. Sit my DIY paper leaf garland down first and then the white jack-o'-lanterns with candles, and you have a happy spooky centerpiece. Talk about a fun dinner party for kids and adults.
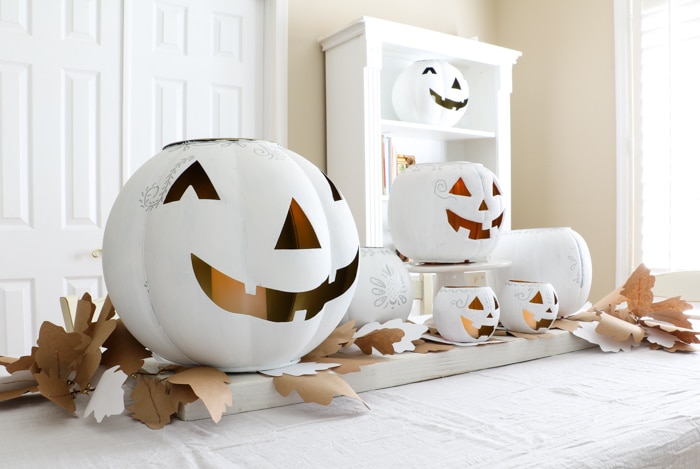
See why painting designs around the pumpkin come in handy? Now you can turn the faces in different ways, and the guests at that table get a pretty view no matter what side of the pumpkin they see.
And last, you can hang them from the ceiling as I did in our Harry Potter table decorations. This was another easy, fun, and cheap Halloween decoration idea.
Conclusion
Okay, so what do think? Are you going to give the white jack-o-lanterns a try? Are you ready to give your home some Halloween spirit? I'd love to hear your great ideas! I almost forgot that the large jack-o-lanterns came from Pottery Barn.They arrived black; to be honest, they just disappeared into the dark when lit up. I knew the white would make them stand out more.
For more of the best Halloween decorations and dollar store Halloween decor ideas, try this old fashion Halloween decorations for a mantel. And for some fun DIYs check out
- How to make a witch broom
- Crafting Spooky Magic: How to Make Halloween Decorations Out of Paper
- Glowing DIY Air Dry Clay Ghosts for Halloween
All these decor ideas will add a little hocus pocus to your home.
Thank you for coming by and visiting Life on Summerhill. I hope you enjoyed this DIY, and have a fun Halloween decorating with them.
Happy Decorating!

Linda, such a cute idea. Love the gold on the inside and the tattoos. Makes a great Halloween display for not much money. I’m sharing today on a Halloween DIY Decoration Ideas roundup.