
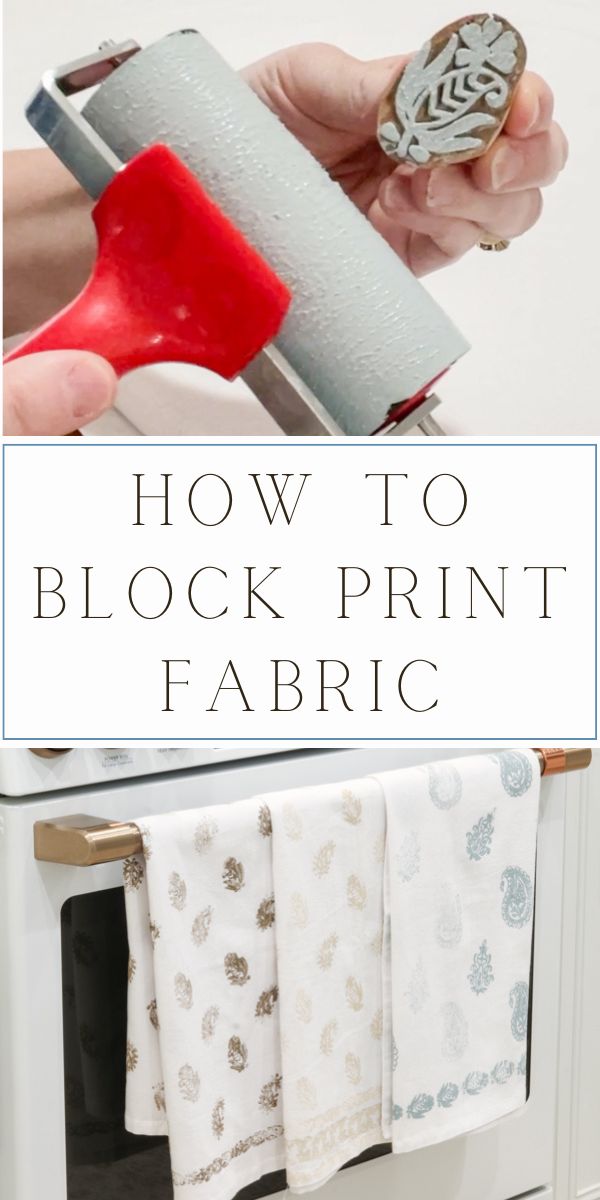
If you're like me and love homemade and vintage, you're in for a treat today. In this blog post, I am excited to share how to block print fabric.
Because I have experience stamping fabric, I thought, it would be fun to take it back to ancient times and block print with wood. Traditional block printing always looks amazing. With a set of real wooden blocks and a dash of chalk paint, I turned these humble flour sack towels into delightful pieces of functional art for my kitchen.
So, grab your apron, and let's dive into the world of block printing fabric together!
I have marveled at block print anything for some time now, from tablecloths to pillows. Anything with a block print pattern calls my name. I love it so much many years ago I made dinner napkins to match my Currier & Ives dishes, but then I was using rubber stamps and a stamp pack.
Fast forward to today, and I wanted to learn how to block print fabric with real wood blocks. I wasn't sure where to find a carved block and I thought about carving my own designs, but then my daughter discovered these block stamps on Amazon. And, good news, they have a lot of great designs.
I am now convinced Amazon carries everything!
So, my adventure began researching and using my personal skills of stamping to find the best way to block print with wooden blocks.
This post contains affiliate links, meaning I receive a commission if you purchase using the links below at no extra cost to you. All opinions are all my own.
How to Block Print Fabric
Before we dive in here is a supply list of what I used that worked along with a short step by step on how to block print.
What Supplies Do I Need to Block Print Fabric?
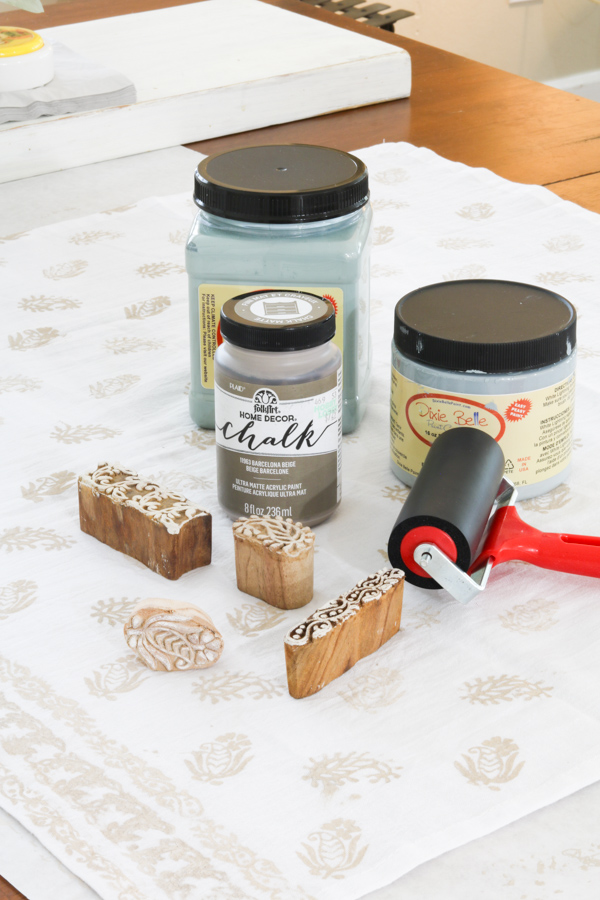
The first thing I recommend doing is gathering your supplies for your woodblock printing project.
- Wooden block stamps
- Chalk paint
- Brayer (foam roller)
- Glass or something to roll paint
- Fabric (I used these flour sack towels)
- Iron and ironing board
What are the Steps to Block Printing?
Block printing is actually pretty simple and only require basic skills and patience. Here is the 9 step process of block printing.
- Press fabric flat
- Mix paint well: stir paint good and thin it if needed with water
- Place some paint on glass
- Roll paint evenly on brayer or foam roller
- Roll paint evenly on block stamp
- Stamp pattern on fabric
- Reapply paint to block and stamp pattern on fabric (repeat this step over and over)
- Let dry
- Iron block print pattern with medium temperature (I set mine on silk)
And that's the block printing process. I think it's a pretty easy way to block print fabric. There are many more details to each step, but this is a simple step-by-step guide to hand block printing. Now let's break this down even more, and I will share fine details.
Step by Step: Block Printing Fabric
To begin, it's a good idea to collect all your supplies and cover your work surface with paper to protect it from paint that might bleed through. You can use an oil cloth or a roll of craft paper like I did. I used painter's tape to tape the corners down.
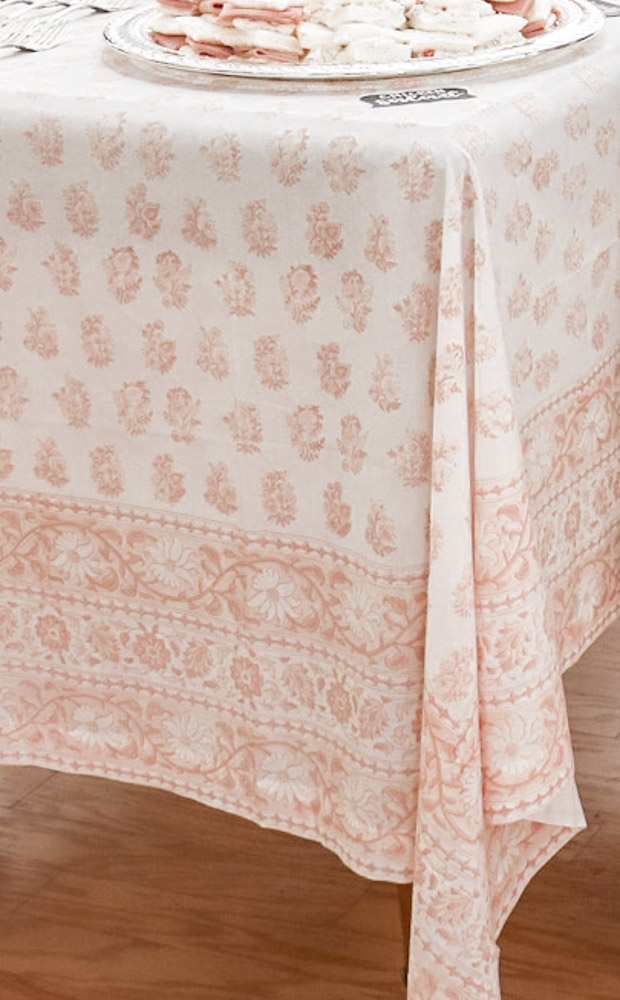
And plan your design. Trust me it will make your project go more smoothly and be more enjoyable is you plan your design now. I recommend using simple designs when you first start fabric printing. You can use a single block or a few different blocks. Look on Pinterest for block print designs. I used this Pottery Barn tablecloth I own as an idea. This is one of my favorite table linens. They don't have this pink on any more but they do have this beautiful blue block print tablecloth.
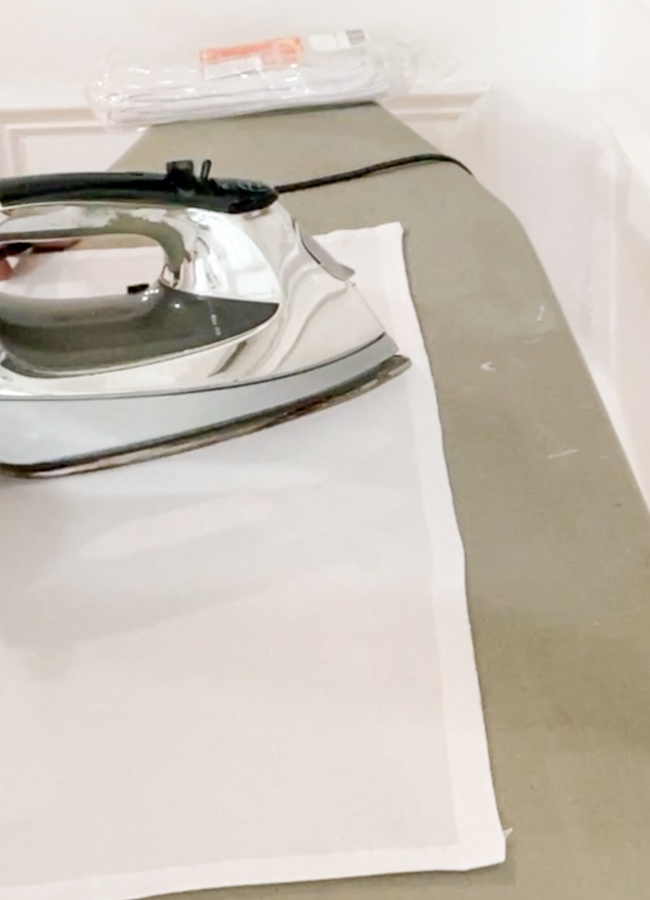
Step 1: Press Fabric
Pressing the fabric is a great starting point for your block printing project. This step is important because you need a nice flat surface of fabric to press the blocks onto. It will help your design come out more even. I used a hot iron with steam to get all the creases out. Once your own fabric is nice and pressed, place it flat on your covered work surface.
Step 2: Mix Paint Well
Make sure to stir your paint so the color is even, and there are no clumps. My blue color Savannah Mist by Dixie Belle has been on the shelf for a while, so I have to stir it well and add water to thin it enough so the roller would glide through easily.
Now that your paint is ready, let's set up the roller.
Step 3: Set up the Roller
This is the one area where I did some trial and error. Instead of talking about what didn't work, I want to focus on what worked the best. Buying this brayer was the ticket. I found it at Hobby Lobby.
Take a piece of glass or something that is hard and silky smooth (I think one of those paper-thin plastic cutting boards would work, too) and set it on the work surface next to you.
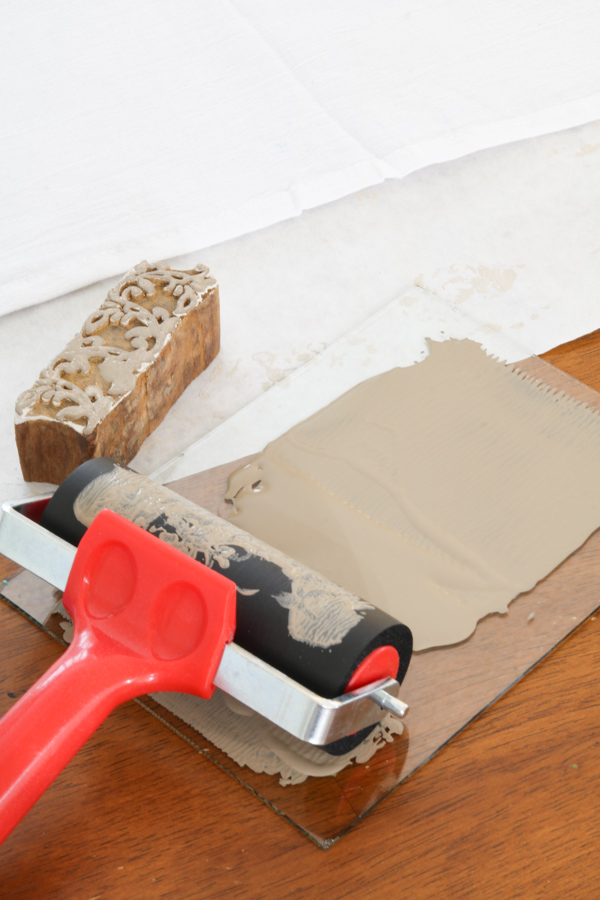
Next, place about a tablespoon of paint on the glass and begin rolling it with the foam brayer. Cover the whole brayer until your face covers everything.
Step 4: Apply Paint to Block
Now roll the paint on the brayer onto the pattern on the wooden block stamp. Keep rolling until you cover all the fine details of the design. Just when you think you have it all covered use another fabric to test it.
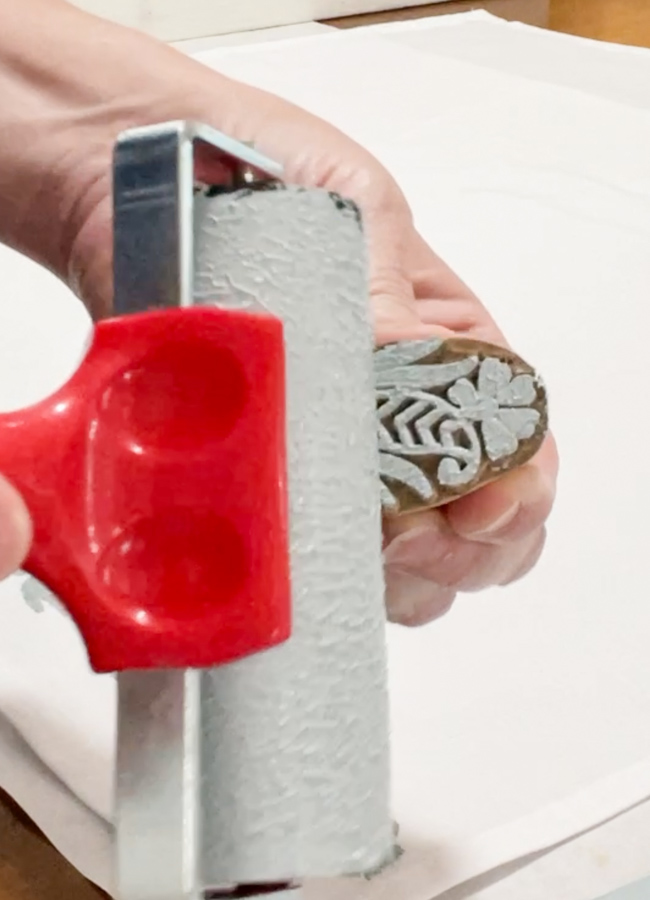
Don't be surprised if it comes out uneven and faint in color. This happened to me every time. For the best result I recommend doing a test print each time with your block carving on a spare piece of fabric.
Now apply paint again to the block stamp and test it again and again until you get just right.
Keep in mind not to let the paint go down into the nooks and crannies. It will happen at some point, and that is only because what makes this vintage block print design so unique and pretty is the imperfection.
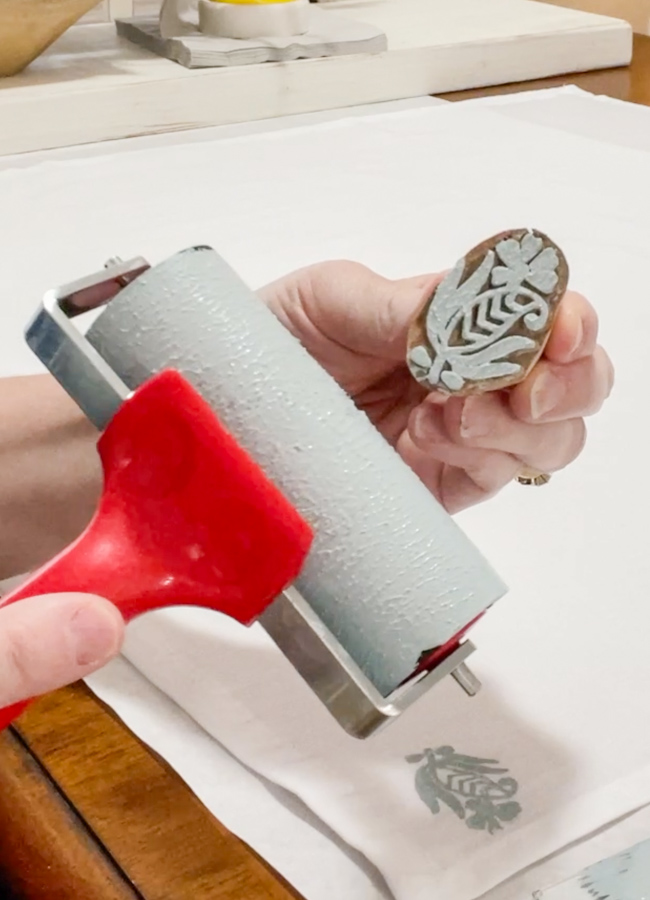
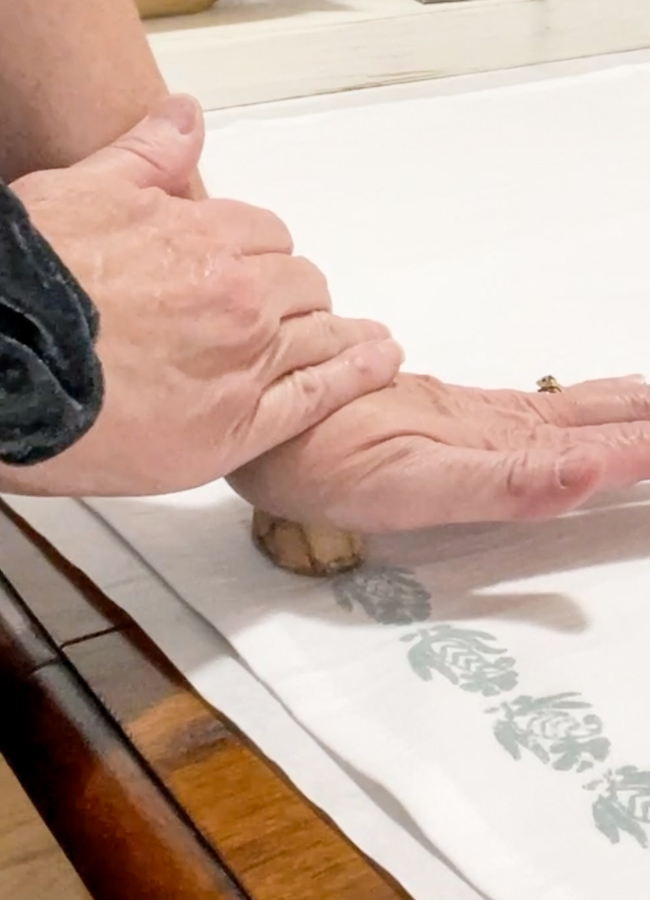
Step 5: Apply Stamp to Fabric
Now for the fun part, and that is applying the stamp to your fabric. Your block stamp has chalk paint on it so now simply stamp it straight down on the fabric. Evenly press on the block so the design touches the fabric on all corners and such then pull it straight up. You want to use enough pressure to ensure paint transfer but not so much pressure it smears.
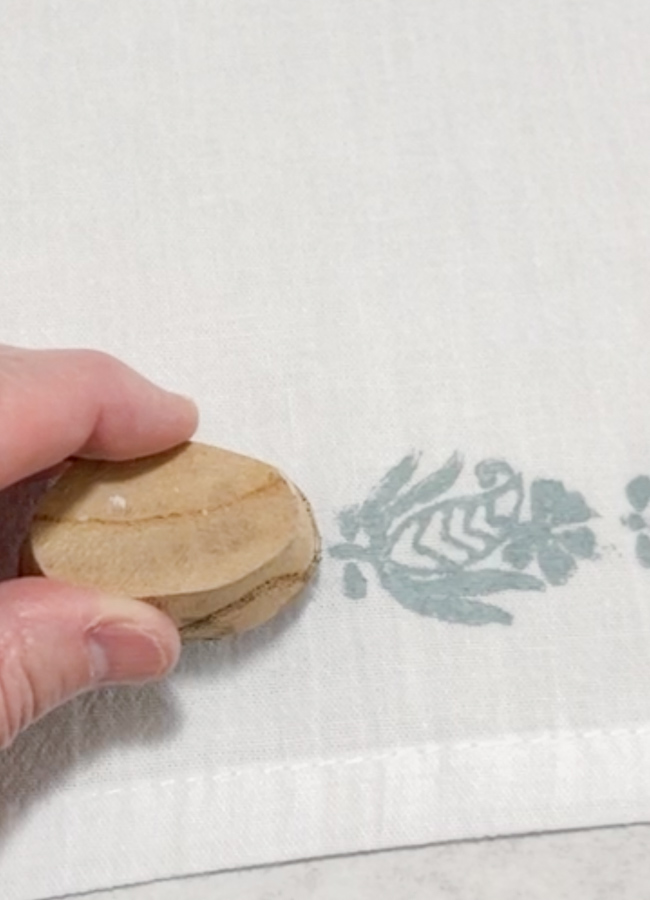
Isn't that a beautiful block print? To give my fabric design a vintage look I apply paint to the stamp and stamp it twice. The second stamp comes out lighter which gives it a worn vintage look in different places throughout the towel.
I keep repeating these steps until l notice my block pattern is starting to look muddy. This can happen quickly if your stamp has fine lines. Then I go and clean my stamp with a toothbrush and some Meyers dish soap. Once it is clean and dried I apply paint and start stamping again.
Step 6: Let Paint Dry
Let your design dry really well before going to the next step. I let mine dry for a couple of hours, but it felt dry to the touch within 30 minutes.
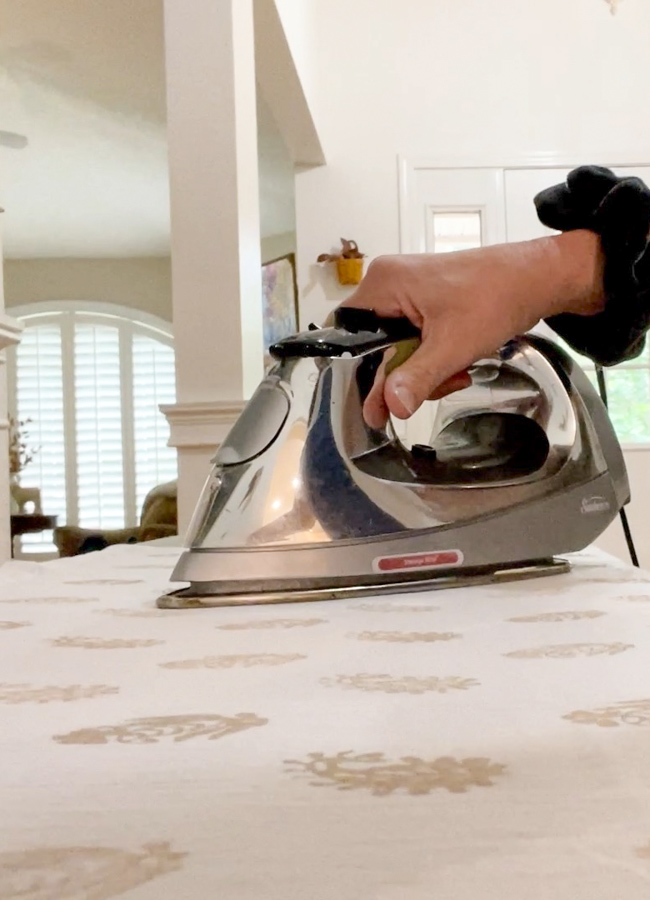
Step 7: Iron Block Paint Fabric
This last step I was leery to try but just as Anne Sloan suggested in her article it worked like a charm.
Simply use a medium-temperature iron or silk heat setting and press the chalk paint block design. No paint came off on my iron. It worked perfectly! The block-printed fabric is beautiful and Anne Sloan said that this would set the paint for good.
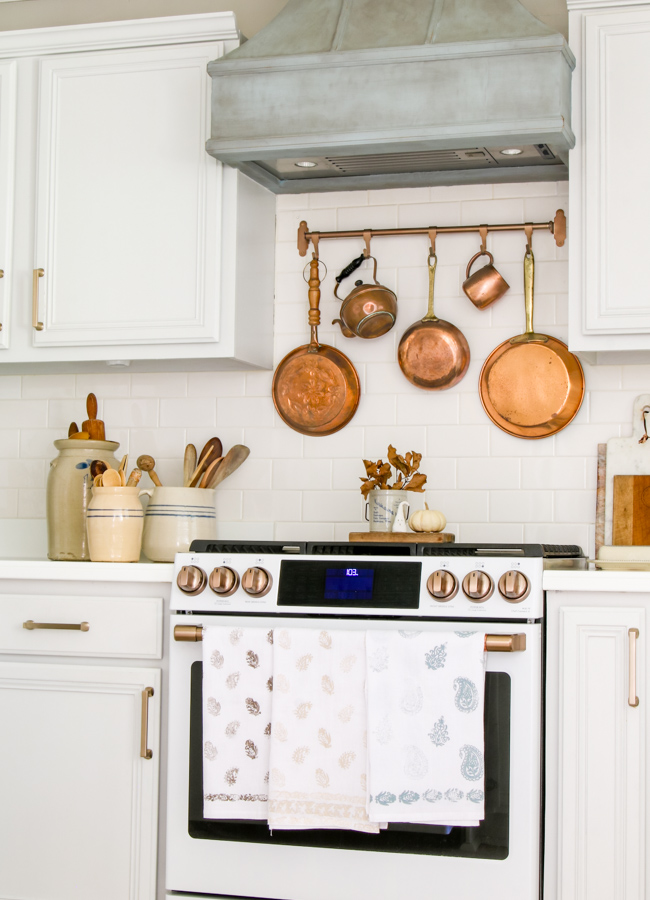
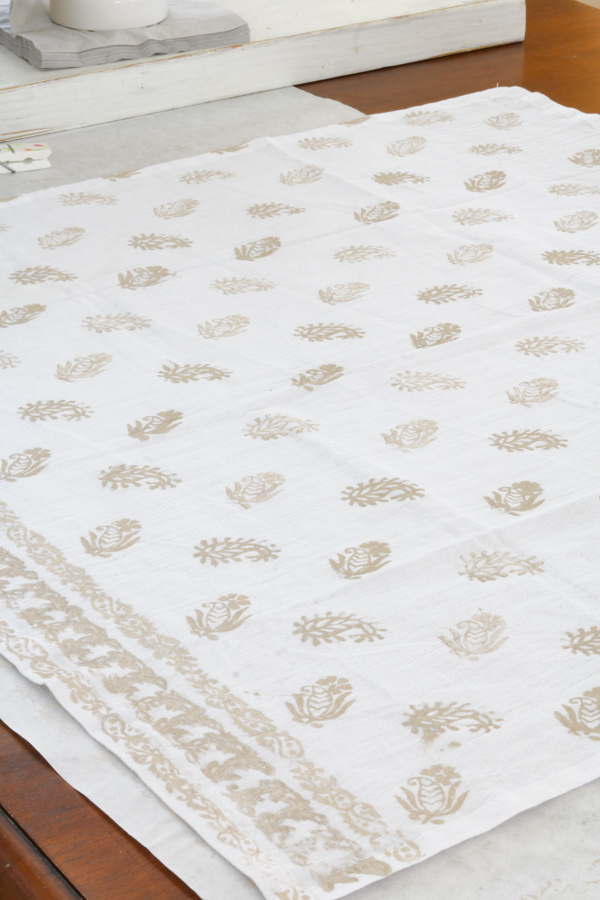
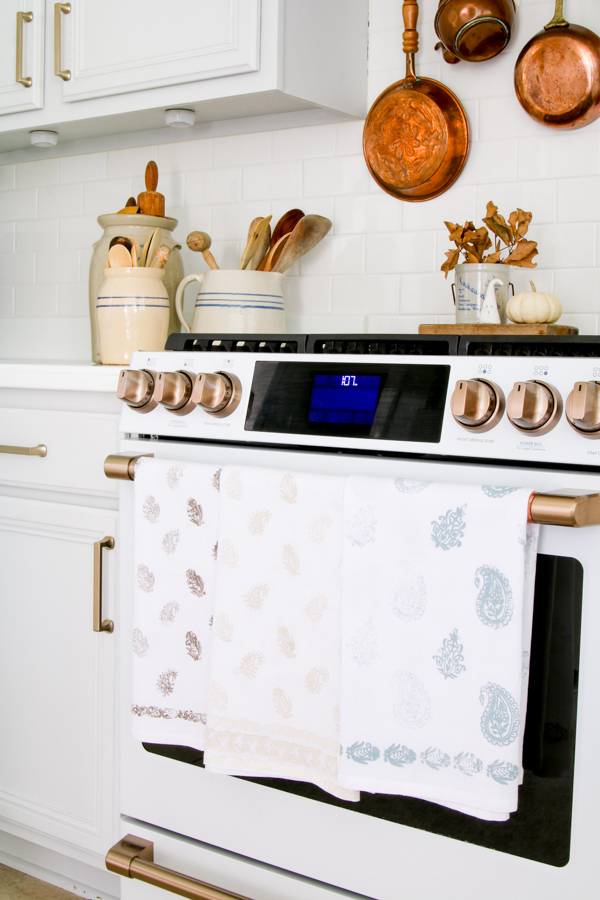
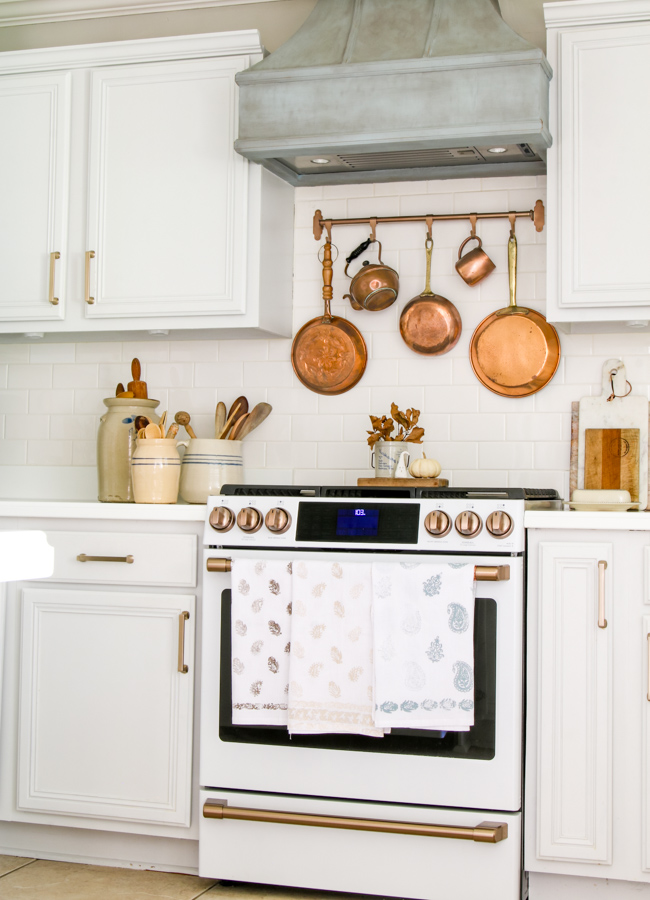
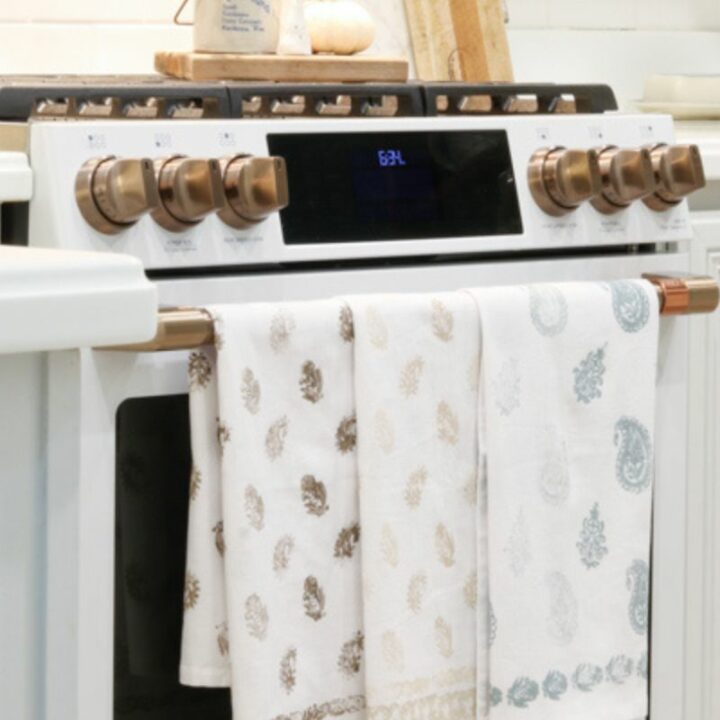
Guess what? My vintage block print towels are done! Now I have custom fabric towels in three different colors. I am so happy with how this turned out and I hope to make many more.

I made three designs using chalk paint, brown, blue and tan. The paints I used are:
- Blue Design: Savannah Mist by Dixie Belle
- Brown Design: Barcelona by FolkArt
- Light Brown Design: Mixture of White by Dixie Belle and a tan acrylic color (this was my test towel so I didn't mind working with acrylic but I only recommend chalkpaint for this project)
Here is how they turned out and look in my kitchen.
My next project using these block stamps is a wall design in my pantry. Stay tuned to see how that turns out.
Decorating with Block Print Fabric
Now that I know how to stamp with blocks, my design and decorating ideas are endless. Here are a few ideas of store-bought block print pieces I have in my home that will give you ideas for block painting fabric.
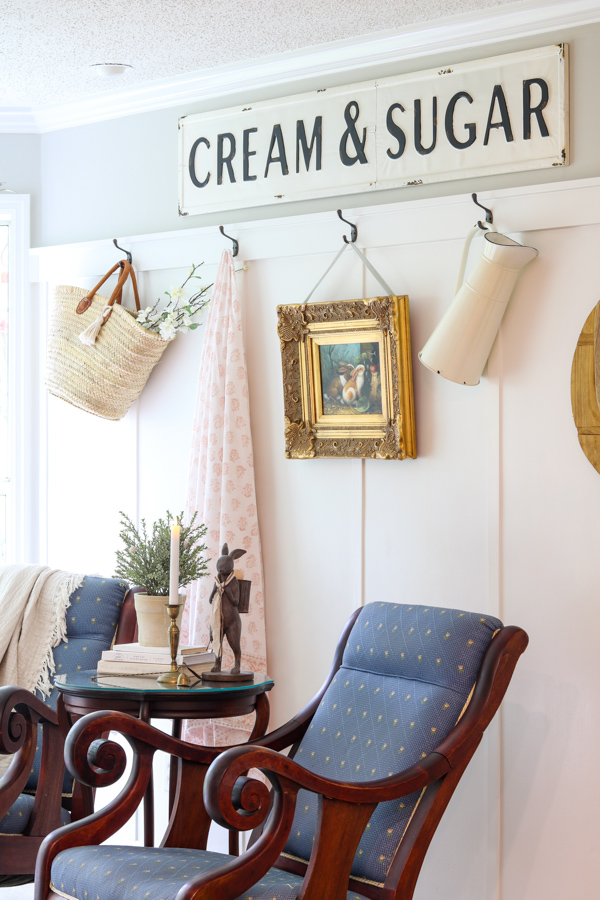
My favorite tablecloth has been used as a decoration for many things, but my favorite is when I hung it on my wall in the kitchen for spring. Here is my full decorating for spring post if you would like to see more photos.
Just think how beautiful it will be to make your own block-printed tablecloth.
I love this vintage bedroom makeover we did in my daughters room. She picked out a block print comforter for her bed. See how block print has charmingly written all over it.

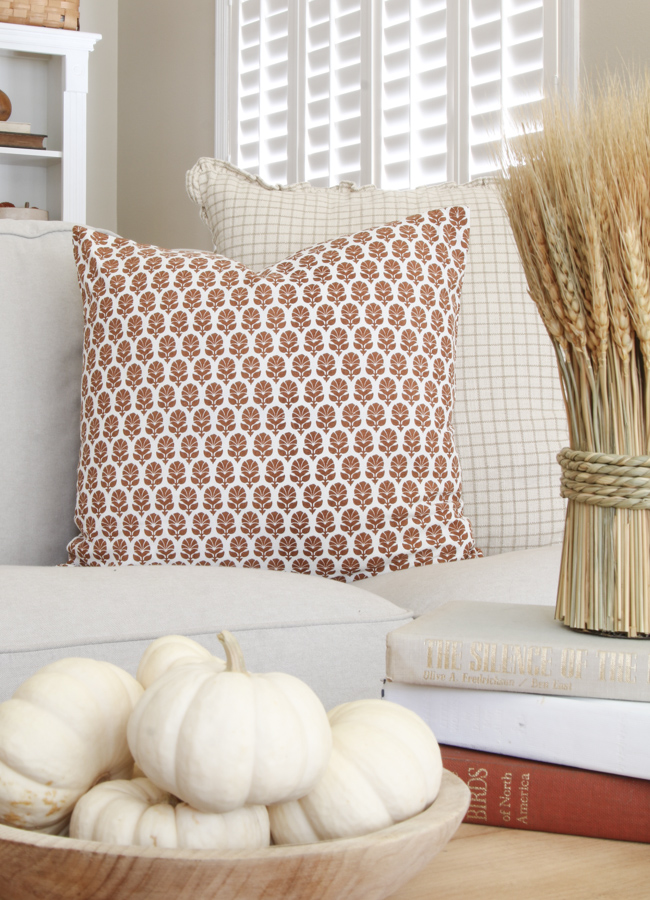
Here is another idea of a block print pillow cover I found on Amazon for my fall decorations by Creative Co-op. Isn't it so pretty?!
Creative Co-op on Amazon has so many pretty pillow cover designs and many more block print ones. Check them out here.
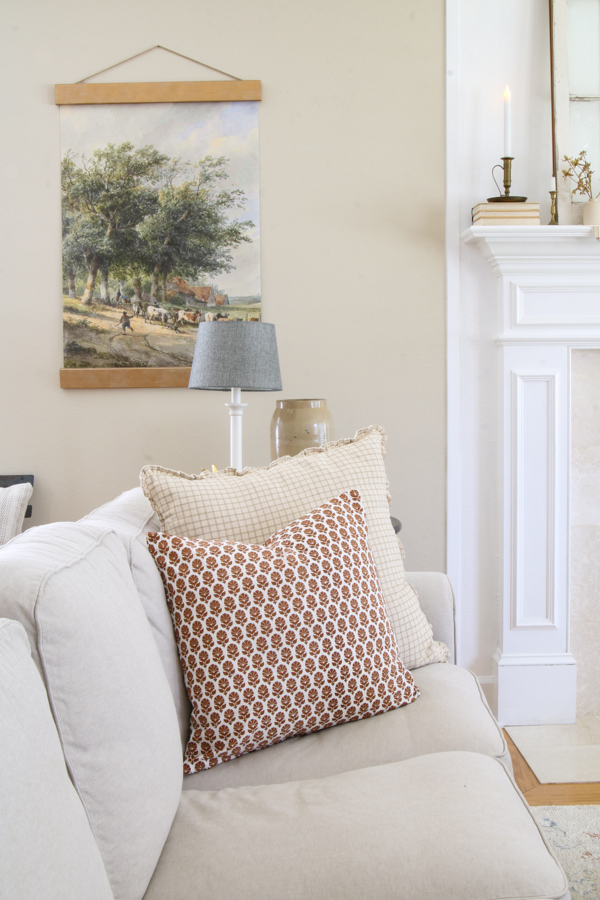
I think it would be easy to block print this pillow pattern. It is basically the same stamp over and over in one color.
And of course consider making kitchen towels or you can use these for cafe curtains.
Final Thoughts
Now that you know how to block-print fabric you will be surprised at how many times you see block-printed items for sale. Block-printed items are charming, clean, and fresh-looking. Block printing is an ancient printing technique and I love their charm and appeal in home decor.
If you love block printed designs here are some other items I found that you can buy already block printed.

Like I said I hope to tackle block printing on walls next. I plan to do it on the back wall of my small pantry but I would like to one day do it on the inside back of my bookcases. I'm excited to master the art of block printing. I think it will look very cottagecore.
So waht are you thinking of block printing? I would love for you to share in the comments.
Thank you for stopping by Life on Summerhill. I hope you have a wonderful day!
Happy Decorating!

How to Block Print Fabric
With a set of real wooden blocks and a dash of chalk paint, I turned these humble flour sack towels into delightful pieces of functional art for my kitchen. So, grab your apron, and let's dive into the world of block printing fabric together!
Tools
- Brayer (foam roller)
- Glass or something to roll paint
- Iron
- Ironing Board
Instructions
- Press fabric. Once the fabric is nice and pressed, place it flat on your covered work surface.
- Mix paint well. Make sure to stir your paint so the color is even, and there are no clumps.
- Set up the Roller. Take a piece of glass or something that is hard and silky smooth (I think one of those paper-thin plastic cutting boards would work, too) and set it on the work surface next to you. Next, place about a tablespoon of paint on the glass and begin rolling it with the brayer. Cover the whole brayer until your face covers everything.
- Apply Paint to Block. Now roll the paint on the brayer onto the pattern on the wooden block stamp. Keep rolling until you cover all the fine details of the design. Just when you think you have it all covered use another fabric to test it.
- Apply Stamp to Fabric. Your block stamp has chalk paint on it so now simply stamp it straight down on the fabric. Evenly press on the block so the design touches the fabric on all corners and such then pull it straight up.
- Let Paint Dry. Let your design dry really well before going to the next step. I let mine dry for a couple of hours, but it felt dry to the touch within 30 minutes.
- Iron Block Paint Fabric. Simply use a medium-temperature iron or silk setting and press the chalk paint block design.
Notes
To give my fabric design a vintage look I apply paint to the stamp and stamp it twice. The second stamp comes out lighter which gives it a worn vintage look in different places throughout the towel.
can you wash items and the paint not wash off or do you seal it with something?
Great question! I have been washing my homemade block print dish towels and they wash beautifully.