
Looking to add a unique and fun touch to your Easter celebrations? Look no further! With a few simple materials, you can create adorable wooden bunny rabbits in no time—no special skills are required! This DIY wood bunny is so cute and easy to make.
This blog post will walk you through the unbelievably easy process of making wooden Easter bunnies. Read on for the step-by-step instructions and see for yourself just how easy it is!
Recently I got the urge to make some Easter decorations, but I wanted something simple and inexpensive. So after spending a couple of hours at Dollar Tree and Hobby Lobby, I came up with a few ideas.
In this first blog post of a series of DIY Easter craft decorations, I will show you how to make these simple DIY wooden bunnies in a few easy steps and different ways you can decorate with them. These bunny shapes are quite easy to make and a great way to decorate.
It can be the perfect way to craft with your kids for spring. This project is so much fun!
This post contains affiliate links, meaning I receive a commission if you purchase using the links below at no extra cost to you. All opinions are all my own.
DIY Wooden Bunny FAQs:
What Do I Need to Make a DIY Wooden Bunny?
This is actually your first step of the bunny craft project! Gathering your craft supplies at your local craft store to make your wood easter bunny.
Step 1: Supplies for Wood Bunny Rabbit
- Wooden ball knob 1 1/2″ with a flat side
- Slightly smaller wooden ball knob 1 1/4″ with a flat side
- Curved popsicle sticks
- Scissors
- Hot glue gun
How Can I Decorate with a DIY Wooden Bunny?
There are so many fun ways you can decorate with DIY wooden bunnies. You can use them in table centerpieces, in planters, on bookcases and placed in candy dishes. At the end of this post I'm going to show you five fun ways to create Easter décor with your adorable wood bunnies so stay tuned!
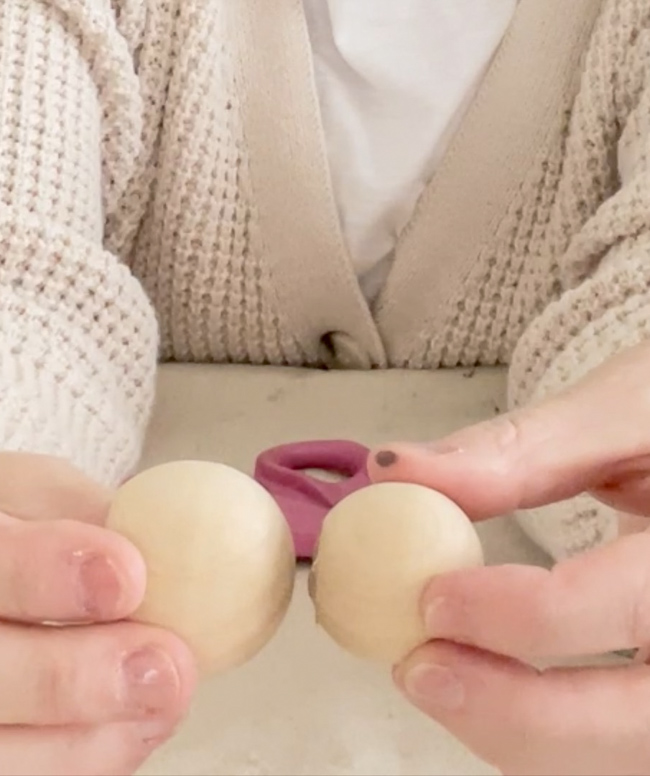
Step 2: Glue the Wooden Balls Together
This step is simple but forewarning – when the glue adheres the knobs together it holds in place quickly. For my bunny I use natural wood, meaning it's unfinished.
Using your hot glue gun, glue the bottom of the smaller wooden ball to the top of the larger wooden ball. Hold it in place for a few seconds to make sure it is secure.
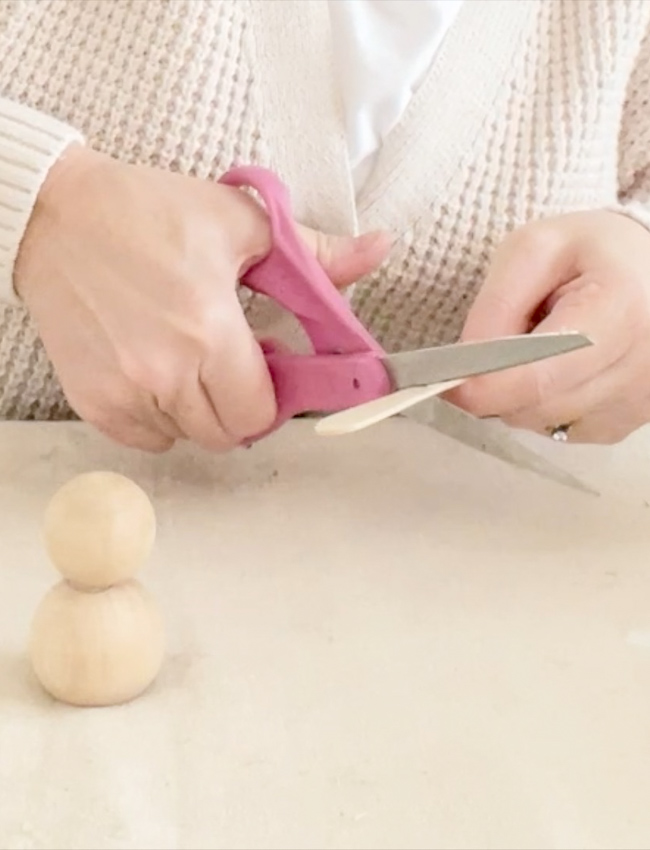
Step 3: Cut the Curved Popsicle Stick
Next, cut the curved popsicle stick in half. These will be two ears for each bunny.
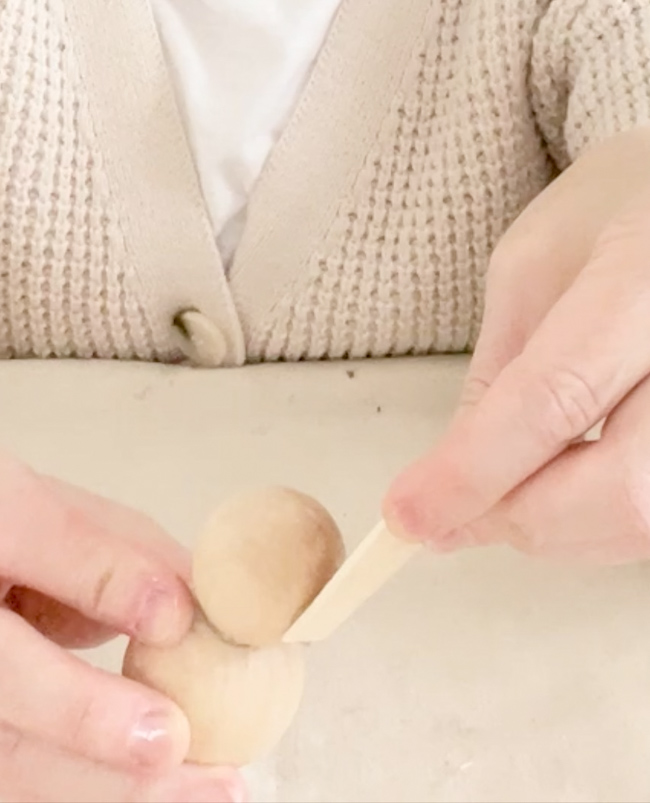
Step 4: Hot Glue Ears
Follow by applying a dot of hot glue where you cut the popsicle stick. Then adhere the glued stick to the back of the small knob slight angled outward. Repeat this step with the other stick but lean the ear slightly outward in the other direction.
Just like when gluing the knobs together, hold the ears in place for a few seconds until they are good and secure.
Now you have your ear shapes.
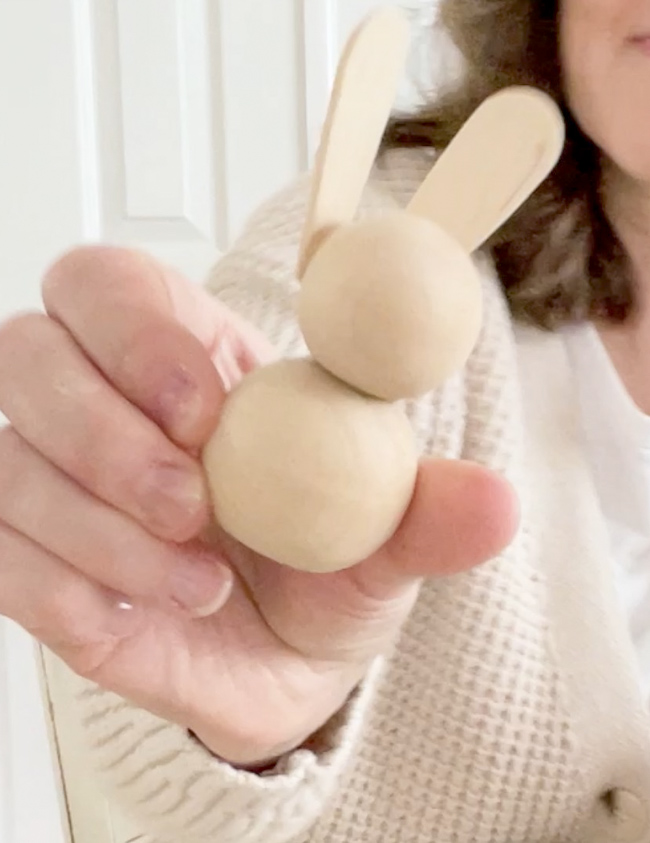
That's it! You've got a wood bunny!
You can leave it natural or decorate it with paint. You could use white paint on the body and then give it a face and maybe some pink felt on the bunny ears and a little pink nose, or you could paint it pretty pastel colors.
The options are endless!
Decorating with Wooden Bunnies
These cute little wooden bunnies are easy to use in your decorations, even in small spaces. Here are ideas for decorating with wooden bunnies for Easter or any day.
DIY Easter Centerpiece
One of my favorite applications of these bunny decorations is this DIY Easter centerpiece. I will share how to make this table decoration in another blog post soon. But I wanted you to see a simple idea.
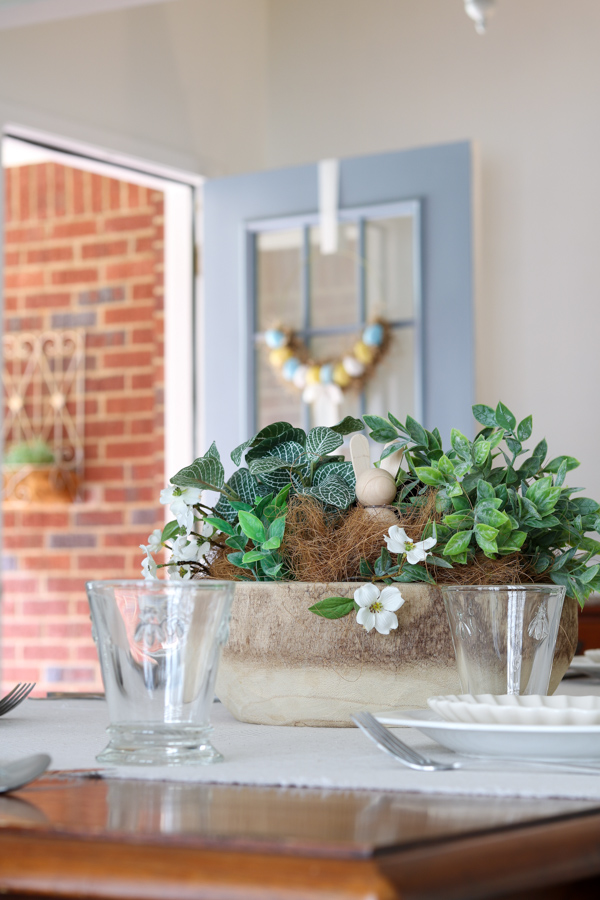
I used three wooden bunnies in this floral arrangement, elevating them from underneath when needed.
DIY Wooden Bunny Candy Dish
There are so many ways you can decorate with these adorable bunnies like turning it into a candy dish. This is so easy to create. Take a tea cup saucer and put something in the middle to elevate your wooden bunny. Next place your favorite candy around the bunny covering what is elevating it.
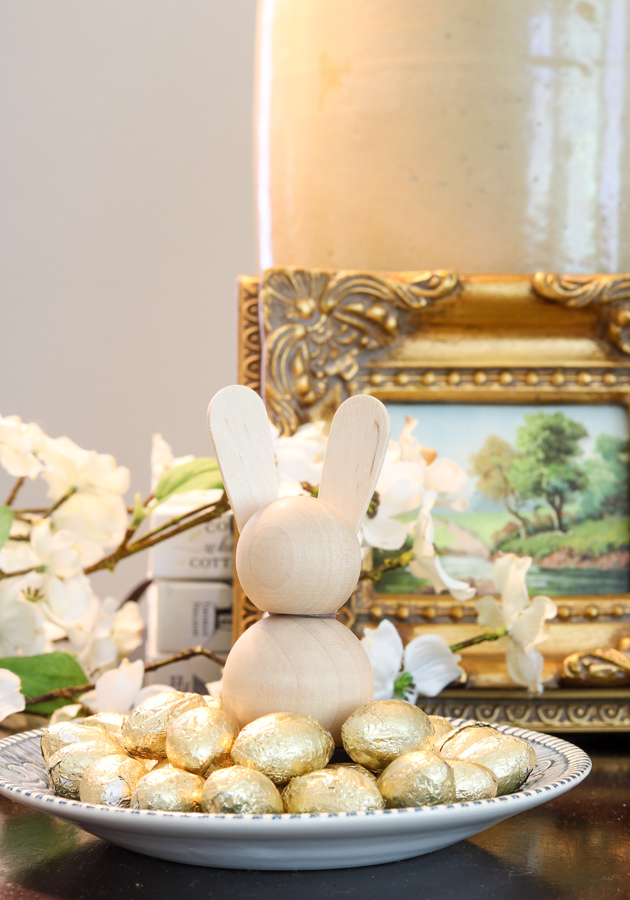
I wish I had those cute little candy robin eggs for this photo but I was out. The robin eggs would look so good up against the wood bunny.
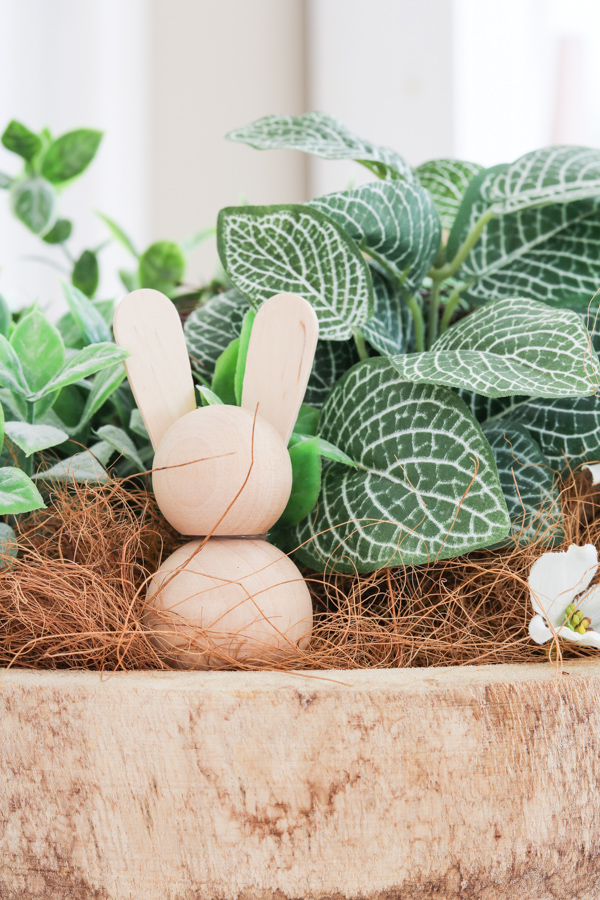
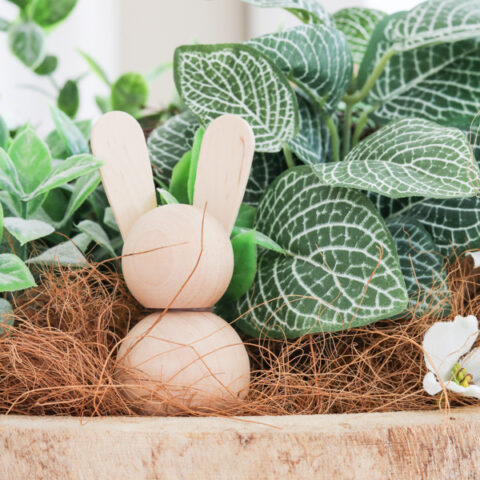
DIY Wooden Bunny Outdoor Planter Decoration
Here is another favorite way to decorate with these adorable bunnies. Place one, two, or three in your outdoor planters.
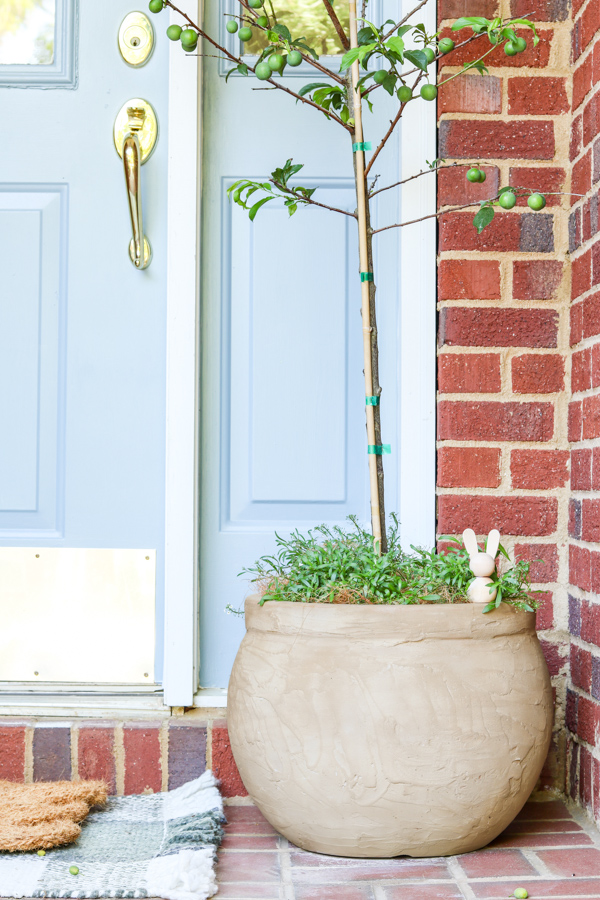
Isn't this adorable!! You can do this inside your home too.
There are so many other ways you can decorate with these bunnies. Consider adding them to tiered trays for Easter, bookcases and window sills. The options are endless.
Conclusion
You can create the most adorable wooden Easter bunnies with just a few materials and minimal effort! Whether you paint your DIY wood bunny or leave it them unfinished, these bunnies will surely bring some Easter cheer to your home. They're also the right size to decorate an Easter basket.
If you're looking for more ideas for Easter, check out these posts:
- Best Easter Decorations for Home
- Easy Easter Place Setting Ideas and Centerpieces for the Holidays
- Easter Basket Ideas Your Peeps are Sure to Love
- Creative Easter Wreath DIY from Dollar Tree
- How to Create a Fun DIY Easter Egg Garland In Just Minutes
Now that you’ve seen how easy it is to make wooden Easter bunnies, get out your crafting supplies and make your own DIY wood bunny! I'd love to hear about your creative ideas. Don’t forget to share photos of your creations on social media, and feel free to leave a comment to let us know how you liked the tutorial. Happy Easter!
Happy Decorating!

Unbelievably Easy Way to Create a Wood Bunny
With a few simple materials, you can create adorable wooden bunny rabbits in no time—no special skills are required! This DIY wood bunny is so cute and easy to make.
Materials
Tools
Instructions
- Gather your supplies for above for the Wood Bunny Rabbit.
- Glue the wooden balls together. This step is simple but for warning that when the glue adheres the knobs together it holds in place quickly. For my bunny I use natural wood, meaning it's unfinished. Use your hot glue gun to glue on the bottom of the smaller wooden ball and glue it to the top of the larger wooden ball. Hold it in place for a few seconds to make sure it is secure.
- Cut the curved popsicle stick. This will be two ears for each bunny.
- Hot glue the ears. Follow by applying a dot of hot glue where you cut the popsicle stick. Then adhere the glued stick to the back of the small knob slight angled outward. Repeat this step with the other stick but lean the ear slightly outward the other direction. Just like when gluing the knobs together hold the ears in place for a few seconds until they are good and secure.
Notes
You can leave it natural or decorate it with paint. You could use white paint on the body and then give it a face and maybe some pink felt on the bunny ears and a little pink nose, or you could paint it pretty pastel colors. The options are endless!