

Are you looking for a fun and budget-friendly idea for decorating your home for Easter? Then you’re in the right place! This Easter Wreath DIY from the Dollar Tree will show you how to create a festive and unique hanging décor piece without splurging at craft stores.
If you have seen my last two blog posts, you know I had a creative spurt and made four Easter decorations in one day. I am not sure what got into me, maybe it's the early spring weather, but it was so much fun and I couldn't wait to show the details of my Easter crafts in case you had a creative spell, too.
For the third of my Easter DIY ideas, I am sharing the cheapest wreath I have ever made in this DIY craft post. The entire wreath cost five dollars plus a ribbon and a glue gun I already had at home.
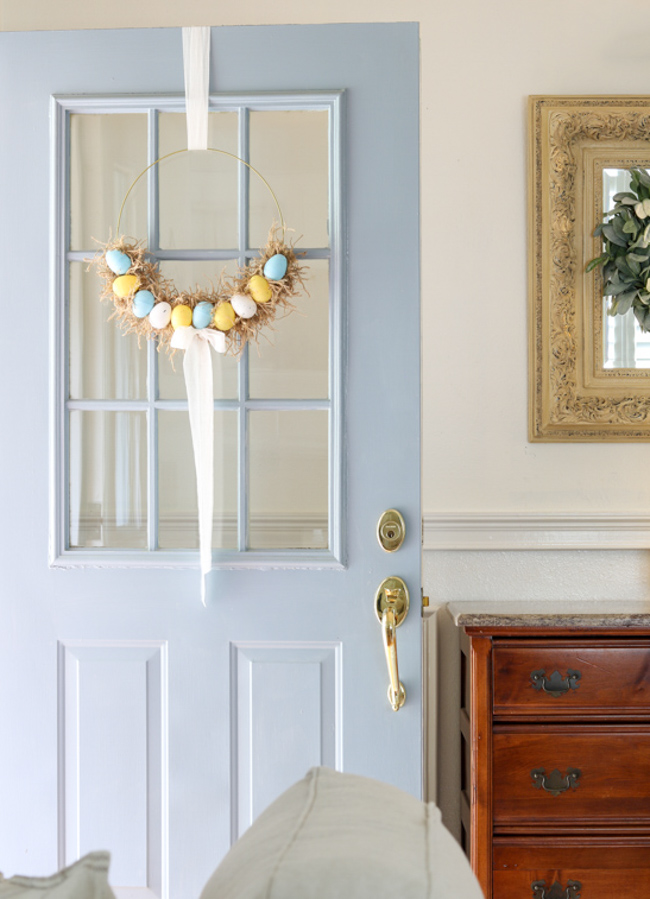
I can't think of a better way to decorate for Easter. This Easter wreath DIY from Dollar Tree turned out amazing and looks great on my new spring front porch.
So enough about how I got to this point, let's break down how you can make this Easter wreath too.
This post contains affiliate links, meaning I receive a commission if you purchase using the links below at no extra cost to you. All opinions are all my own.
Easter Wreath DIY Dollar Tree FAQs:
How do you Make a Simple Dollar Tree Wreath?
You might think making DIY wreaths is complicated and expensive. But it's easier to make a simple Easter Wreath than you think! You just need a few inexpensive craft supplies. I've broken this easy Easter wreath down to 8 simple step-by-step instructions. Most of your supplies will be Dollar Tree items and supplies you have from home. For example, I had ribbon at home I thought was perfect for this project.
How do you Attach Easter Eggs to a Wreath?
For this project we use plastic Easter eggs from the Dollar Tree. I find hot glue to be a great way to attach the eggs to the wreath. The best part is that they carry a lot of different sizes, different colors, and styles of eggs so you can design the Easter wreath that's perfect for your family this Easter season. Maybe that's with colorful eggs, glitter eggs, or even animals shaped eggs. You could try wood eggs but I believe they'd be too heavy to attach well with hot glue.
Supplies
Let's start by gathering our Dollar Tree supplies:
- Wreath frame
- Jute ropes (2)
- Bags of plastic eggs (2)
- Hot Glue Gun
- Ribbon
- Scissors
- Gloves to protect fingers from hot glue (optional)
Step 1: Glue Rope to Wreath Frame
The first thing you want to do before starting you Dollar Tree Easter wreath is lay down a drop cloth over your work surface because you will be using hot glue and you don't want to get it all over your table.
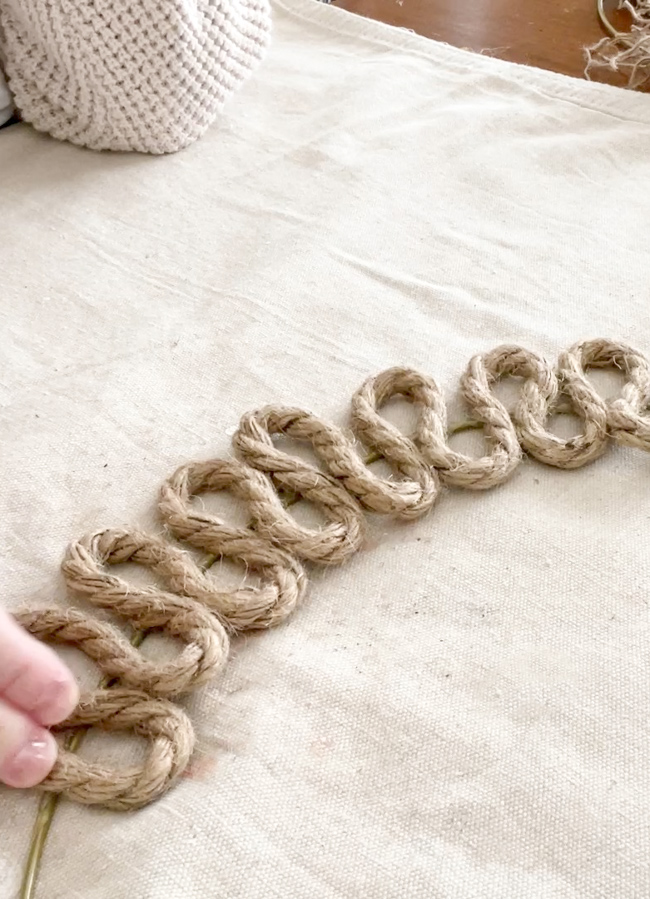
Once that's done, glue the jute rope to the wire wreath form in an s-shape. I did mine on the lower half of the wreath.
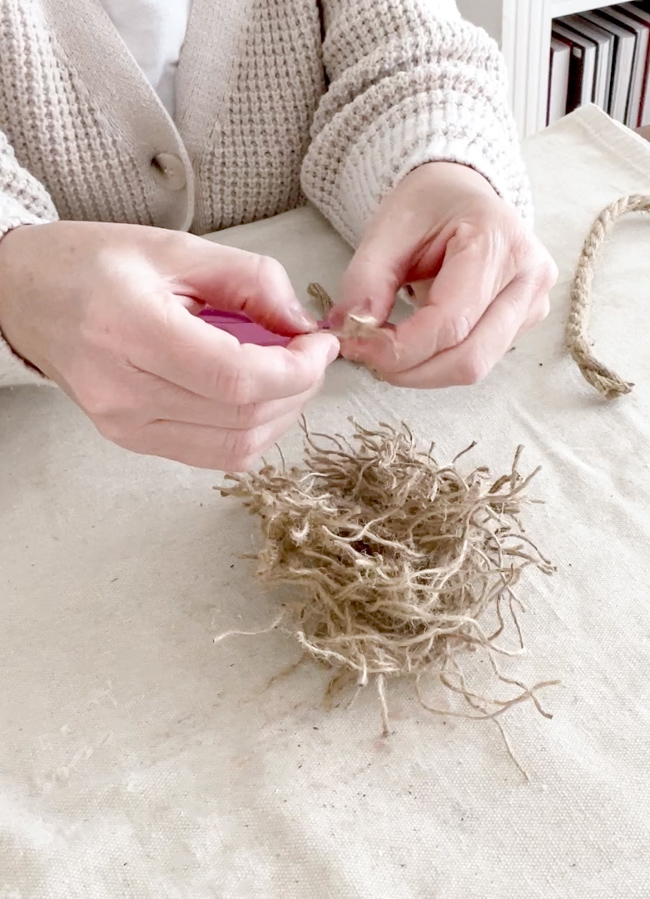
Step 2: Prepare Jute for Nest
Cut remaining jute rope into 4″ pieces, pull it apart, and then rub the small pieces between your fingers. You want a natural, imperfect look to the rope.
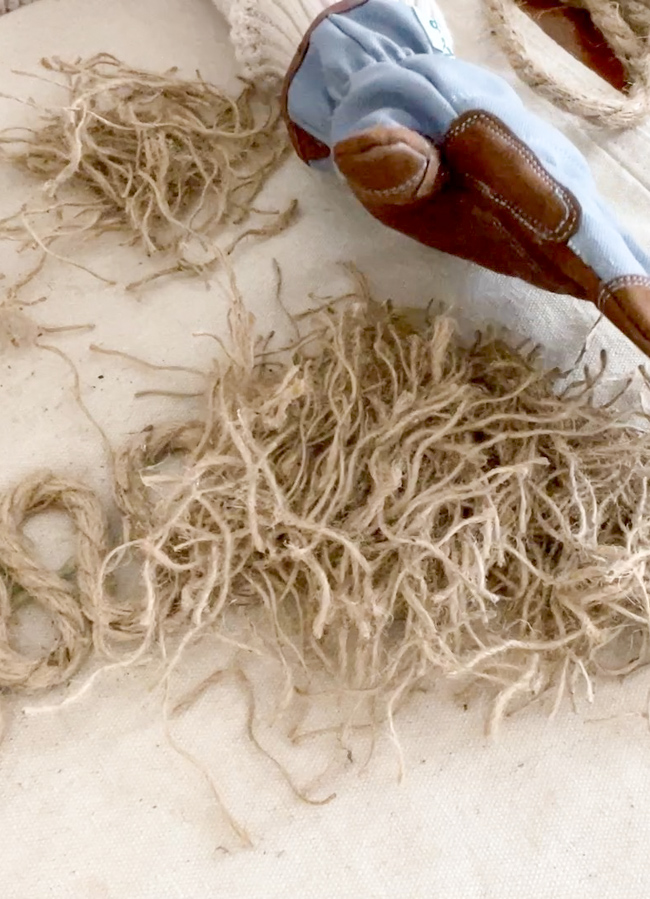
Step 3: Glue Jute Cuttings to Frame
Put hot glue on the s-shaped jute and place bundles of the jute into the wreath frame over the s-shaped jute. Use caution and consider gloves like I used, as the hot glue can burn you if it makes contact with your skin.
Step 4: Remove Loose Jute
Once the glue has dried, pull any loose jute pieces off and reuse until no more jute comes loose.
Step 5: Create Egg Pattern
Lay the eggs out on the nest of jute to determine the pattern (I used white, yellow, and blue for a fun pop of color).
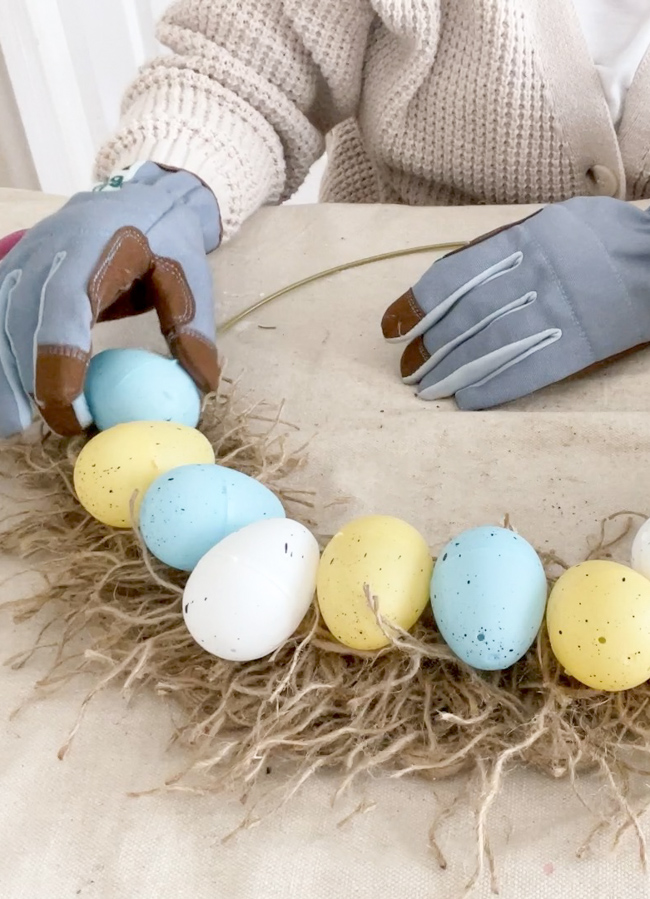
Step 6: Glue Eggs
Once you have them set up to your liking, hot glue the eggs into place.
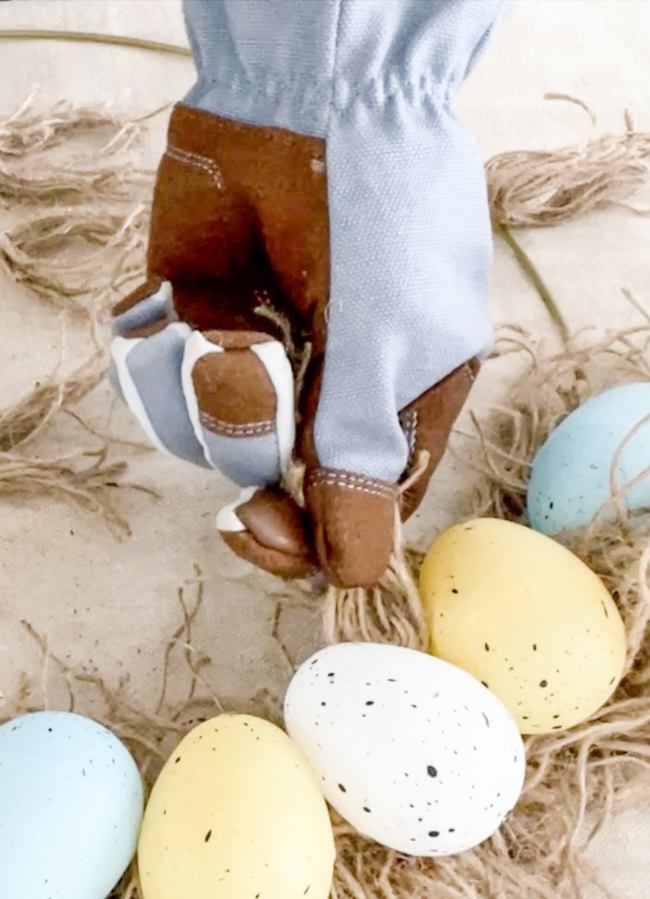
Step 7: Prepare More Jute Cuttings
Cut more pieces of jute into 4″ pieces and make small bundles. Fold each bundle in half.
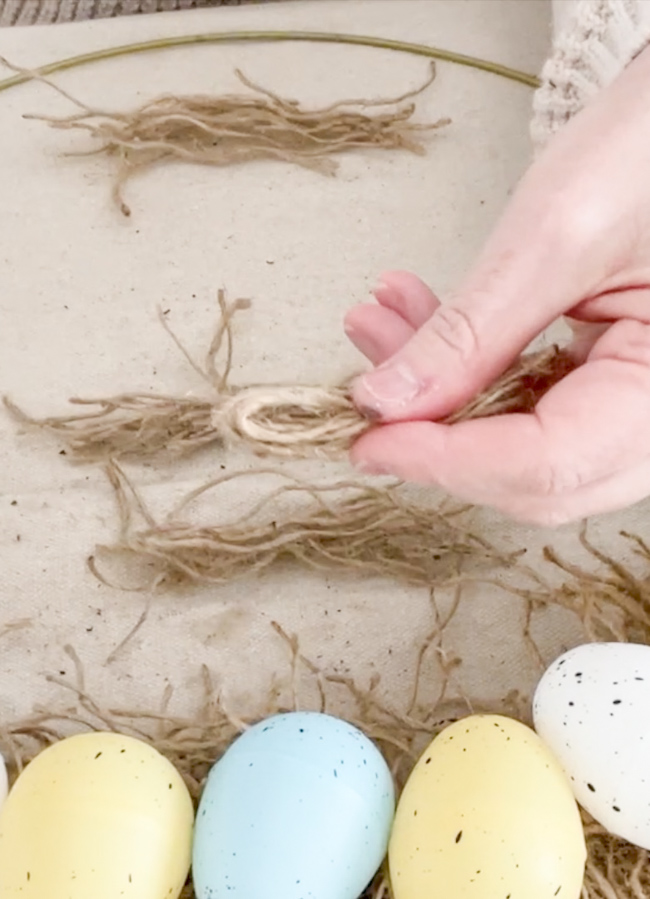
Put hot glue on the folded end of the bundle and tuck the bundles between the eggs. Hold in place while the glue dries. Remember to protect your hands while working with hot glue. Your simple wreath is almost done!
Step 8: Add Bow
Lastly, take a piece of ribbon 36-40″ long. Fold it in half until you find the center. Make two loops (or “bunny ears”) on each side of the center and tie them to make a bow. Adjust the bow until it has the ear and tail lengths you want.
You can have a big bow or a small bow with long tails. Position the bow where you'd like it on the wreath. I put mine at the bottom of the wreath. Add hot glue to the back of the bow and secure it to your wreath.
Isn't this a cute wreath?

Step 9: Add Ribbon Hanger (optional)
Cut another piece of ribbon to hang on the front door using my hang a wreath with ribbon method.
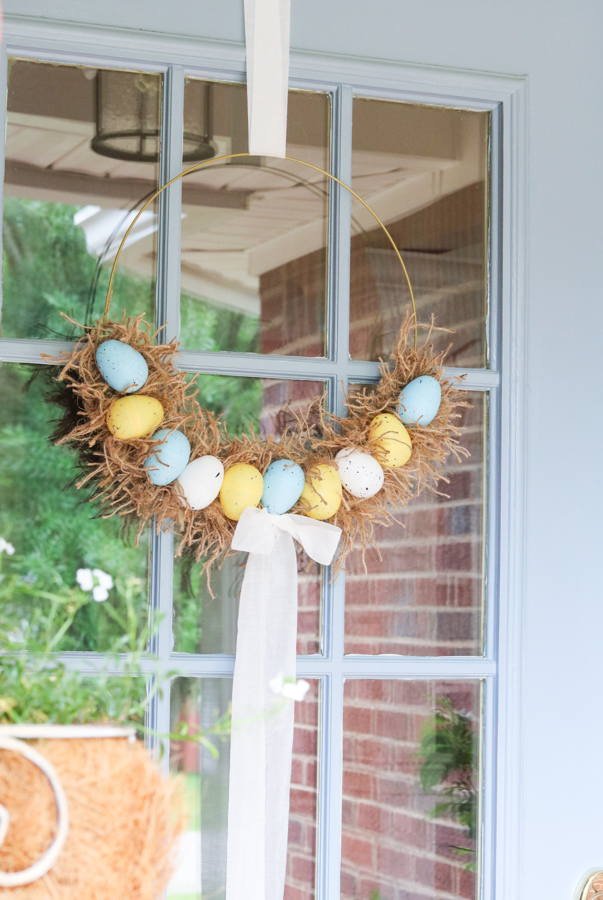
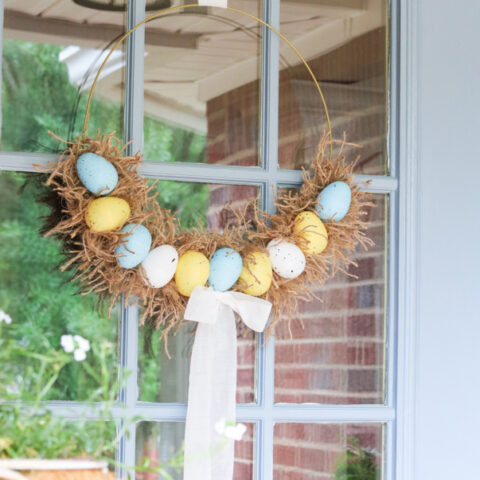
And you are all done! Can you believe this Easter egg wreath only cost five dollars? It looks much more expensive. Here is another photo of it handing on my front door.

Conclusion
With a little bit of imagination and craftiness, you can easily create a beautiful Dollar Tree DIY Easter wreath. Not only does this easy Easter craft bring a stunning piece of décor to your home, but it doesn't cost a lot of money and also allows you to express your own creative style.
If you enjoyed this Easter wreath DIY, you may also enjoy these Easter DIY projects:
- Decorating Your Home for Spring & Easter: Tips and Tricks
- A Step-by-Step Guide to Crafting a Stunning Easter Centerpiece DIY
- How to Dye Easter Eggs Naturally (Simple and Easy Steps)
- Unbelievably Easy Way to Create a Wood Bunny
If you have tried this Easter Wreath DIY from Dollar Tree, please share your pictures or videos on social media. We can’t wait to see what you create!
Happy Decorating!

Creative Easter Wreath DIY from Dollar Tree
This Easter Wreath DIY from the Dollar Tree will show you how to create a festive and unique hanging décor piece without splurging at craft stores.
Instructions
- Glue the jute rope to the wire wreath form in an s-shape. I did mine on the lower half of the wreath.
- Cut remaining jute rope into 4" pieces, pull it apart, and then rub the small pieces between your fingers. You want a natural, imperfect look to the rope.
- Put hot glue on the s-shaped jute and place bundles of the jute into the wreath frame over the s-shaped jute.
- Once the glue has dried, pull any loose jute pieces off and reuse until no more jute comes loose.
- Lay the eggs out on the nest of jute to determine the pattern.
- Once you have them set up to your liking, hot glue the eggs into place.
- Cut more pieces of jute into 4" pieces and make small bundles. Fold each bundle in half. Put hot glue on the folded end of the bundle and tuck the bundles between the eggs. Hold in place while the glue dries.
- Take a piece of ribbon 36-40" long. Fold it in half until you find the center. Make two loops (or "bunny ears") on each side of the center and tie them to make a bow. Adjust the bow until it has the ear and tail lengths you want. Position the bow where you'd like it on the wreath. Add hot glue to the back of the bow and secure it to your wreath.
- (Optional) Cut another piece of ribbon to hang on the front door using my hang a wreath with ribbon method).
Notes
- I recommend you lay down a drop cloth over your work surface because you will be using hot glue and you don't want to get it all over your table.
- Use caution and consider gloves like I used, as the hot glue can burn you if it makes contact with your skin.