

Looking for a centerpiece this Easter season that is both stunning and homemade? This guide will provide step-by-step instructions on how to create a homemade centerpiece that will be sure to impress your guests this Easter. Get ready to create a stunning Easter centerpiece DIY.
Recently I got an urge to make Easter decorations, and out of that desire came fresh ideas for the cutest wooden bunnies and two Easter centerpiece DIY ideas.
I wanted to create a simple, fuss-free, and inexpensive centerpiece for our Easter dining table, meaning something that would last weeks, I wouldn't need to keep alive and use items I had around the house.
It all started with these cute little wooden bunnies – all the details on making them are in this DIY wooden bunny post. Once I made the bunnies, I thought about Easter table decorations. I grabbed my round wooden dough bowl and shopped for plants at home. These are the first of many DIY Easter decorations I'll be sharing.
Here is how I made this simple Easter centerpiece.
Easter Centerpiece DIY FAQ's
How to Decorate a Centerpiece for Easter?
Easter is a time of renewal and celebration, and creating your own centerpiece is the perfect way to show what that means to you. Your centerpiece can reflect this with fresh, or faux, greenery and flowers and any items that remind you of the spring season and Easter, like bunnies and eggs.
How Can I Decorate a Centerpiece on a Low Budget?
Easter centerpieces don't have to be expensive floral arrangements. The best part for me of this easy DIY was that most of the items I already had in my home or could make inexpensively. Aside from items in your home, an easy way to keep your budget low is to find items at dollar stores.
Step 1: Gather the Materials
- Dough bowl
- DIY Wood Bunnies (or a bunny statue pictured at the end of the post)
- Small plants
- Fillers like grass or straw (I used an old coir liner)
- Flower cuttings (real flowers or faux flowers)
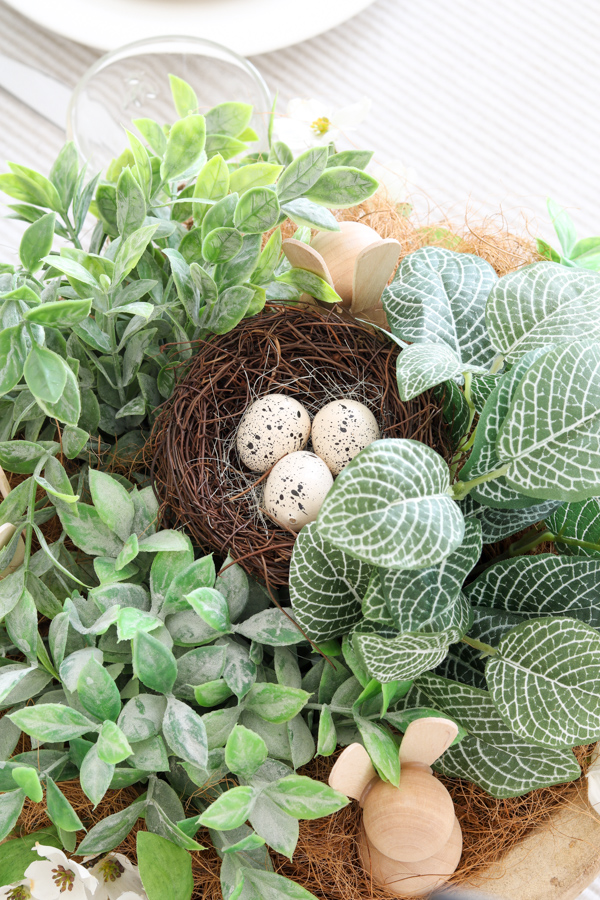
- Birds nest with eggs
Step 2: Assemble the Base
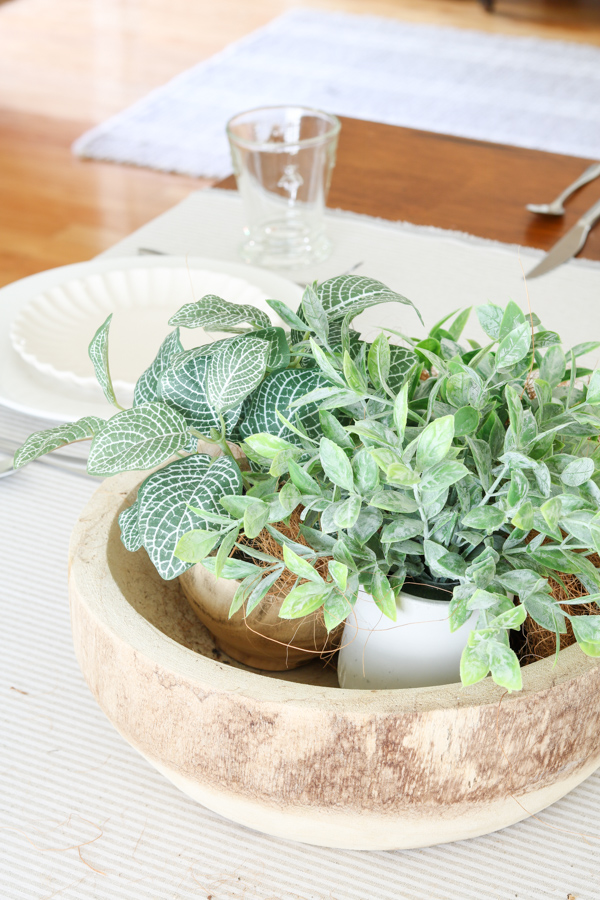
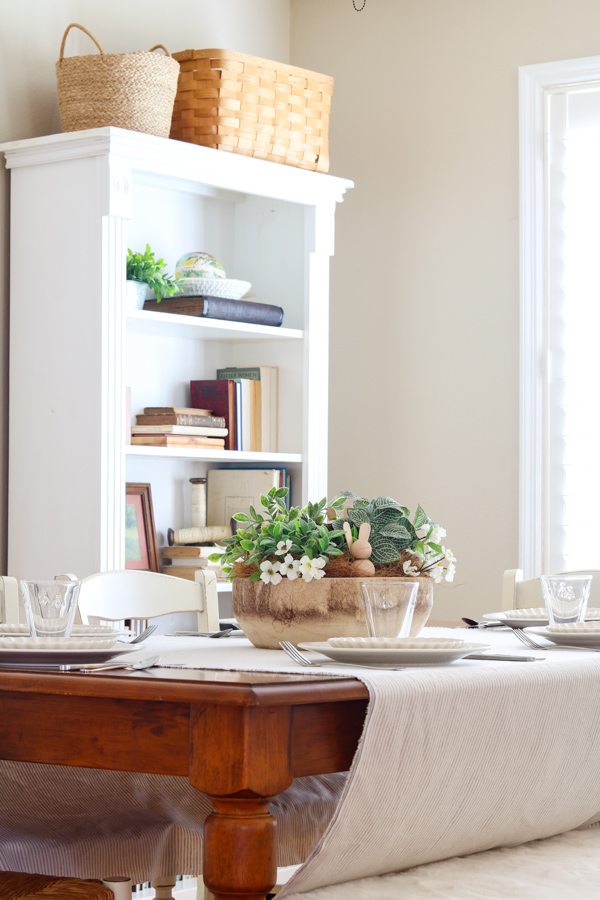
I used a dough bowl for my centerpiece. It's a good use of the dough bowl and has a beautiful natural wood finish. Add floral foam on the bottom if needed.
In my case, I used plants in tiny pots, so the pots took up most of the space. I did use a little styrofoam to hold up one of the wooden bunnies later in the project.
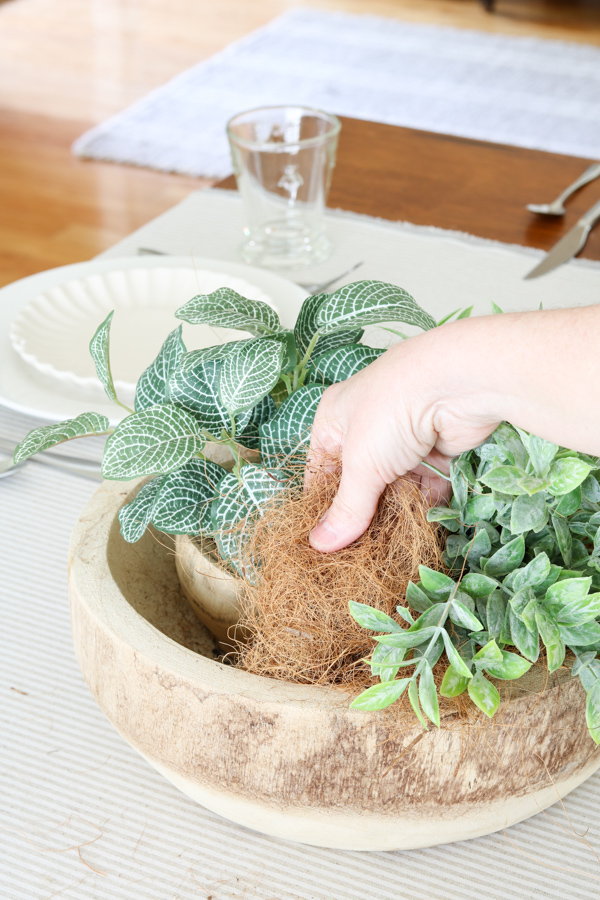
Step 3: Arrange the Plants and Fill with Straw
I like using plants of different types and different lengths. You can see in the photo how I simply sat the potted artificial plants down inside the dough bowl. I used three plants for the dough bowl but you can use more or less depending on your sizes.
Once you're happy with your plant placement, gently arrange the grass, straw or in my case coir liner, around the plants. It's a great way to cover the foam or plant pots.
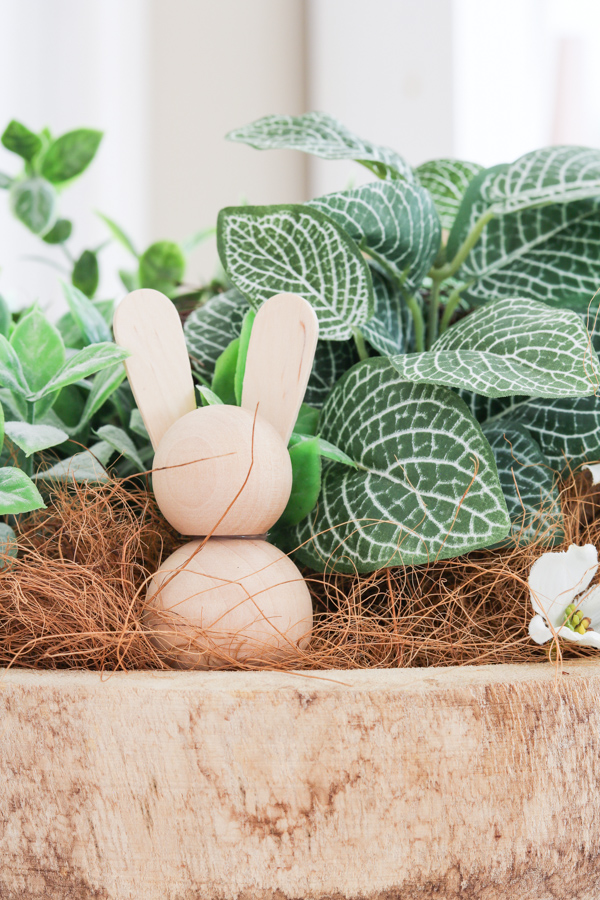
Step 4: Embellish with Easter Theme Elements (DIY wood bunnies)
Add Easter theme decorative items like these DIY wood bunnies. Or you could add cute wooden eggs. Your personal touch will make it unique to your Easter celebration.
Step 5: Finish with a Garnish (birds nest on top and flowers)
I think a bird's nest with eggs is perfect for an Easter centerpiece. Since I like using white for Easter, I chose white eggs but you can also find these bird's nests with colorful eggs.
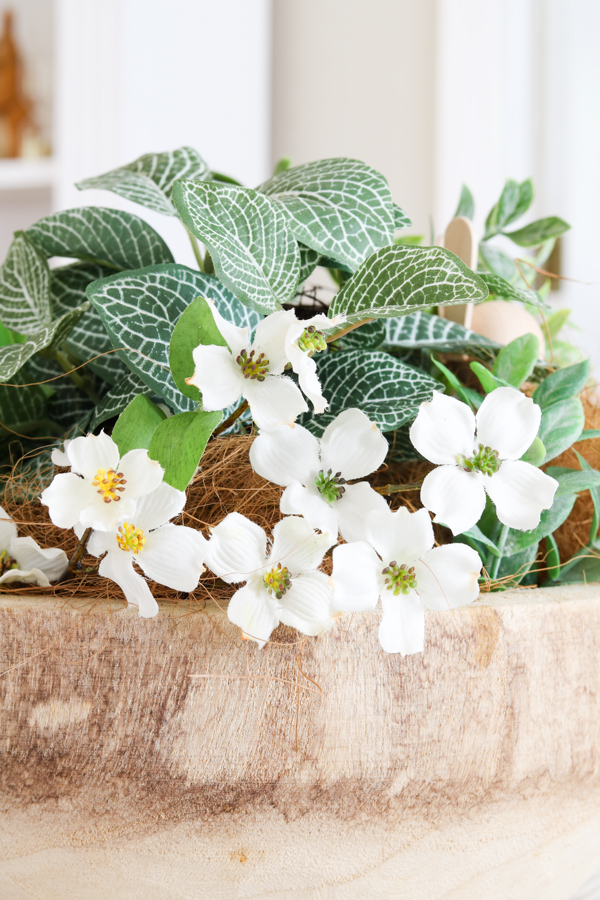
It's a good idea to tuck in real flowers or faux spring flowers to brighten the centerpiece. I chose white flowers but you may want to use different colors if you have specific color schemes.
If you want your Easter centerpiece to be taller, consider adding a rabbit statue like the one my friend Mel at Adventures of Mel sent me. If you need some good Easter recipes, she has loads of delicious ones to choose from.
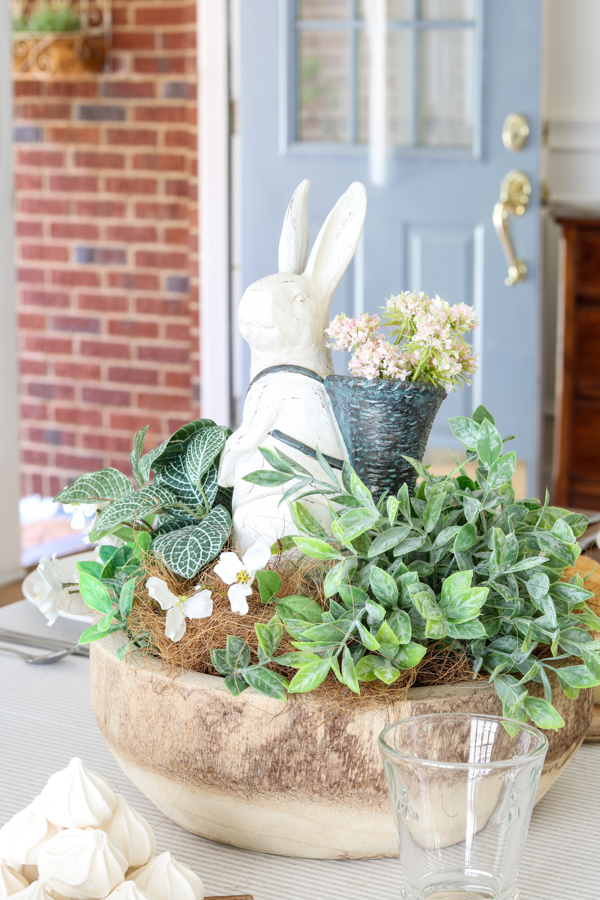
I sat him down on the top in the center, moving him around until it was secure and standing straight. I love how the Easter bunny centerpiece turned out.
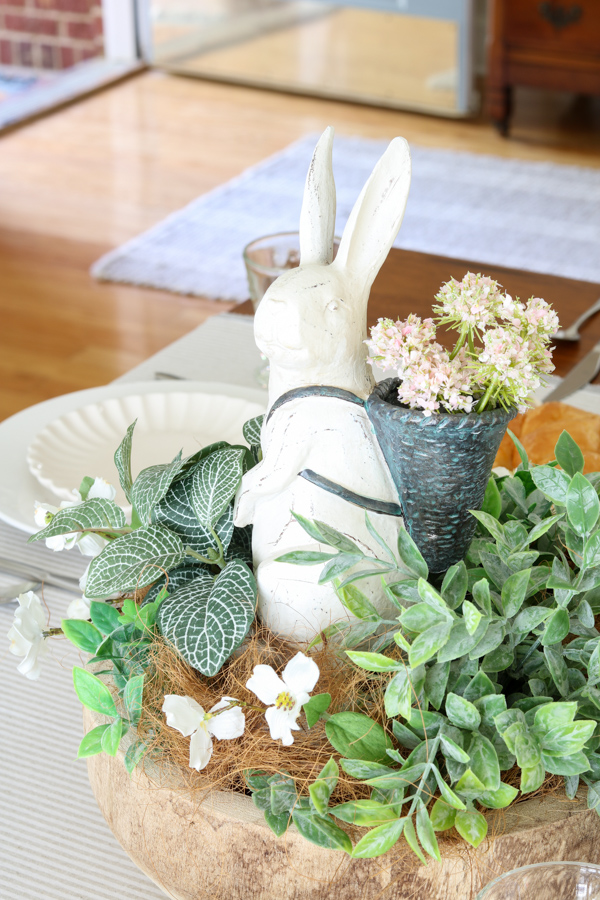
Here is a closer look at the bunny with basket backpack.
That's it! See how easy this centerpiece is to re-create. You may even have all the items needed in your home to make the spring centerpiece.
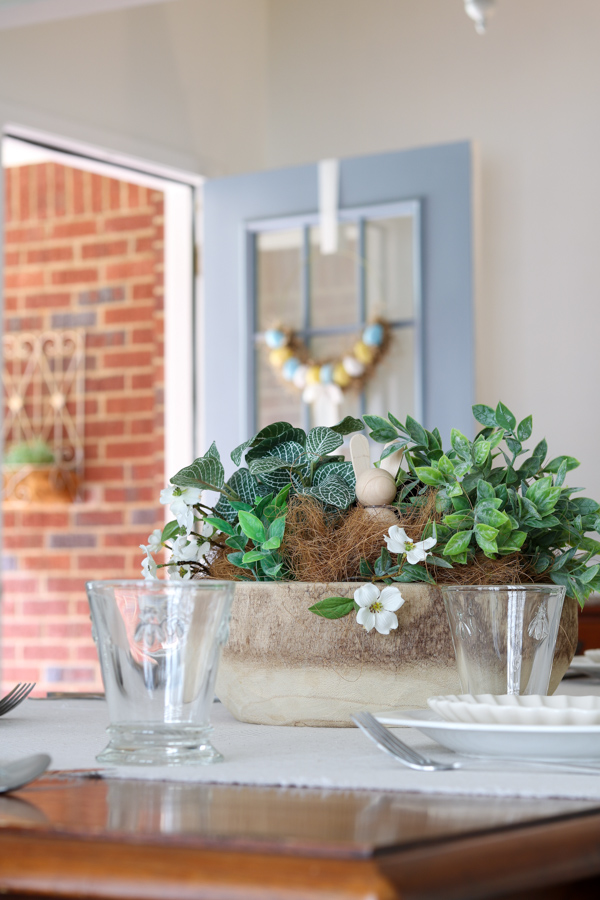
To finish my table, I tossed a neutral stripe piece of fabric across the center of the table. Then added white plates, off white salad plate, La Rochere glasses, and silverware. The rest of the table I kept open for the food we prepared for Easter dinner.
Conclusion
I love how this festive centerpiece turned out, and it looks amazing on my Easter tablescape! When it's done, place the centerpiece in the center of your Easter dinner table.
Crafting a homemade Easter centerpiece doesn't have to be difficult or take long. With this guide, you'll have the instructions and materials needed to easily create a beautiful centerpiece that will be the star of your Easter table.
It will look perfect on your dining room table for an Easter brunch or Easter dinner. Your family members and friends will be impressed with this stunning centerpiece.
Now that you know how to create your own DIY Easter centerpiece, it's time to get creative. Your centerpiece can be a lovely complement to the rest of your spring decor.
Do you have any Easter centerpiece ideas? Share photos of your masterpiece with us on social media and see how you can inspire others!
If you enjoyed this project, check out these other Easter crafts and Easter decoration ideas:
- DIY Wood Bunnies
- How to Dye Easter Eggs Naturally
- Easter Basket Ideas your Peeps are Sure to Love
- Creative Easter Wreath DIY from Dollar Tree
- How to Create a Fun DIY Easter Egg Garland In Just Minutes
- Decorating Your Home for Spring & Easter: Tips and Tricks
Happy Decorating!
