
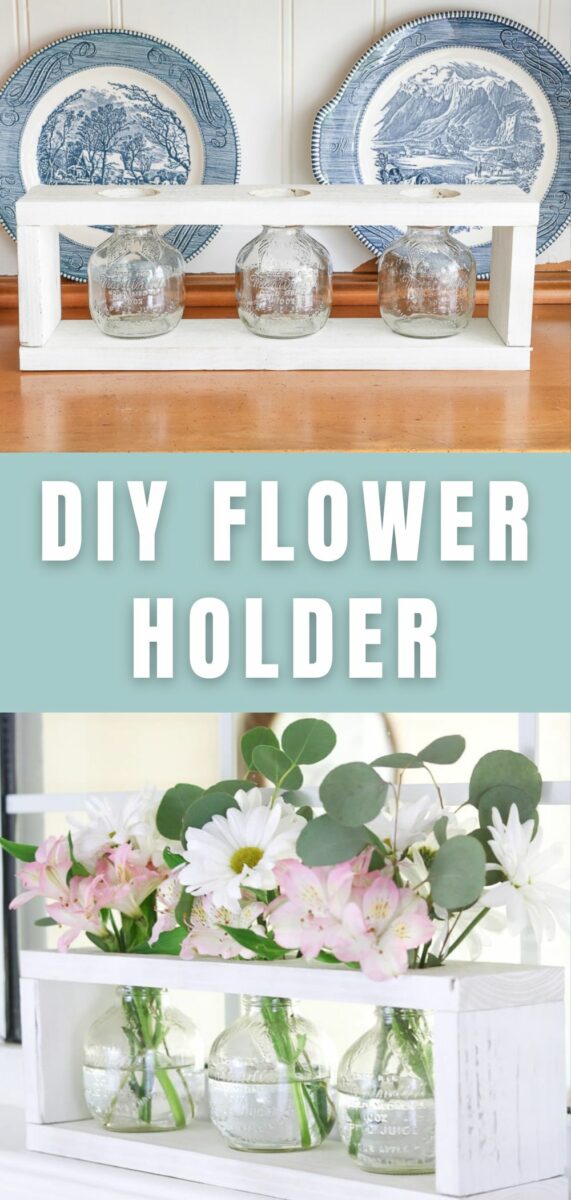
This farmhouse wooden flower vase DIY is easier to make than it looks. With a short list of items and a few tools you to can learn how to make a centerpiece with Martinelli apple juice jars.
Farmhouse Flower Vase DIY
Now let's get started with this vase DIY by gathering all your supplies.

Here is what you will need.
- 1″ x 4″ x 4′ board (I found this one at the Habitat ReStore)
- Finishing nails and hammer (or nail gun brad nailer)
- Saw (or miter saw)
- Chalk paint (Dixie Belle Cotton)
- Paintbrush
- Drill
- 2″ drill bit
- Martinelli 10 oz apple juice jars
- Quick grip
Once you have all your supplies laid out near you it is time to cut the boards. Let's Get Started!
Rather Watch Than Read?
Cut Wood
First, cut your 1 x 4 into these sizes. Then cut two boards at 16 1/2″ long and then cut two more boards at 4″ long.

Nail the Boards
Your next step is the nail the boards together. The end boards will sandwich between the top and bottom board.
Place the 4″ board in between the 16 1/2″ boards and use the quick grip to hold them together. Then nail one nail on each side.

Next turn it over, remove the quick grip and nail the other side. Now nail the other 4″ board on the other end.

Drill Large Holes
Now it is time to drill 2″ holes into one board. Mark the center and drill the center hole. Then drill the outer holes 2 1/4″ from edge of the board to edge of the hole.

Paint
It is time for some chalk paint. Sit your farmhouse apple juice vase on something when you are painting. It will make it easier to paint along the bottom.
Because raw wood is perfect for chalk paint, you will not need to prime unless you want a flawless look. But if you want an imperfect paint finish then start painting on the raw wood.
Directly apply one coat of paint with the grain. Let the wooden jar holder dry overnight.
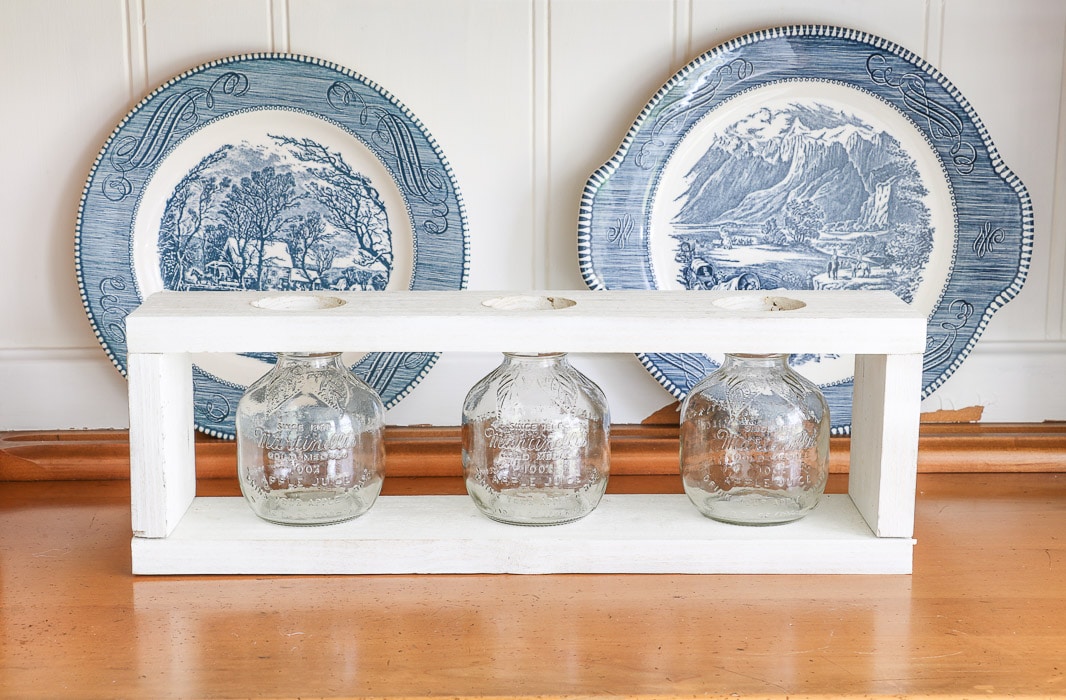
Martinelli Apple Juice Jars
We are almost finished. Just fill your apple juice jars halfway with water and slide them into the wooden jar holder. I like to rotate the jars so that the words are all facing the front.

Style your Wooden Jar Holder
Now for the fun part! Here are some ways I have styled my farmhouse style wood jar holder.
Table Centerpiece
My favorite is the pink roses and white flowers I used for my Valentine table decorations.

Window Decoration
I also love sitting it in my kitchen window and filling it with flowers according to the season.

Add whatever flowers make you happy. Sometimes I love to put some baby's breath in the jars. I like how they can last for a very long time.
But the main thing is to stay with smaller flowers.
Conclusion
This farmhouse wooden jar flower holder makes a great gift too.
Years ago in March, a sweet friend made one for me because my sister had passed. It was such a beautiful and kind gift! It warmed my heart so much until it has been out in my house every sense.
Another great idea is to make it for your lovey for Valentine's day, birthday, or just because you love them. Either way, it makes a great gift.
I hope this vase DIY has helped inspire you.
Here is a recap of the steps.
- Cut the board
- Drill the large holes
- Nail the bottom and one end
- Attach the other end
- Nail the top with the holes
- Chalk paint the farmhouse wooden vase holder
- Add the Martinelli jars
- Add flowers
I am so glad you stopped by to check out this wooden apple juice jar flower holder.
For more fun centerpiece ideas check out my dining room category. It will give you loads of ideas.
Happy Decorating!

If you enjoyed these ideas, please sign up for emails, so you don’t miss out on more fun decorating tips and ideas HERE.
What a wonderful project!! I love this!!!
Thank you!! 🙂
How do you empty & clean the vases? Are they just centered under the holes?
That is a great question. You can easily tilt them and pull them out to clean them. I run them through a wash cycle in the dishwasher about once a year to give them a good cleaning.
I would drill the holes before assembly.
Great suggestion!