
Learn how to make this simple DIY paper bag planter for your plants or flower pots. These brown paper bag planters make cute gifts or add style to your plant decorations.
If you love decorating with plants or giving them as gifts then you will adore this DIY paper bag planter. It is simply made from a brown paper bags and coated with a finish to give it a scrumptious patina and make it more water resistant.
DIY PAPER BAG PLANTER
Plants are so good for us. They add warmth to our interior design. They help clean the air and produce oxygen. They make a great gift bag. I could go on and on about plants but what makes plants even more beautiful is their pot or planter.
When decorating your home or giving one as a gift consider planters that add to the plant's beauty. But a homemade planter can make it even more special which is why I couldn't wait to show you how to make a simple brown paper bag planter for your precious plants.
WHAT IS A PAPER BAG PLANTER
A paper bag planter is basically a brown paper lunch bag that a plant will sit inside of to use as decorations in your home decor or to give as a gift to a friend. There are many different kinds of paper bag planters.
Some are naturally brown while others are white. You may even see paint designs or ones with writing on them.
Sometimes it is a simple brown paper bag tied with twine or coated with something to make it water resistant. But overall it is a way to add style to a plain old pot.
HOW TO MAKE A SIMPLE BROWN PAPER BAG PLANTER
Now that you know what a paper bag planter is let's make one beginning with collecting these supplies.
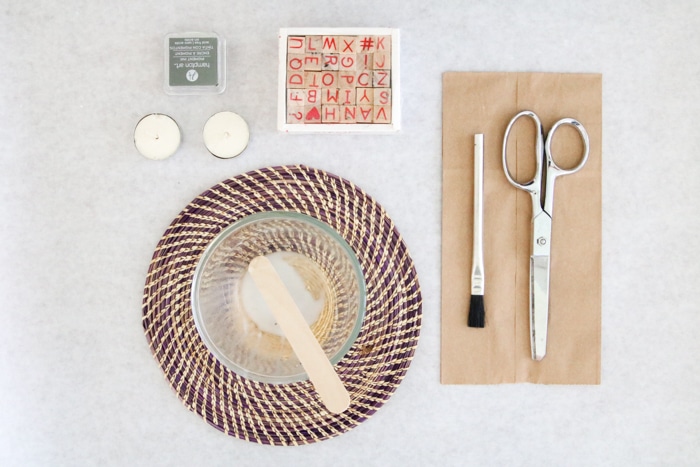
- brown paper bag
- scissors
- tea light candles (Dollar Tree)
- cheap glass bowl (Dollar Tree)
- cheap artist paintbrush (Dollar Tree)
- letter stamps
- stamp ink pad
- plant (grocery store)
- hot pad
Most of these items came from the Dollar Tree and the rest came from WalMart.
RATHER WATCH THAN READ?
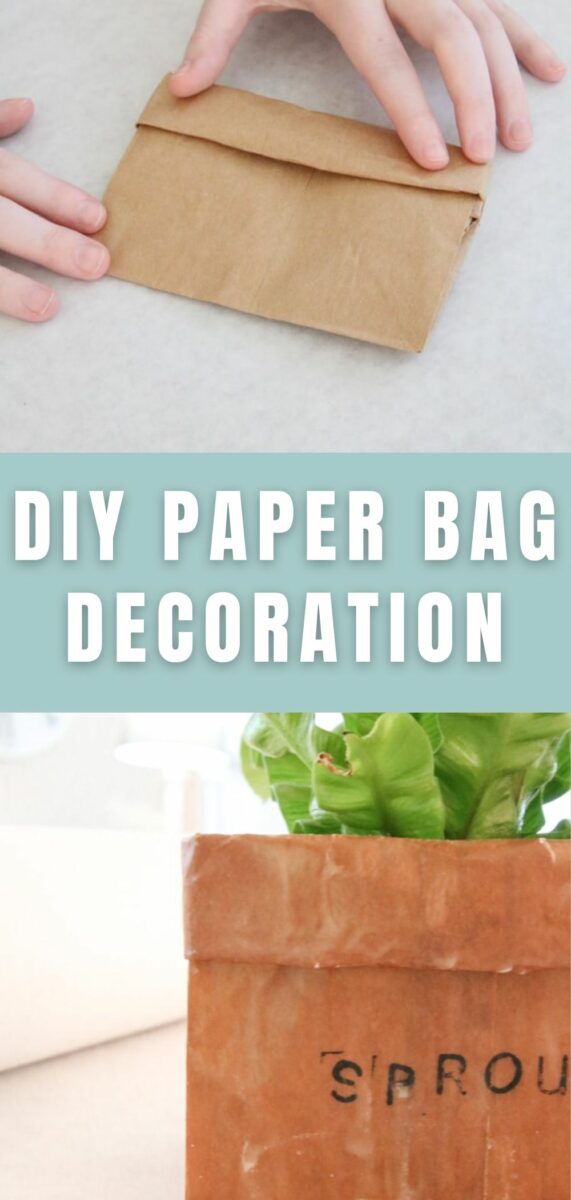
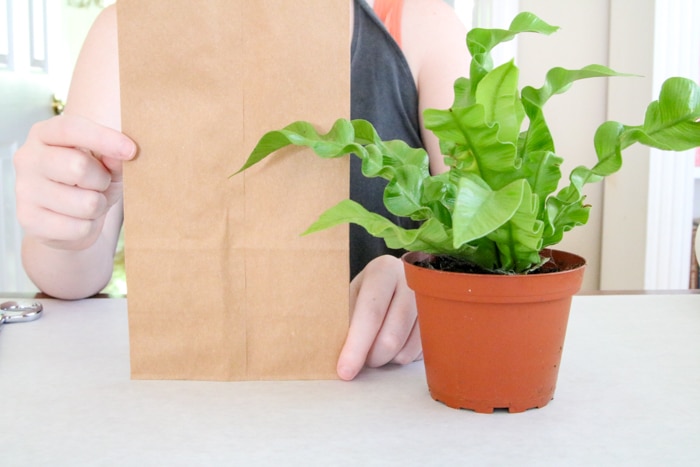
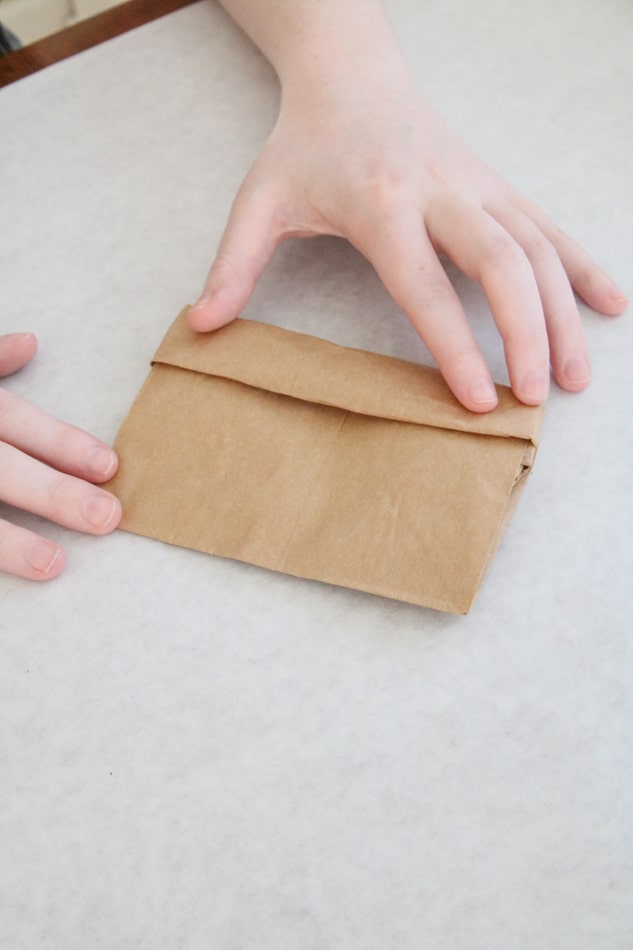
MEASURE AND CUT BAG
Start by holding your bag up next to your plant. Mark with a pencil on the bag where the top of the pots is.
Now add two inches to this mark. Then fold the bag down lining up the edges.
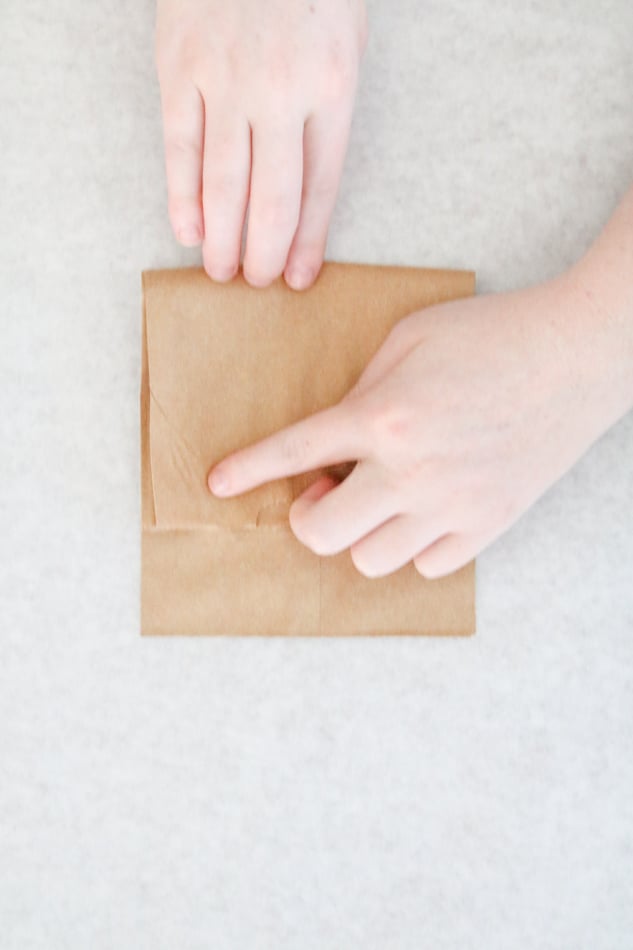
Next cut along the crease.
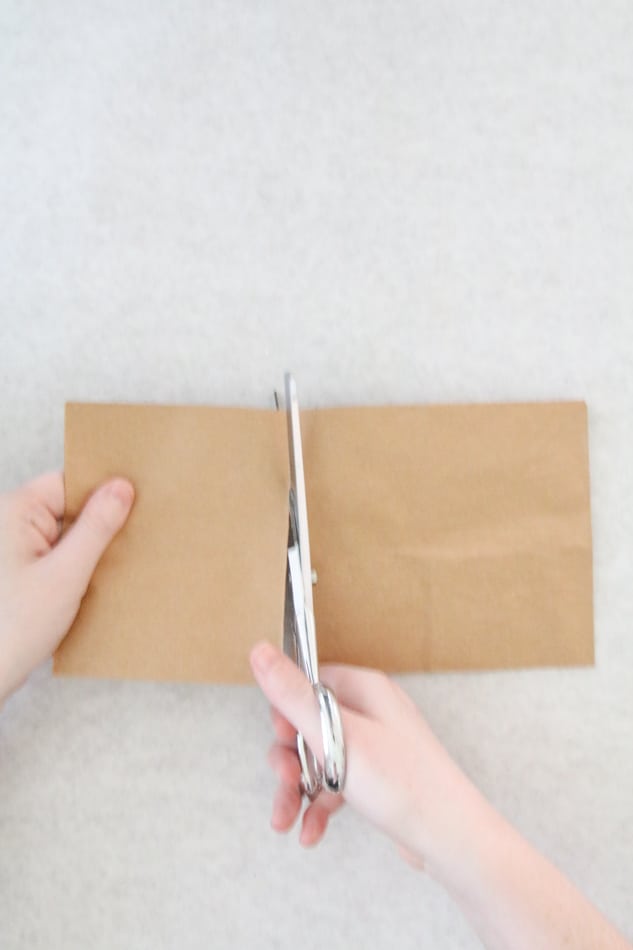
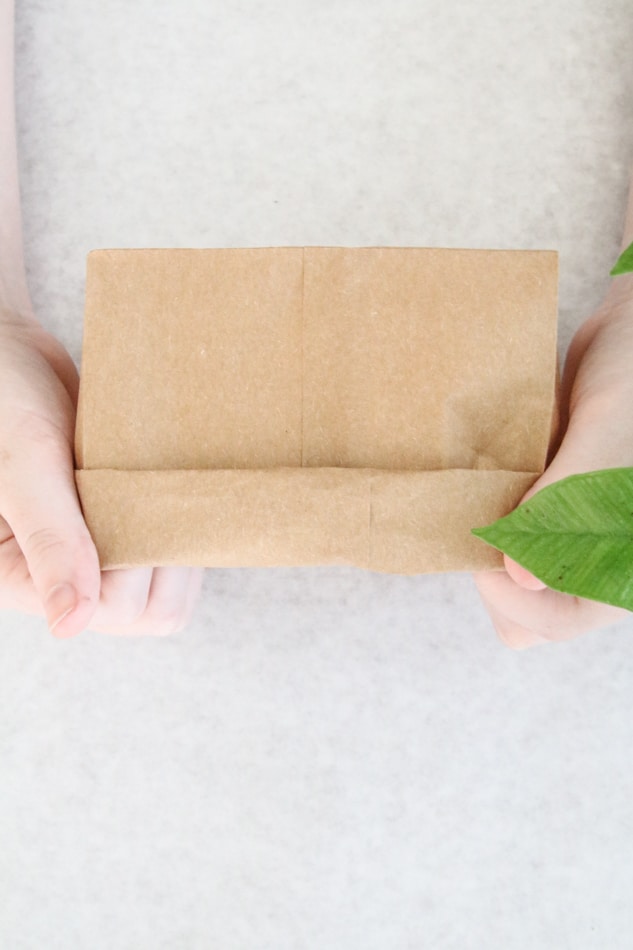
Then fold the top down two times making a one inch band around the top.

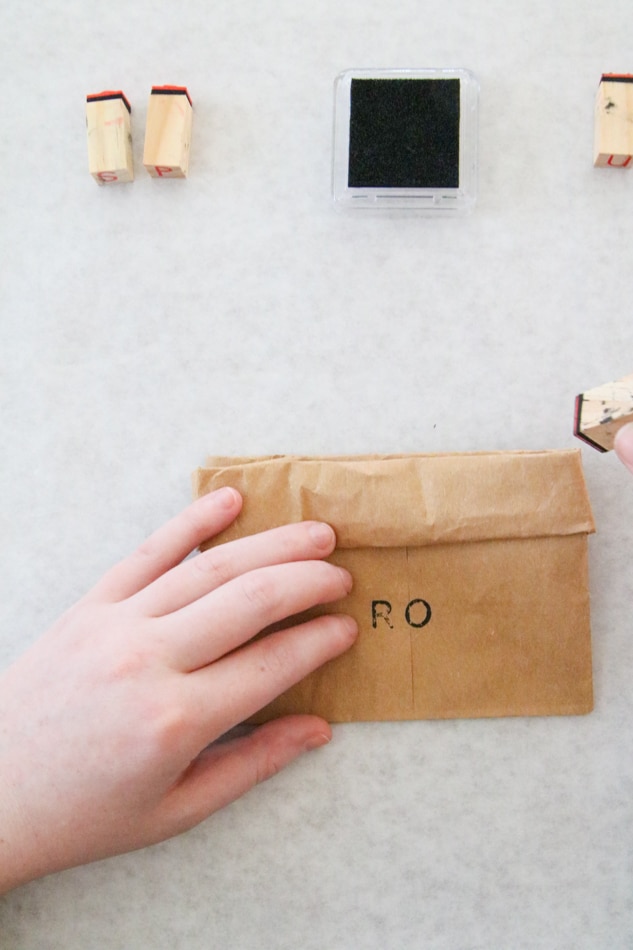
STAMP DESIGN ON BAG
Now fold your bag flat and stamp a design on the bag.
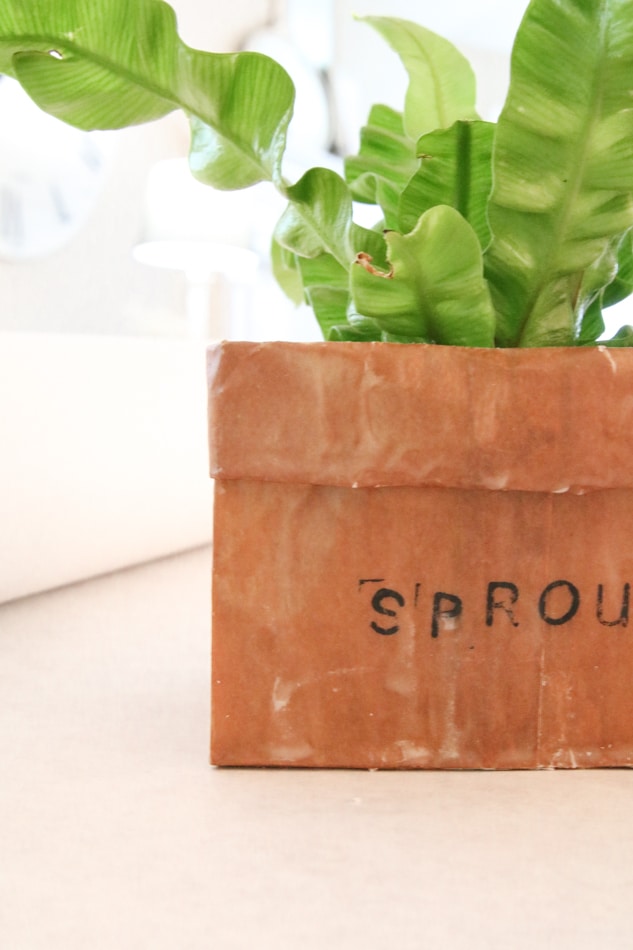
We choose to write a design on ours. On one bag we wrote flower in french on the band and on the other flower bag planter we wrote sprout. Have fun on this part if you don't want a design skip to the next step.
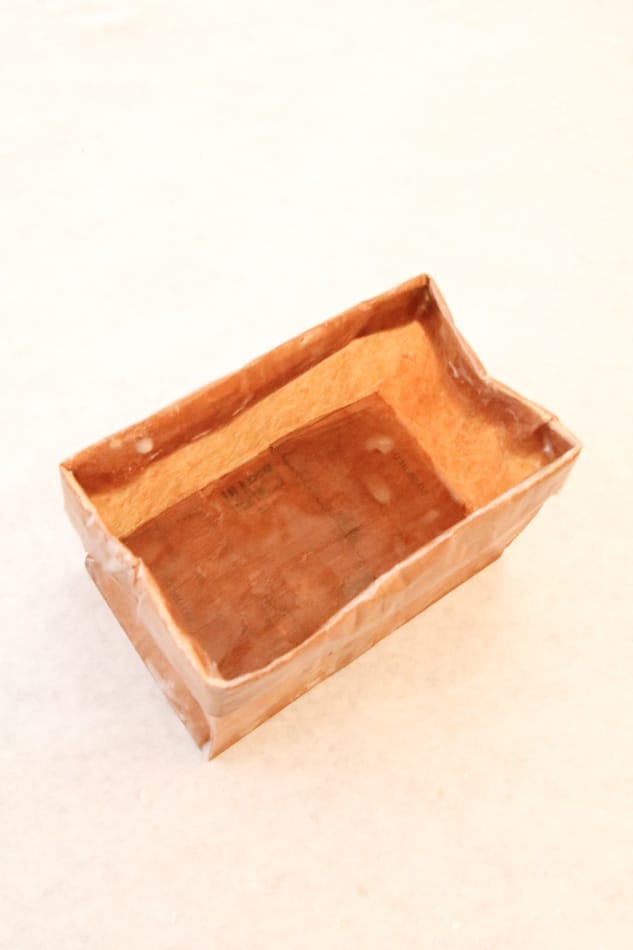
ADD WAX TO BAG PLANTER
Next, let's melt some wax and apply it to the inside and outside of the paper pot. First, remove the solid candle wax from the tea light tin and then slide out the wick.
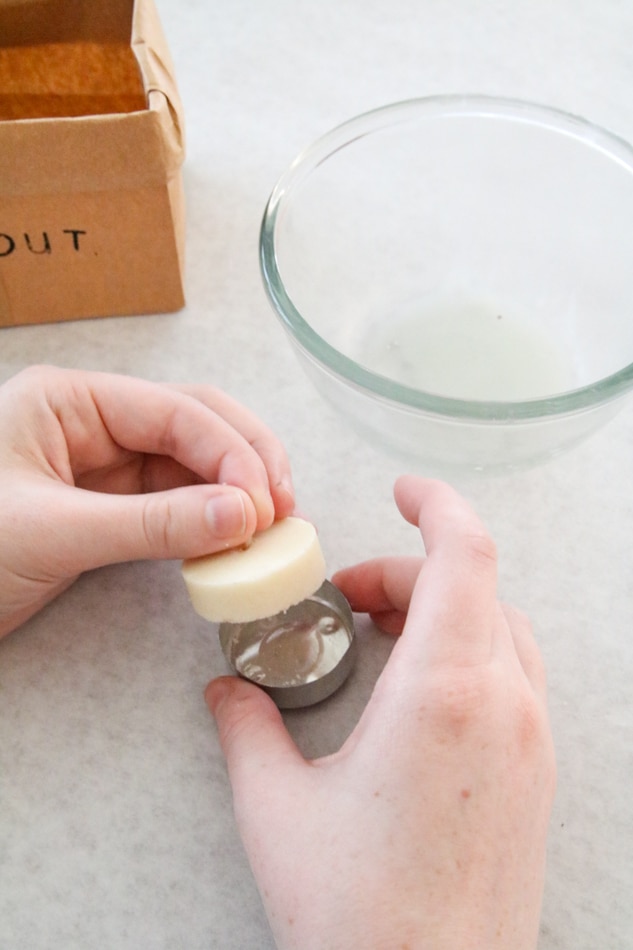
Now place the solid wax into the glass bowl and put it in the microwave for a minute. After the first minute take it out and stir it a little. Make sure to use a hot pad when removing the bowl from the microwave. The glass does get hot. Sometimes I use a craft stick and other times I use the paintbrush to stir the wax.

After you stir it a little put it back into the microwave for another minute and stir again. Repeat these steps until it has melted the wax and the wax is hot. The hotter the wax the easier it is to apply to the bag. When the wax is ready move it to your work surface but make sure to put it on a hot pad so it doesn't mess up your table.
APPLY WAX TO BAG
Now let's add the wax to the flower pot bag. Work in organized strokes by starting at the top on one side and painting the wax on as you go down. The thinner the brush strokes of wax the better. In other words, don't put too much liquid wax on your paintbrush.
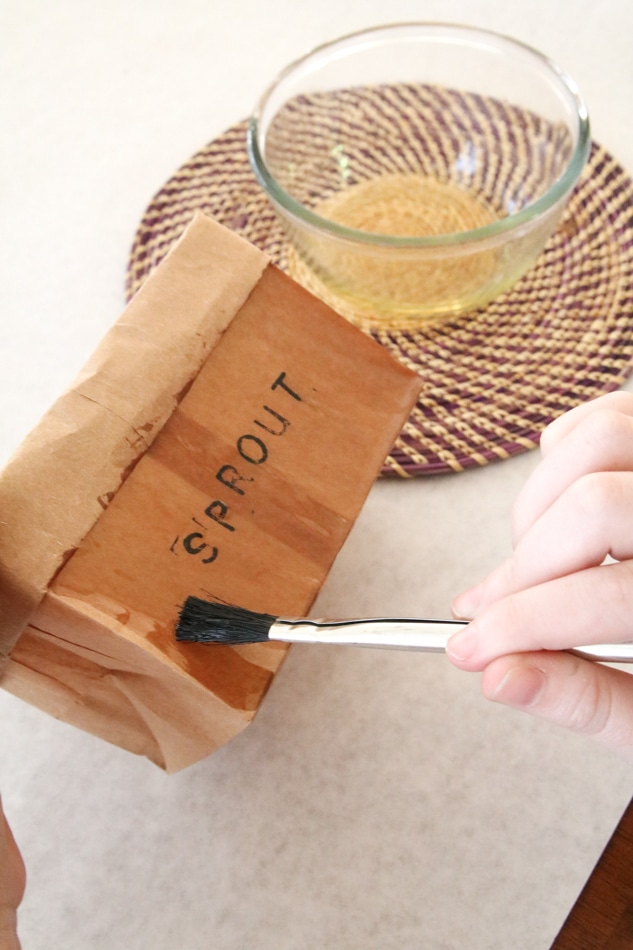
You can start on the inside of the bag first and then the outside or you can start on the outside and then move inside. It is really up to you. Also, don't forget the bottom of the bags but make sure the wax is good and dry before you sit it down on any surface.
ADD PLANT TO BAG PLANTER
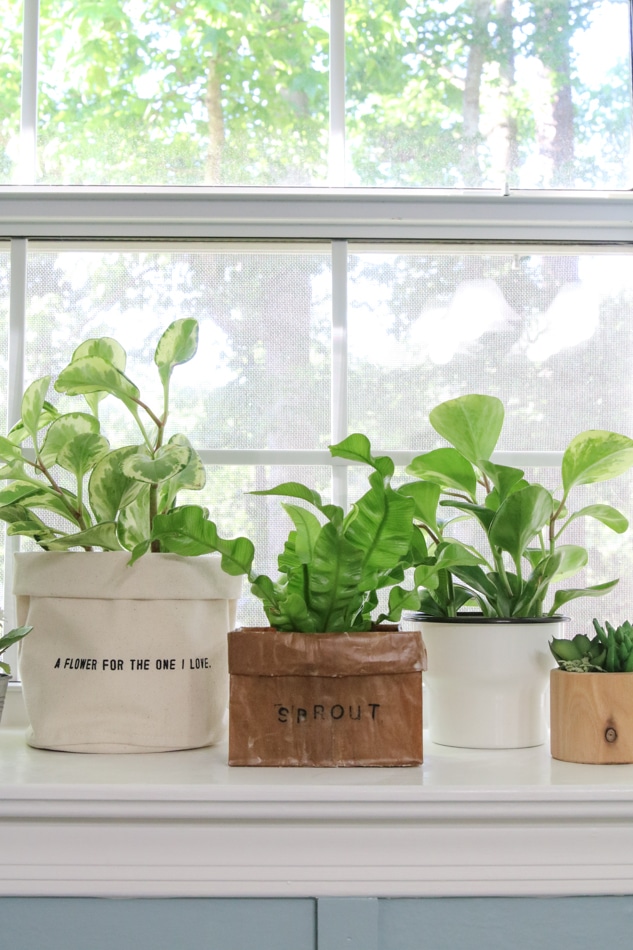
Next, all you have to do is sit your plant or flower pot into the bag. If your brown bag planter is a little higher than your pot place a small piece of wood or something in the bottom to elevate it. These make the cutest flower pots. And now you are all done.

CONCLUSION
See how cute and easy these DIY paper bag planters are. It is such a simple way to add style to your plants. One thing to keep in mind when moving around your brown paper planters, remember the wax can crack so be gentle. The wax gives the bag such a great patina and if there is cracking it's just another way of giving it character.
Now for a few ideas on where to put your brown paper bag planter. You can add it to a window full of plants like I did here.

Or you can place it on a bookcase along with books. Spring greenery looks so pretty on bookcases nestled with other accessories or books. Another new place is to add a planter bag in a grouping of accessories or on a mantle. They look so pretty sitting over a fireplace.
Another last thought is to repurpose items for your plants. Old galvanized buckets along with these paper planters would look super cute.
I hope you have found this easy DIY tutorial to be fun and helpful and if you need help with the best plants to buy to clean the air in your home.
Here is a post where plants are more than a decoration. And if you love decorating with plants then you will love this Dollar Tree DIY indoor herb garden decoration.
Happy Decorating!

Brillant Linda! I Love this idea so much. What a great idea for farmers’ market vendors too!
Thank you, Andrea! I am so glad you like it.
That looks so sweet, And something as simple as a tealight – who knew? (Well, apart from you of course!) Love this. Thanks.
LOL! Thank you! I am glad you think they are sweet.