

This DIY indoor herb garden decoration is easy to make turning a new pot into an old painted farmhouse pot. Learn how to build a herb garden indoors using Dollar Tree items. Easy and cheap small container gardening for your kitchen window for less than 15 dollars.
I am so excited to show you this DIY indoor herb garden project and how to build a herb garden indoors. Ever since I started eating healthier I try to use fresh herbs but walking outside on a cold day is not fun.
That is when I decided to create a cheap and easy container herb garden for my kitchen window. One that wouldn't cost me much, looked super cute with a vintage farmhouse vibe, and holding my most used herbs.
That is where the Dollar Tree came in and they didn't disappoint. Did you know they have a whole gardening section? I was so surprised. But enough about me let's get started making this small or tiny kitchen window vintage farmhouse herb planter.
Rather Watch Than Read:
DIY INDOOR HERB GARDEN
Before we get started planting your favorite herbs let's make this super cute farmhouse vintage pot using Dollar Tree item to hold your plants.
DIY DOLLAR TREE PAINTED FARMHOUSE VINTAGE POT
I love the look of chippy paint and distressed anything. One time I aged galvanized bucket with toilet bowl cleaner and it turned out amazing but this DIY farmhouse vintage pot called for white. Here is how I gave this new pot an old look.
SUPPLIES
- Dollar Tree galvanized bucket
- Sanding block fine grit
- Paper towel
- Paintbrush
- Paint (you can use any kind but I used Dixie Belle chalk paint because I had it laying around but acrylic white paint is the cheapest and it works great too)
- Glue gun and glue
- Jute rope
- Rock
- Soil
- Herb plants (I bought these from Trader Joes)
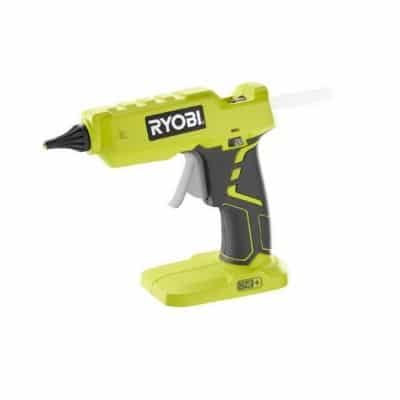
All these items came from the Dollar Tree except for the glue gun and herb plants. I use a Ryobi cordless glue gun. It is so much easier not having a cord.
Now that you have your supplies let's get started on how to age a new galvanized bucket with paint.

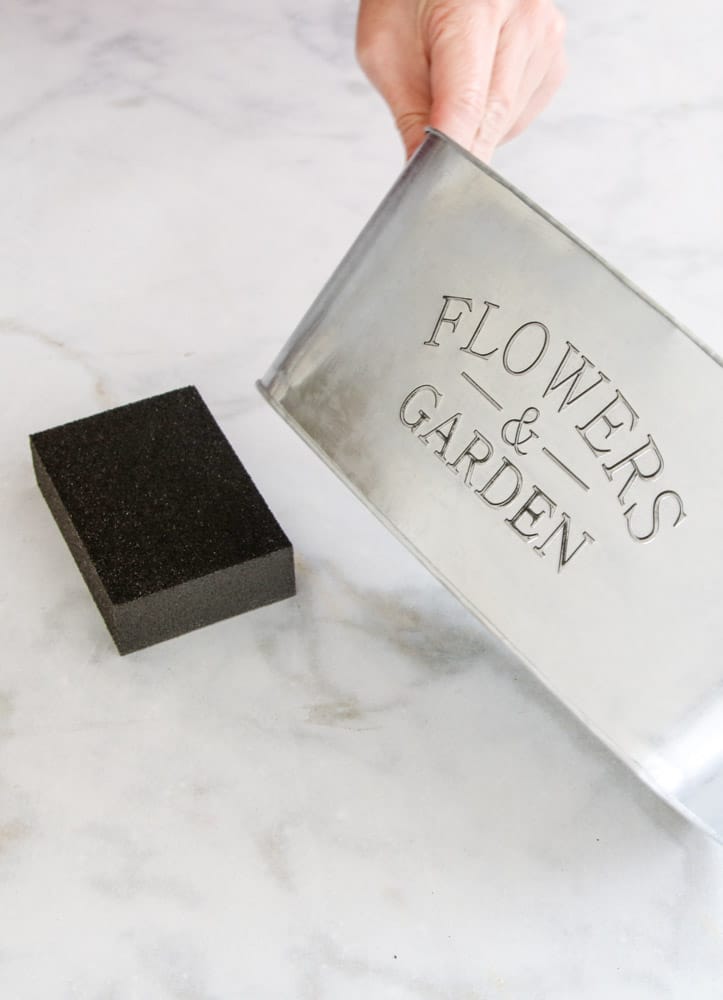
HOW TO PAINT AND DISTRESS A NEW GALVANIZED BUCKET
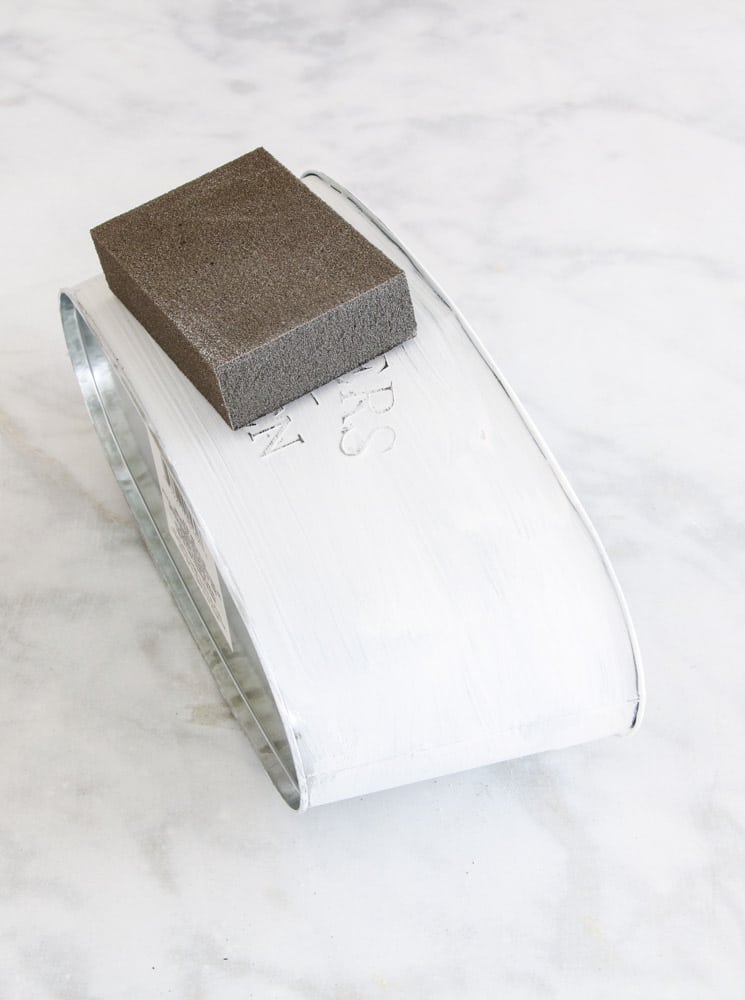
The most important step to getting the paint to attach to the galvanized material is sanding. Take a sanding block and start roughing up the outside of the Dollar Tree flower container.
Step One: Sand the outside
Simply move the sanding block across the surface many times until you can visibly see where it is scratching the surface. I went as far as to remove the black letter mostly on the letter.
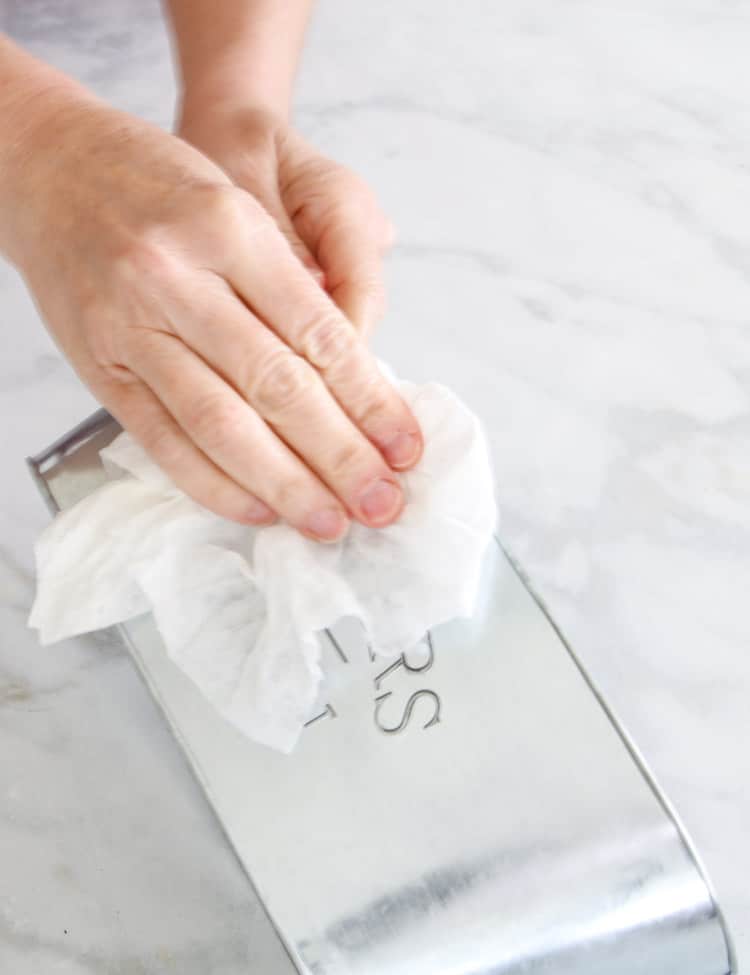
Step two: Remove grit with damp paper towel
Next, take a barely damp paper towel and wipe away all the grit on the outside.
Step three: Paint one coat of paint
Now brush on one thin layer of paint. It helps when you distress to only have one thin layer of paint on the outside.
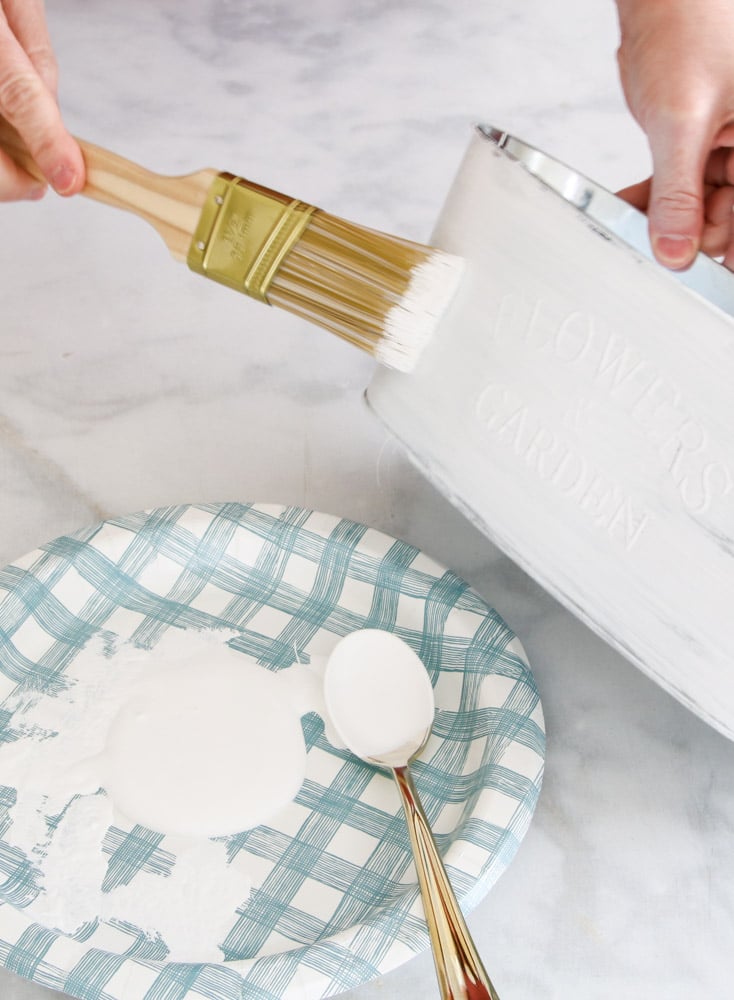
To make drying time go faster I used a blow dryer to speed up drying time by simply blow drying the paint on the outside until it didn't look shiny anymore.
Step four: Sand away the paint
Next, take the sanding block and lightly sand away any paint especially over the letter. I didn't remove all the paint on the letter but most of it and it hit other areas here and there to give it a distressed look.
Step five: Make drainage holes
Now make drainage holes in the bottom of the planter by hammering a nail through the bottom.
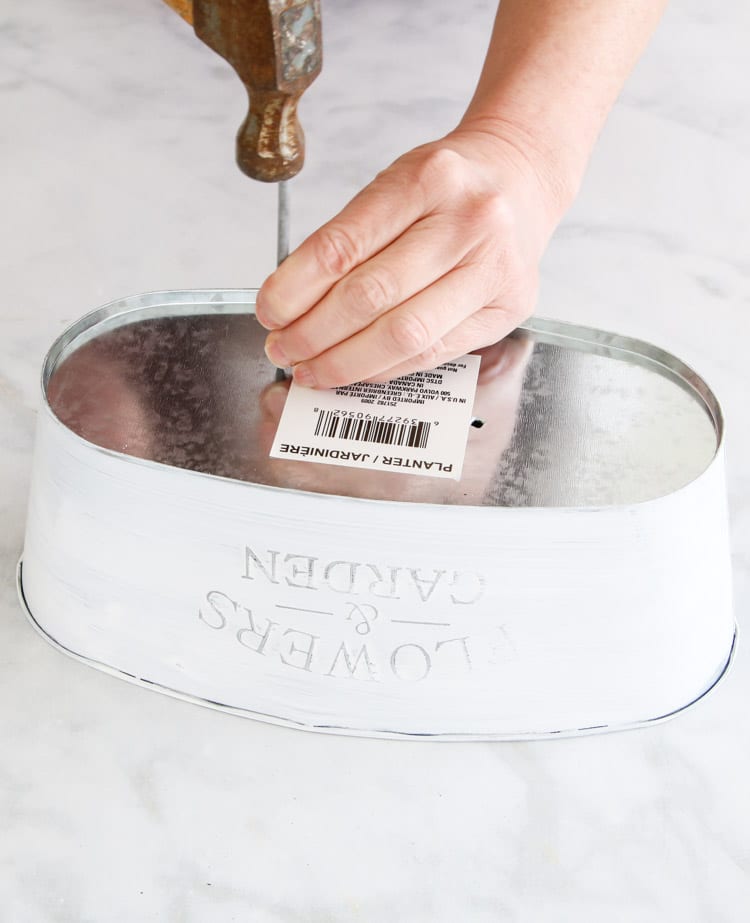
Make as many holes as you like but I tried to space them out so that the whole bottom would be able to drain well.
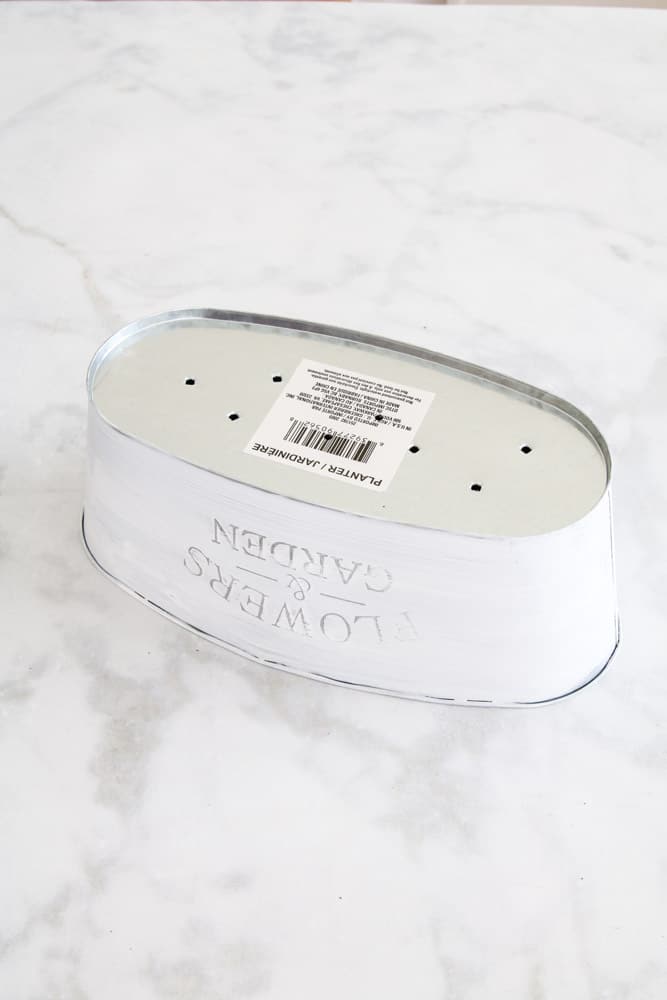
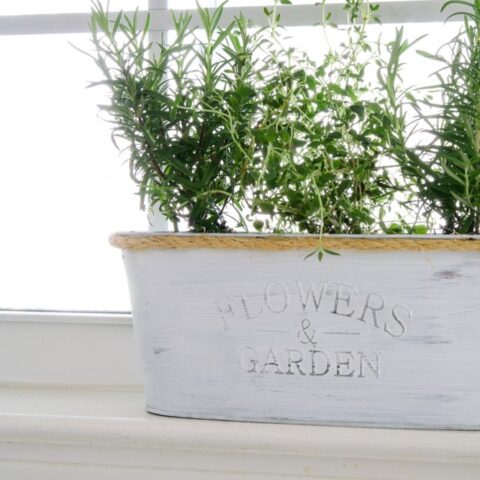
Step six: Glue jute rope around the top
After you finish distressing your herb pot run a bead of glue just under the lip on the top and attach jute rope onto the glue. Remember Dollar Tree has all these items except for the paint including the rope which I found in the floral section.

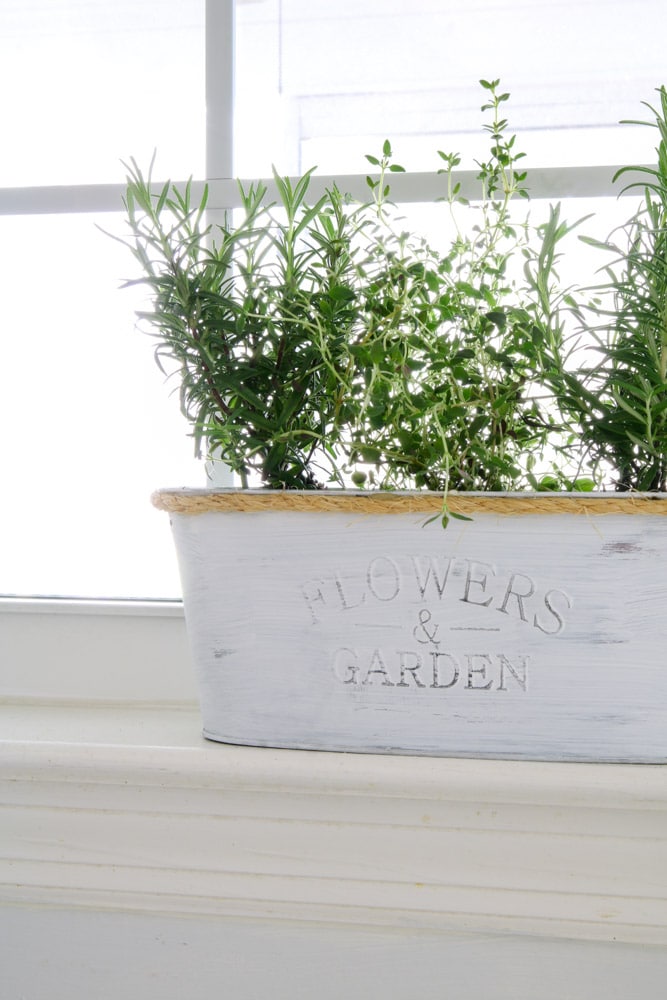
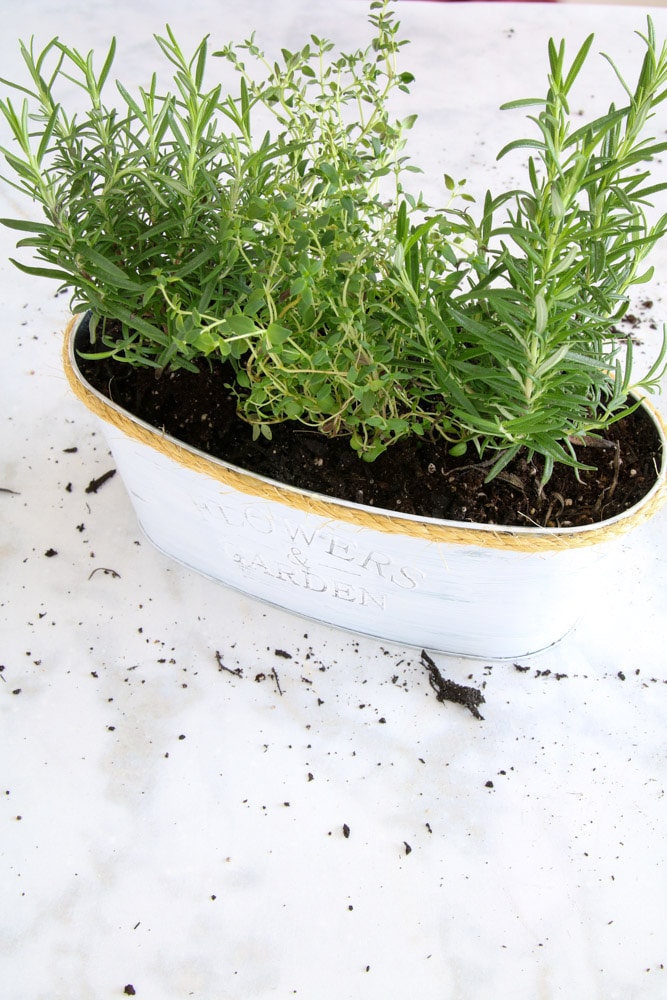
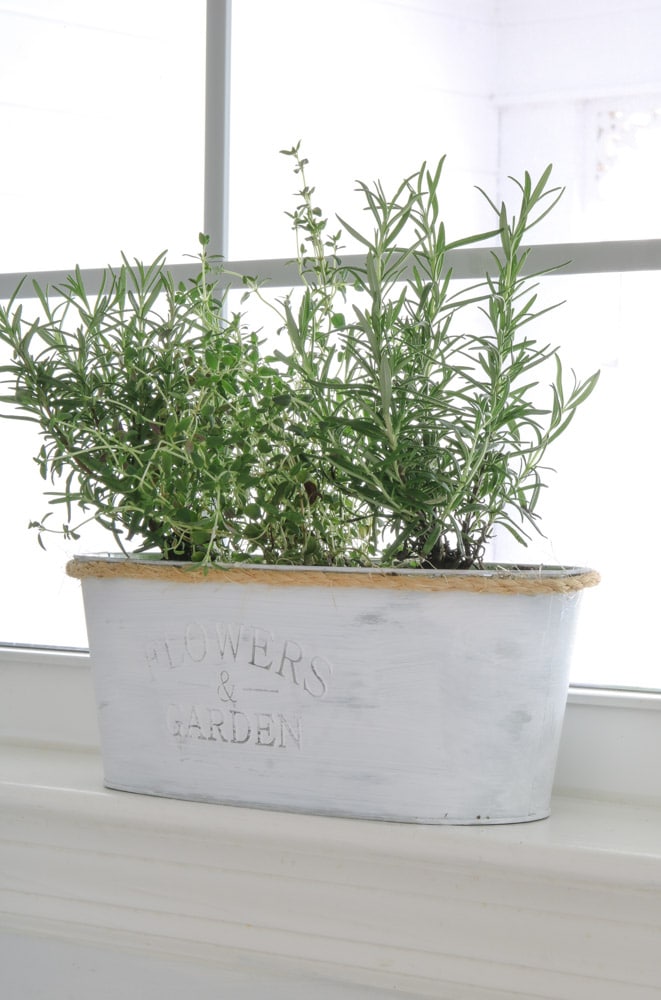
And your white distress painted herb pot is ready for plants.
How to Plant Herbs in a Small Herb Garden
I am no expert on plants but before you pick out your herbs here is a list of the best herbs that grow indoors.
I want to recommend using the herbs you use the most in your indoor tiny herb garden. I used thyme and rosemary. Rosemary is not considered a great indoor plant but I am giving it a try since it is in my window.
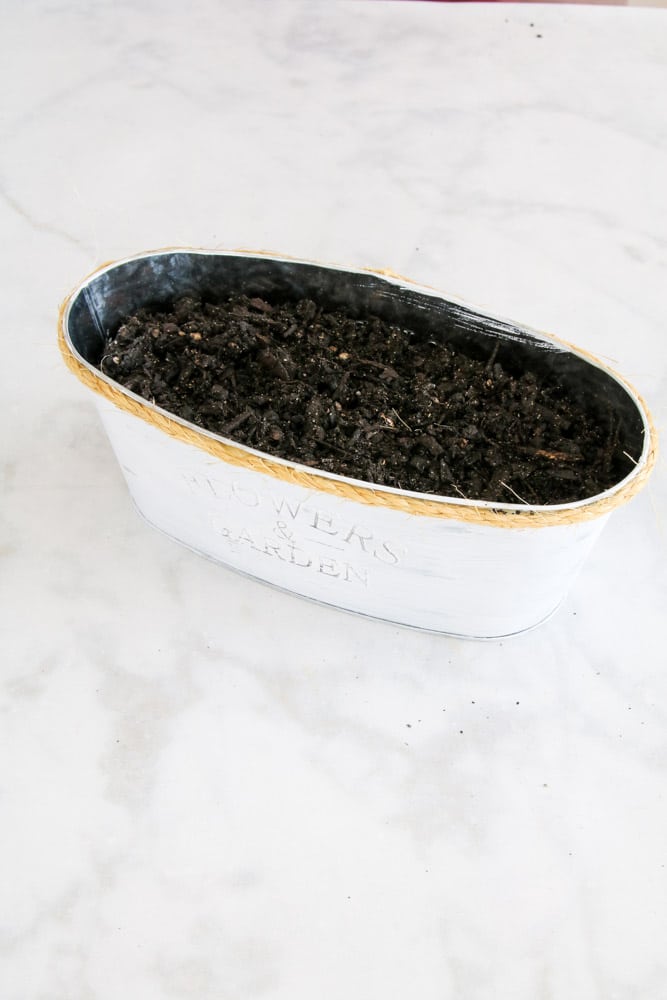
Now let's plant the herbs in your vintage farmhouse Dollar Tree pot. Begin by adding rock to the bottom of the pot. About a 1″ or less layer will do.
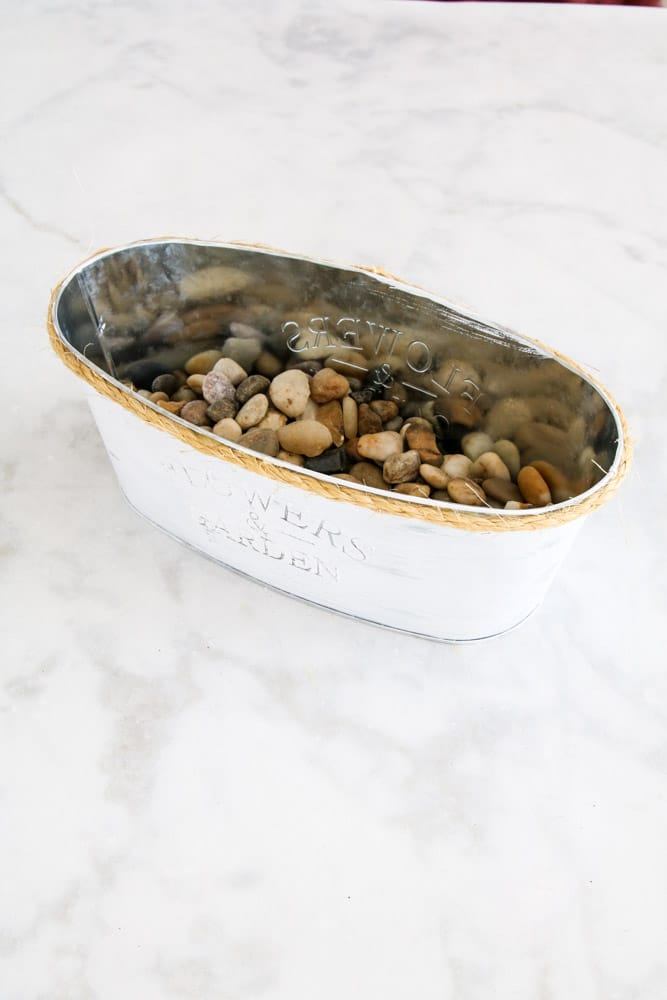
And then add soil about an inch from the top. There are lots of great tips on planting herbs in this herb gardening for beginners post.
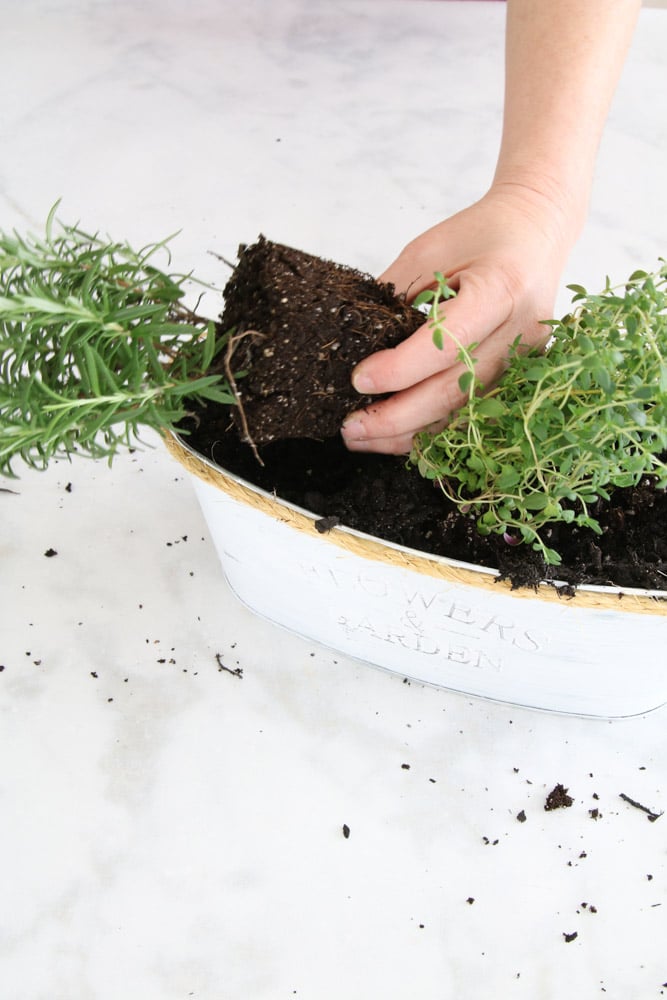
Now dig a hole, remove the plant from the pot and plant your plants. I have more detailed instructions on this part in my container flower gardening for beginners DIY. But basically, after you remove the plant from the pot squeeze your fingers into the roots to loosen the soil away from the roots.
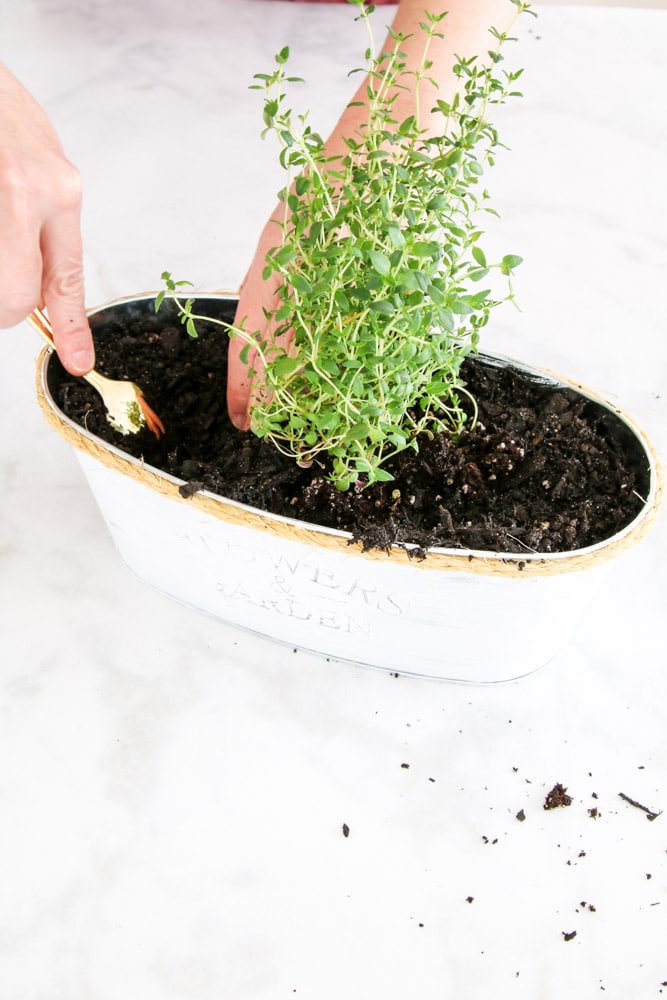
Then place the plant down into the hole and move fresh soil around it while packing it down by pressing down around the base of the plant.
After you finish adding your plants take a dry clean brush, I used a paintbrush, and brush away any soil from the jute rope.
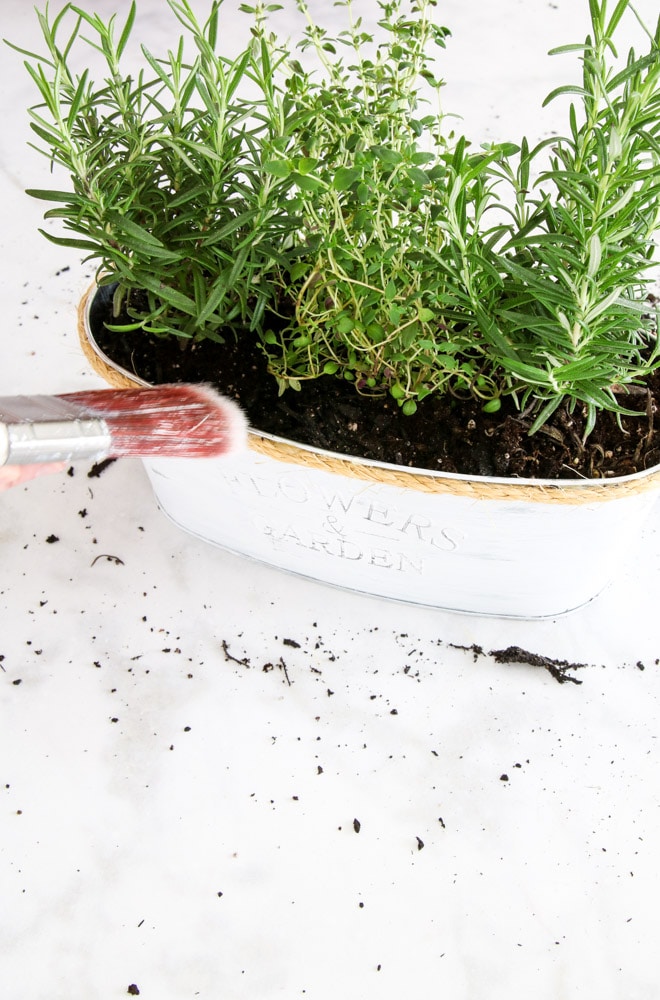
And guess what? You are all finished.
Now find a spot with lots of natural light for your tiny little herb garden.
Conclusion
Putting your small herb garden container near natural light is important. I bring my garden down into the sink and lightly water it when the soil feels dry to touch.
I read that herbs do not like to be overly wet so I try to keep my watering at a minimum but honestly I am not an expert. Take my advice and look to those who know all about gardening and herbs for keeping them alive advice.
I love how this DIY farmhouse vintage container herb garden turned out and I loved sharing how to build a herb garden with you. If you need help deciding on what to plant in a container I have a whole post on container flower gardening for beginners. It talks about what plants and flowers to plant in one pot.
And if you love beautiful containers for plants try this simple DIY paper planter. This is a popular home decor idea for indoor plants.
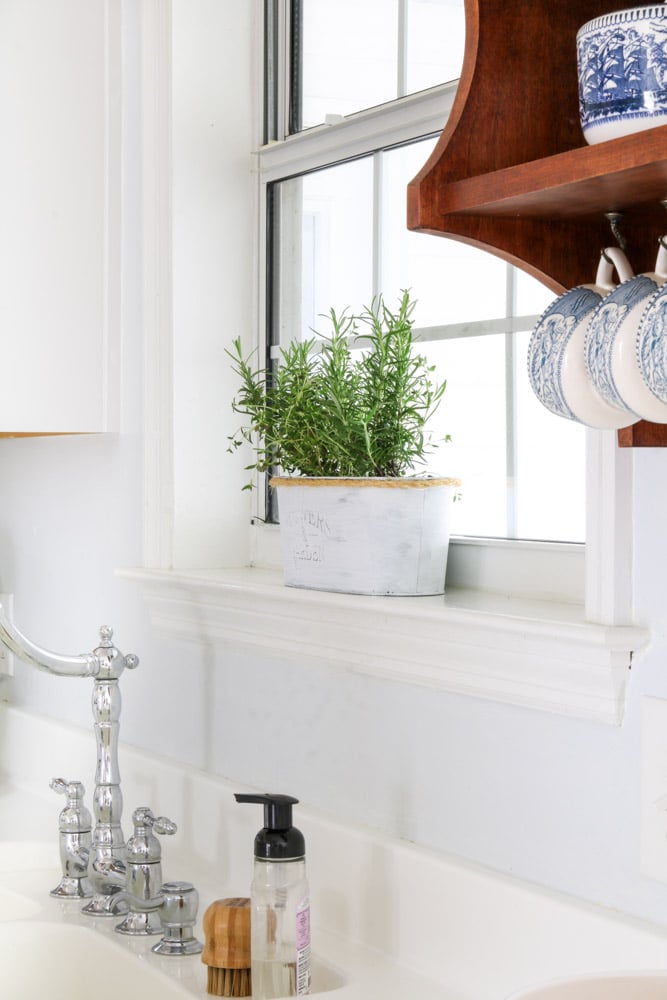
As you can see my herb garden is sitting in my window so now when I cook I can easily cut pieces off and toss them in my food. If you like drying herbs try my DIY dried flower wall hanging. Another fun idea to decorate with your herb garden is to use it as a centerpiece in a tablescape like this DIY dollar store spring tablescape. It is another great place for herbs.
Happy Decorating!

DOLLAR TREE DIY INDOOR HERB GARDEN DECORATION
Turn a new tin from Dollar Tree into an old farmhouse vintage painted flower pot for an indoor herb garden.
Materials
- Dollar Tree tin
- Dollar Tree rope
- Dollar Tree soil
- Dollar Tree rock
- Paper towels
- Sanding block
- Paint
- Other materials: herb plants
Tools
- Dollar tree tools
- Fine sanding block
- Paintbrush
- Other tools
- Glue gun
- Glue stick
- Hammer
- Nail
Instructions
- Sand outside of the pot
- Wipe grit away with a damp paper towel
- Paint a thin layer of paint on the outside of the pot and let dry
- Sand away paint over the lettering and lightly in other places to distress
- Glue rope under the lip of the pot with a glue gun
- Hammer a nail into the bottom to make grain holes. Make many holes.
- Place rock in the bottom of the pot
- Place soil over rock an inch below the top of the pot
- Scoop a hole for the plant
- Remove the plant from the pot and squeeze roots to loosen them
- Place the plant into the hole and move soil around the base while packing it down
- Add all the plants and you are done.
- Find a place to sit your container herb garden where it get lots of natural light.
Recommended Products
As an Amazon Associate and member of other affiliate programs, I earn from qualifying purchases.
So cute, Linda. I hope my dollar store will have one of those adorable “little tubs.”..
I, too, love herbs ???? and having them in a kitchen window, ready to pick, it doesn’t get any easier than that. Keep on inspiring us.
This is so cute, but I don’t see anything under to pot to catch the water that will drain out. What do you suggest using under your oval tub?
How do you keep the pot from draining down your window sill and wall?
This is a very good question. I have a dish drying rack that sits over my sink. I bring the pot down and water it and let it dry completely and then I return it to the window sill. Another idea is to get a tray or rectangle plate to place under it to catch the water.
It’s so adorable however, I can’t find any thing under the pot to collect the water which will eventually drain out. What are your suggestions for putting underneath your oval tub?
That is a very good question. I pull it down off the window seal and place it on my drying rack and water it. I wait until it has stopped draining before placing it back on the window seal.