

I'm excited to share one of my favorite DIY projects today: how to frame canvas art. Framing canvas can instantly transform any space and give your favorite artwork the attention it deserves. Plus, it doesn't have to be an expensive or complicated process.
With a little bit of creativity and some easy-to-find supplies, you can create a stunning frame for your canvas art that perfectly complements your home decor.
So, let's dive in and get started on this fun and rewarding project!
My daughter, Hannah, graduated from college with a major in Studio Art. Now that college is over, we have many oil paintings to consider framing. With so many pieces of art, I knew I needed an inexpensive way to frame them, and this is how this story begins.
Recently I saw someone framing a canvas painting on social media that was inexpensive and I was amazed at this easy DIY.
This got me thinking, I can do this, and because it is super easy, I can test it and share it with you. But I decided to research more to see how other people make their own canvas art frames, and I found all kinds of creative and different ways.
So I thought, let's give this a try and frame one of Hannah's canvases and, after experimenting, I am sharing how to frame a canvas cheaply and easily. After reading this post, you will be amazed and probably never buy a frame again. I know I'm ready to frame all of our unframed canvases.
How to Frame Canvas Art FAQs:
Can you Put Canvas Art in a Frame?
Absolutely! But it is different than framing paper prints or photos where you would use a traditional frames with glass. You can create your own frame which will be open in the back and does not require a glass front.
How Do you Frame your Art Canvas?
Custom framing can be very expensive. But, believe it or not, creating wooden frames for your canvas art is not complicated or expensive. These simple frames are easy and inexpensive to make. You'll need a few supplies you can get at your local home improvement store like Home Depot and craft supplies. I've broken the process down in this step-by-step tutorial I think you'll find easy to follow.
How to Frame Canvas Art: Materials Needed
To create an inexpensive DIY frame, you'll need a few materials that are easily accessible. Here are the materials you'll need:
- Wood Trim: This will serve as the frame for your canvas art. You can purchase this from your local hardware store or online. If you measure your art before buying, you'll know how much wood you need.
- Wood Glue: This will be used to glue the wood trim together.
- Nail gun or Finishing Nails and Hammer: This is optional but will secure the wood pieces together
- Miter Saw or Miter Box: This will be used to make the 45-degree angle cuts on the wood trim.
- Sandpaper: This will be used to smooth out any rough edges on the wood trim.
- Paint: Use this to paint the wood trim to match your canvas art.
- Paintbrush: This will be used to apply the paint to the wood trim unless you use spray paint then you won't need a paintbrush.
- Tape Measure: To get exact measurements of your art.
- 90 Degree Clamps: optional
Steps to Frame Canvas Art for Cheap
Now that you have all the needed materials let's start framing your canvas art. Here are the steps to follow to make your own wooden frame:
Step 1: Measure the Unframed Canvas
The first step is to measure the size of your canvas artwork. You'll need to know the exact measurements to cut the wood trim to the right size.
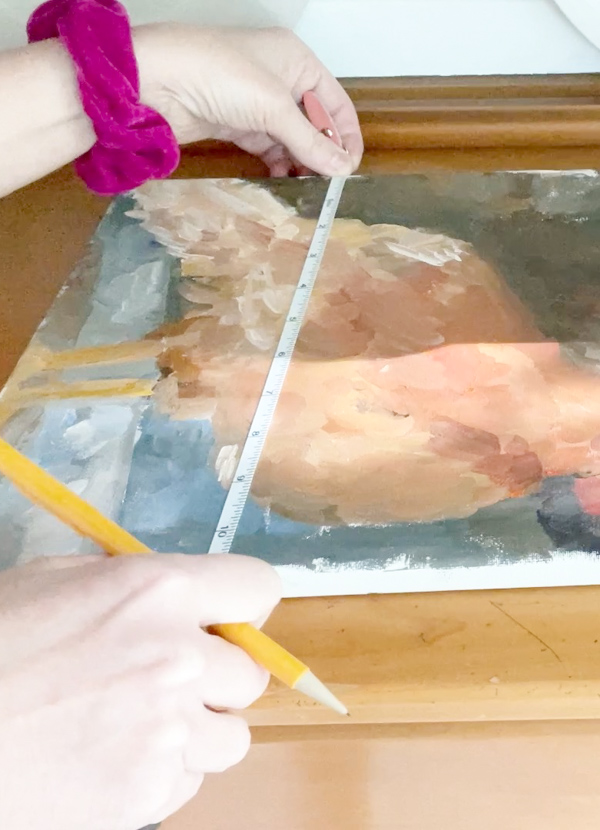
Measure the width and height to determine the length of your wood but also the thickness of the canvas to get a piece of wood that is that thickness or a little less, depending on the look you want.
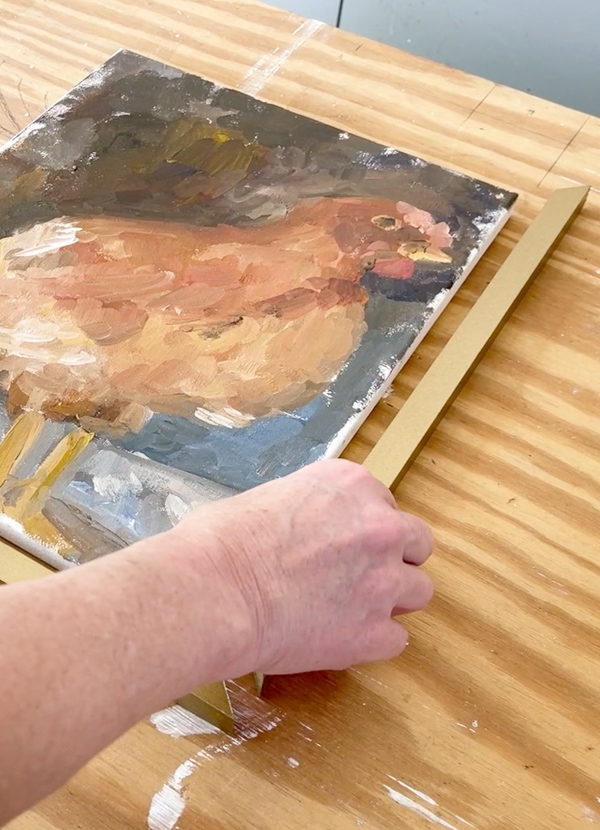
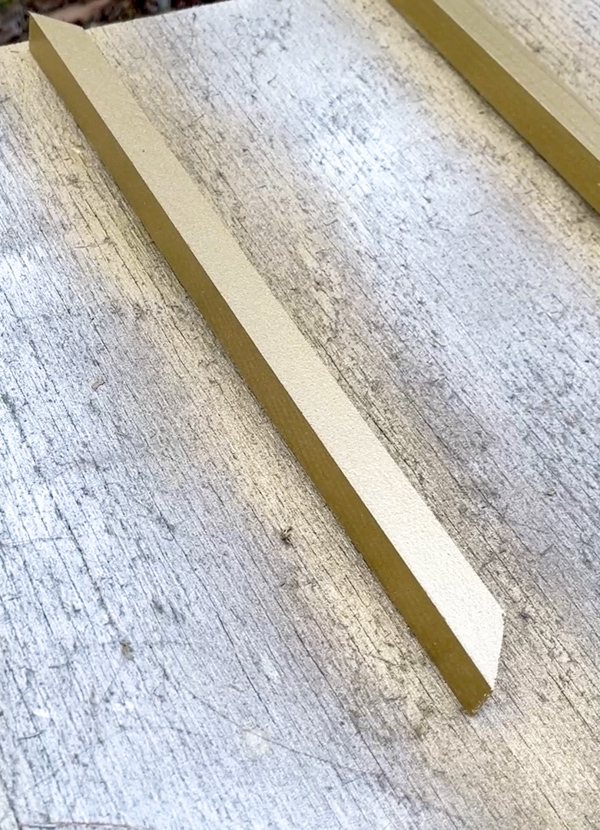
Step 2: Cut the Wood Trim
Using a miter saw or a miter box, cut the wood trim to the measured length. Cut two pieces for the top and bottom of the canvas and two pieces for the sides. For best results, make sure to cut the wood trim at a 45-degree angle to create the frame corners.
Step 3: Sand the Wood Trim
Once you have cut the wood trim, use sandpaper to smooth any rough edges from the trim pieces. This will ensure that the frame looks neat and tidy.
Step 4: Glue the Wood Trim Together
For the next step, using wood glue, glue the corners of the frame pieces together. Hold the corners together until the glue dries or nail together.
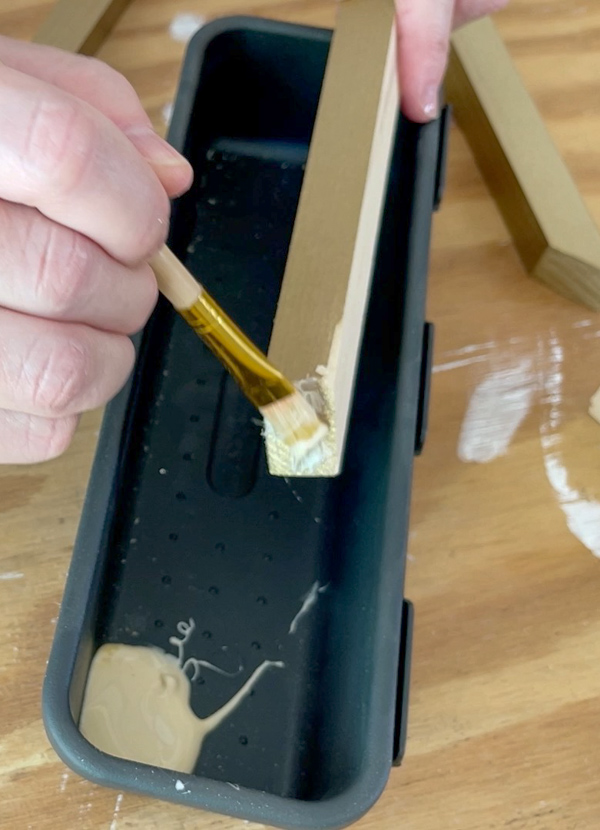
I made these wood 90-degree pieces to help make a perfect 90-degree angle, but you can purchase a special 90-degree clamp at the hardware store.
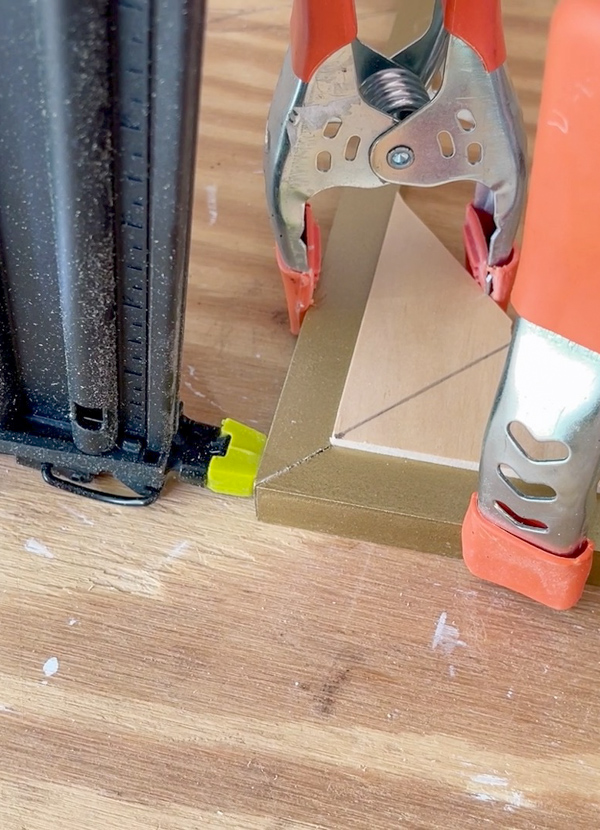
Next, shoot a nail into the end to help secure the corner. I used 1/2″ nails. Don't worry; your nail holes won't be noticeable.
Step 5: Paint the Wood Trim
Once the glue has dried, paint, wood stain, or leave unfinished the wood trim to match your canvas art. You can use any color that complements your canvas art.
I used gold spray paint applying three coats over the entire frame. I also painted small ornate pieces to apply to the corners of the frame. This extra step makes a simple wood frame a little more decorative.
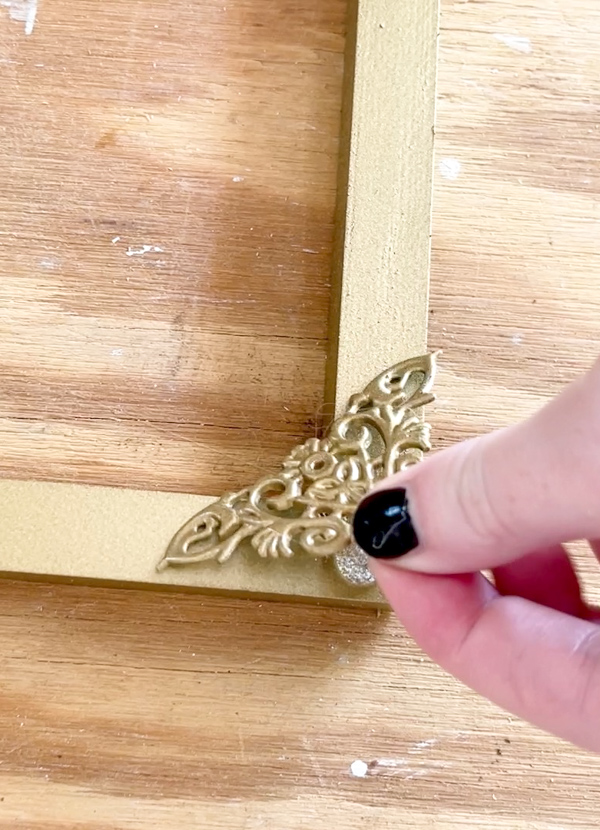
After all the paint was dry, I attached embellishments to the corners of the frame with hot glue.
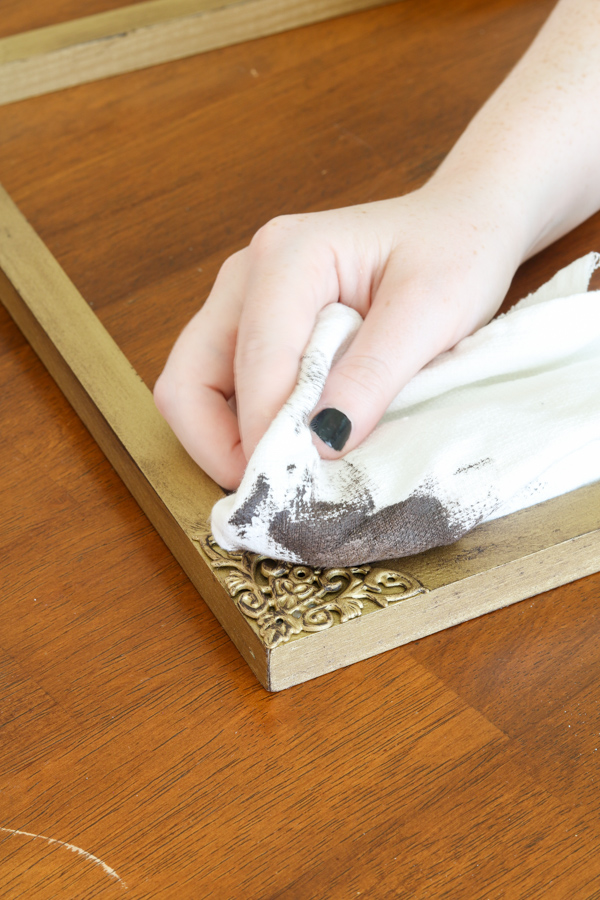
And last, I wiped on brown wax to give it an aged, vintage, or distressed.
Step 6: Attach the Canvas
It's time for the final step. Now that the frame is ready, lay the canvas art face down on a flat surface. Then, set the frame over the canvas and secure it using small nails, staple gun, or hot glue.
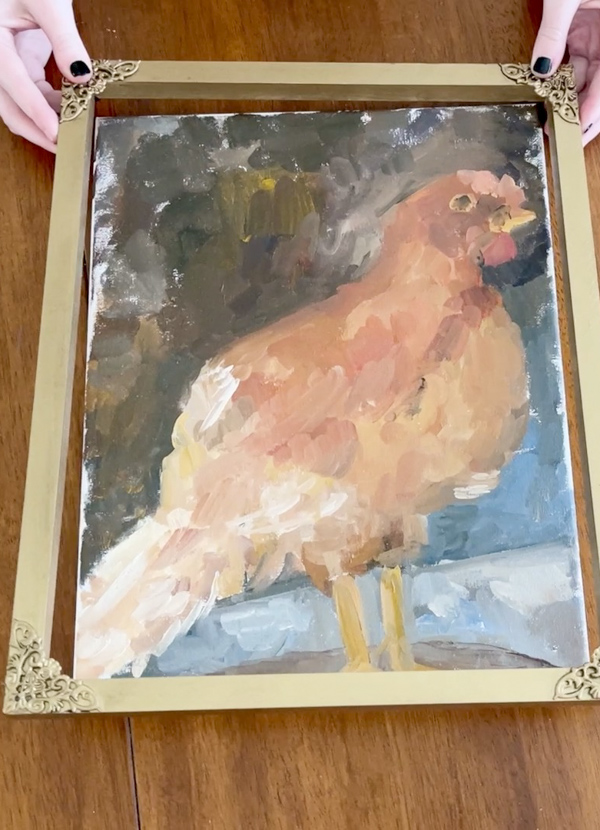
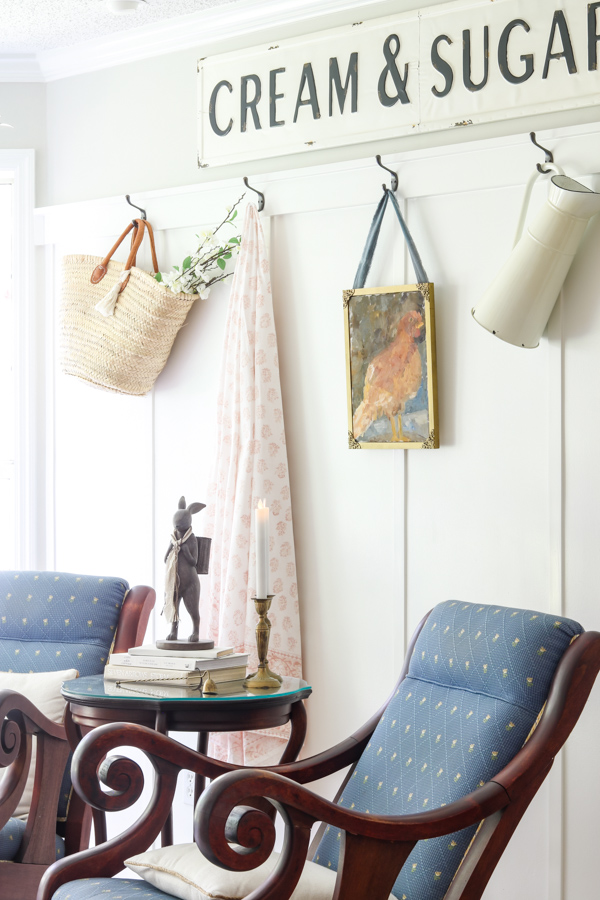
My frame was so snug that we didn't need to secure it from behind but if you have any movement make sure to secure your piece of art inside the frame. Now our original painting is beautifully framed.
How to Hang Your Framed Canvas Art
Congratulations! You've successfully framed your canvas wall art for cheap. Now, it's time to hang it up. Here are a few of the best ways to hang your framed canvas art pieces:
- Picture Hangers: You can attach picture hangers to the back of the frame and hang it on a nail or screw in the wall.
- Command Strips: You can use command strips to stick your framed canvas to the wall, basically. This is great for apartments or dorm rooms because it doesn't damage the walls.
- Ribbon Hanger: Another idea to hang your canvas is with ribbon. Staple the ribbon to the back of the canvas frame and then place the ribbon over a hook.
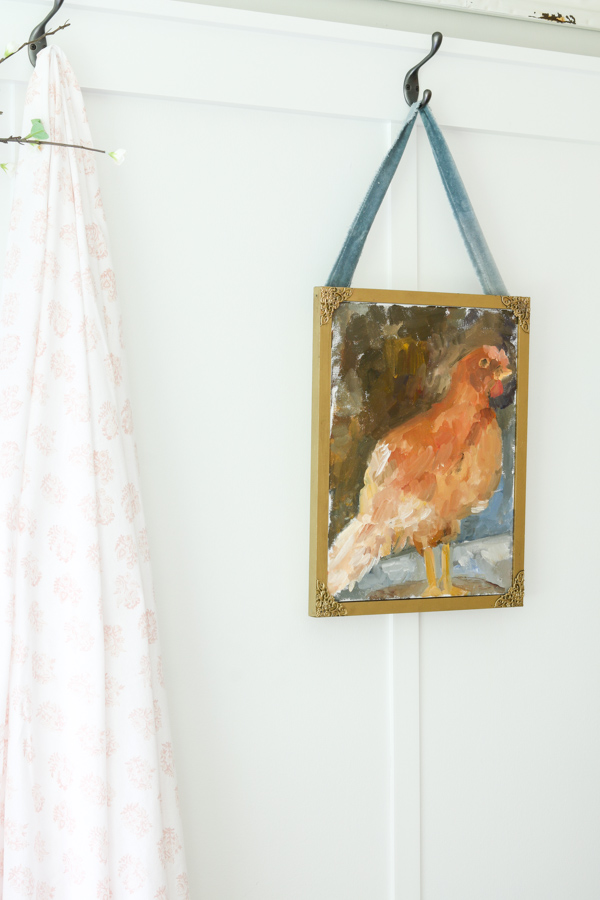
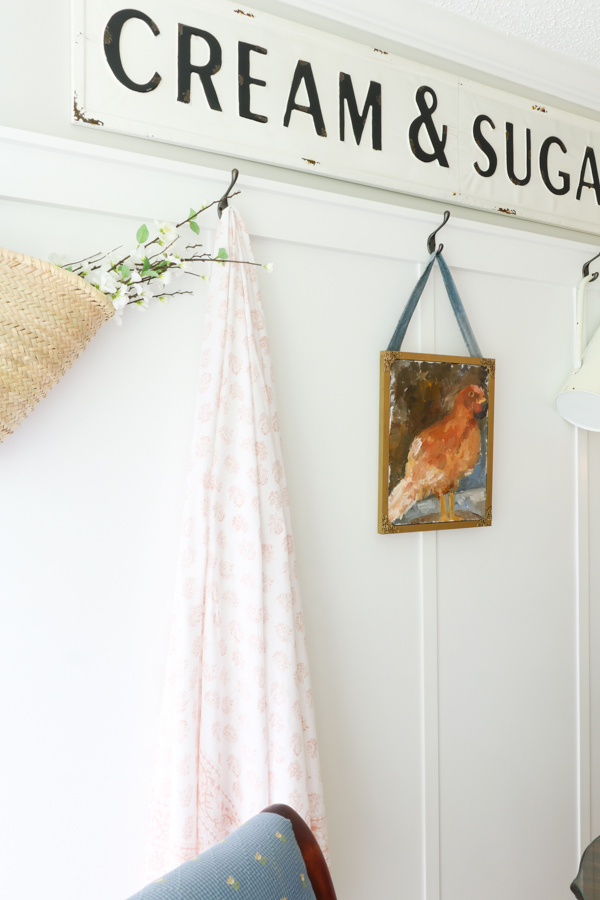
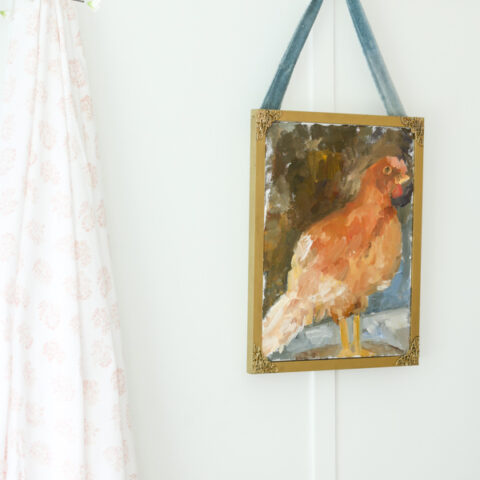
Now that your project is finished let's look at where I hung my canvas print and a few ideas for hanging your art.
Where to Hang Framed Canvas Art
You can hang art in any room of your home and on any wall but don't forget unique places to display canvas art, such as bookcases and easels. The options are endless.
Conclusion
In conclusion, framing your canvas art inexpensively is a great way to add personality to your walls without breaking the bank. By following these tips and tricks, you can create beautiful framed canvas art that complements your style and budget.
Don't be afraid to experiment with different frame types, colors, and sizes until you find the perfect match for your canvas art.
Here is a designer tip. Stand back, look at your art, and ask yourself what colors are jumping out at you. This will help you select a paint color or stain finish for your wood.
I hope you enjoyed this easy DIY project! Now, you can make frames for your art in the convenience of your own home.
Looking for More Inspiration?
If you have other art or decor you want to hang in your home, check out these other posts:
- How to Hang a Gallery Wall the Easy Way
- Easy DIY Wall Hanging Using Beautiful Free Printable Wall Art
- Step-by-Step Guide: How to Hang a Wreath on Your Wall
Now be sure to share your DIY framing projects in the comments or tag me on Instagram at lifeonsummerhill. Thanks for reading, and happy framing!
Happy Decorating!

Inexpensive Way to Frame Canvas Art: Step-by-Step Guide
Framing canvas can instantly transform any space and give your favorite artwork the attention it deserves. Plus, it doesn't have to be an expensive or complicated process. With a little bit of creativity and some easy-to-find supplies, you can create a stunning frame for your canvas art that perfectly complements your home decor.
Instructions
- The first step is to measure the size of your canvas art. You'll need to know the exact measurements to cut the wood trim to the right size. Measure the width and height to determine the length of your wood but also the thickness of the canvas to get a piece of wood that is that thickness or a little less, depending on the look you want.
- Using a miter saw or a miter box, cut the wood trim to the measured length. Cut two pieces for the top and bottom of the canvas and two pieces for the sides. Make sure to cut the wood trim at a 45-degree angle to create the frame corners.
- Once you have cut the wood trim, use sandpaper to smooth any rough edges. This will ensure that the frame looks neat and tidy.
- Using wood glue, glue the corners of the wood trim together. Hold the corners together until the glue dries or nail together.
- Once the glue has dried, paint, stain, or leave unfinished the wood trim to match your canvas art. You can use any color that complements your canvas art.
- Now that the frame is ready, lay the canvas art face down on a flat surface. Then, set the frame over the canvas and secure it using small nails, staples, or hot glue.