
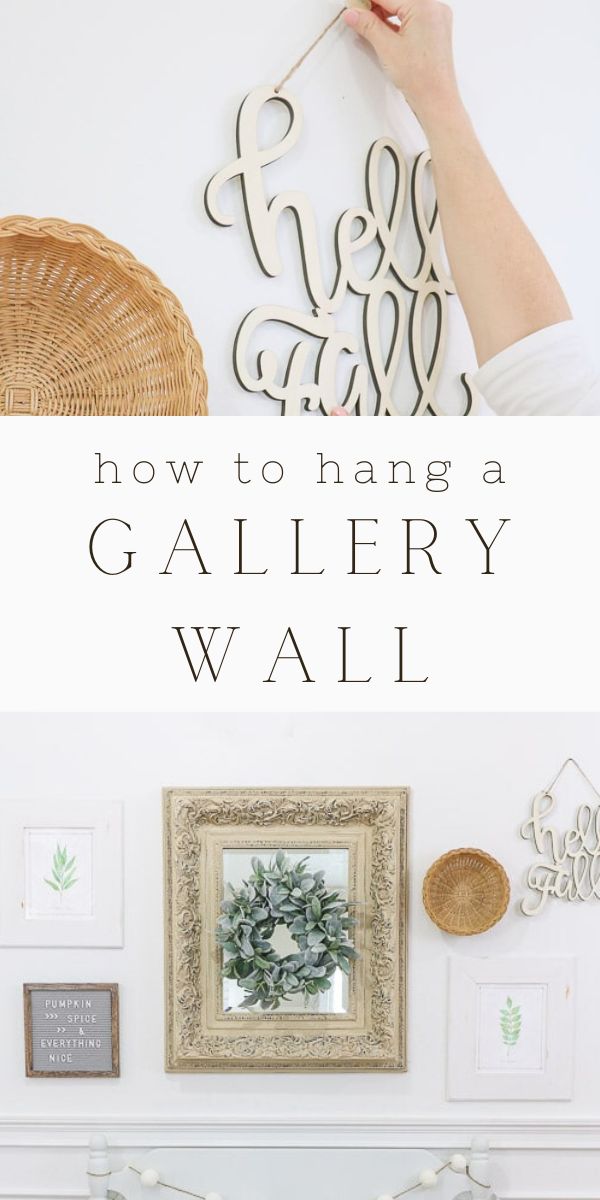
Clever tips from an interior design on how to plan a gallery wall and the easy way to hang pictures.

Decorating is fun but planning and hanging a gallery wall can be challenging so I am sharing my secret on how to hang a gallery wall. If you have fears of hanging anything on your wall I hope after this post you will be motivated to not only hang a piece of art but dare to plan a whole gallery. I'm going to show you how the easy way to hang pictures and create the gallery wall of your dreams.
This post contains affiliate links, meaning I receive a commission if you purchase using the links below at no extra cost to you. All opinions are all my own.
Easy Way to Hang Pictures for a Gallery WallFAQs:
What Do I Need for an Easy Way to Hang Pictures?
Before you begin any project I always recommend getting your tools together. So here is a list of what you will need to hang your gallery of art, baskets, mirrors, clocks picture frames or whatever fancies you.
- Hammer
- Tape measure
- StickyMark (update: this product is no longer available so I am linking another tool anywhere it says StickyMark)
- Nails or picture hangers
- Level
- Ladder
- Art, baskets, clocks, mirrors, word art, shelves or anything that will look good in your wall gallery.
- Screwdriver
How Do I Lay Out a Gallery Wall?
A gallery wall is a great idea for large blank walls. Of course your design will be whatever is pleasing to your eye, there are a few guidelines you can use when designing your gallery wall. Here's a good tip for your grouping of pictures. When your pieces are different sizes, keep the largest piece(s) in the center to create a focal point and the smaller picture sizes on the outside perimeter. Keep your art three to six inches apart. This is a great way to get the gallery wall of your dreams. Read on for my best tips to hang a gallery wall.
How to Hang a Gallery Wall
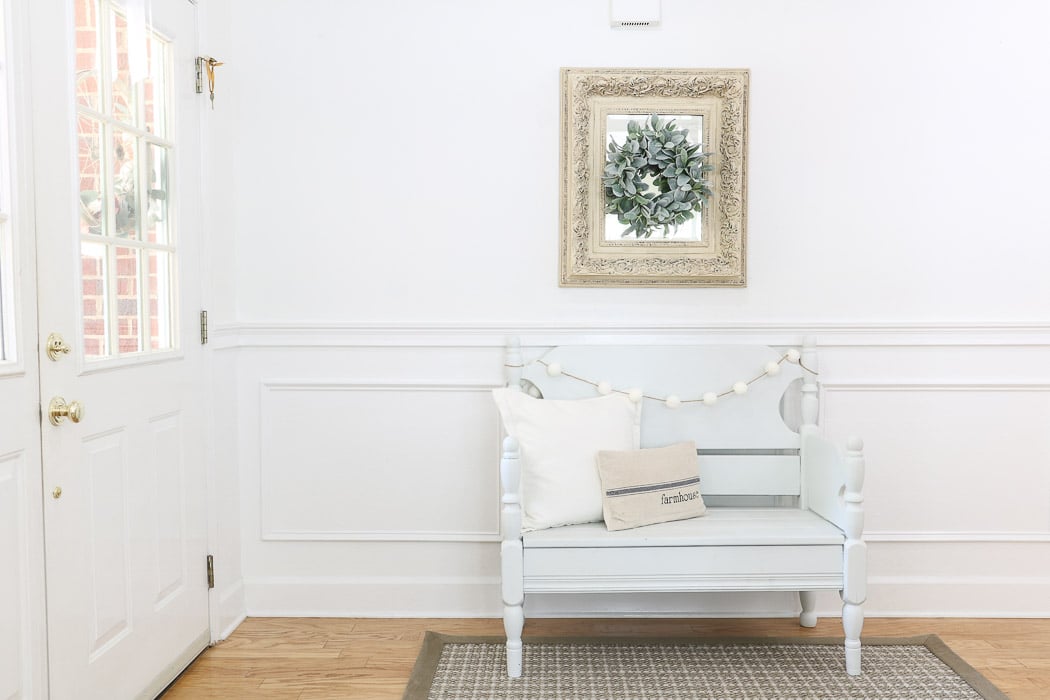
In our home, we have a large wall in the entryway that could use some extra design pieces for the fall. As a part of my decor plan for the season, I thought it would fun to add a little extra here. And since I am going to create a gallery wall why not bring you all along to see my tips and tricks.
Lay Out Your Design
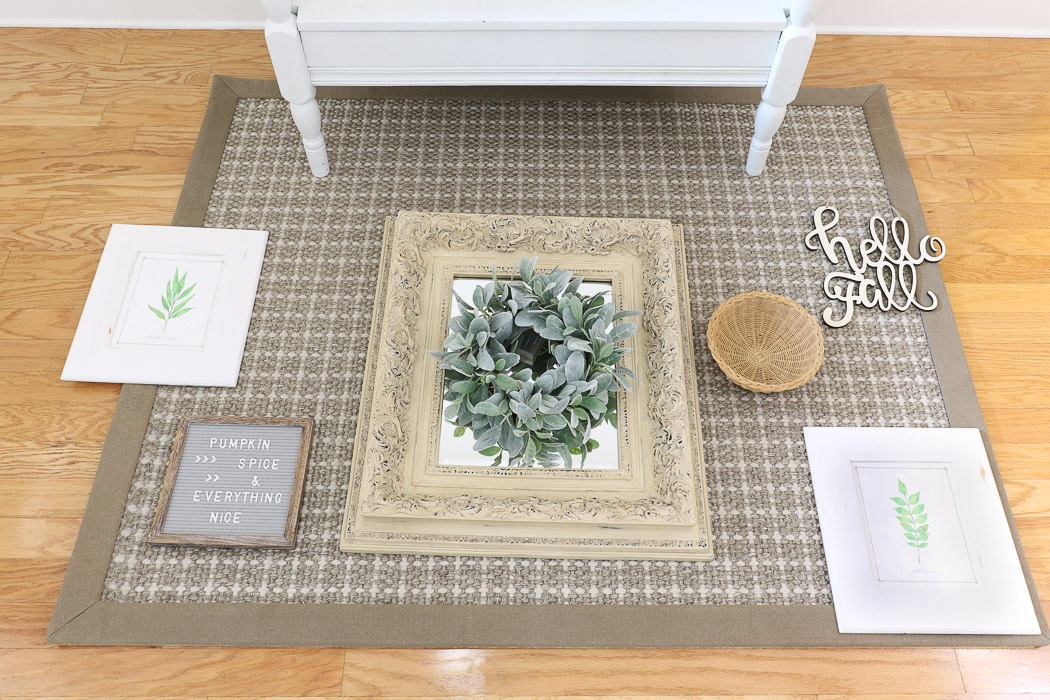
It's always a good idea to have a plan before you start hammering nails into the wall and ending up with extra holes. Here is an easy method to prepare your gallery wall. Start by placing all your items on the floor in front of the wall where you will be creating your gallery wall.
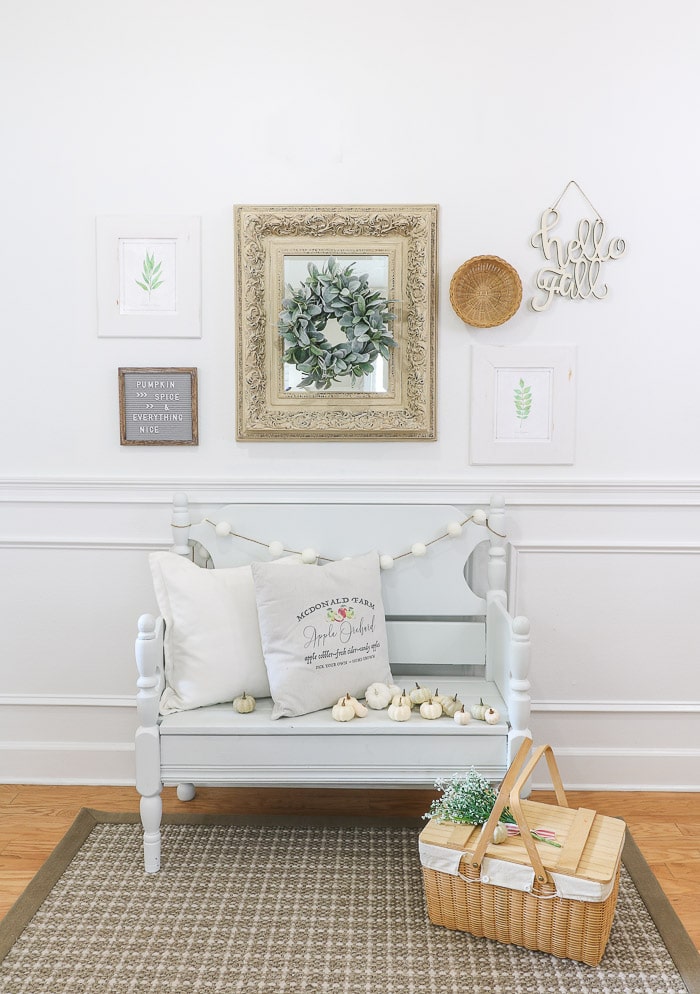
If you have one piece that you want to be center stage place it in the middle. My mirror was already in the middle of the wall so I decided to keep it there.
Simply place the main item on the floor right in the middle of the wall or where you plan for it to be on the wall. Now start placing other pieces of art and such on the sides. You'll start to see how you want to arrange your group of pictures.
The great part about this step is that you can move things around until you get the design that looks balanced and flows pretty. Try a few different arrangements. Once you have the best spot for all your pieces, take a photo with your phone so you can refer back to it. This is the easiest way to stay on track.
Hang the Center Piece
Next place your centerpiece or your main piece on the wall. Since my mirror was already in the middle of the wall I simply put it back on the picture hanging nail.
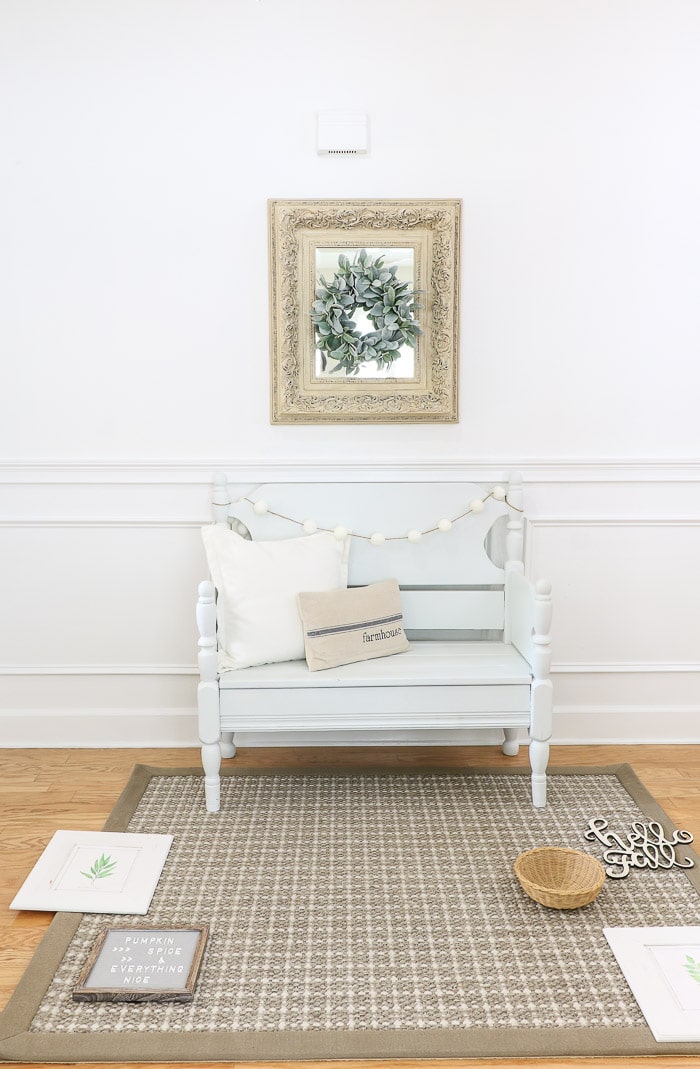
Now see how I left all the other pieces in their spots on the floor? Simply hang that first piece and not move anything on the floor. This will help you remember where each piece goes.
Hang a Bottom Piece
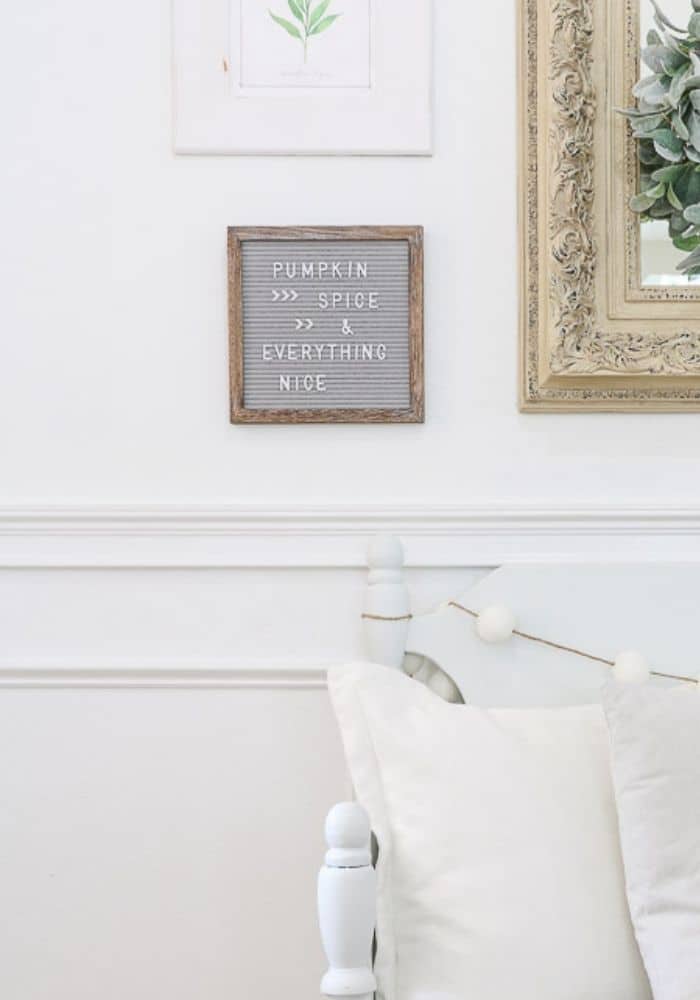
Next, grab the piece that is lowest from one side. My lowest piece was one of the botanical free printables from my free printable library. I have a whole post on how I framed this if you want one too.
Refer back to your photograph and look at how low you had this piece next to the mirror. Was it a little lower than the mirror, level with the mirror or just above the mirror? Also, note how far from the mirror it was laying. For example, mine was about 3 or 4 inches.
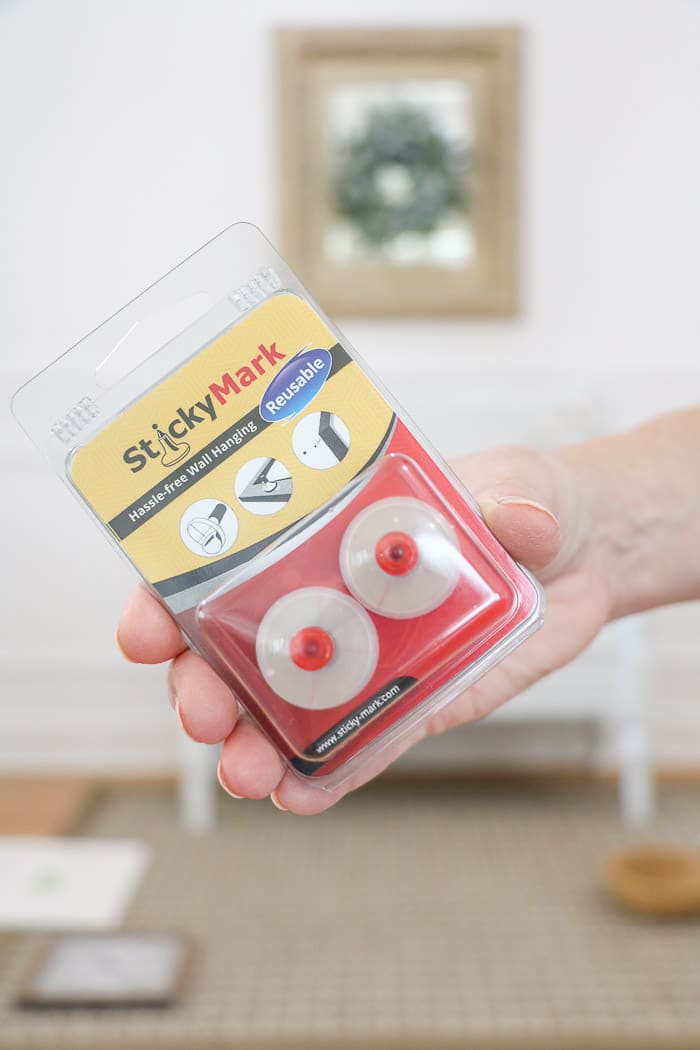
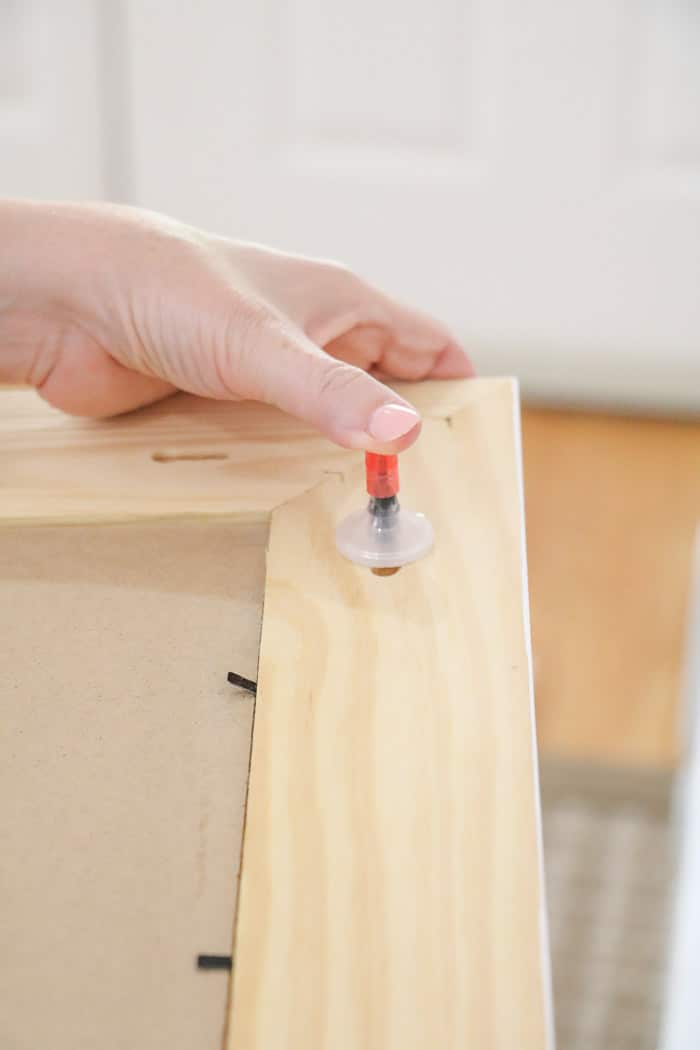
Next, let's dive into the details on how I use StickyMark to hang my gallery wall. In case you are wondering what is StickyMark, it is a device that you stick to the back of your art when you go to hang it. It allows you to mark the wall exactly where you will need to place your nails.
Steps on How to Hang Art with StickyMark
Using a wall hanging assist tool is an easy way to hang pictures and I find it to be the best way. Here is exactly what the StickyMark tool looks like. It's a surefire way to ensure your the holes you put in the wall are in the right spot the first time. No more unnecessary holes in your wall. You can find them on Amazon or at some Ace Hardware stores.
Begin by peeling off the adhesive backing.
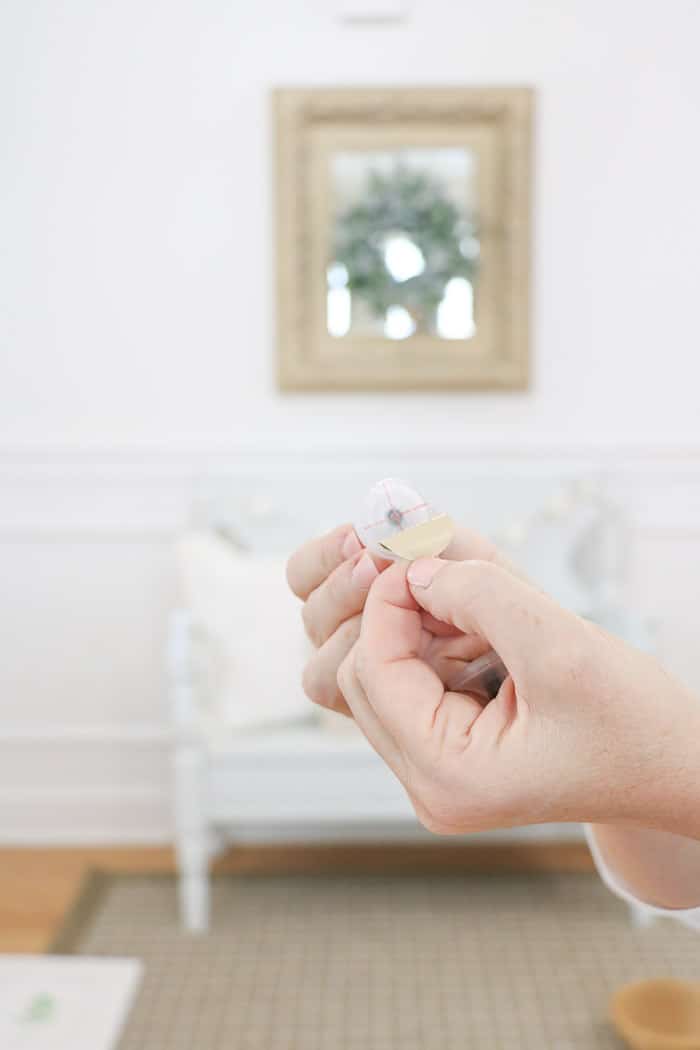
Then place the sticky side over the hole, bracket or whatever is on the back of the frame or art piece where it will hang. This will usually be at the top of the frame.
Repeat this process on the other side if you need to use two nails to hang your wall art. Then remove the red cap on the markers. The back of the picture frame or art work will look like this.

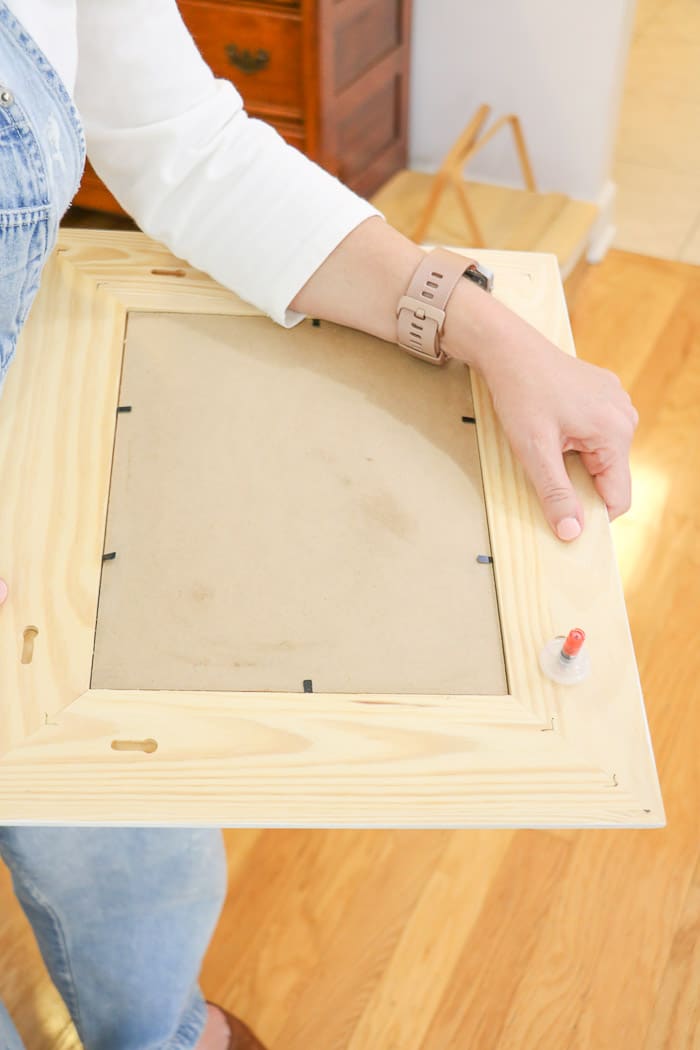
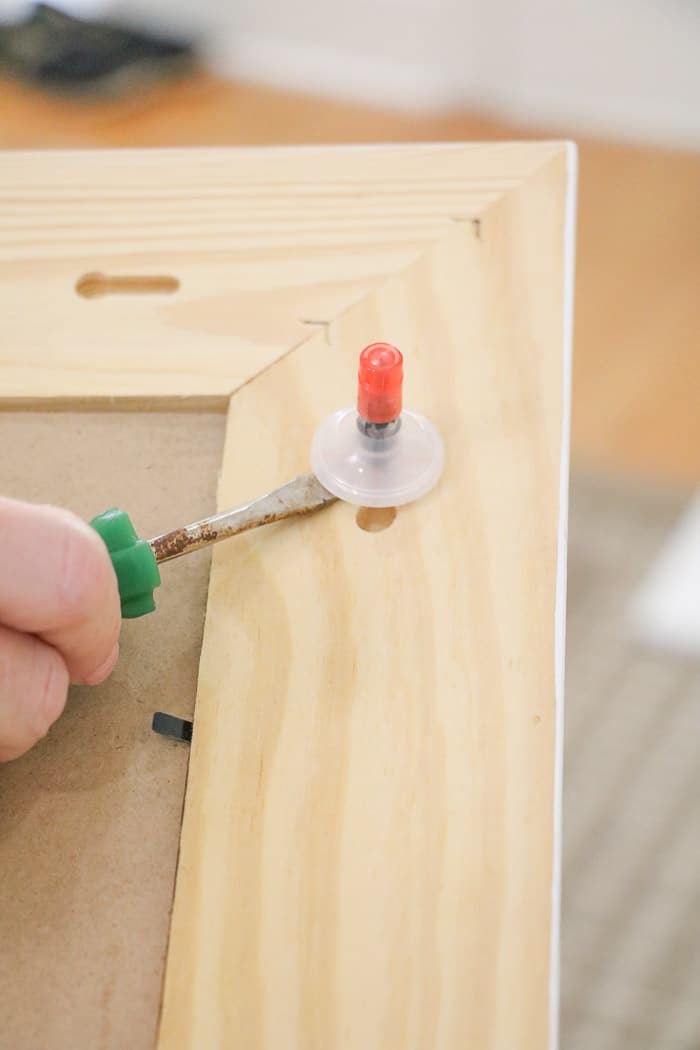
Next, grab a small level and place it on the top of your frame and position on the wall but make sure not to touch the wall with the markers yet.

Look at the level and keep positioning until the level bubble is right in the middle. Then gently move the art piece where it touches the wall. Mark the spot when you find the right place. The markers are very good at marking so you do not need to push hard or move the piece back and forth. A simple tap works like a charm.
Now remove the art piece from the wall and place the red caps back on the markers. The beauty of StickyMark is that you can reuse them over and over until the sticky backing stops working.
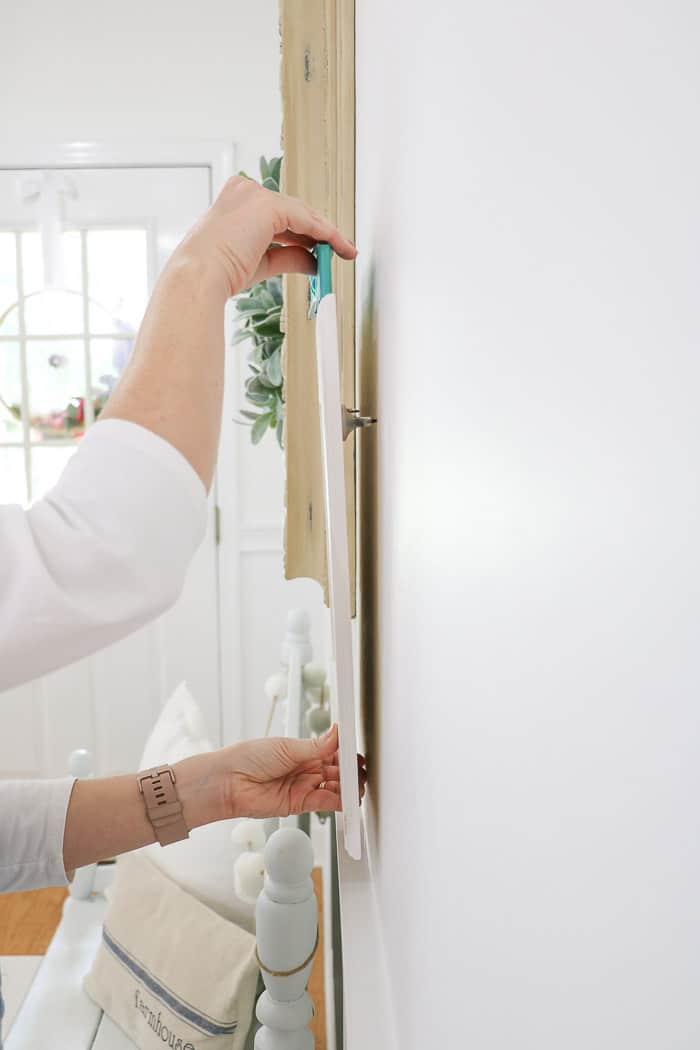
Now remove the StickyMark piece by simply sliding a screwdriver under it and gently lifting it up.
Add the backing film to the sticker so it stays fresh for the next picture. I used this one set for my whole wall and it still seems to be good for more. Isn't that an easy way to hang pictures? And no unsightly holes from mistakes.
Let's get back to all the other pieces. For my next piece, I decided to just work on one side so my basket is next.
Hang the Basket
You can use the StickyMark again by sticking it to the back of a basket and just like the free printable simply tap the wall.
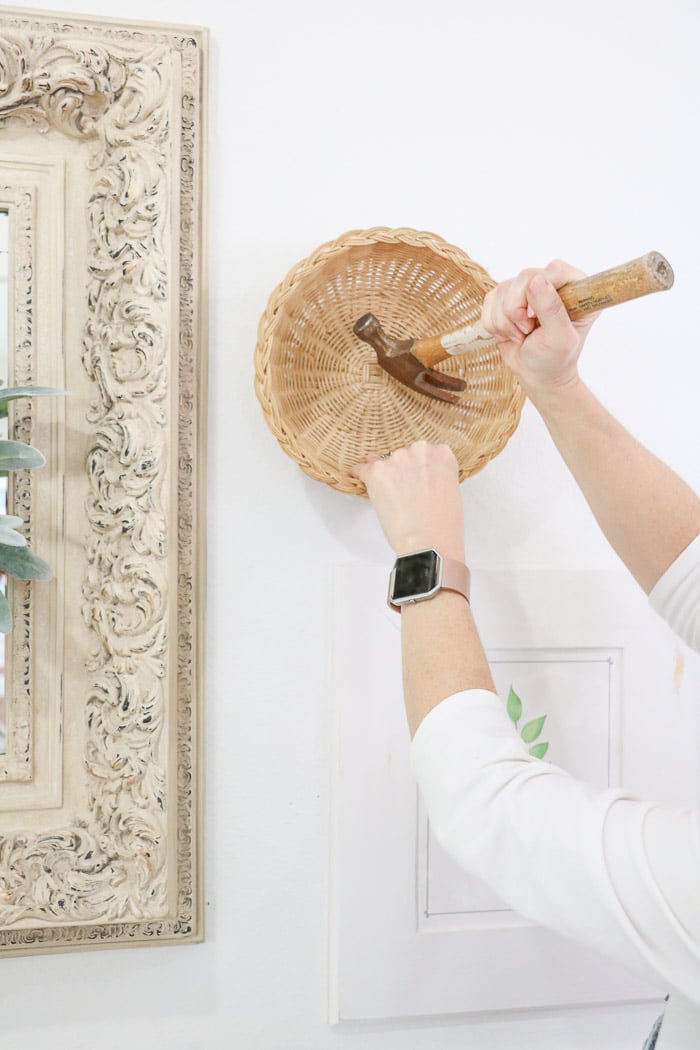
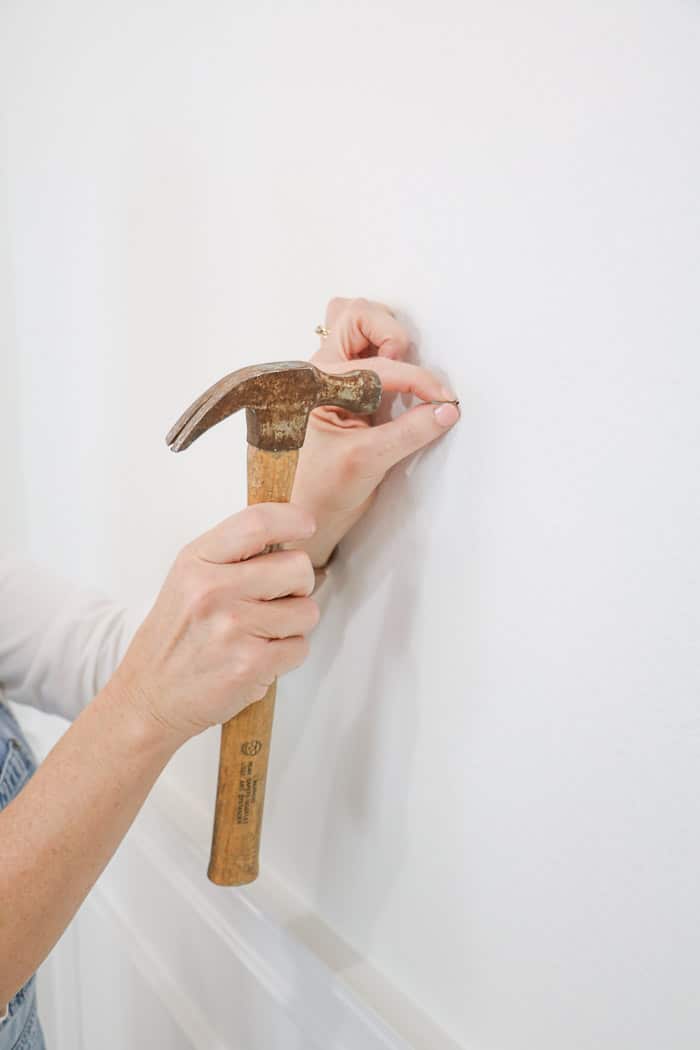
To hang a basket all I do is use a single nail and pierce it into the middle of the basket. Then I line up the nail that is showing through the back of the basket onto the mark on the wall and I hammer it in.
If your basket is to small for the hammer to hammer into then use the top of the hammer.
Hang the Word Art
Next, for cut letter word art, you can also use StickyMark. I didn't remove the back but hung the piece on the marker and marked the wall.
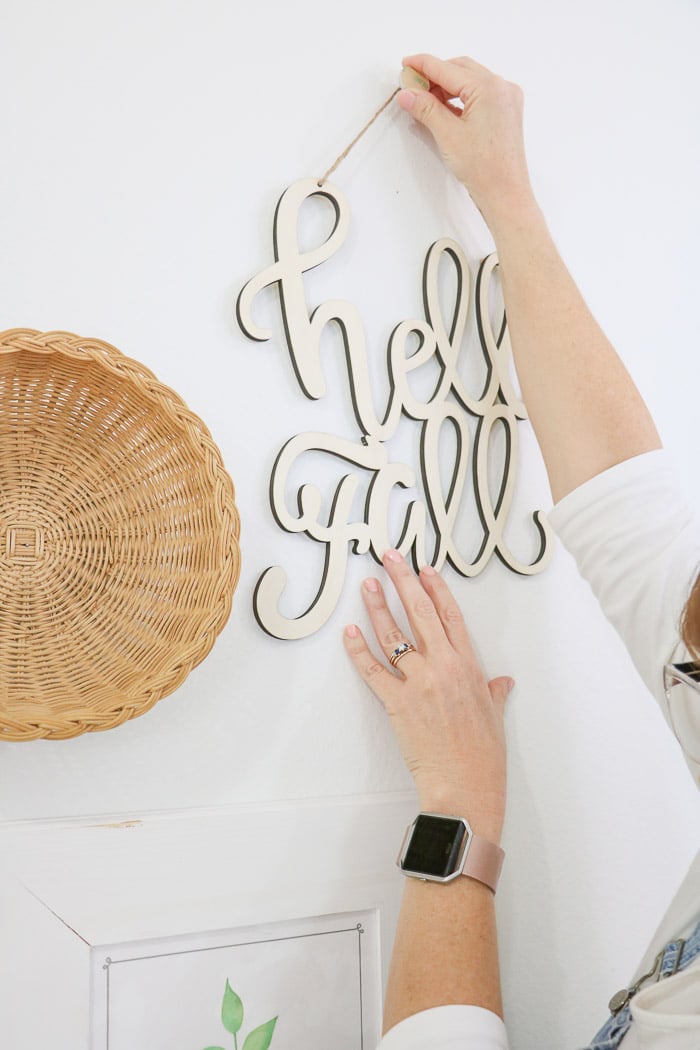
Then all I did was hammer a small nail right onto the mark and hung my letter art. It is starting to feel like fall in my entryway!!!
Hang Pieces on the Other Side
One side is finished so let's repeat the process on the other side.

Again I started at the bottom and only had to attach the marker to one place on the letter board. I made a mark, returned the cap to my marker, nailed in the nail and hung my letter board.
Next, I hung another one of my botanical free printables. But this time I used a longer level so I could show you another way to use StickyMark.
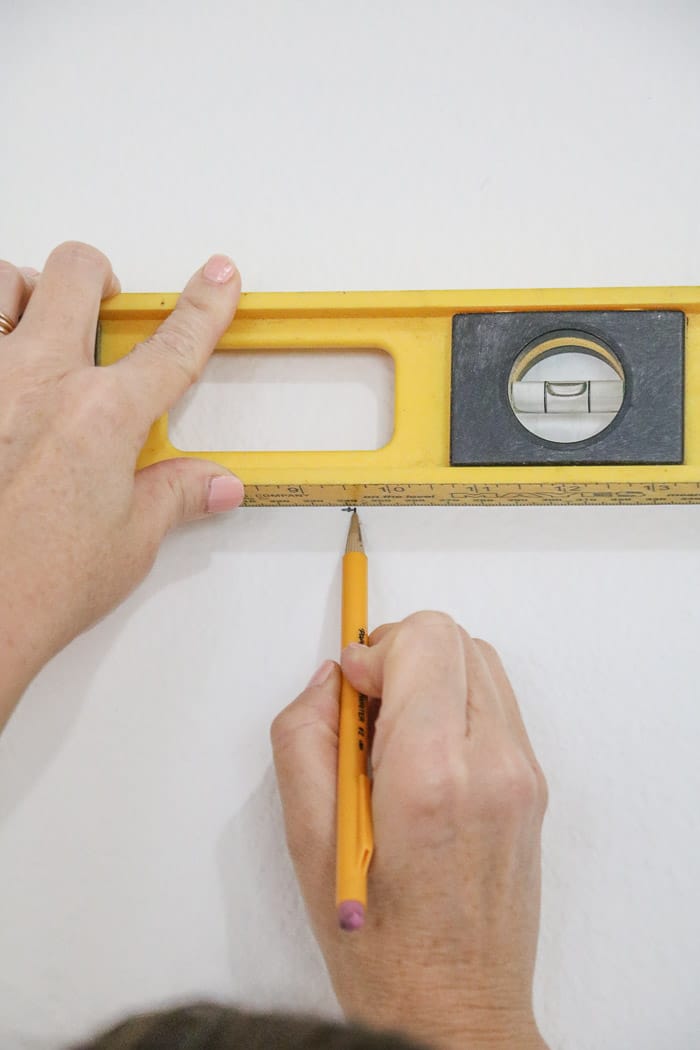
This time after marking the wall with the StickyMark markers I placed my level over the marks and made sure they were level. They were pretty close but to be exact I leveled my level over the marks and then drew a small line from right to left. Where the points meet that is where I put the nail.
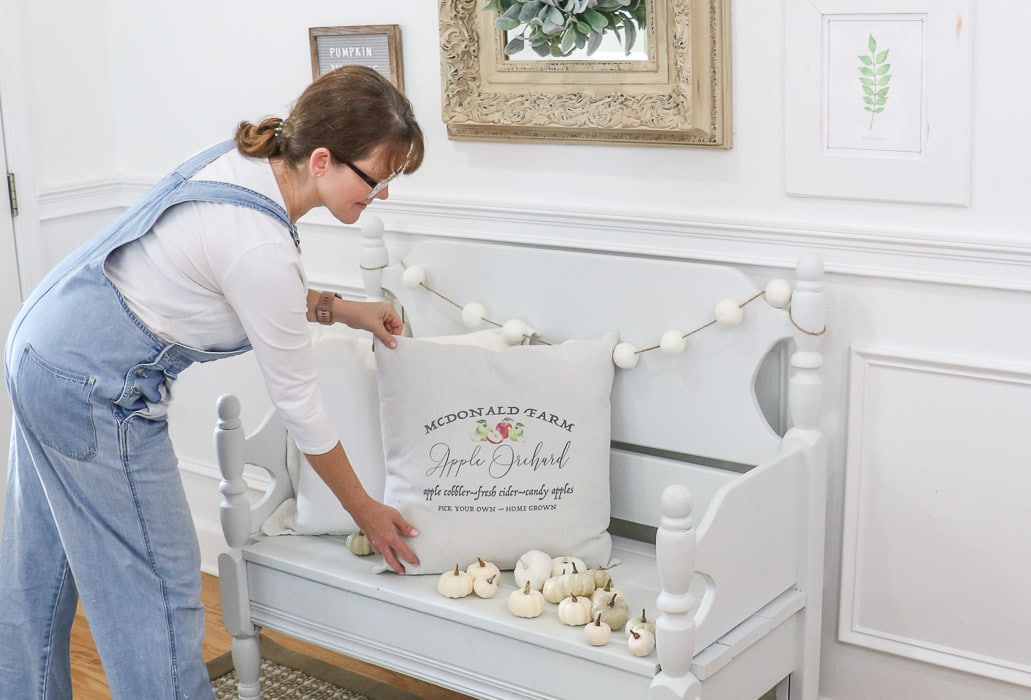
And now I am done with hanging a gallery wall. Let's add a few fall accessories like pillows, pumpkins, baskets and such. And the whole autumn gallery wall is complete.
Conclusion
Now you know the easy way to hang pictures on the first try without ending up with a bunch of holes in the wall and it doesn't take a long time. The best part is that your hanging assist tool can be reused anytime you need to hang art.
A project like this goes so much faster when you have StickyMark to help. Probably the one thing that takes me the longest are pieces that require two nails. Like with heavy pictures and art that requires drywall anchors.
I used to have serious reservations on hanging those kinds of pieces. I would avoid them and use picture hanging wire on larger frames just so I wouldn't have to use two nails. LOL!
Here are some more photos of my entryway.
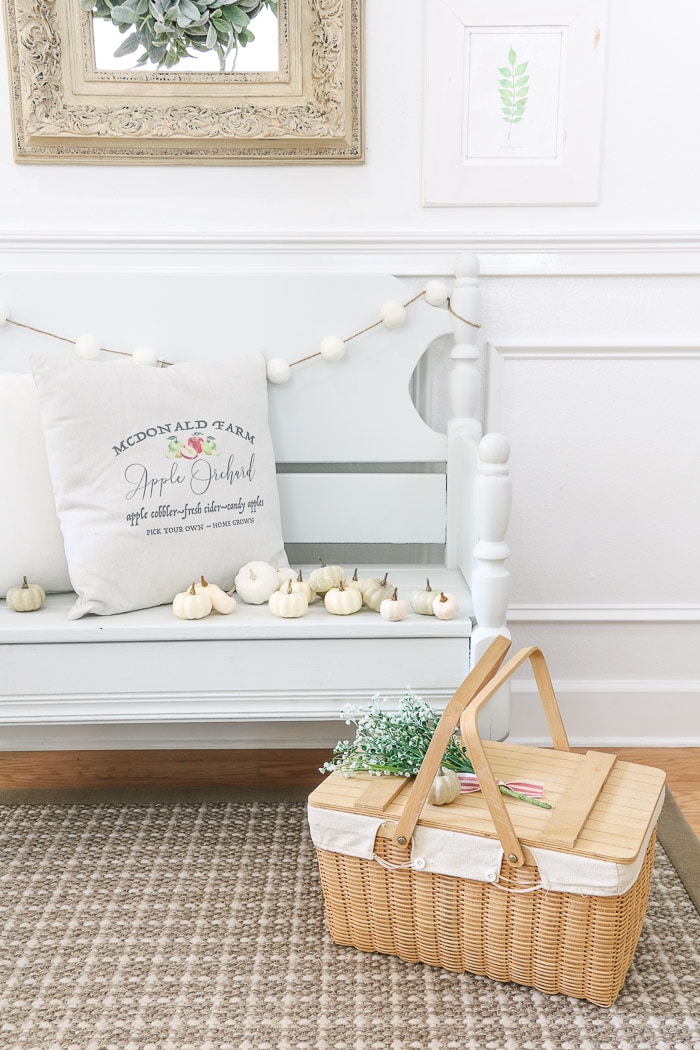
See the cute flowers on the basket? I already had to take them down because our new kitten, Kit, decided they were a toy. LOL! He's a mess!
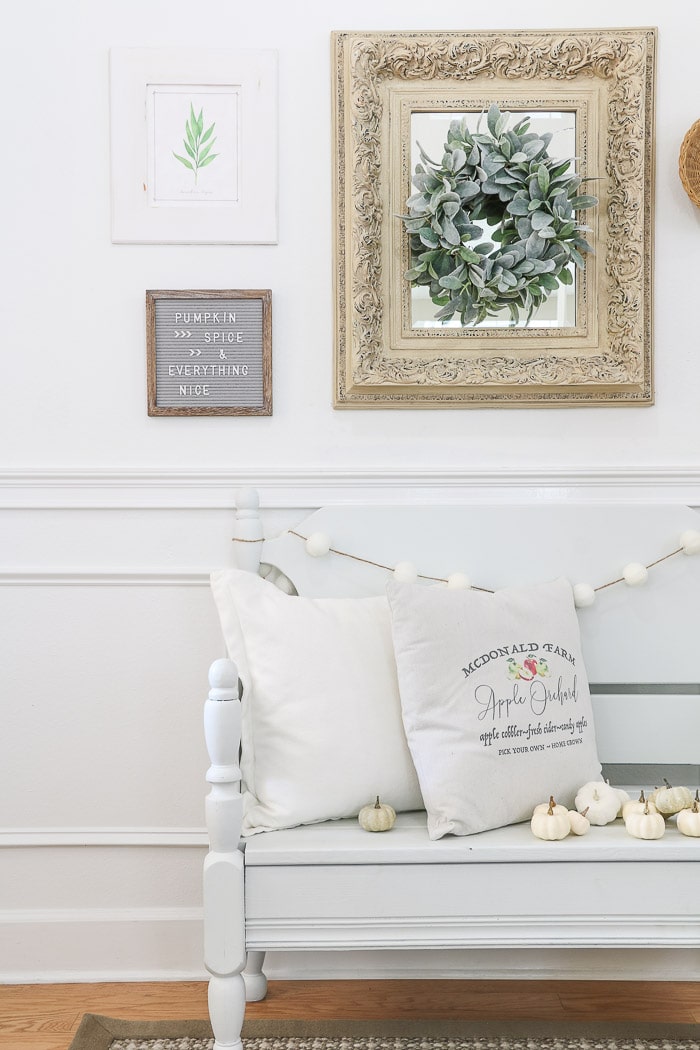
I didn't mention it during the gallery wall steps, but the small letter board saying was inspired by Starbucks' pumpkin spice latte.
I hope this post on how to make a gallery wall has encouraged you to create one for yourself. If you have any tips or tricks, please feel free to share them in the comments. And if you love plates hanging on the wall, check out my plate gallery wall trick. It is clever, too.
If you have any canvas artwork you need framed for your gallery wall, check out my post about Inexpensive Way to Frame Canvas Art: Step-by-Step Guide.
Enjoy making your own wall art? Check out my post about Easy DIY Wall Hanging Using Beautiful Free Printable Wall Art.
If you're moving your gallery wall to a new location, check out my post about How to Cover Nail Holes in Walls.
Happy Decorating!

Where did you get that gorgeous frame with the wreath on it? If you painted the frame yourself, may I have the colour please? Just exquisite!
Thank you so much! I bought that mirror many years ago at Bombay and Company and the funny thing is that I put the wreath on there because I broke the mirror a while back and the wreath hides it. LOL!