
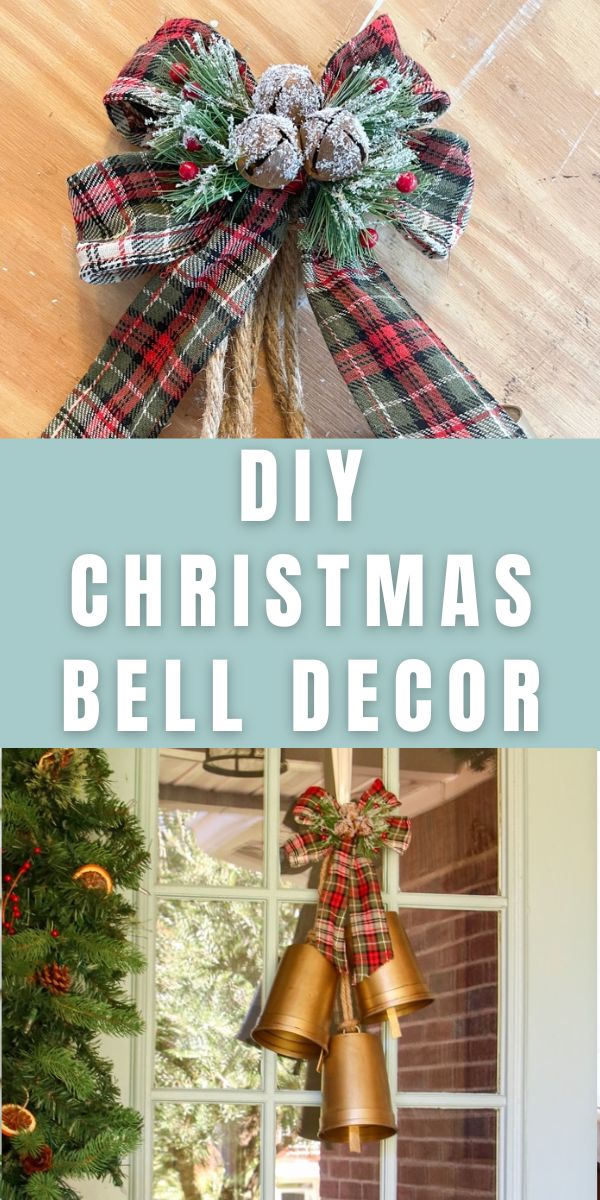
Let's talk about how to make Christmas bells for your home or front porch for this Christmas season. This is a fun and easy DIY holiday decorations project that is made of inexpensive materials to make a wreath for indoors or outside.
A couple of years ago I showed my friends on Instagram how to make Christmas bells from galvanized buckets but this year I wanted to make the project even easier and cheaper. Plus I remember I never shared this DIY Christmas bells project here on my website.
But let me rewind for a moment to what made me remember the old bell project. With Christmas approaching, I decided to start with a cottage farmhouse Christmas porch. I wanted something different for my front door and that is when I remembered the old bucket bell trick.
This project is a lot of fun and I know you'll enjoy it.
How Do you Make Outdoor Christmas Bells?
Now that you know how all this got started let's jump right in and start making Christmas bells for your front door, to hang on the wall or anywhere that inspires you. This is one of my favorite things to decorate with.
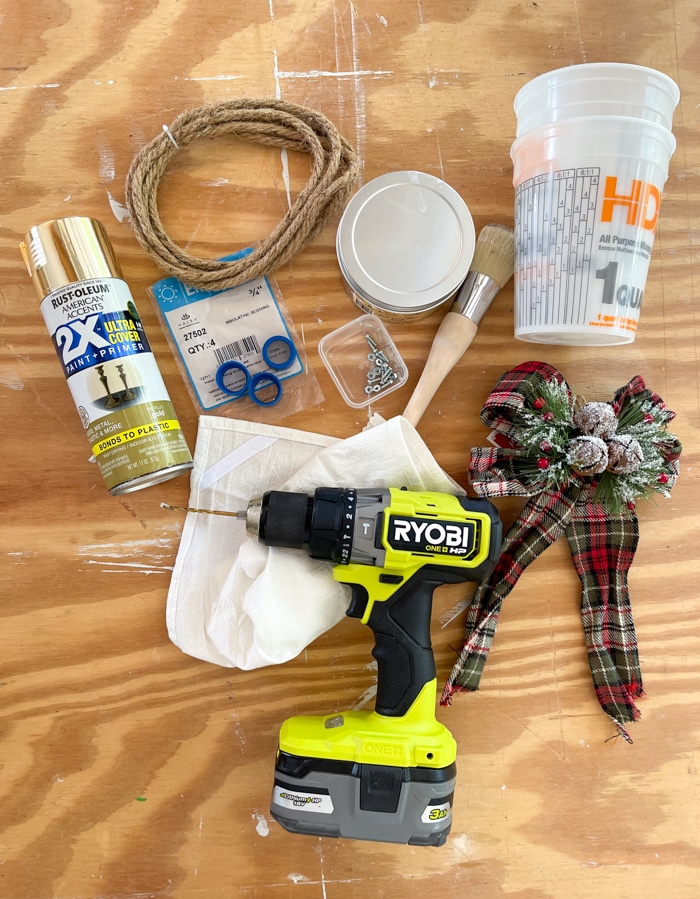
Let's start with gathering some supplies. It's always a great idea to ensure you're not missing anything. The best part is you probably have a lot of these items to make these DIY large bell ornaments already.
What DIY Christmas Bells Supplies Do You Need?
- 3/4″ insulted bushings
- 1 quart paint buckets (I found these plastic ones in the paint section at Home Depot)
- Gold spray paint
- Drill (I use Ryobi and love it)
- 1/8″ drill bit
- Vise
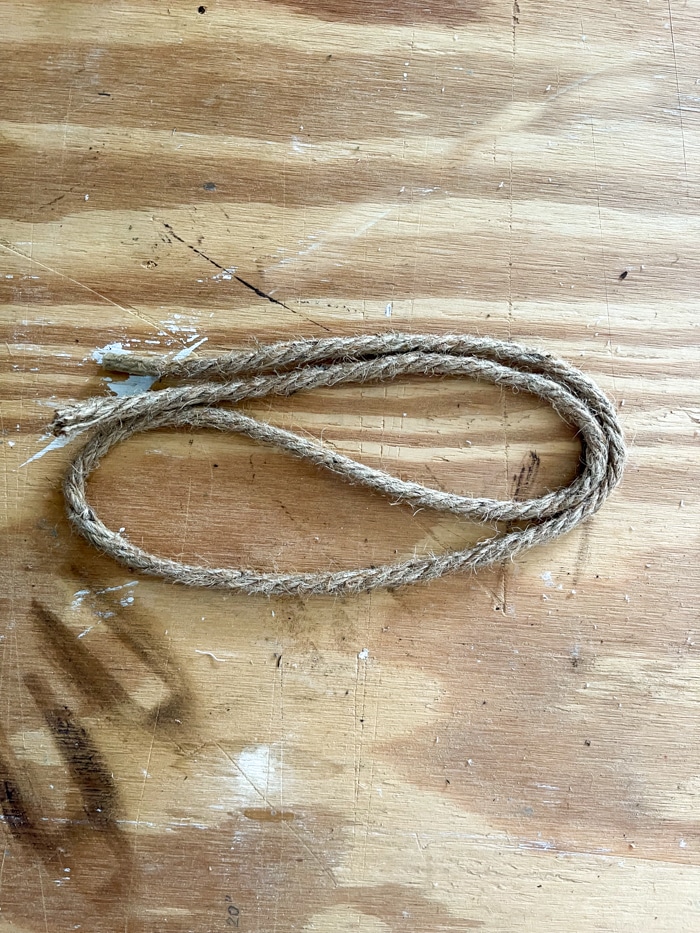
- Jute rope
- Dark antique wax
- Wax brush
- Cloth to remove wax
- Hot glue gun (optional – I also use Ryobi glue gun and love it)
- Screws and nuts
- Leather strips or immitation leather (I had some leather left over from a project but you could also use an old leather belt)
- Ribbon decoration
- Metal ring to hang your bell wreath (I used a hook bracelet)
If you are making lots of bells get as many buckets as you want but for this project, we only used 3 bells. I love the size of the bells they make. Now that we have our supplies let's begin with the drill.
Drill Holes into Ring and Buckets
This is where the vise comes in “real” handy. Sit your little ring into the vise and close it snuggly. Drill straight down into the plastic with your drill. You only need to drill through one side of the ring — not all the day through.
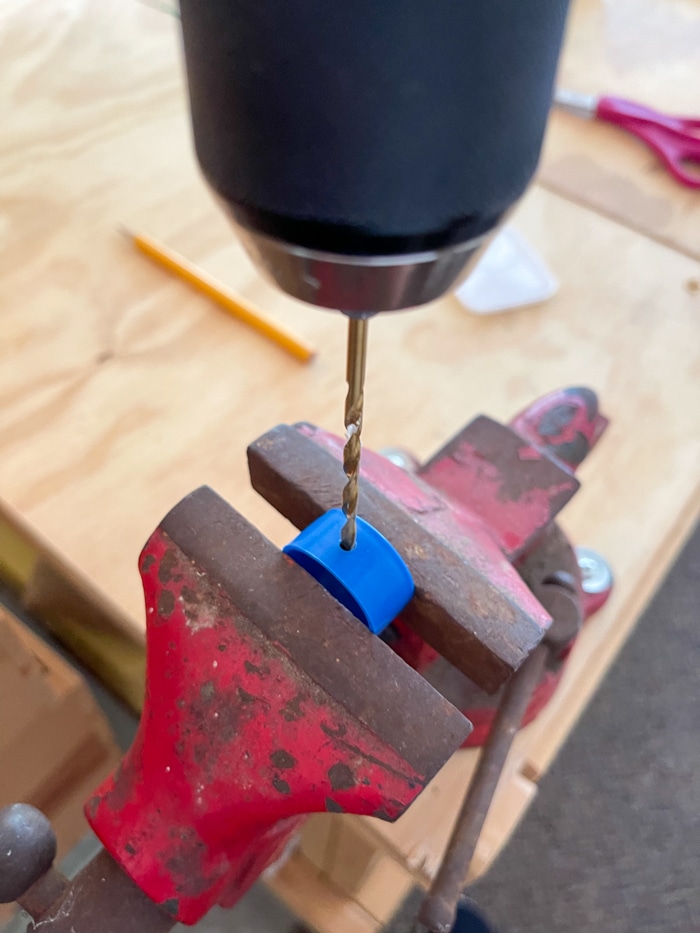
Next, turn your bucket upside down and drill into the center of the bottom of the bucket.
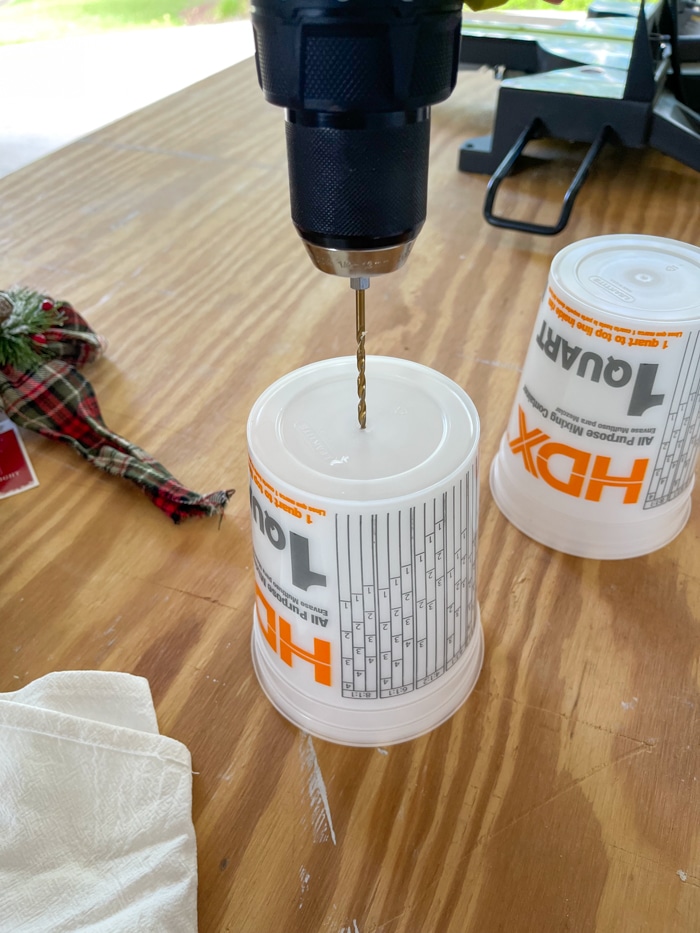
The Ryobi drill and titanium drill bit slid through like cutting into butter on the bucket and the ring.
Attach Ring to Bucket
Now let's attach the ring into the bucket of the bell. Place a screw into the ring from the inside and then place the screw and ring into the top of the bucket.
Then screw on the nut but do not overtighten it. We will be adding the leather strip inside of the large bell later. I found turning the bucket right side up helped when screwing on the nut. That way if it fell out of my hand it would fall into the bucket.
Spray Paint the Bells
Now, this is the easy part. Turn your buckets sideways and place something on each side. I used the other two buckets to keep it in place.
Spray paint inside the bucket, or the inside of the bell we should say. You may need to turn the bucket to get it all the way around. You do not have to be perfect with the paint up inside because most likely no one will see it.
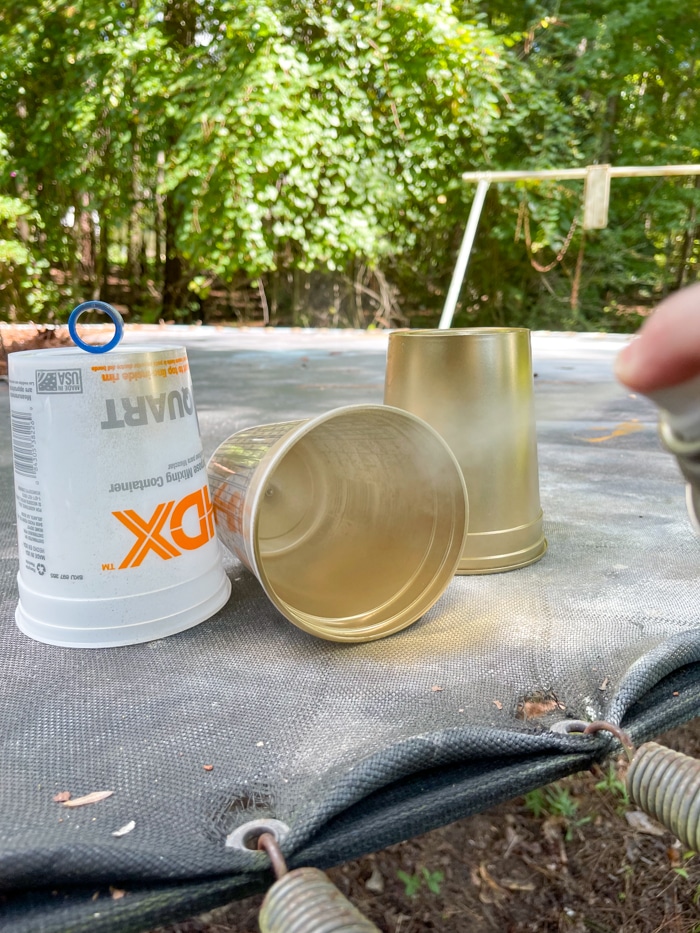
Next, sit the bucket upside down with the ring on the top and paint around the edges. And then paint the tip spritzing a little paint inside the ring.
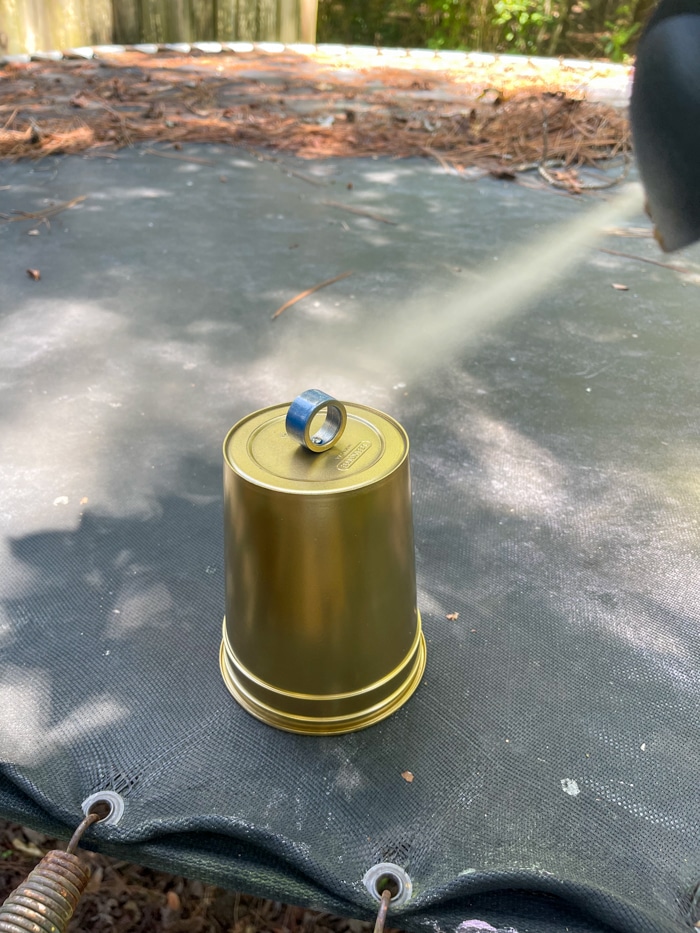
This is how all your bells should look at this point. You can really see the bell shape now, right? Let the buckets dry for an hour before going to the next step.
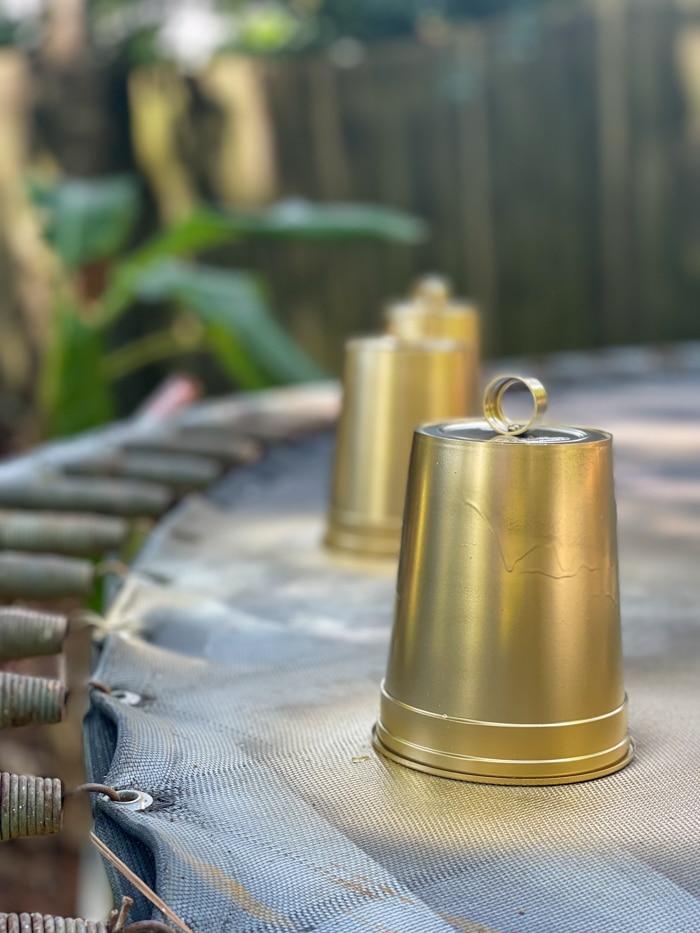

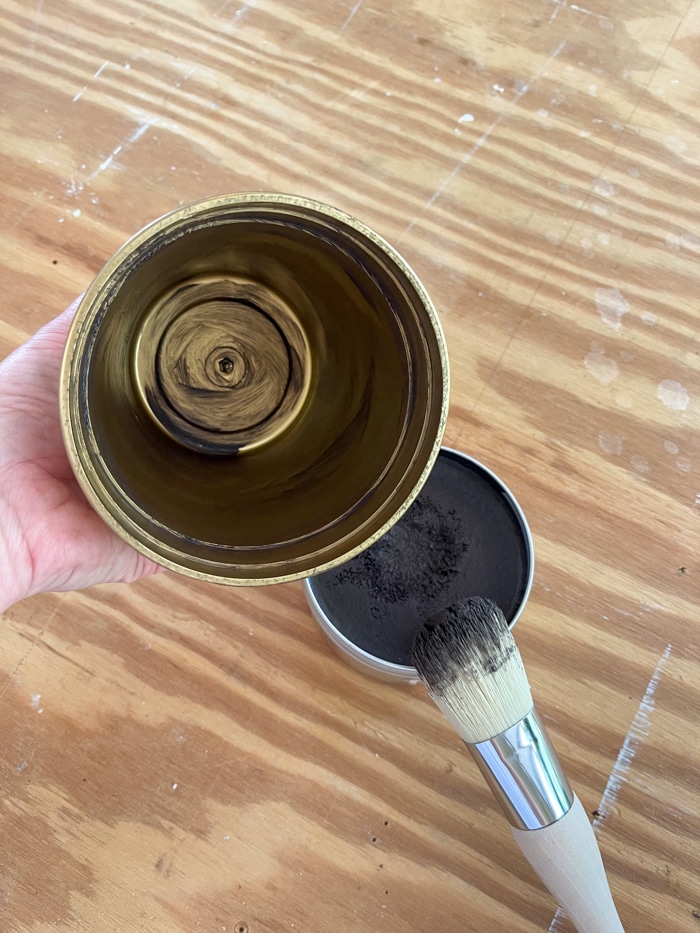
Wax the Gold Spray Paint Finish
At this point, you are starting to see the pretty bells are going to have an elegant look. Next grab cloth, wax, and wax brush and start applying the wax to the bucket inside and out.
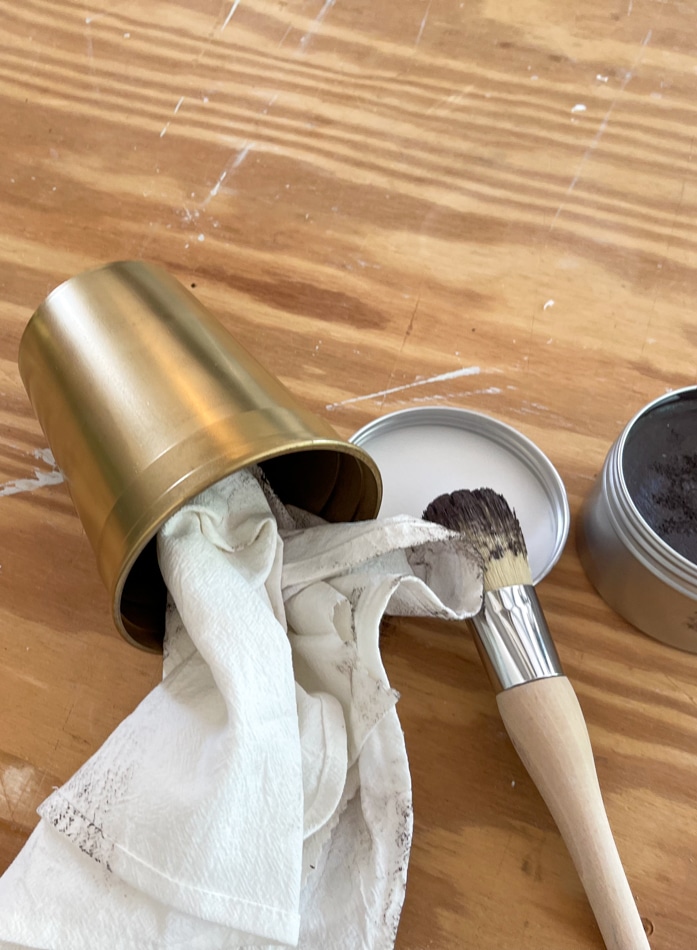
I started with the inside and did all three buckets. I let it sit for about 5 minutes and then I removed the wax.
Then I repeated the process on the outside. You will notice when removing the wax that it picks up any imperfections which are great. That gives it an old-fashioned vintage Christmas bell look.
And the wax makes the gold a different color — a more vintage gold color. Our DIY large bell ornaments are really coming together. They look just like large bells.
Cut Strips of Leather and Paint
Next cut strips of leather about 3/4″ wide and long enough to fit up inside your vintage little bell with an extra couple of inches past the bottom. Then spray paint the leather with gold paint on the front and back and let it dry.
Follow by adding wax to the painted leather strips and drill a small hole into the top.
Last, unscrew the nut and attach the leather strip. Then cut the bottom of the leather about 1 inch past the bottom of the cup.
And guess what? You are all done making the bells and it is time to add jute thread rope and Christmas bows. This is how I tied the rope on and the beautiful bow decor.
How to Tie Rope to Bells
This part was actually challenging for me because I wanted the ropes to look thick but I figured it out. However, if you have another idea then go for it.
First I determined the length of each rope and then times it by 4. For example, if I wanted one bell to hang down 12″ then I multiplied that by 4 and got 48″. So cut each rope to the length you want.
I went with three different lengths and to determine my lengths I sat the bells on the table the way I wanted them to hang until I found just the right look. Then I measured up from each bell to the bow and went with those lengths.
Next, fold one rope in half and then fold it in half again.
Now thread the open end through the small loop on the top of the bell and then thread the rope into the loop on the other end. Pull it right until it is as snug as you can get it.
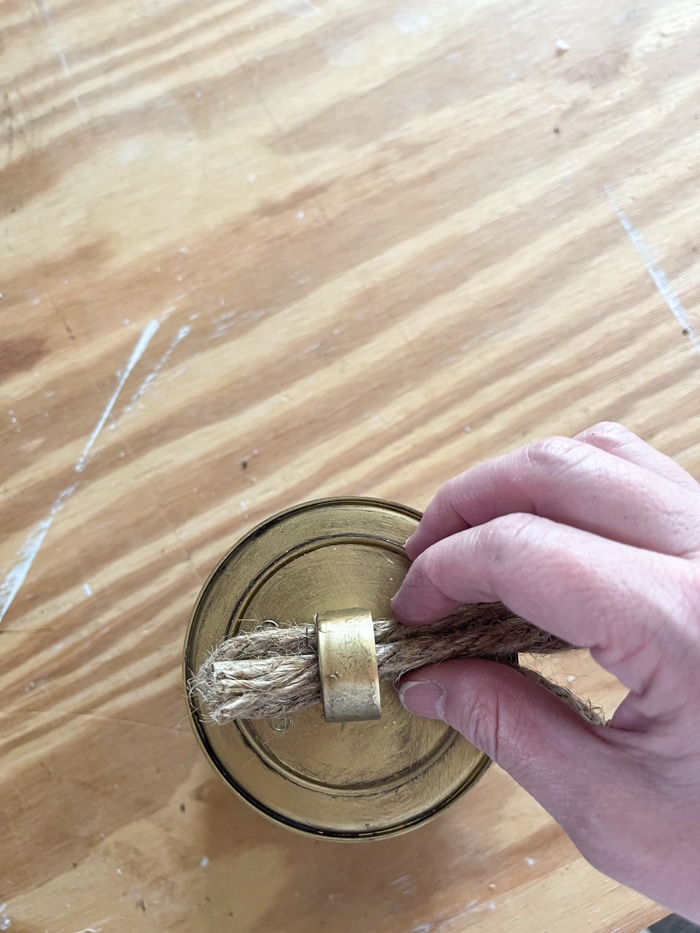
My rope would not get tight but instead was a gentle snug. I kept pulling one piece of the rope at a time to get it as tight as I could. I think it turned out nice.
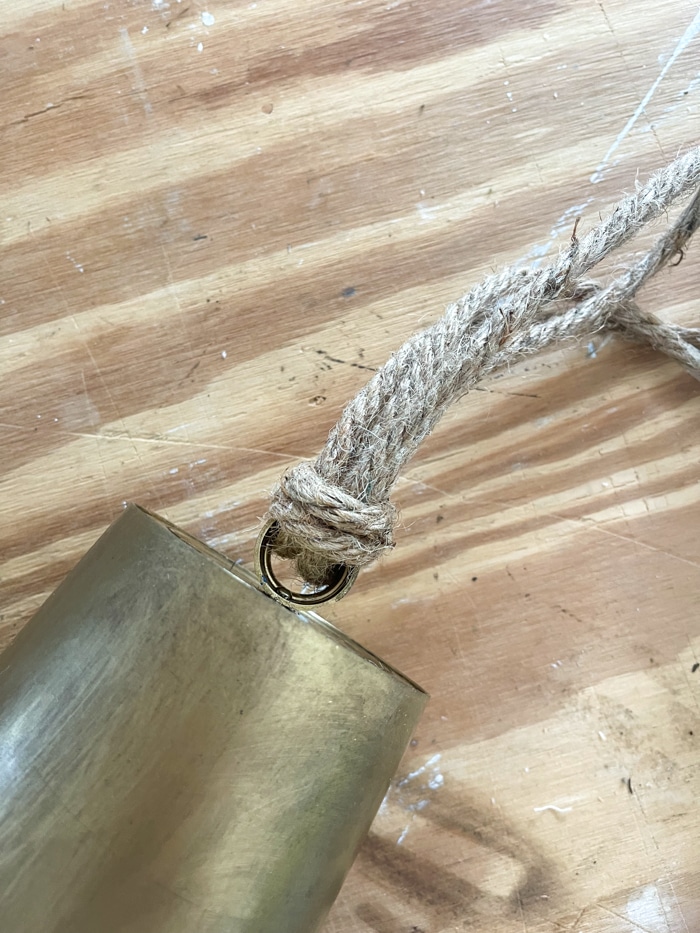
Next, I used my Ryobi glue gun to hide the cut ends of the rope from the finished rope next to it. Don't worry the glued area will be hidden by the ribbon decoration.
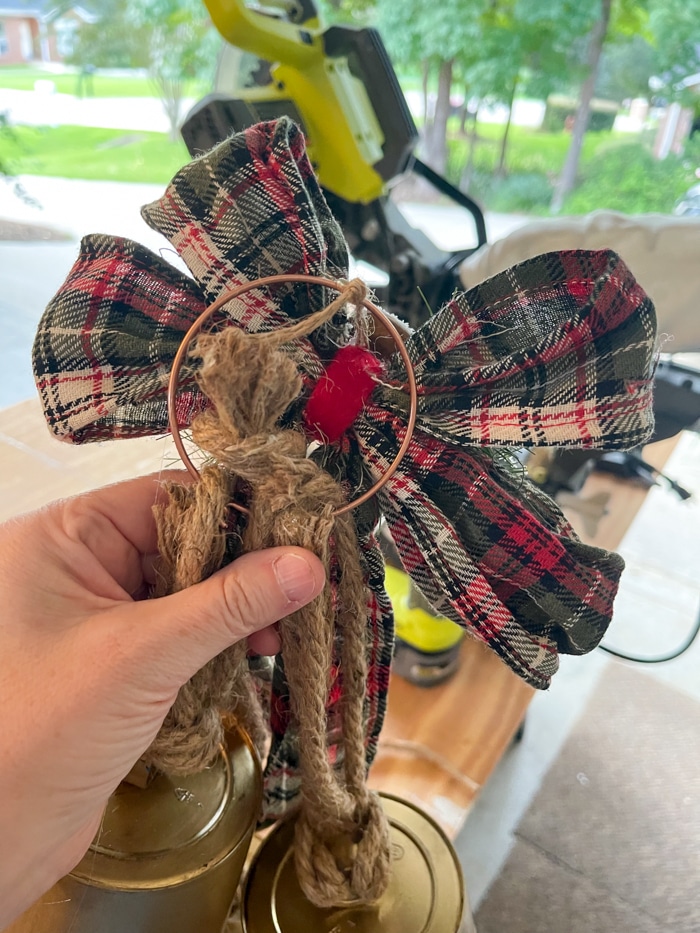
Attach Ropes to Ring
We are almost finished and this is a super easy part. Unhook your ring and slip all the ropes holding the bells onto the ring. I used a copper bracelet for this part but you can use any kind of ring that you can open and close.
Apply the Christmas Ribbon Bow Decoration to the Bells
Next, grab your plaid green and red ribbons bow decoration to attach to the bells. I love how this big bow has larger loops, rustic small jingle bells, and is dusted with a little snow.
Even though the bells I made don't have a jingle the small bells on the bow will give a little jingle when the door opens. I also love that this bow can be used as Christmas tree ornaments too.
Before you begin attaching the bow decoration I want to share that I removed the floral wire from inside the tails. I wanted them to lay more naturally so I pushed the wire through the end and slid the ribbon up as far as I could go and used wire cutters to snip the wire.
Because this bow decoration had a piece of twine behind it for hanging on a tree or anything I simply tied it to the ring and secure it into place with a drop of hot glue from the glue gun.
The piece of string made this easy. But if you don't have a hook or loop of twine then I would hot glue it to the ring.
This bow decoration would look adorable as a gift bow too. It is the perfect bow for any enchanting home decor and gifting.
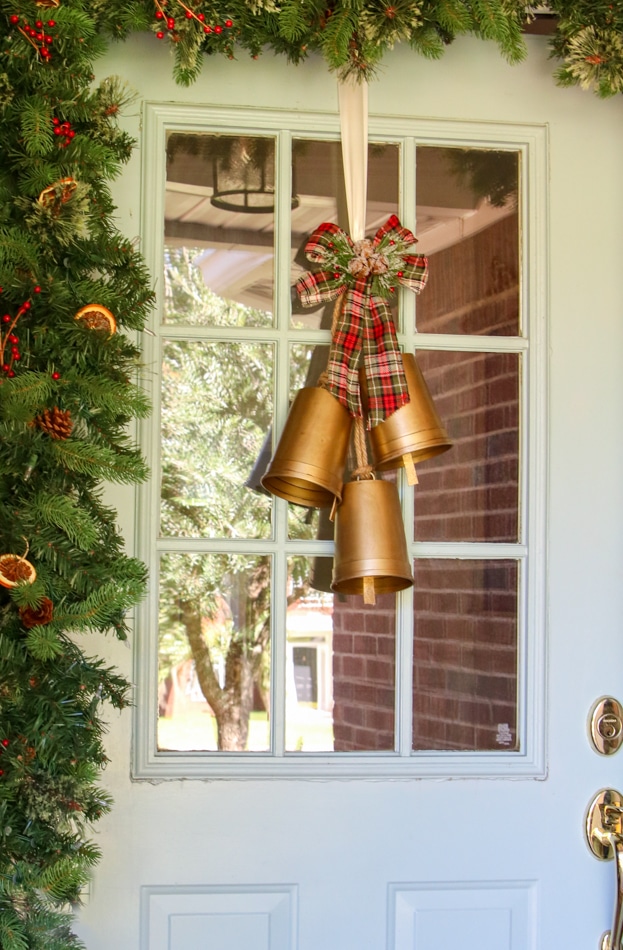
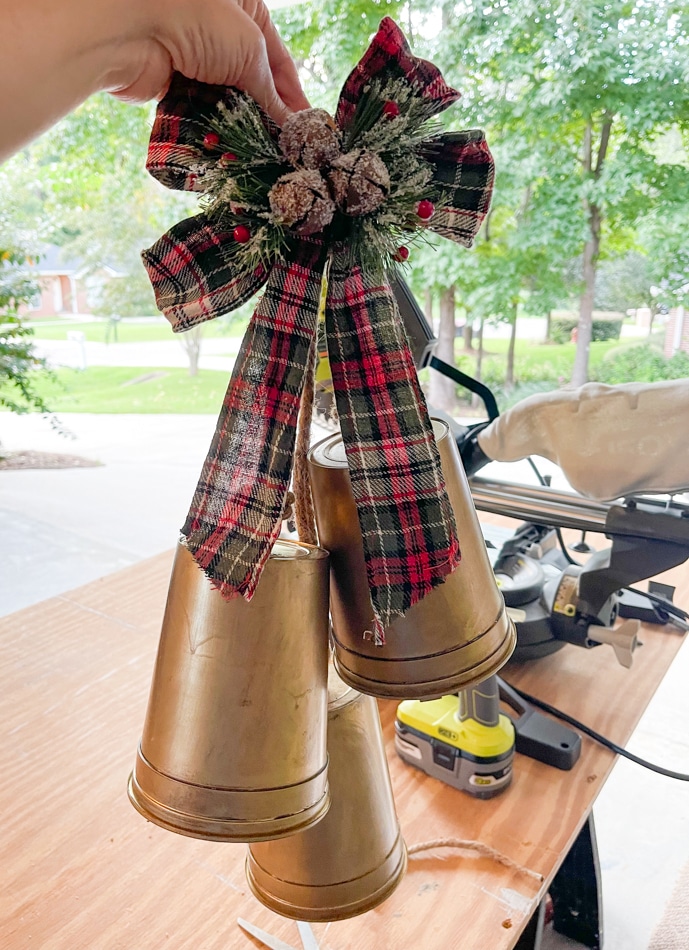
Now guess what? You have new bells and just in time to decorate our farmhouse Christmas porch.
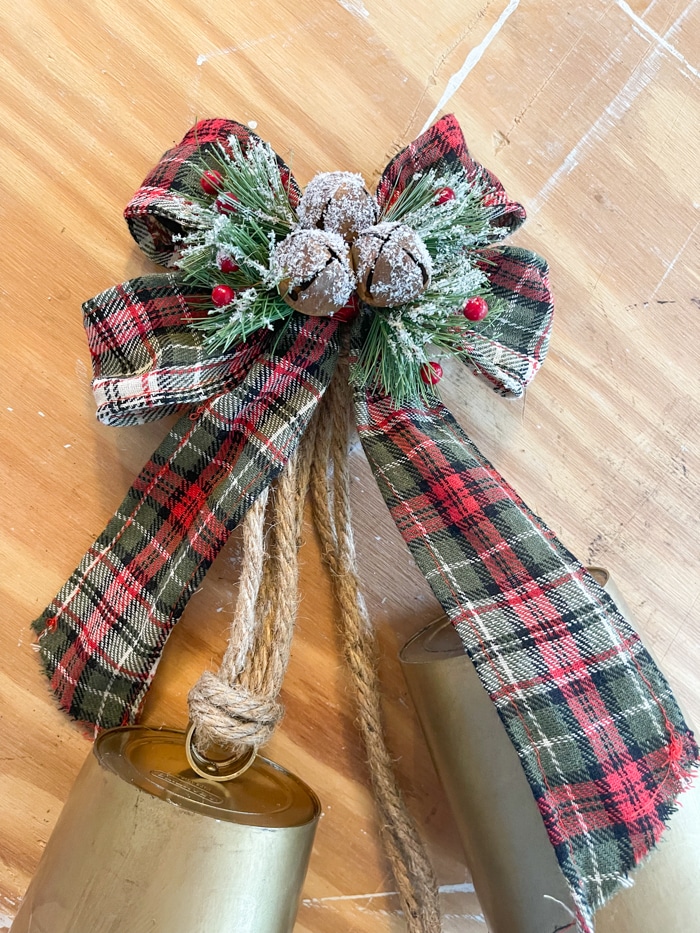
See how this simple bow was the icing on the cake. My Christmas DIY is complete. Look at these adorable Christmas bells. I am excited to hang it on our door and start decorating. This holiday door hanging will bring lots of Christmas spirit into our outdoor decor.
Hang Your Christmas Bells
If you are wondering how to hang this wreath on your door then check out my how to hang a wreath with ribbon. This is a nifty little trick I have been using for years.
This bell wreath will look great hanging on a wall or from a hook. There are so many fun things you can do with these bells. You could even make bell ornaments to hang on your tree.
Here is how the holiday bells look hanging on my front door. I have had a few friends come over and when I gave my secret away that they are plastic they looked so surprised and said they thought they were real. LOL!
After hanging our Christmas bell wreath we had a blast decorating the front porch for the holiday season. Our goal was to create a porch that brought joy to all who come to visit at our Christmas party. Add garland, Christmas tree, and other Christmas decorations for a festive entry.
Conclusion
I love this Christmas bell craft. It is the perfect touch of holiday spirit to our front door.
We go into detail on how to create a farmhouse Christmas porch in the next post coming soon if you would like to see the whole porch reveal. You can check out some more Christmas decor and easy craft DIYs in these posts:
- How to Decorate Small Front Porch for Christmas
- Simple Outdoor Cottage Farmhouse Christmas Porch
- Rustic Outdoor Christmas Decorations for your Small Porch
- How to Make a Christmas Village Wreath
- 19 Creative Christmas Gift Wrap Ideas
- Crafting Magic: How to Make Clay Mushrooms
I hope you have found the DIY helpful and I cannot wait to hear where you decorated with these vintage gold Christmas bells. They're a great way to put your home in a festive mood.
This bell project would make great handmade gifts for someone special too or you can make a larger bell simply by getting a larger bucket.
Do you have any go-to DIY Christmas crafts like these DIY large bell ornaments you do this time of year? I'd love to hear your DIY ideas in the comments!
I hope you have a Merry Christmas!
Happy Holiday Decorating!
