
In today's step by step guide, we are diving into the whimsical world of how to make clay mushrooms with an extra sprinkle of creativity on how to decorate with these precious little fungi.
This delightful project, perfect for beginners and kids alike, will have you sculpting your own charming fungi out of air-dry clay. Let's turn imagination into reality – let the clay crafting adventure begin!
Mushroom decor has made a comeback from the 70s, and this time, it is even more fun and cuter than ever. You can find mushroom decor in stores, like throw pillows, lamps, and wall art. It is everywhere. In fact, we have a mushroom printable in our Etsy shop.
But nothing says adorable and charming like a homemade clay mushroom and the decorating ideas are many, so let's dive into how to make a clay mushroom and get our hands dirty kind of like real mushrooms. LOL!
This post contains affiliate links, meaning I receive a commission if you purchase using the links below at no extra cost to you. All opinions are all my own.
How To Make Clay Mushrooms
To begin making these cute little fungi decorations, you will need some supplies and a flat workspace. Because this project takes up little room, you can even grab a large cutting board and make them while sitting on the floor while watching a movie – that is what I did.
What Supplies Do I Need to Make DIY Clay Mushrooms?
You only need a few basic supplies to make your clay mushrooms.
Is it Difficult to Make Clay Mushrooms?
Good news! It is not difficult at all to make air dry clay mushrooms! This is an easy craft for beginners and kids and it doesn't take a long time. Clay projects are a great way to do a family project. I'm going to give you a step-by-step guide.
We're going to start by making our mushroom shapes.
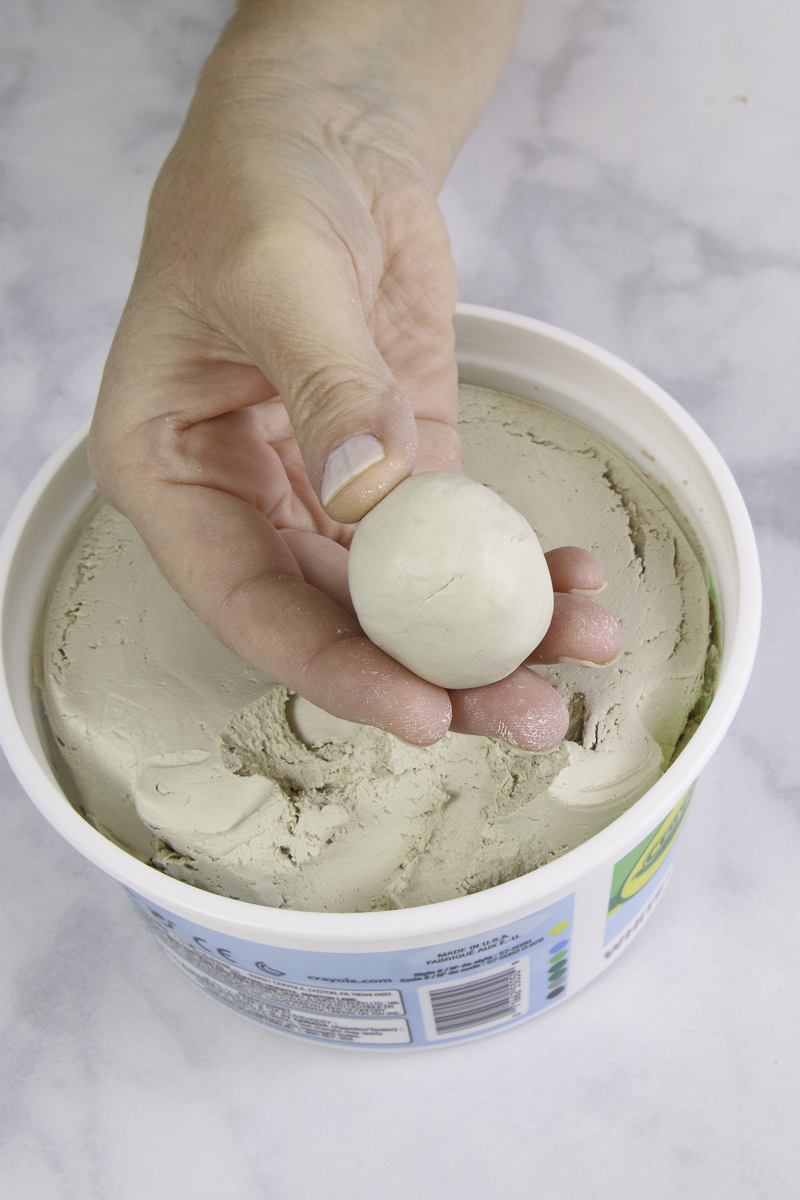
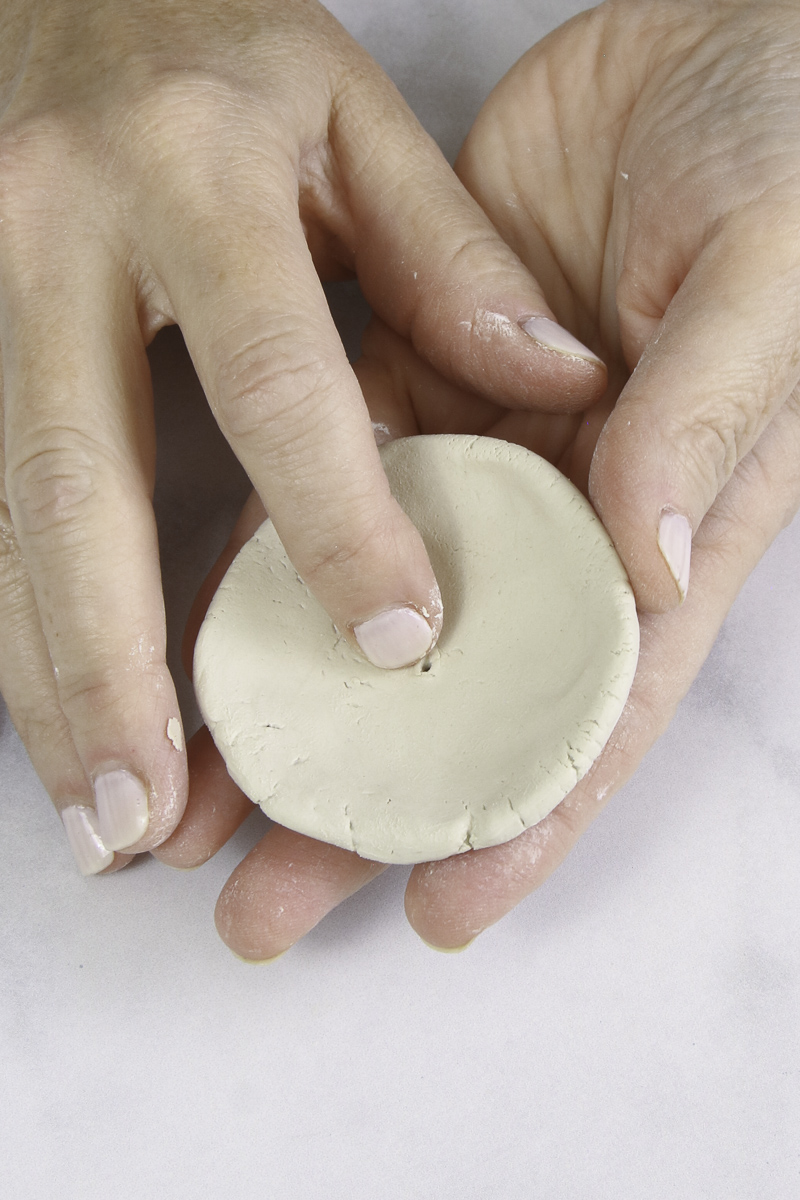
Step 1 – Start with the Cap
Start by taking a small piece of air-dry clay and rolling it between your hands to warm it and shape it into a ball.
On a flat surface, press your thumb into the middle of the ball of clay to make an indentation.
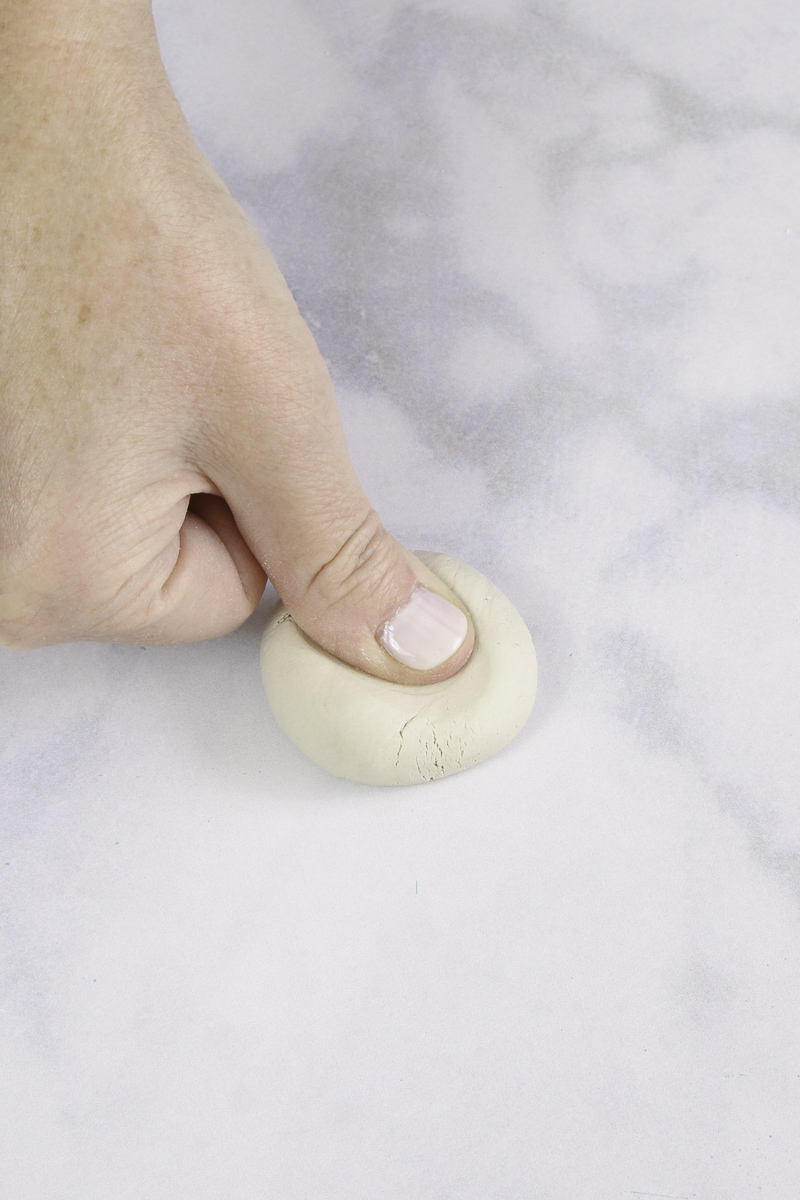
Continue pressing the clay out to the sides and shaping the sides down slightly.
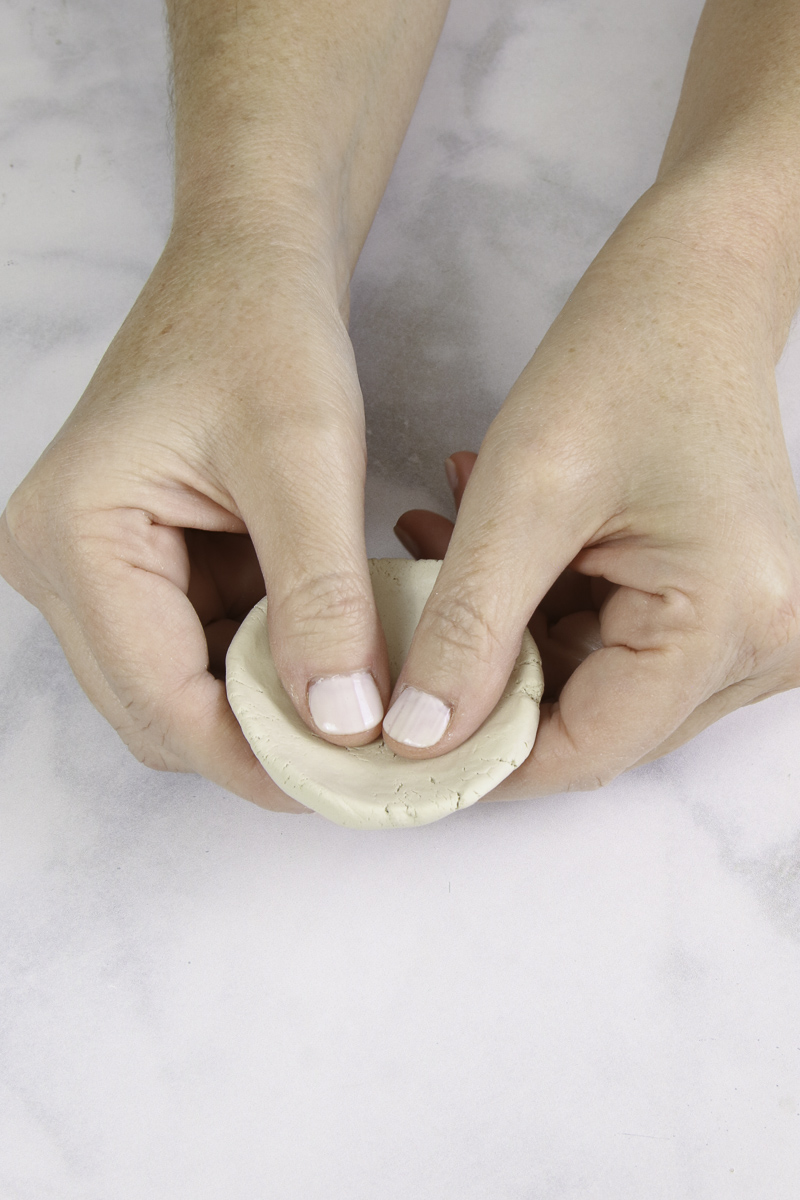
You can see the start of the top of the mushroom cap shape.
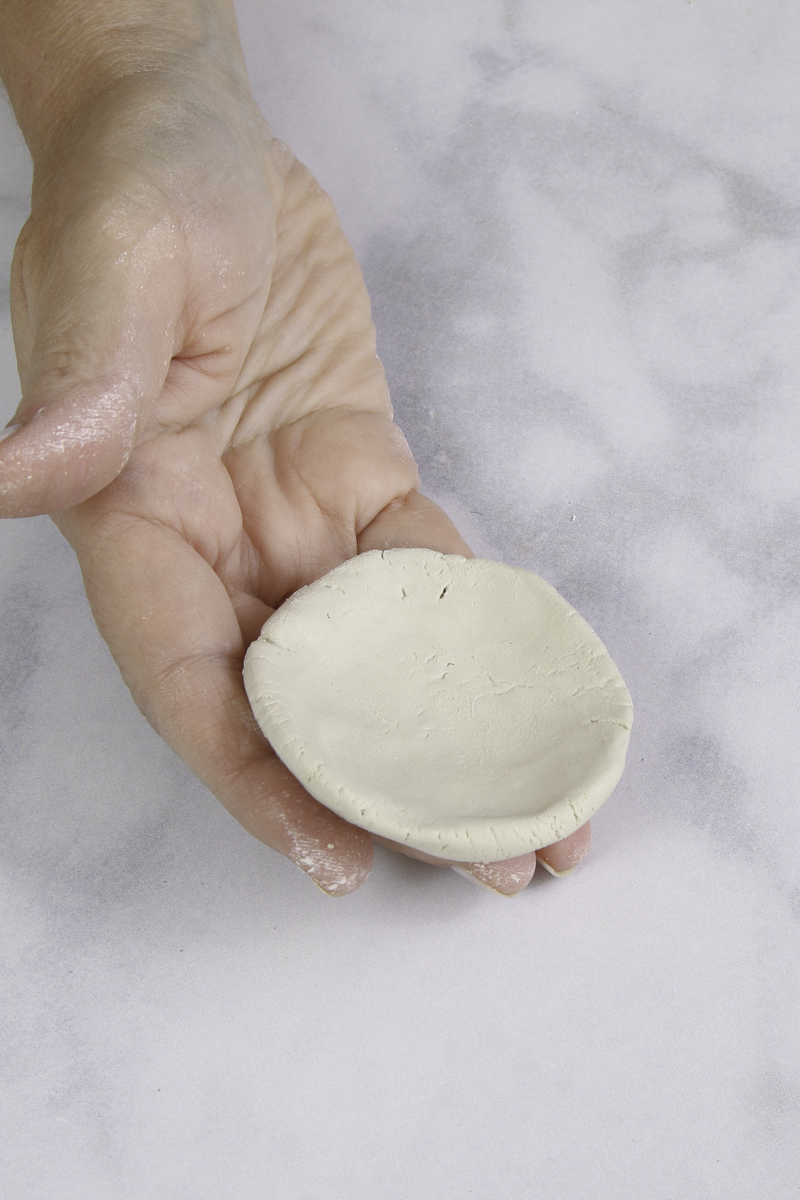
Smooth out the mushroom cap by gently rubbing over any cracks or pieces you want to smooth. Remember, mushrooms are not perfect in nature, your mushroom tops do not have to be perfect either.
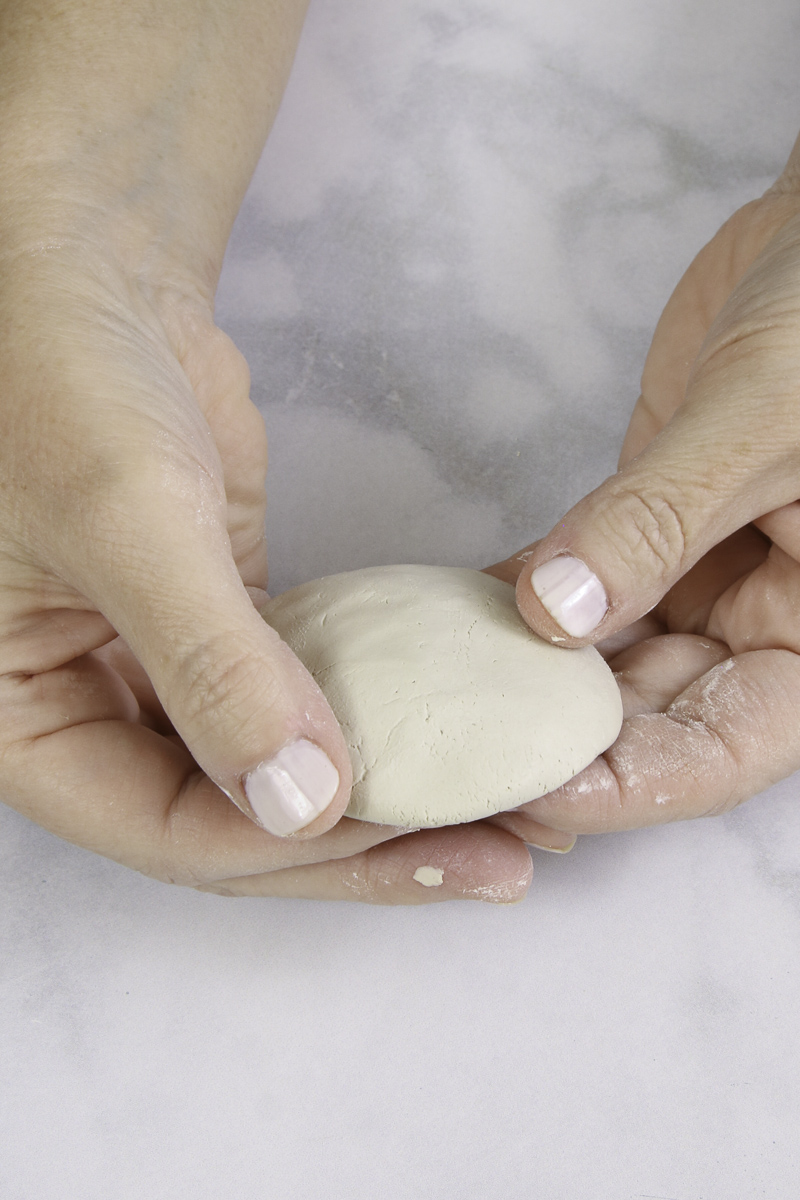
Step 2 – Make the Stem
Let's start on the mushroom stalks or stem by warming a clay section in your hands, just like you did with the cap, and then rolling it into a ball.
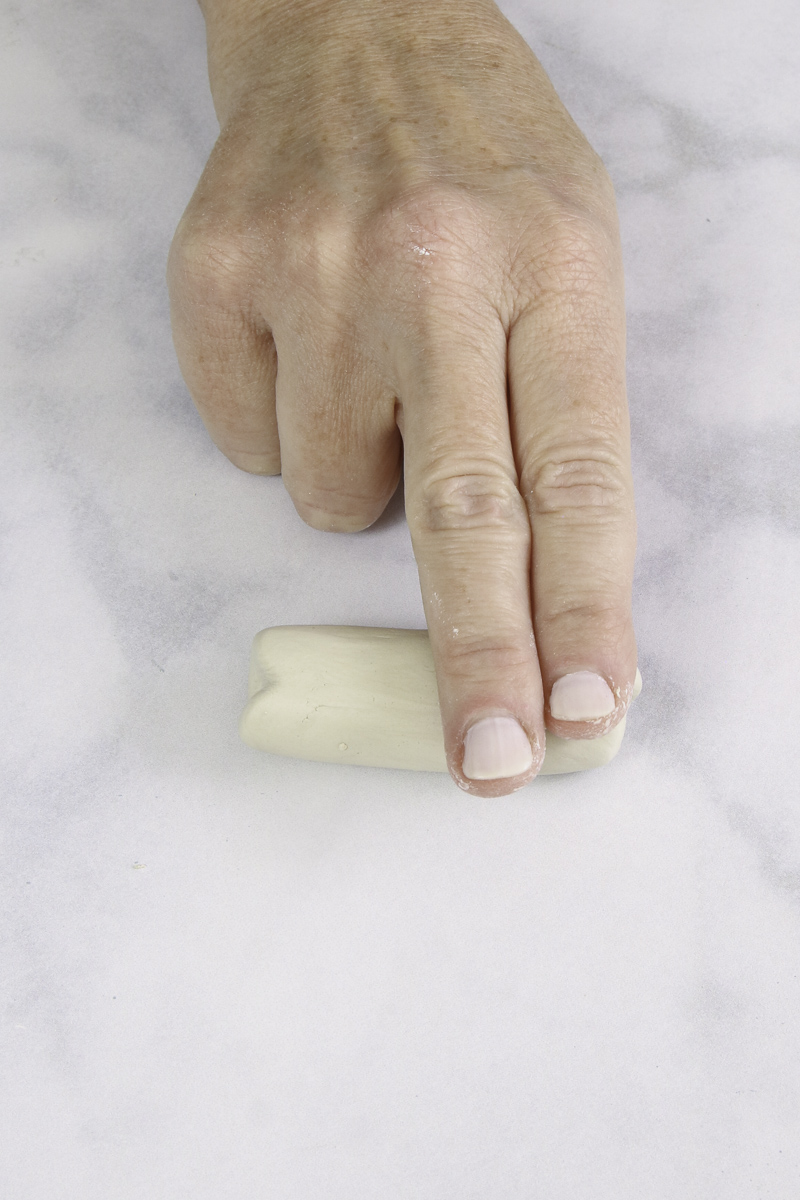
Put the clay ball on your work surface and start rolling it back and forth under your hand, and it will start taking on a cylindrical shape. Once you have a cylindrical shape, use two fingers more on one side because we want one side to be skinnier.
That will be the top of the stem.
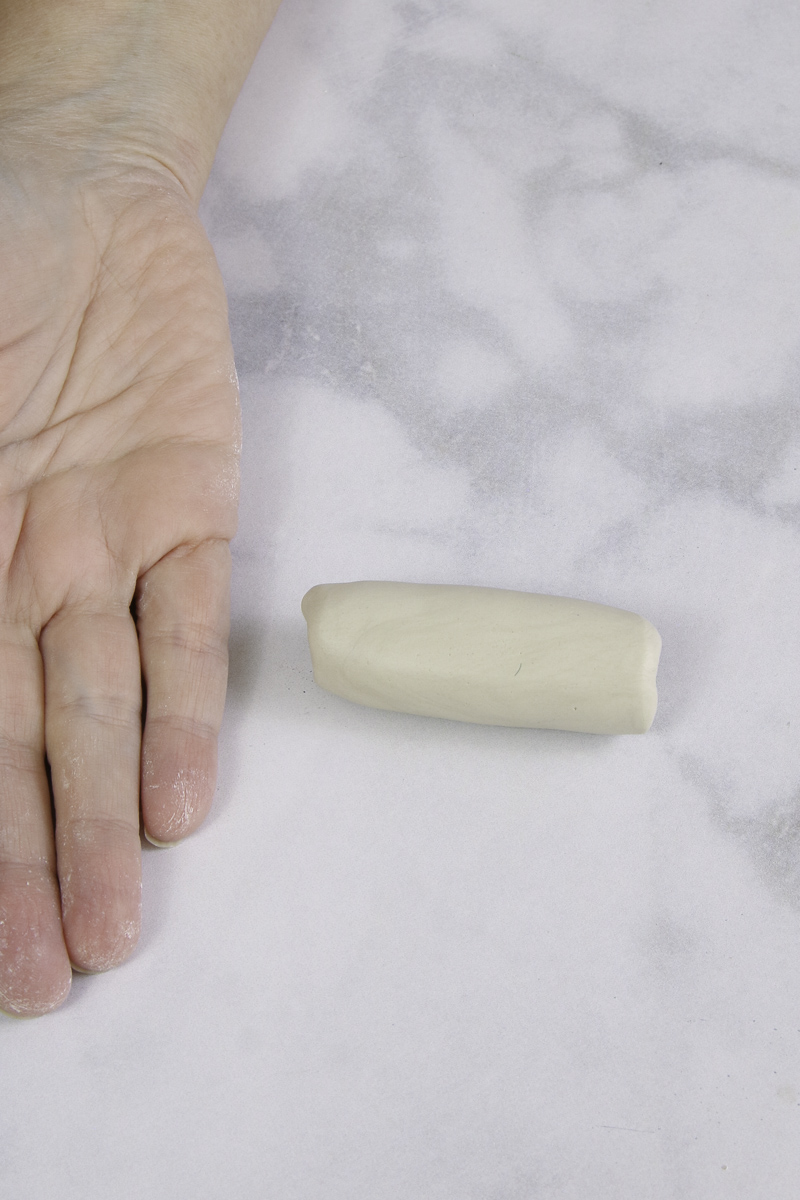
Continue this process until you have the stem length you want.
Place the “stem” with the large side down and apply gentle pressure to flatten the bottom.
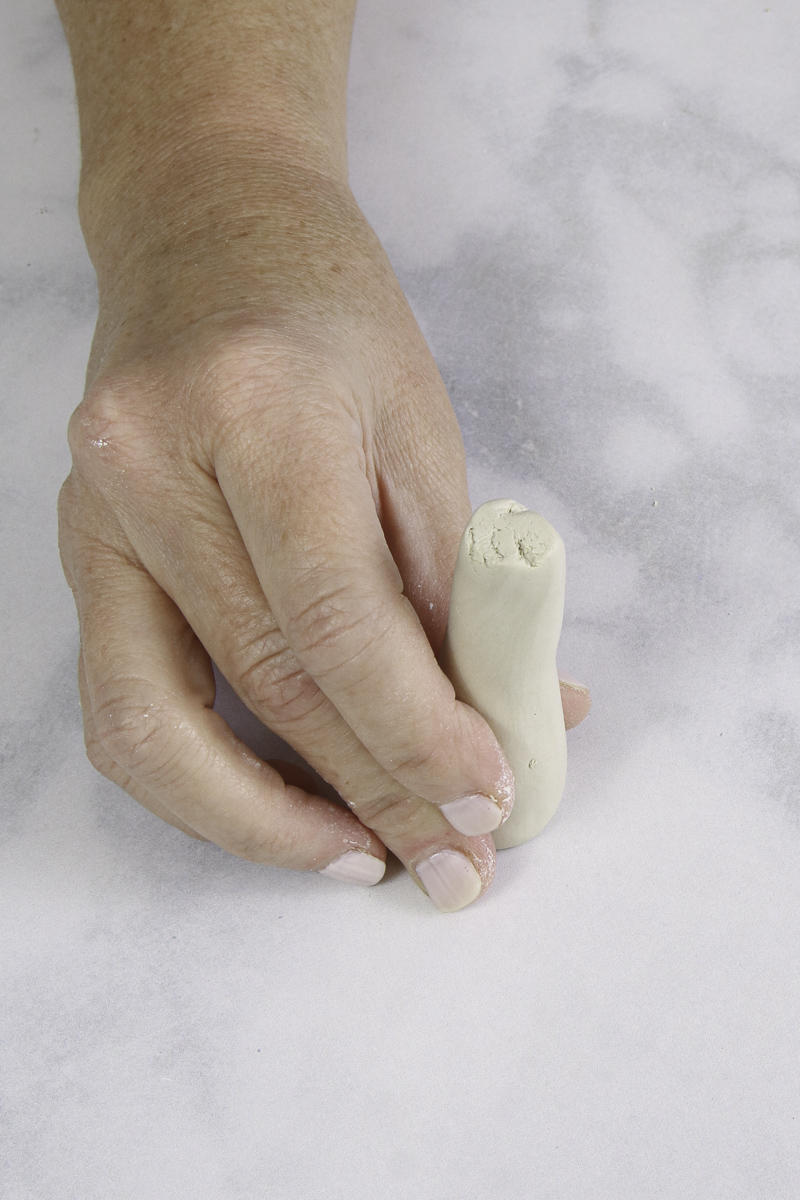
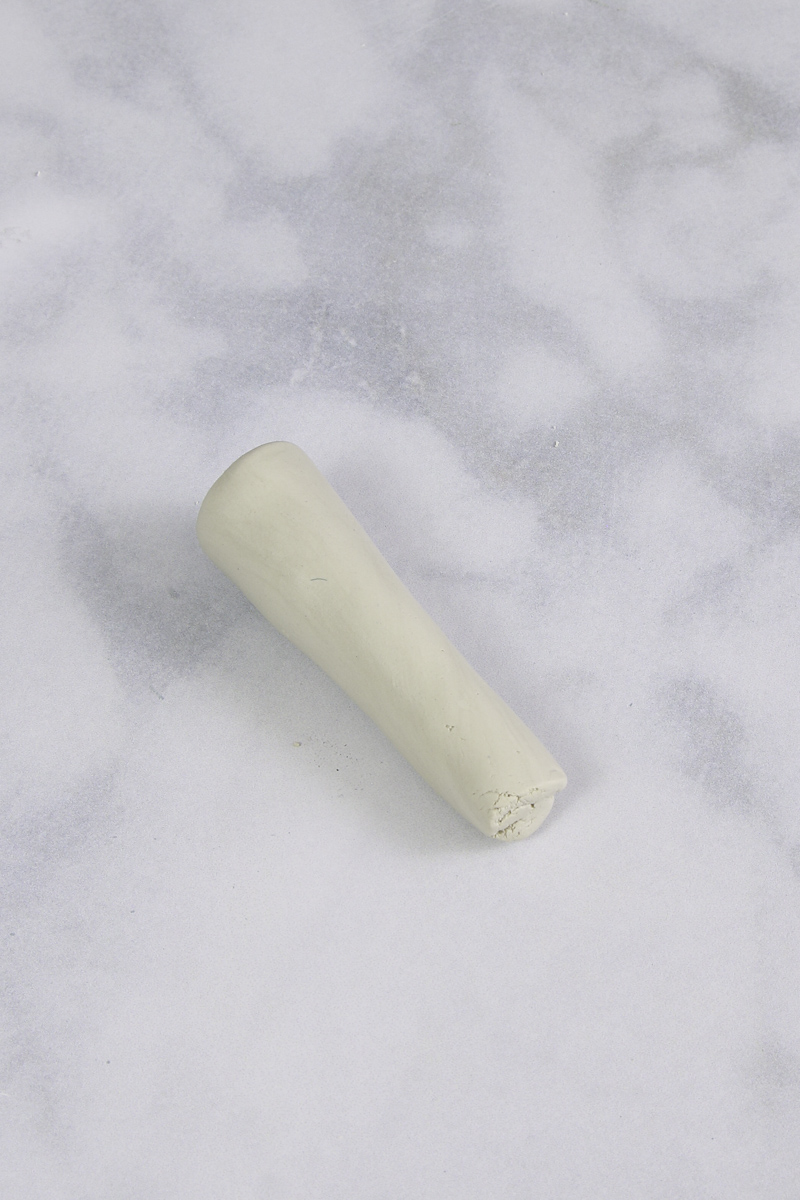
Once the bottom is flat, lay it on its side again and continue to roll it until it's smooth and the length you want.
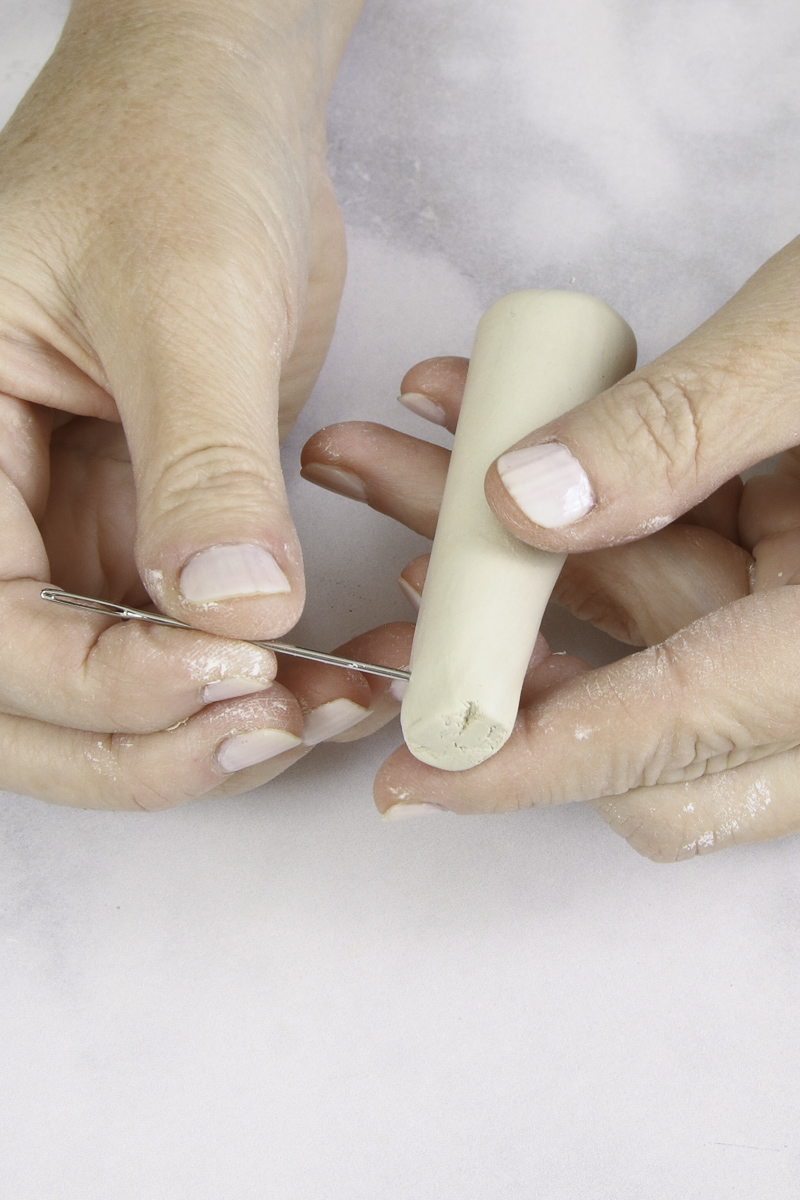
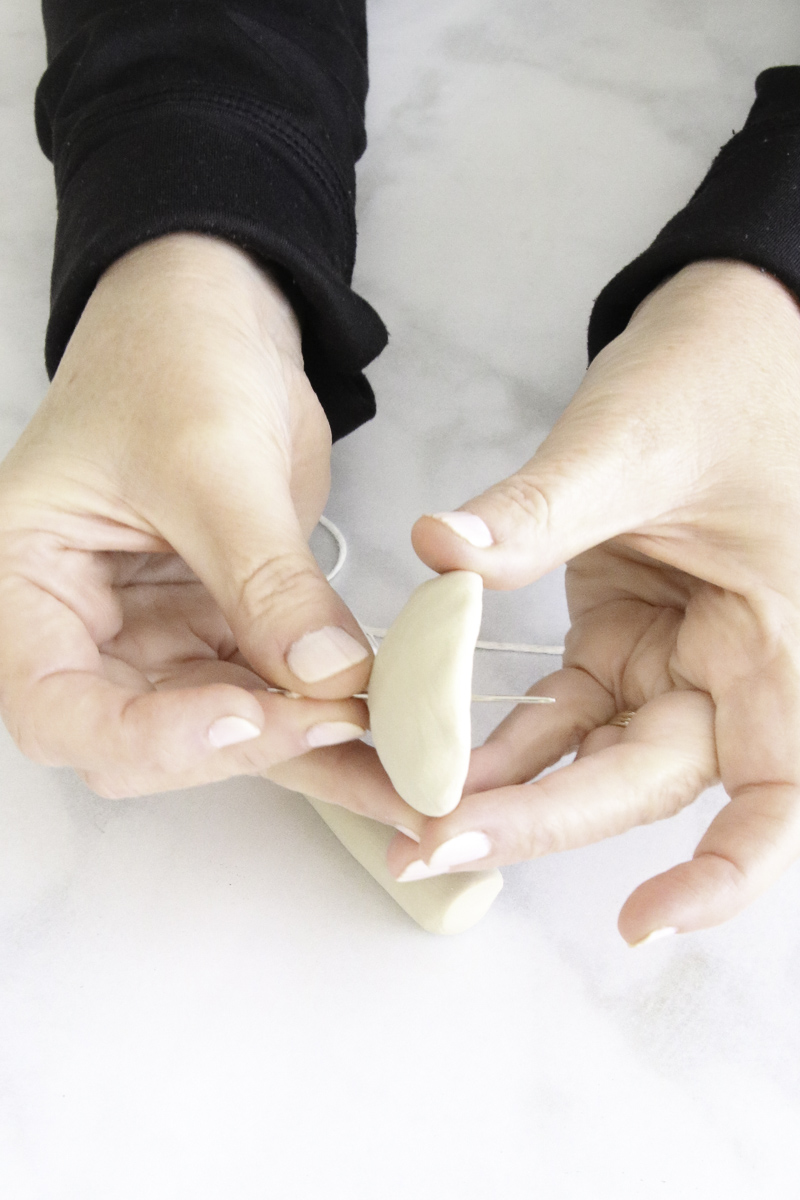
Step 3 – Make Holes in the Cap and Stem of the Mushroom
Now if you want to make ornaments take a yarn needle and make a hole in the cap of the mushroom, starting from the top and go straight through.
Note – if you don't plan on hanging your mushrooms, you can use the hot glue gun to attach the stem to the cap and skip making the holes and threading the twine.
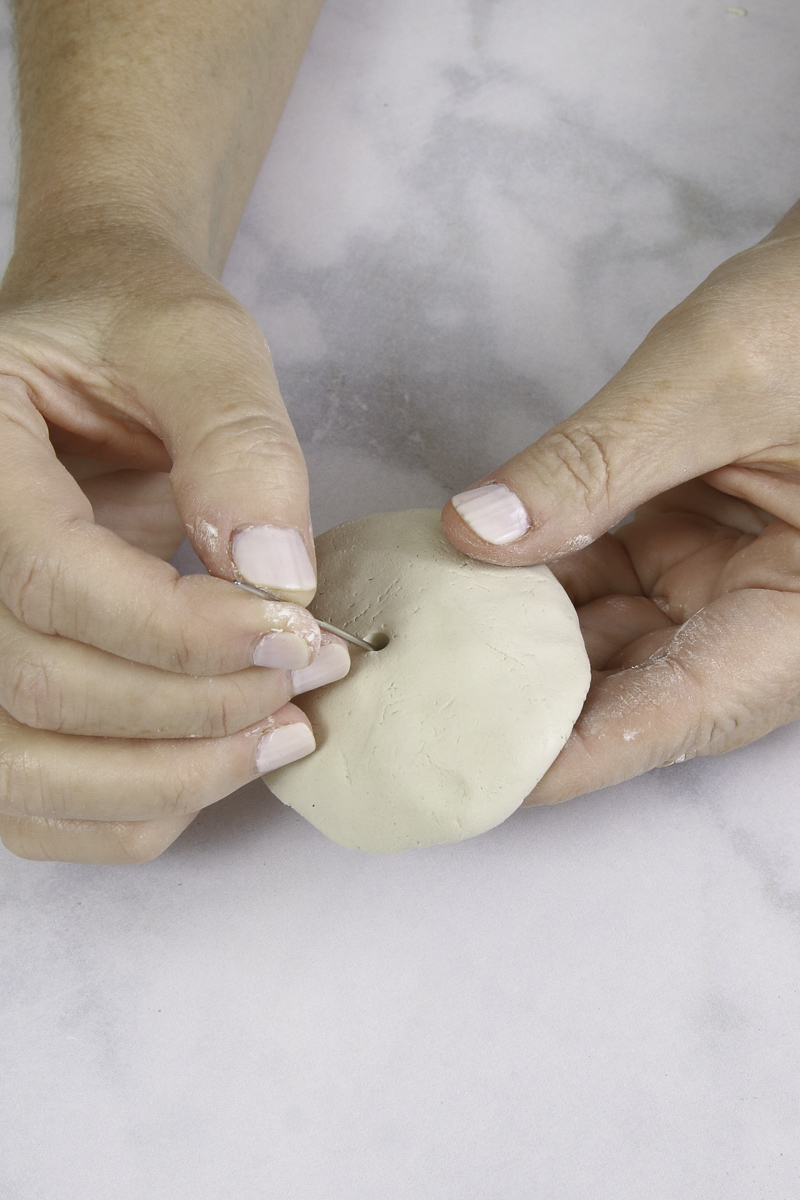
Ensure the hole is wide enough for thread to pass through it. You can smooth the bottom of the hole where the excess clay builds up.
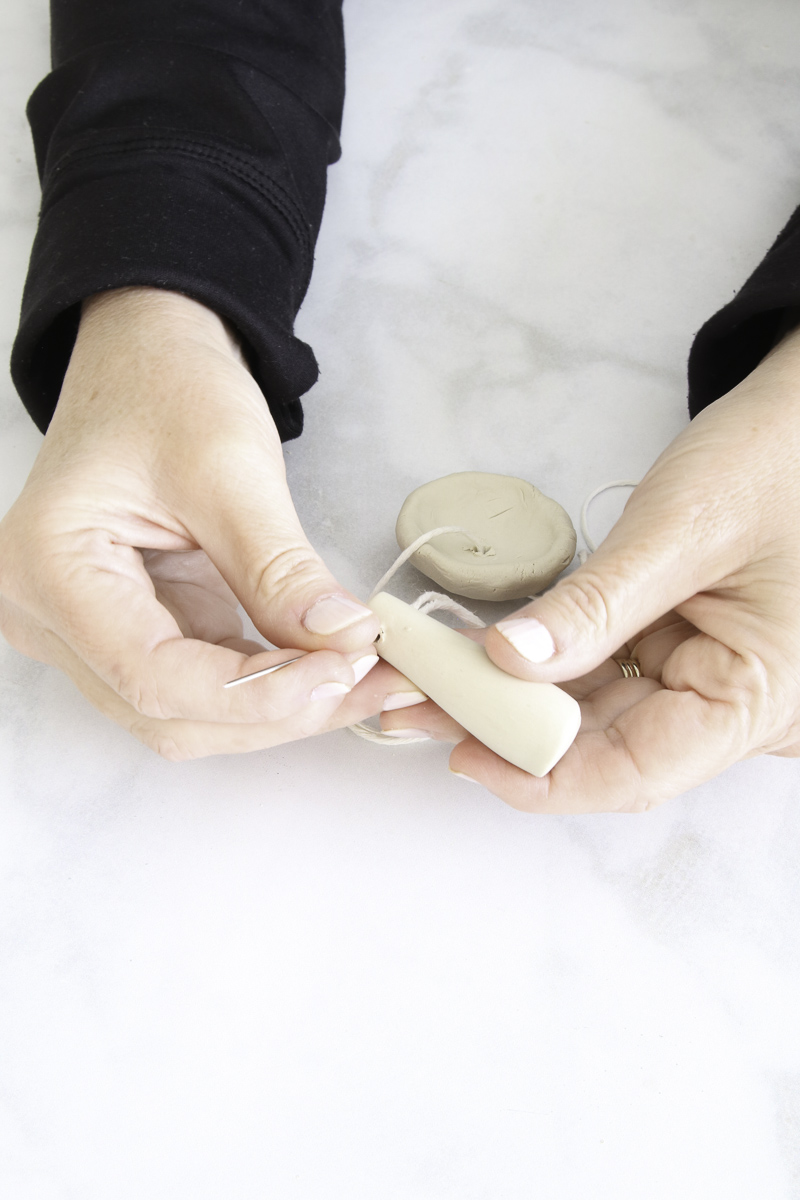
Next, you'll use the yarn need to make a hole through the thin end of the stem, wide enough for thread to go through it.
Step 4 – Let the Mushroom Dry
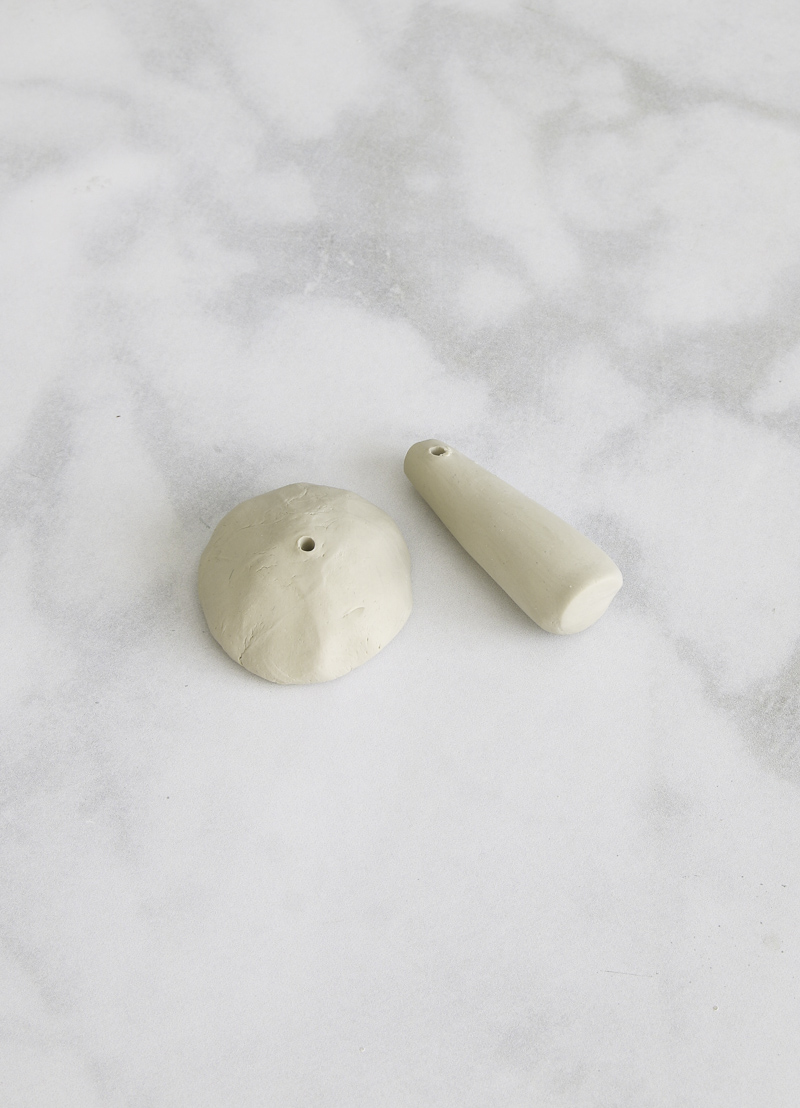
Here's an easy step – let the mushroom forms dry overnight.
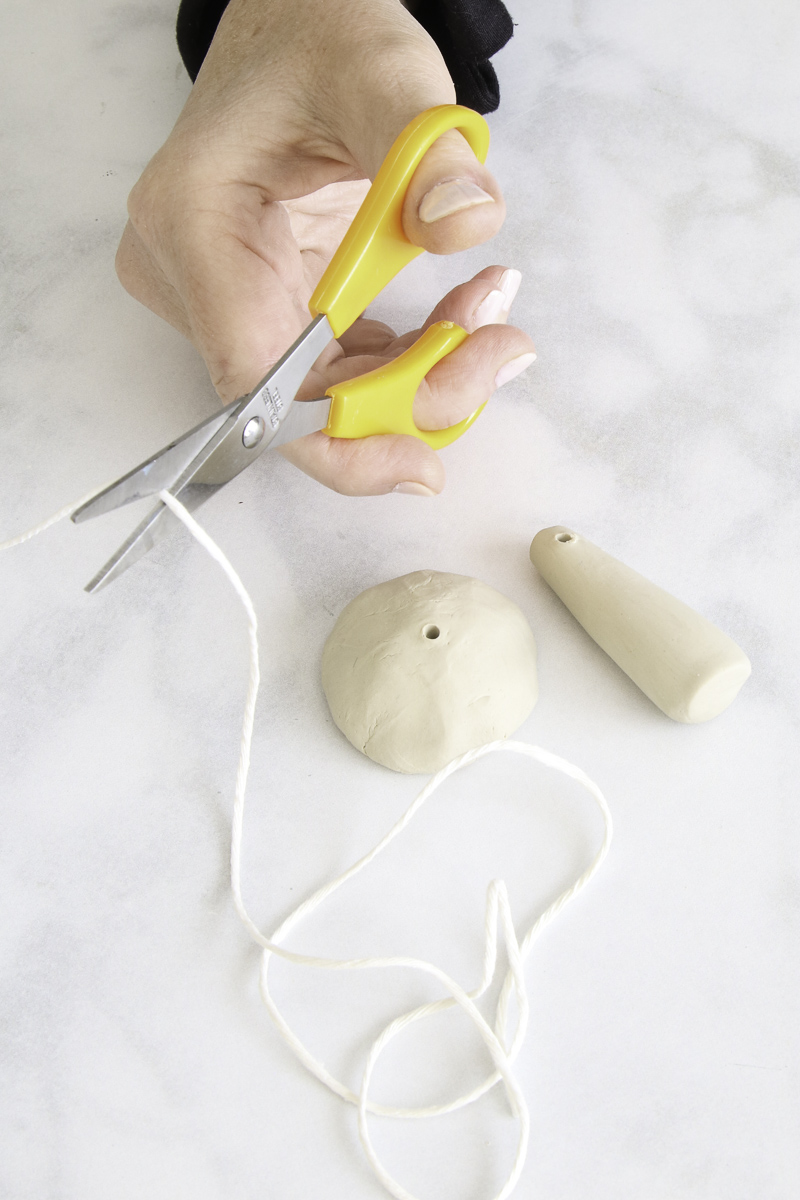
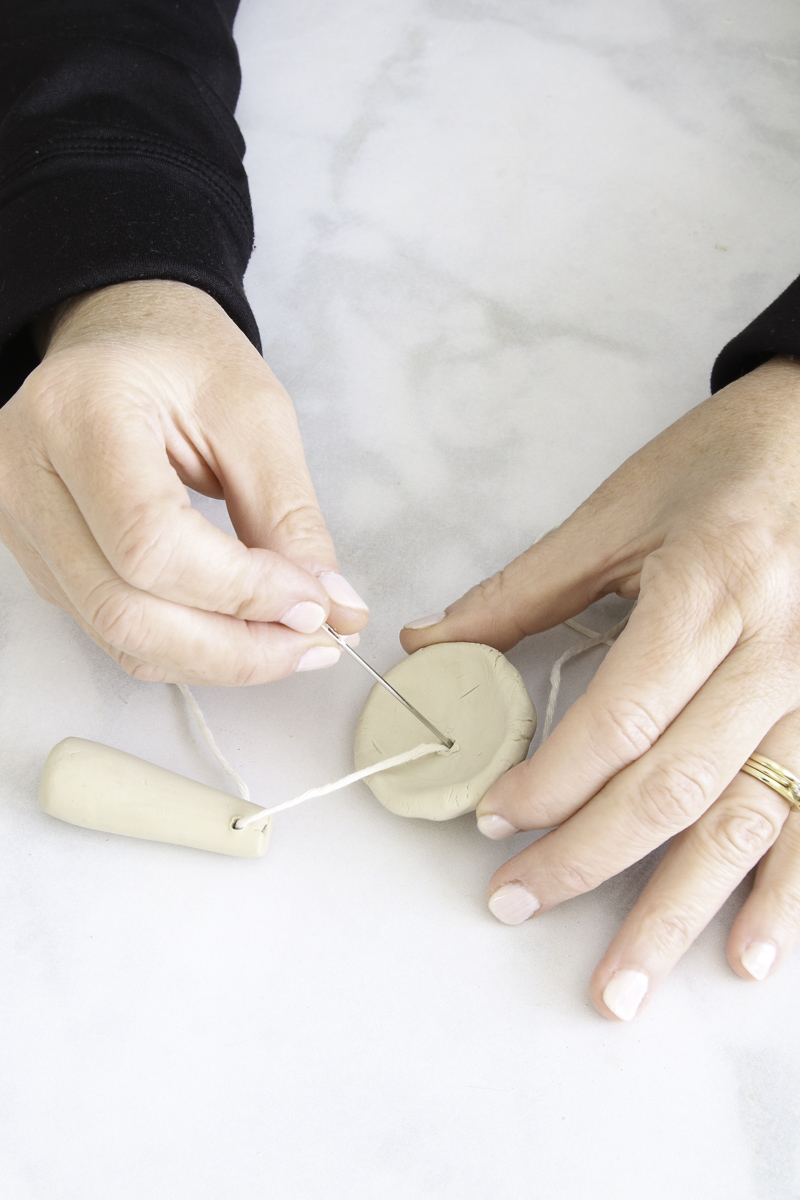
Step 5 – Thread the Twine Through the Mushroom Stem and Cap
Now you can paint the mushrooms if you choose. I'm going to leave mine a natural color and go straight into threading the pieces. You can use twine or any kind of string. Cut a long length. Thread the twine or string through the yarn needle.
Thread the twine through the top of the cap first.
Next, you'll go under the cap and thread the twine through the stem.
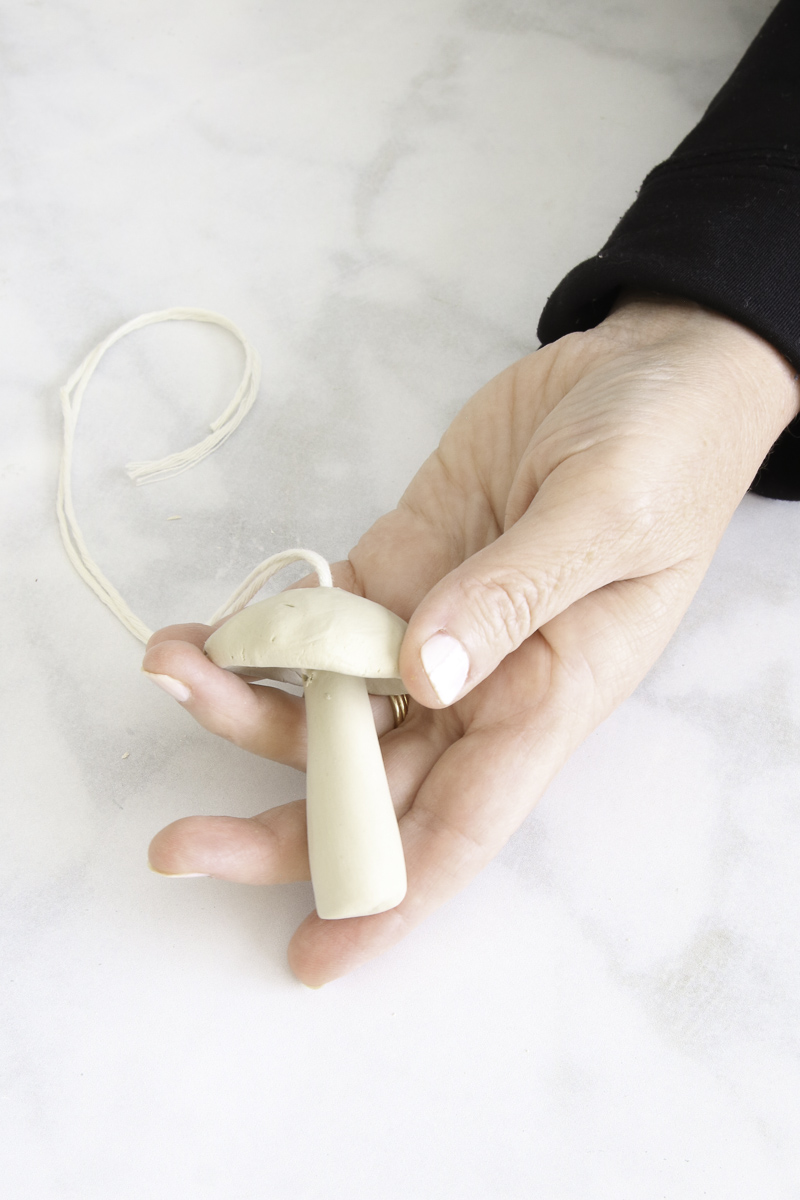
Go under the cap again and pull the twine through the top.
Pull the thread and it will pull the stem underneath.

Step 5 – Tie Up the Twine Ends
For the final step, tie the ends of the twine into a knot.
Cut off the excess twine about 1/2 inch from the knot on each side, then fray the ends to look like a tassel.
That's it! You have your very own clay mushroom ornaments. I love this mushroom project. It's such an easy and fun project!
Decorate with your Mushroom
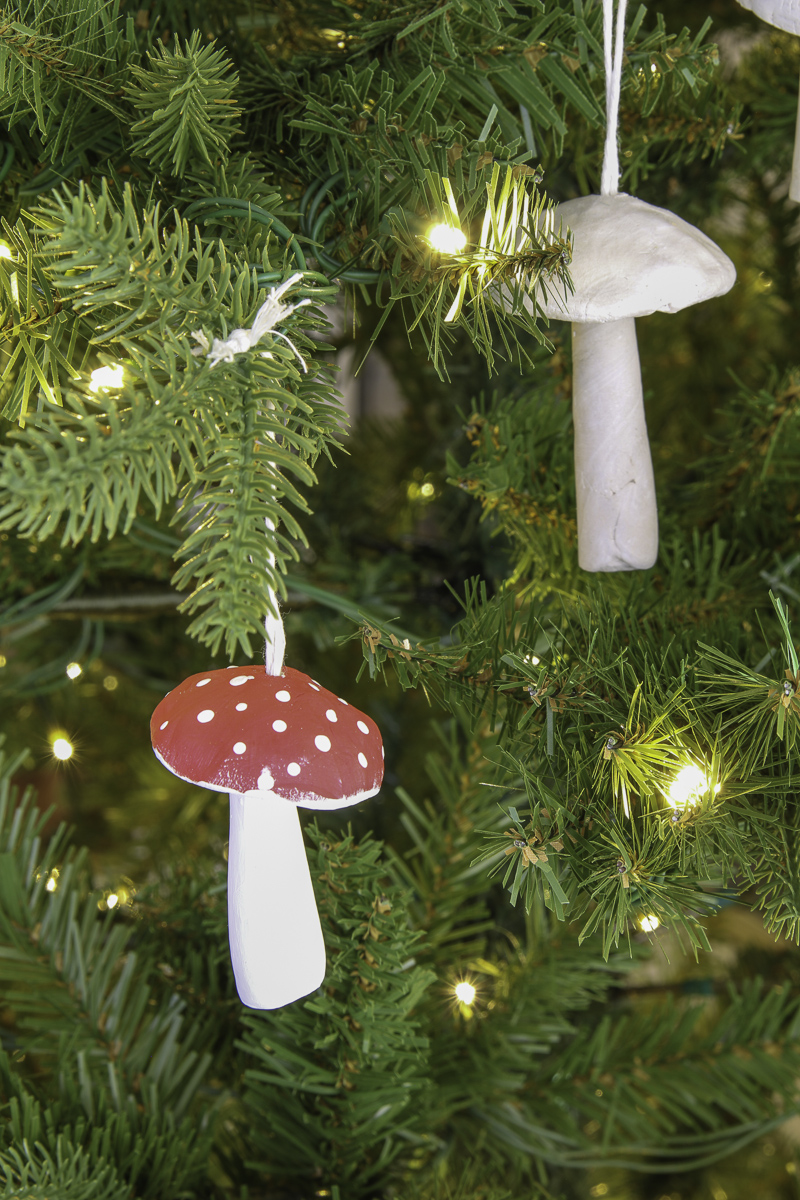
Now it's time to decorate with your DIY mushrooms. There are so many ways you can decorate with your clay creations. I'll be hanging them from my Christmas tree as ornaments.
Decorate your Christmas Tree with Clay Mushrooms
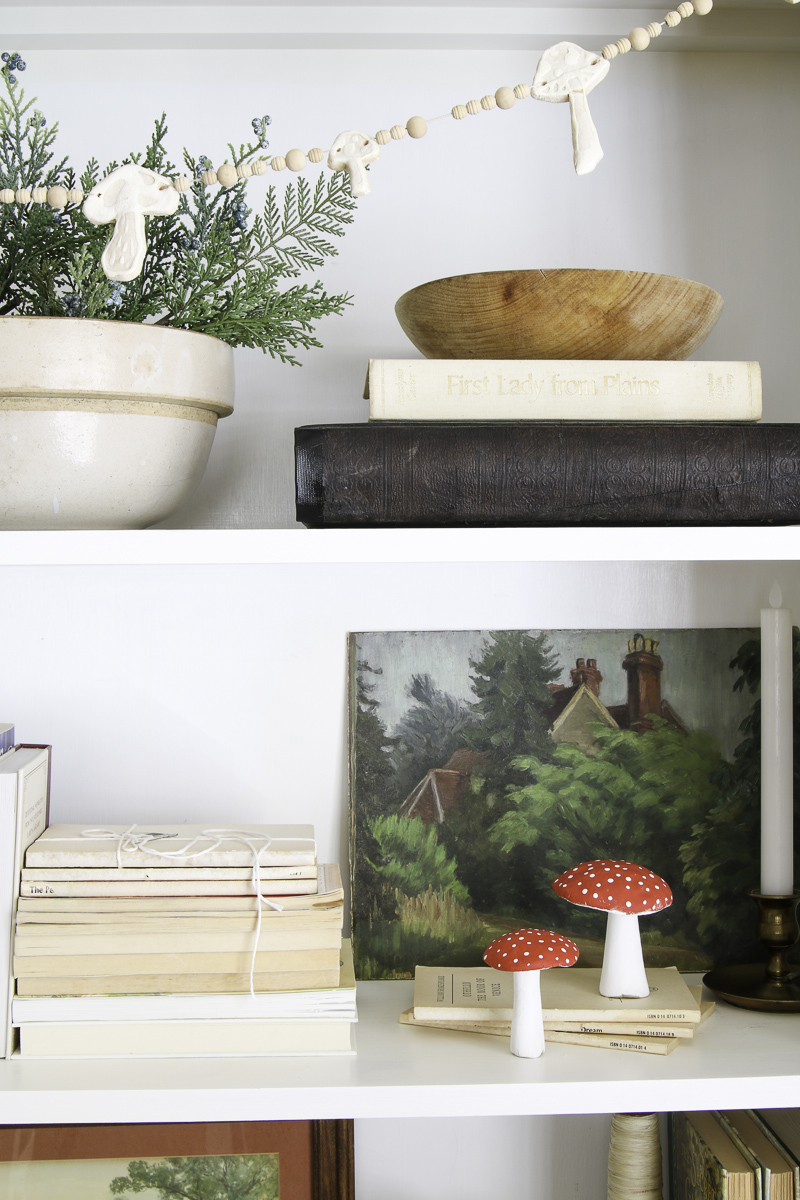
They're also the perfect addition to a fairy garden, in a terrarium, in the kitchen, hanging on furniture hardware, just about anywhere.
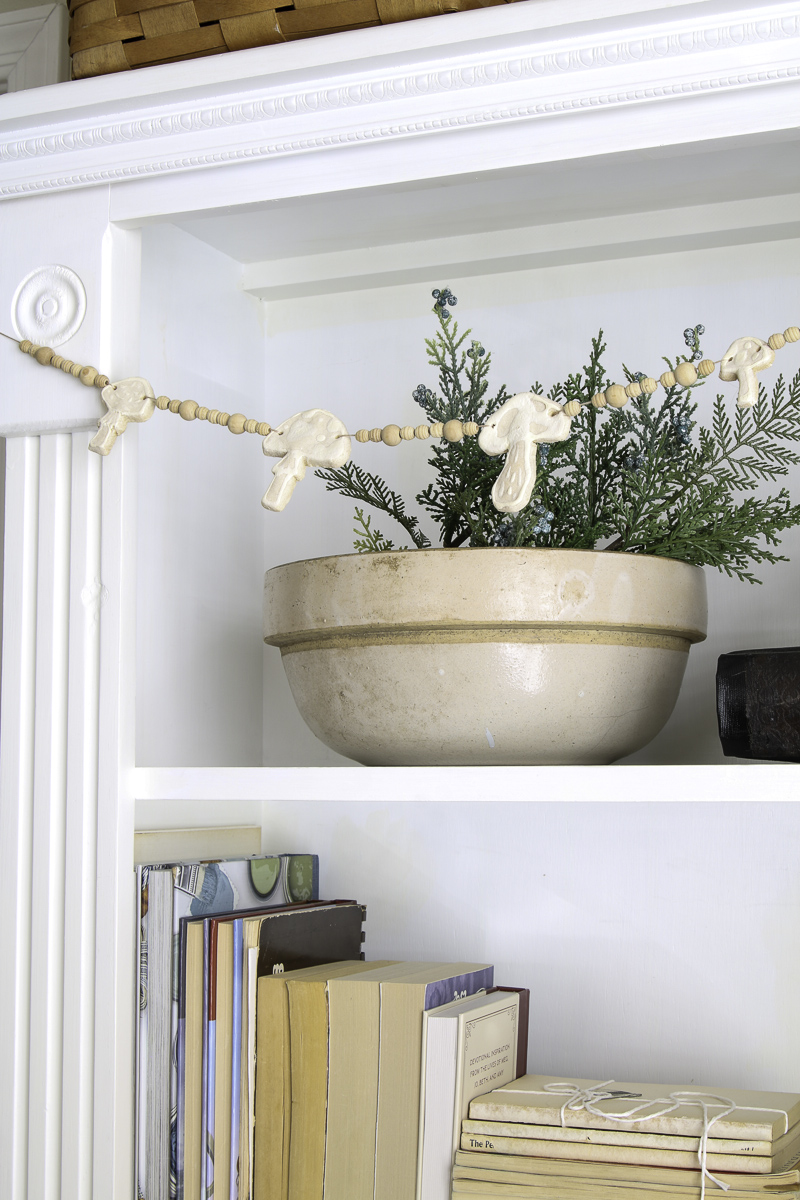
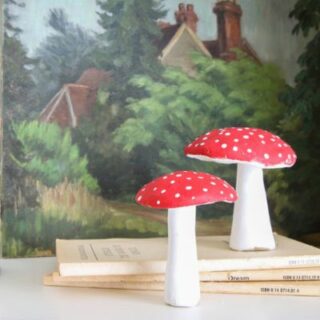
DIY Clay Mushroom Garland
You can also make a garland hanging on the top of the bookcase like this. Roll out the air dry clay and use a cookie cutter or draw and cut out mushrooms. Then, string wooden beads and the mushrooms.
These adorable mushrooms will add a spot of whimsy to your home and make you smile all year long.
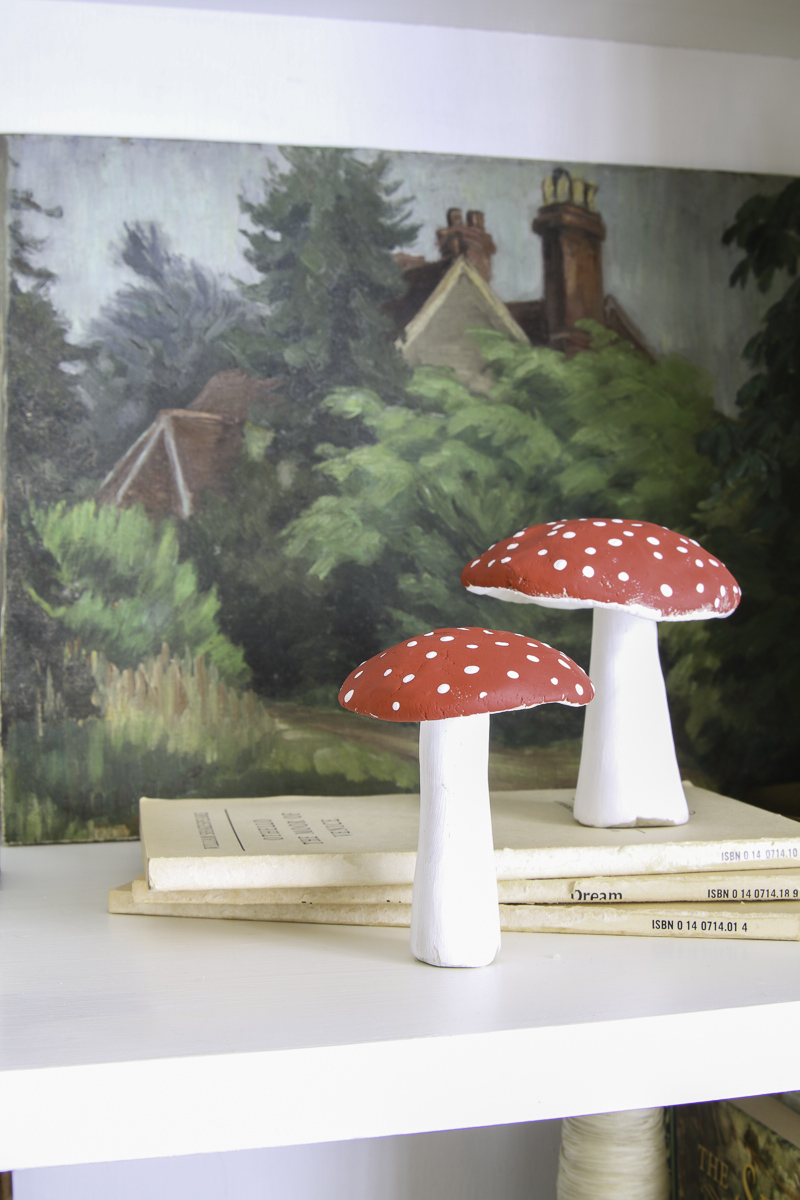
Clay Mushroom Decoration on Bookcases
Conclusion
I had a great time making these clay mushrooms and I hope you do too. Now that you know how easy it is to make clay mushrooms, you can make it an activity the whole family can enjoy.
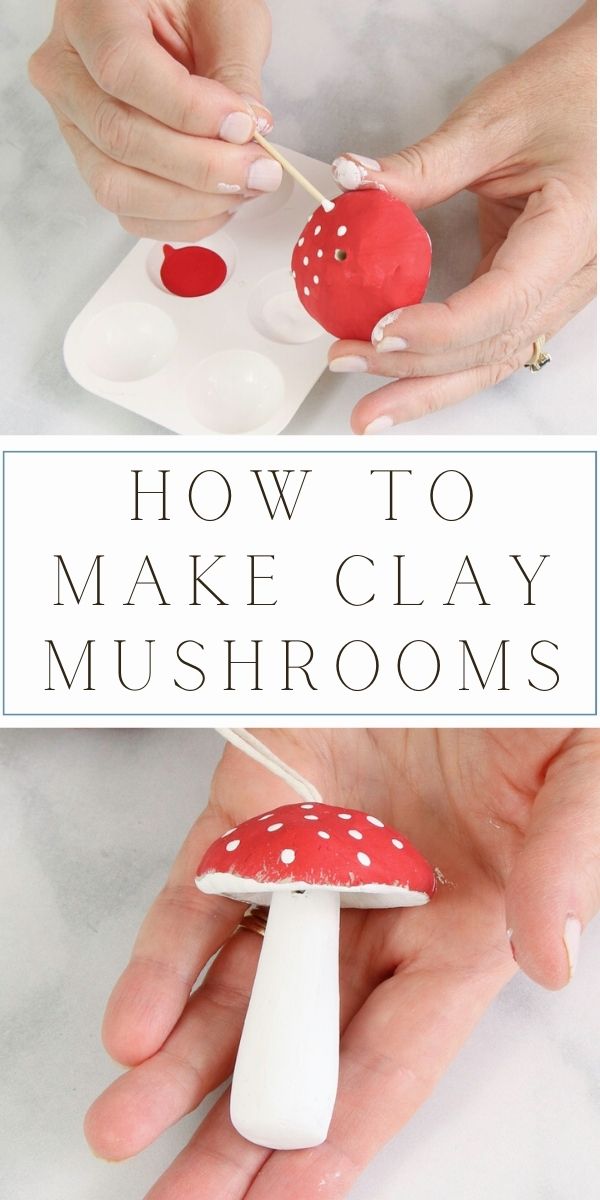
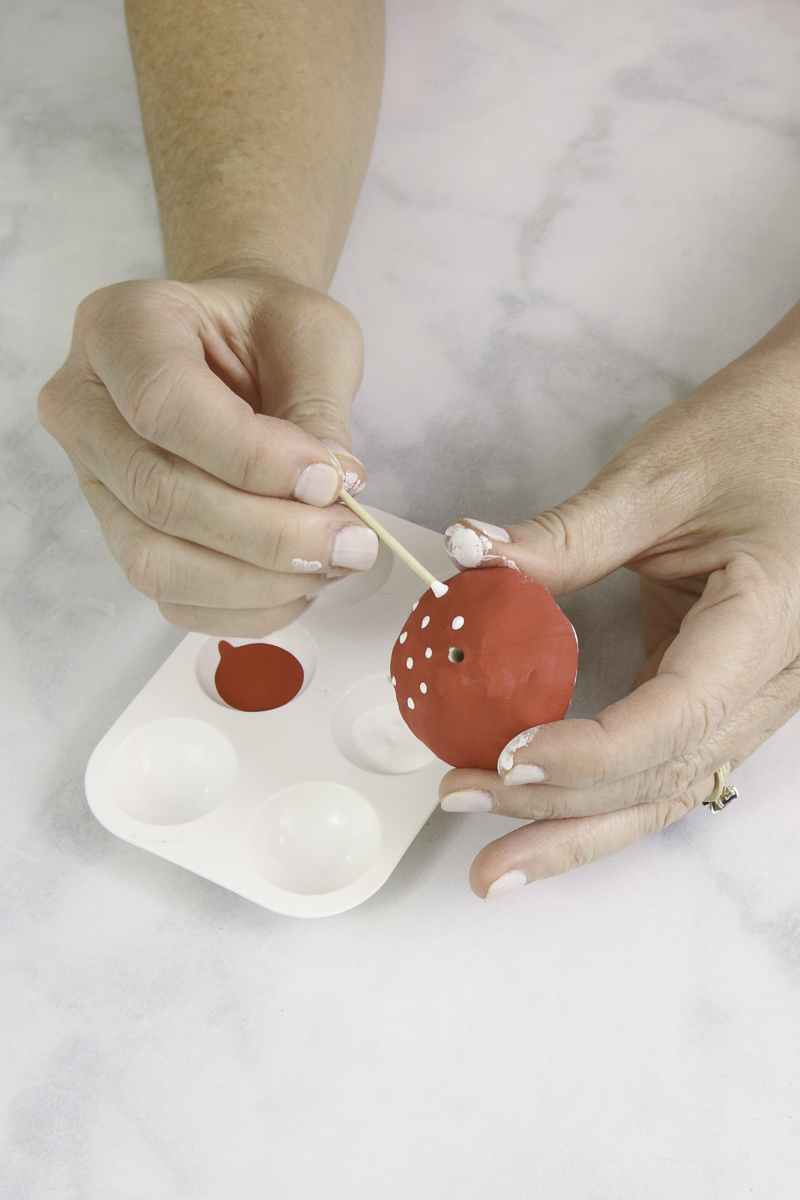
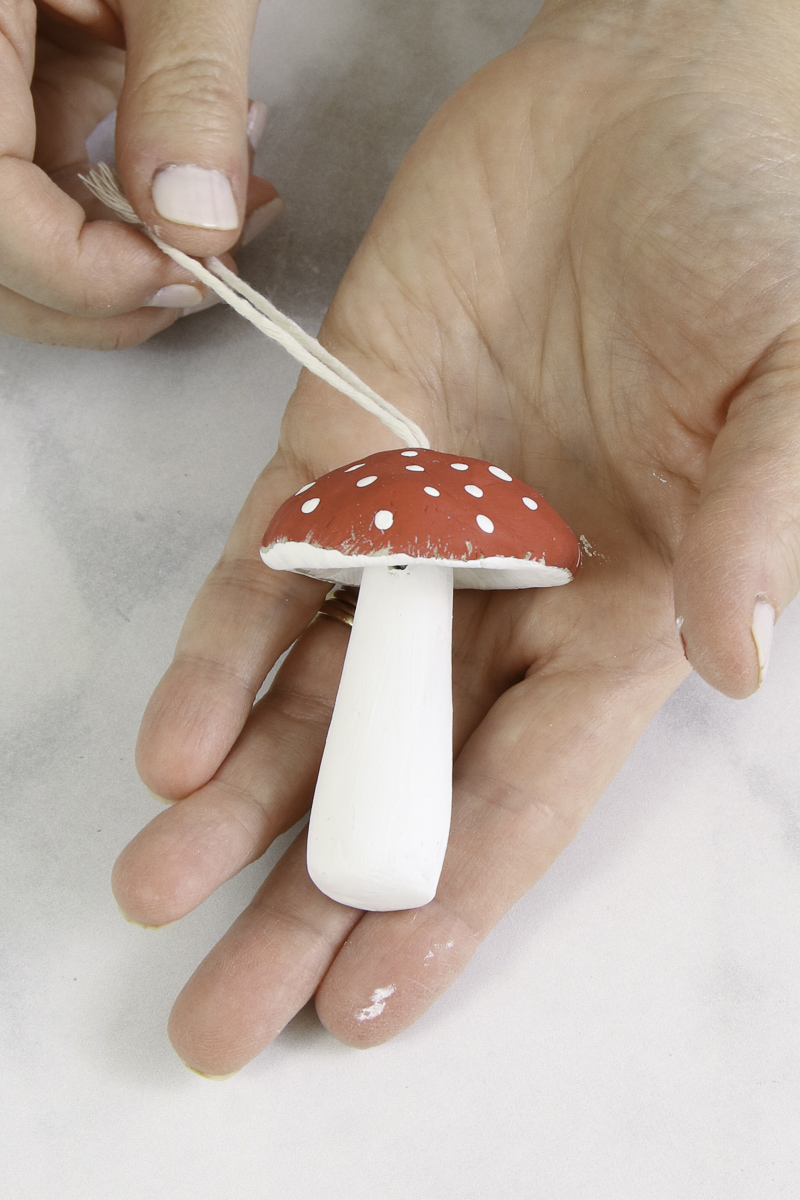
You can use acrylic paints and small brushes to paint the mushrooms after they dry if you choose. I like to use red and white paint to look like a traditional fly agaric mushroom, which is a red capped mushroom with tiny white dots.

After I painted the cap red on the top and white on the inside, I used a toothpick with the end cut off and dipped it in white paint to make dots.
This little clay mushroom turned out so adorable!
But you can also be abstract, use your imagination. Be creative with how you decorate with your mushrooms. I'd love to hear your ideas in the comments! If you're looking for more DIY inspiration, check out these posts:
- 3 Easy DIY Glass Bird Bath Steps
- Simple DIY Paper Bag Planter
- Easy Yarn DIY Bottle Brush Tree
- Crafting Your 12 Days of Christmas Garland Printable
- DIY Air Dry Clay Wall Candle Scone: Handmade Touch for Your Home
Happy Decorating!

How to Make Clay Mushrooms
This delightful project, perfect for beginners and kids alike, will have you sculpting your own charming fungi out of air-dry clay. Let's turn imagination into reality - let the clay crafting adventure begin!
Materials
- Air dry clay
- Hot glue gun or string and yarn needle
- Acrylic paint
- Small artist paint brush
Instructions
- Start by taking a small piece of air-dry clay and rolling it between your hands to warm it and shape it into a ball. On a flat surface, press your thumb into the middle of the ball of clay to make an indentation. Continue pressing the clay out to the sides and shaping the sides down slightly. Smooth out the mushroom cap by gently rubbing over any cracks or pieces you want to smooth.
- Start on the mushroom stalks or stem by warming a clay section in your hands, just like you did with the cap, and then rolling it into a ball. Put the clay ball on your work surface and start rolling it back and forth under your hand, and it will start taking on a cylindrical shape. Once you have a cylindrical shape, use two fingers more on one side because we want one side to be skinnier. That will be the top of the stem. Continue this process until you have the stem length you want. Place the "stem" with the large side down and apply gentle pressure to flatten the bottom. Once the bottom is flat, lay it on its side again and continue to roll it until it's smooth and the length you want.
- Take a yarn needle and make a hole in the cap of the mushroom, starting from the top and go straight through. Use the yarn need to make a hole through the thin end of the stem, wide enough for thread to go through it.
- Let the mushroom forms dry overnight.
- Now you can paint the mushrooms if you choose. I'm going to leave mine a natural color and go straight into threading the pieces. You can use twine or any kind of string. Cut a long length. Thread the twine or string through the yarn needle. Thread the twine through the stem first. Go under the cap and pull it through that hole. Remove the needle from the twine. Put the needle through the other end of the twine. Go under the cap again and pull the twine through the top. Pull the thread and it will pull the stem underneath.
- Tie the ends of the twine into a knot. Cut off the excess twine about 1/2 inch from the knot on each side and then fray the ends so they look like a tassel.