

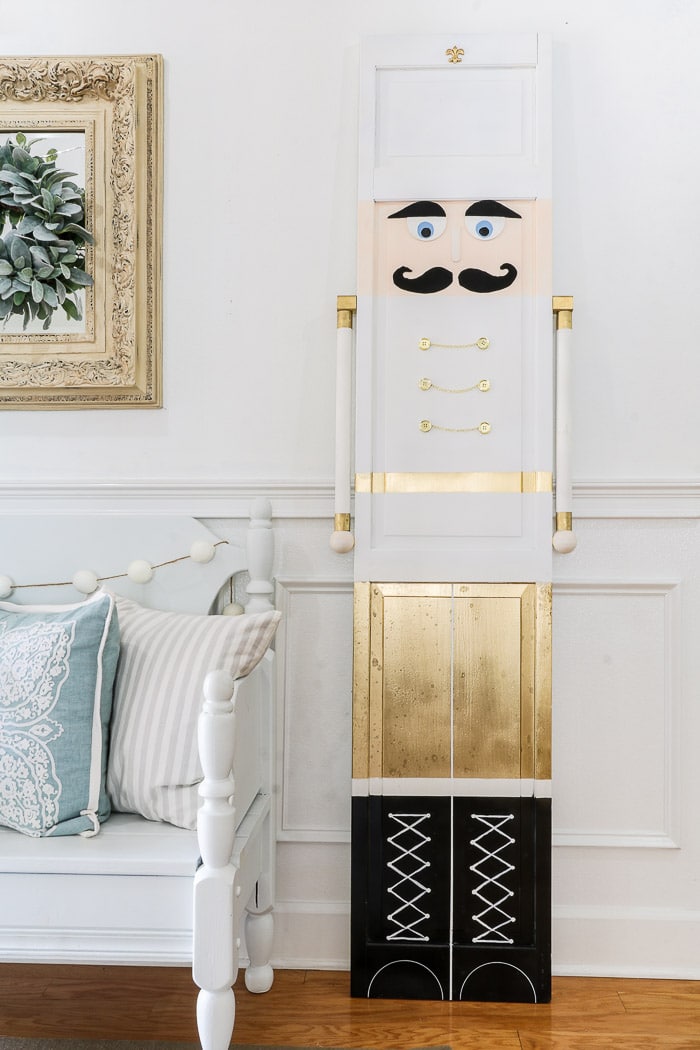
Here you will find an easy step by step instructions on how to make an upcycled DIY life size nutcracker from an old closet door. With a hand full of supplies you can decorate your home, porch, or yard with one of these charming Christmas toy soldiers.
These child-like life-size nutcrackers will bring so much joy to your Christmas decorations which is why I wanted to share this DIY life size nutcracker project so you can make one. Here is an easy way to add some simple festive decor to the most wonderful time of the year!
Rather Watch Than Read?
DIY Life Size Nutcracker
There is something about seeing a child's face light up at Christmas time when they see a giant toy soldier standing by their beautifully decorated Christmas tree. This tall nutcracker can also be a great addition to your outdoor decoration.
How to Make a Wooden Nutcracker
To begin any project it is best to grab all your supplies. This what you will need to make a wooden nutcracker.
- Bi-fold door or doors (repurposed closet doors work great and save money)
- Black shiny spray paint
- Gold spray paint
- Kilz spray paint
- White spray paint
- Skin colored acrylic paint
- Blue acrylic paint for the eyes
- White acrylic paint
- White paint pen
- Two sheets of black felt
- 3″ wood rounds
- Large wood popsicle sticks
- Six gold buttons
- Gold chain (I found mine in the jewelry making area)
- 1 1/4″ dowel
- Painters tape
- Roll of craft paper
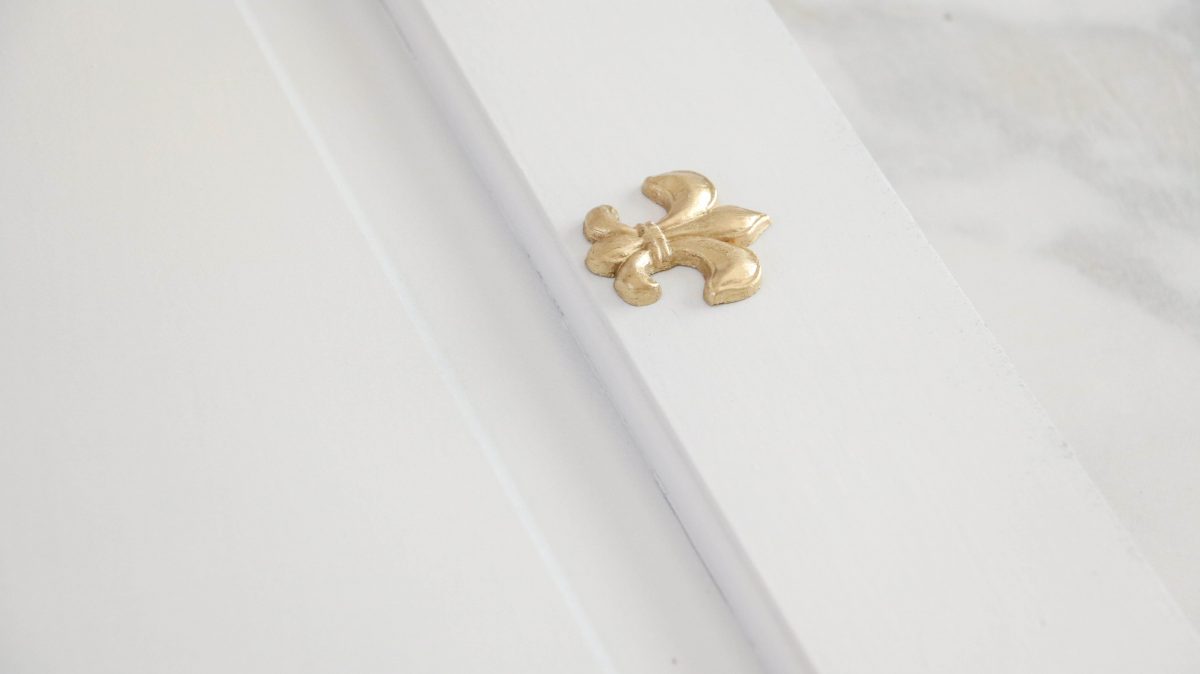
- Fleur de Lis to the top of the hat
- 1″ x 1″ wood for his shoulders (you will only need about 4 inches)
- Round wooden balls for hands (I found ones that had one flat side and are wider than the dowels at hobby lobby.)
- Ruler
- Hot glue gun and glue sticks
- Pencil with an unused eraser
- Craft paintbrush
- 1/2″ round sponge brush
- Scissors
- Wood glue
- Nail gun with 2″ nails
Prepare the Doors
Before you begin, clean the doors if they are used and sand any rough areas. Once they are clean it is time rock and roll except for painting them white if they need it
Okay so let's assume you need to paint them white. Let me recommend you spray some Kilz primer first then spray paint a coat of white.
Now it is time to rock and roll!
Paint the Boots Black
If your door is 78″ tall you can follow these dimensions but if it is different then you will have to figure close to this.
First, layout some craft paper to cover the top of the closet door. Then for the boots measure up from the bottom 16″ and tape the craft paper down as your tape edge sits on the 16″ line.
Make sure to score the edge of the painter's tape so that paint doesn't get under it.
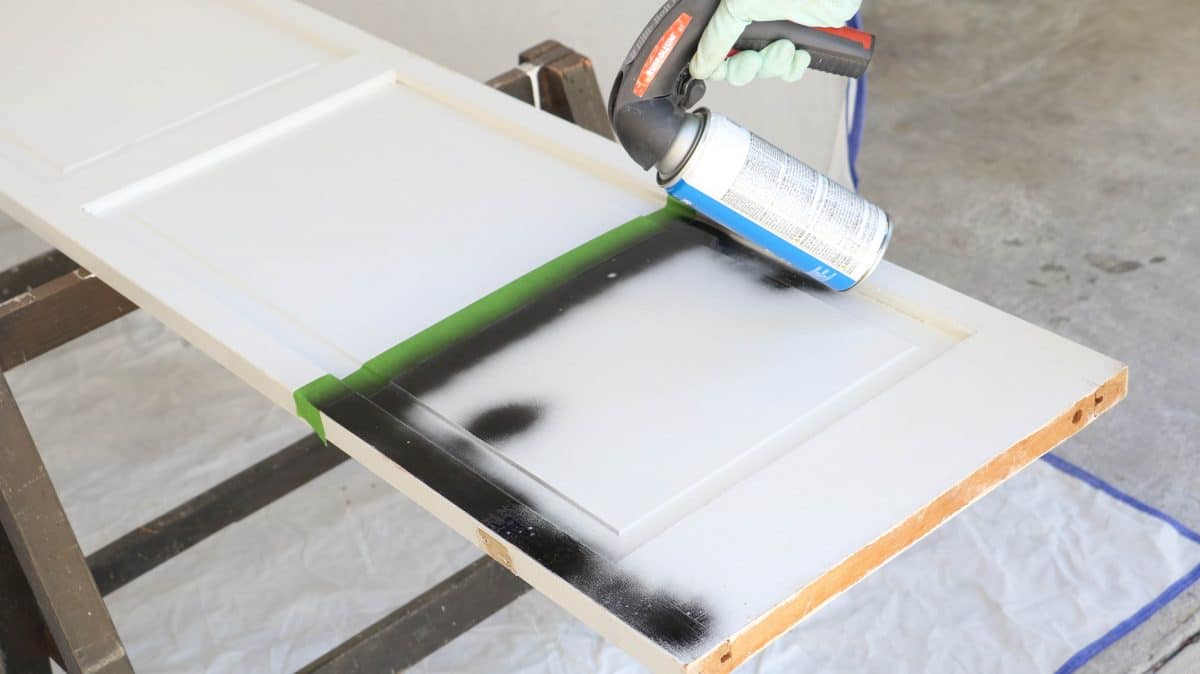
Now spray paint with the black paint and apply several coats to get a good even finish. Before the paint is good and dry go ahead and remove the tape carefully.
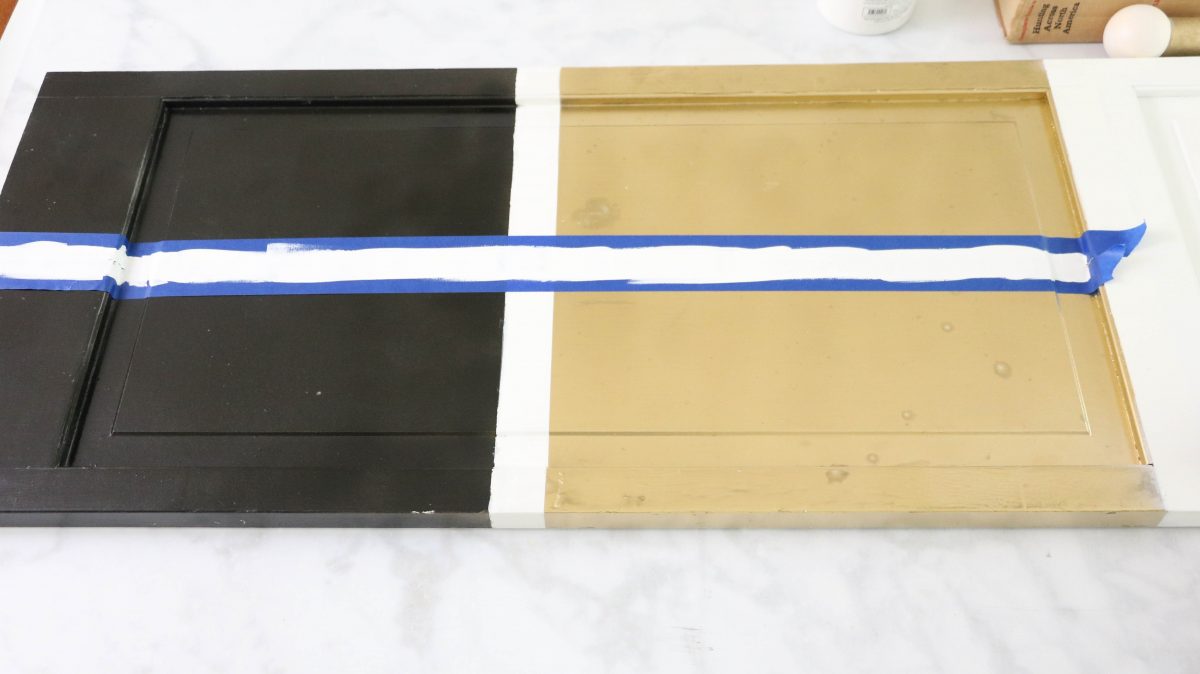
Paint the Pants Gold
Next, measure up 17 1/2″ from the bottom and place a row of tape along with some craft paper to cover the boots. Trust me on this because I didn't use craft paper in the beginning and I had to go back and fix things.
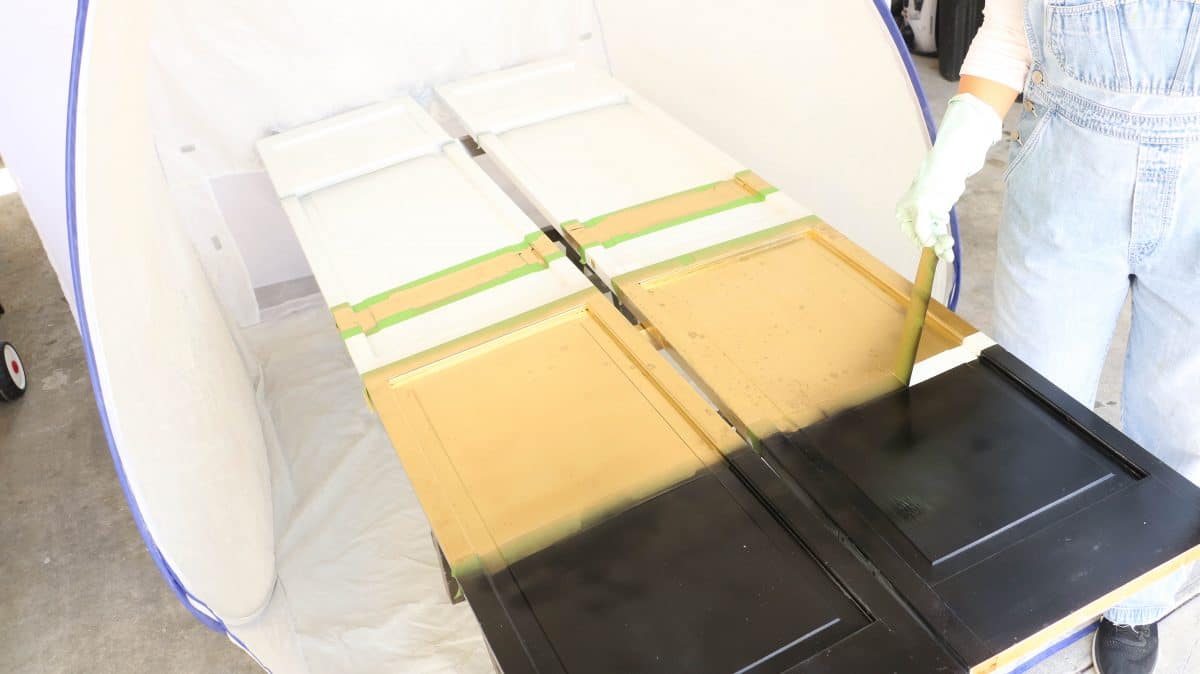
Then measure up 33″ from the bottom and place another row of tape along with craft paper covering the top. Now spray the gold for his paints doing several coats as needed. Before the paint is dry go ahead and remove the tape.
Now you should have a white band above the boots, gold pants and black boots.
Paint the Gold Belt
The following step is the gold belt. Measure up from the bottom 40 1/4″ and tape and craft paper the bottom. Then measure up from the bottom 42″ and tape and craft paper the top.
Don't forget to score the tape so the paint doesn't get under it. Now start spraying the gold again. Applying several coats as needed.
While the paint is still wet go ahead and remove the tape carefully.
Paint the Face, Nose, and Hands
Just under the first band of trim that is running horizontally, you will apply the skin colour paint. Measure down about 8″ below the band and put some painter's tape.
You do not have to add the craft paper now because you will not be spraying on the doors anymore.
After you score the tape use a paintbrush and paint on the skin tone color between the band and the tape. Once you are finished go ahead and remove the tape.
Next paint the wood balls which are the hands. Make sure to paint two balls for each soldier. Then paint one of the large popsicle sticks.
Now move the doors out of the way because the next paint steps will be sprayed but not on the doors.
Cut the Dowel Arms, Shoulders and Nose
Before we start painting again let's cut the dowel arms and shoulders. First, measure the arms 18″ each. You will need two arms. Go ahead and cut them and sand the edges.
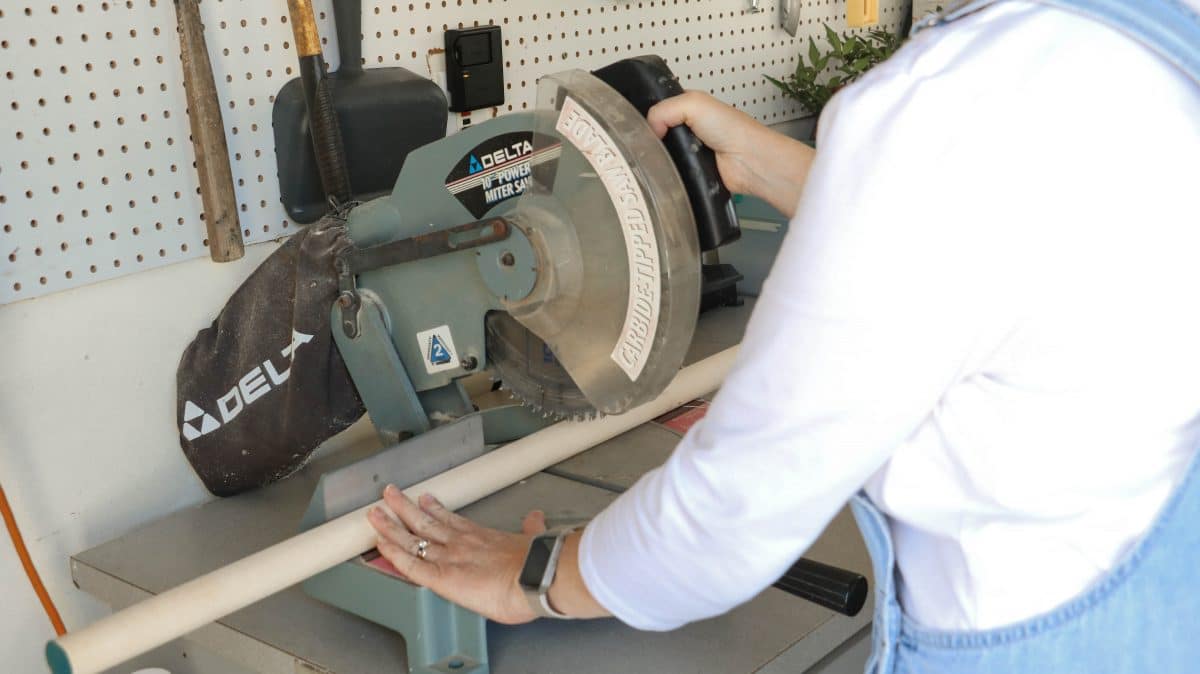
Next cut the shoulder 1 5/8″ and sand the edges. You will need two of the shoulder for each nutcracker. And cut one popsicle stick in half which will make two noses.

Paint the Eye and Arms White
Now that everything is cut and the doors are out of the way, let's spray paint white again. Simple lay the eyes out and arms and spray them like you did the doors.
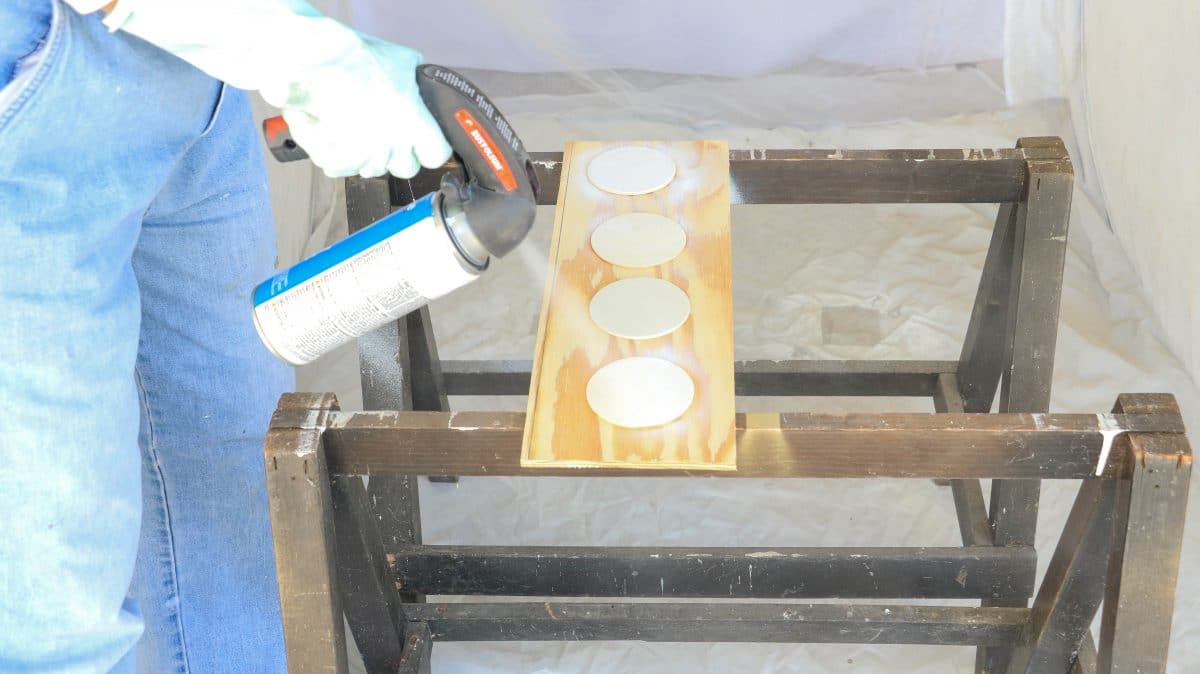
If your dowels are unfinished you can use the Kilz primer first and then paint them. I found it to be easier to hold the dowels while I painted them.
After you are finished lean them up somewhere to dry. Spray paint doesn't take long which is good because our next step is to paint the gold on the shoulders and the arms.
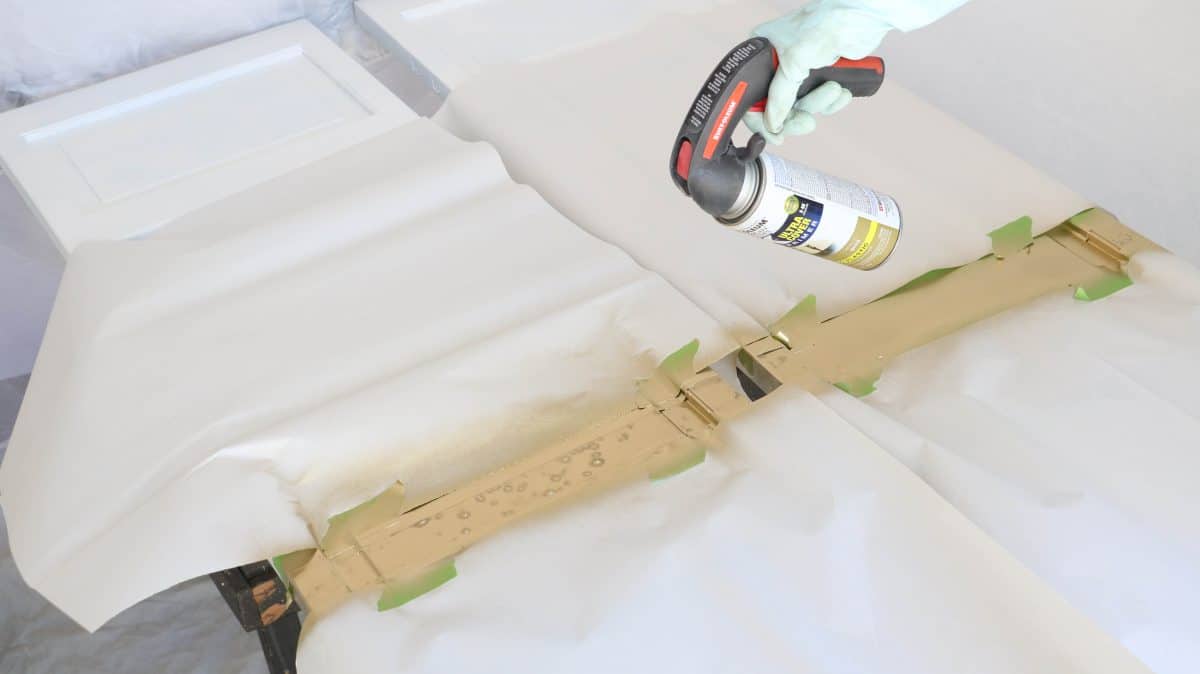
Paint Gold on Arms, Shoulder and Fleur de lie
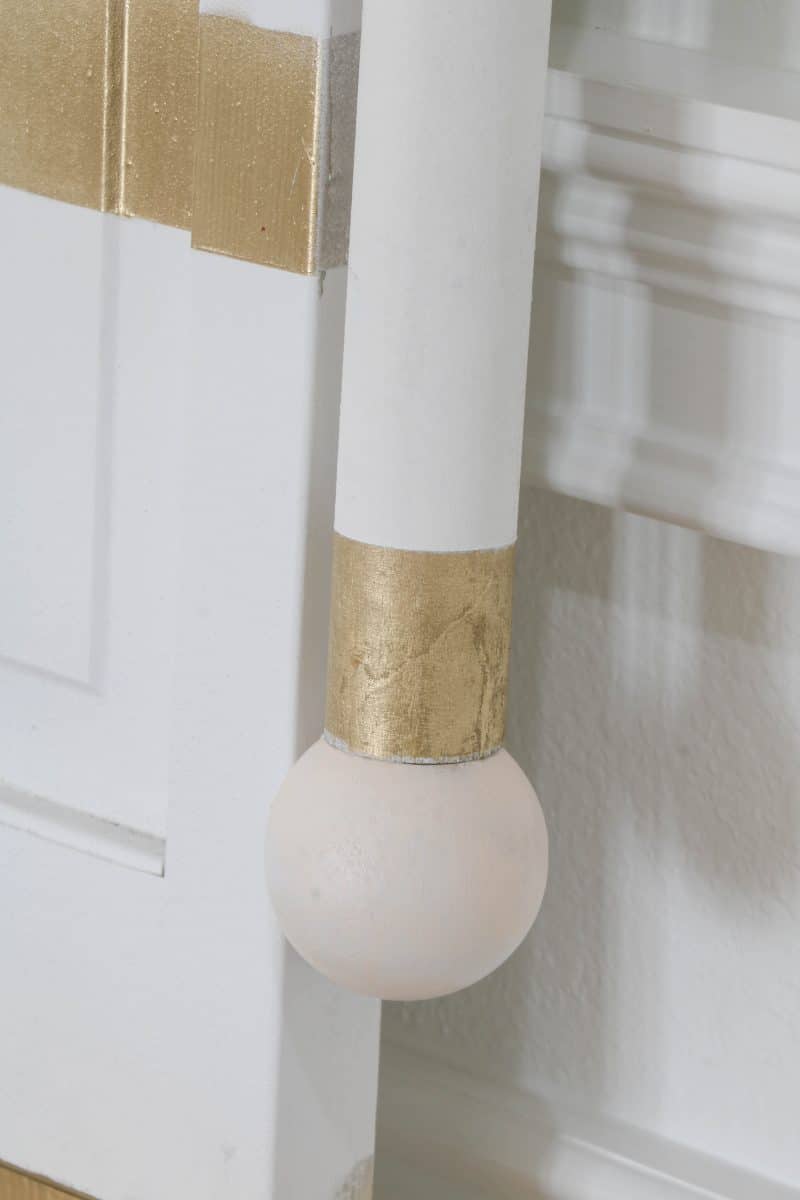
Next, lay the shoulders out and the fleur de lie and spray paint them gold which will add some festive colors to your finished piece. Then the arms should be dry so measure down 2″ and run a band of tape around the arm on both ends.
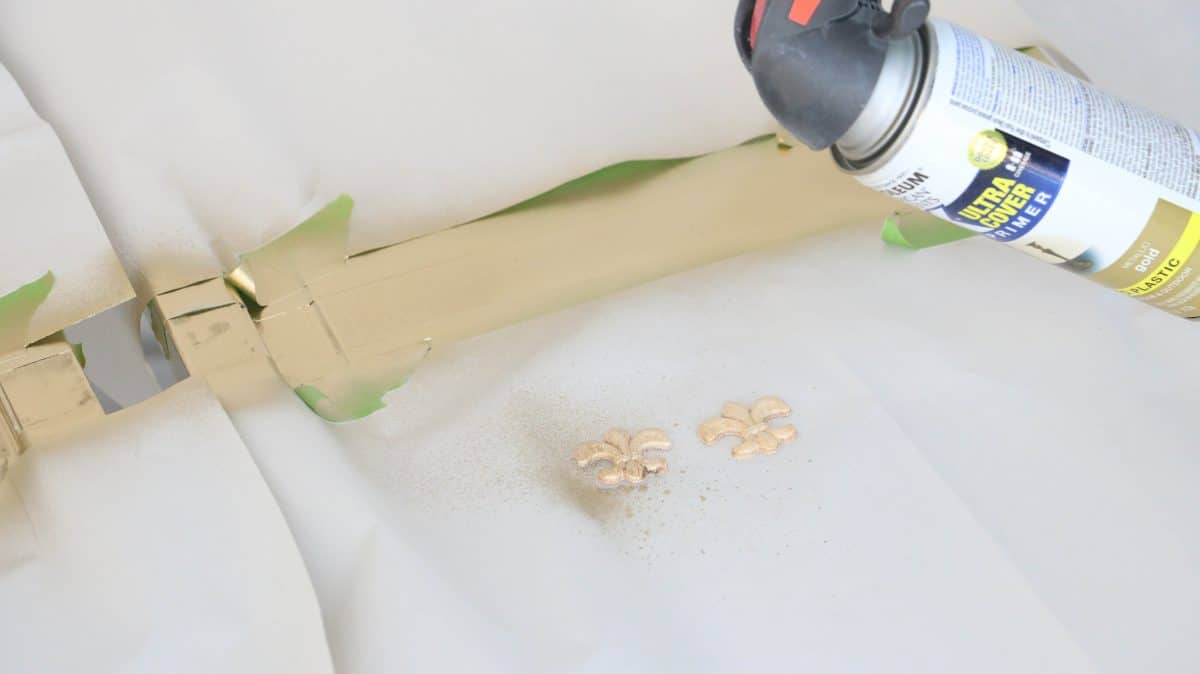
Make sure to score the edges so the paint doesn't bleed under. Now you can spray paint carefully away from the rest of the arm, or craft paper the rest of the arm if you are experienced.
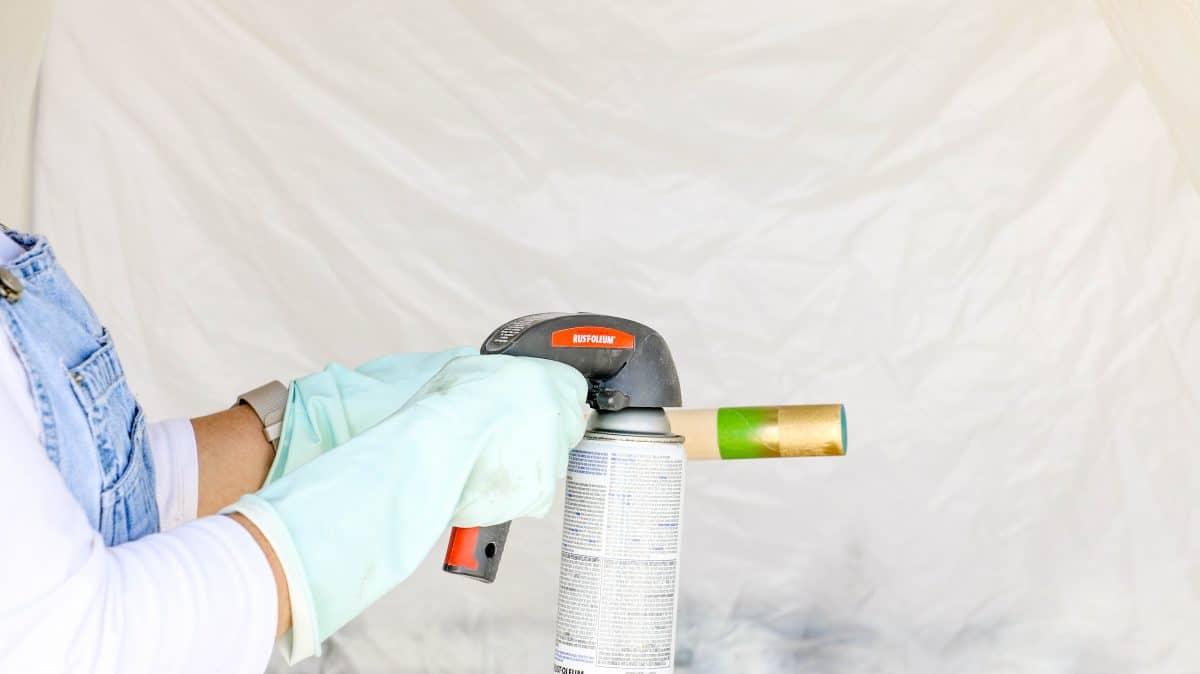
Either way, go ahead and spray gold paint to the top and bottom band like in the photo.
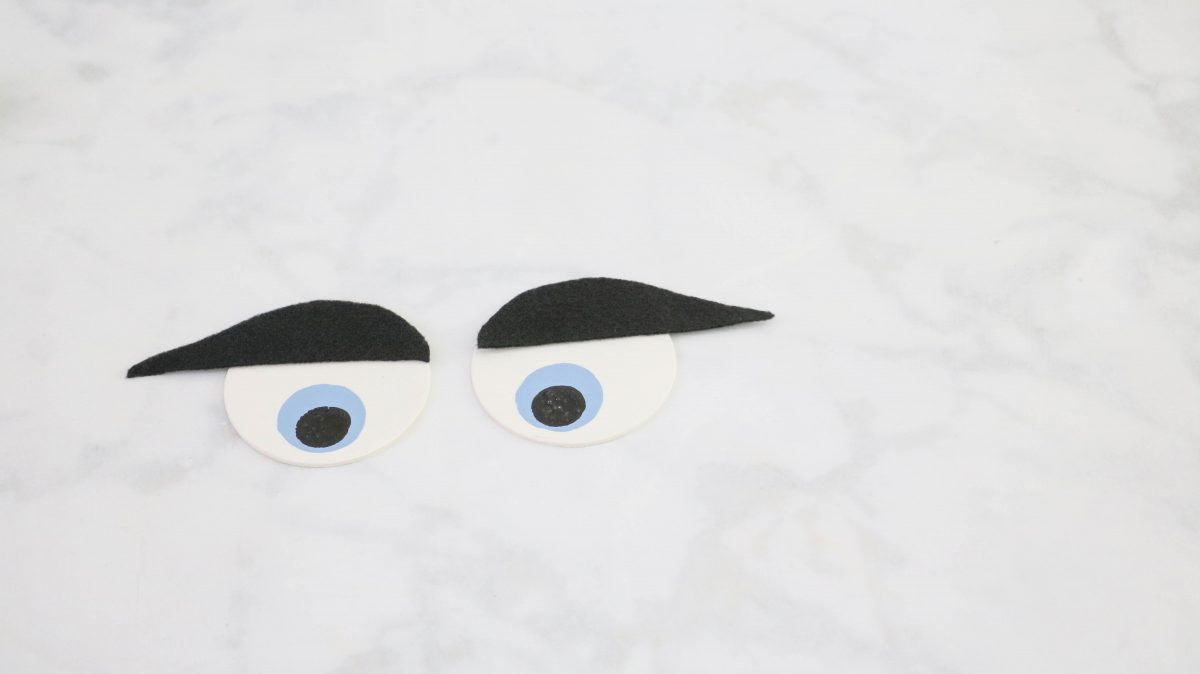
Paint the Eyes
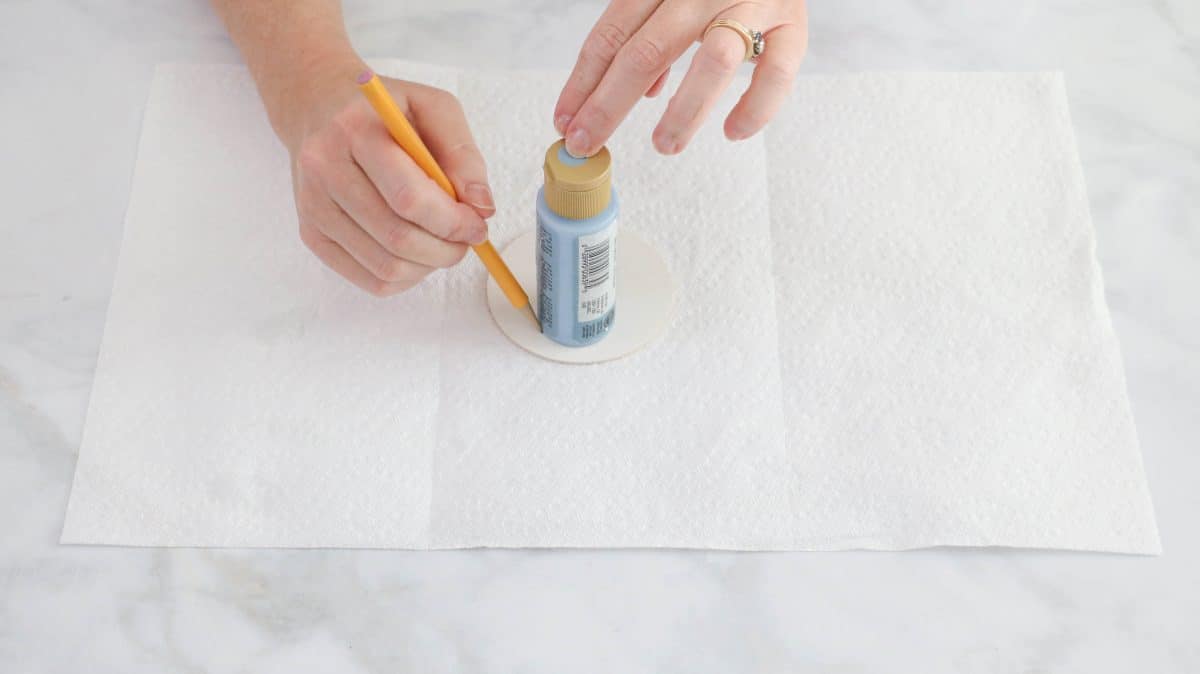
Now that the eyes are painted let's add the pupils. Grab a paper plate and drop a little bit of black and blue paint. Then take the acrylic paint bottle and trace it around base onto the bottom of one of the eyes.
Next paint inside the circle with the blue paint.
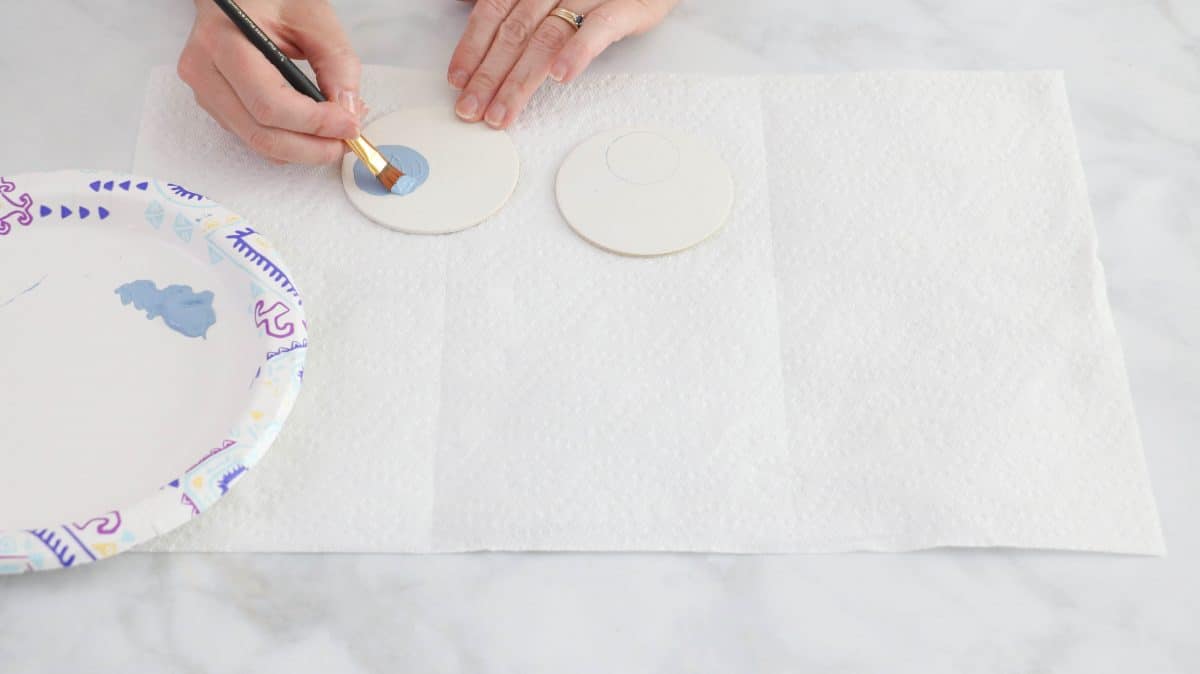
Repeat this step on the other eye and now let's do the black. For this, I used a small 1/2″ sponge brush. I simply dabbed the brush into some paint and dabbed it on the bottom of the blue eye.
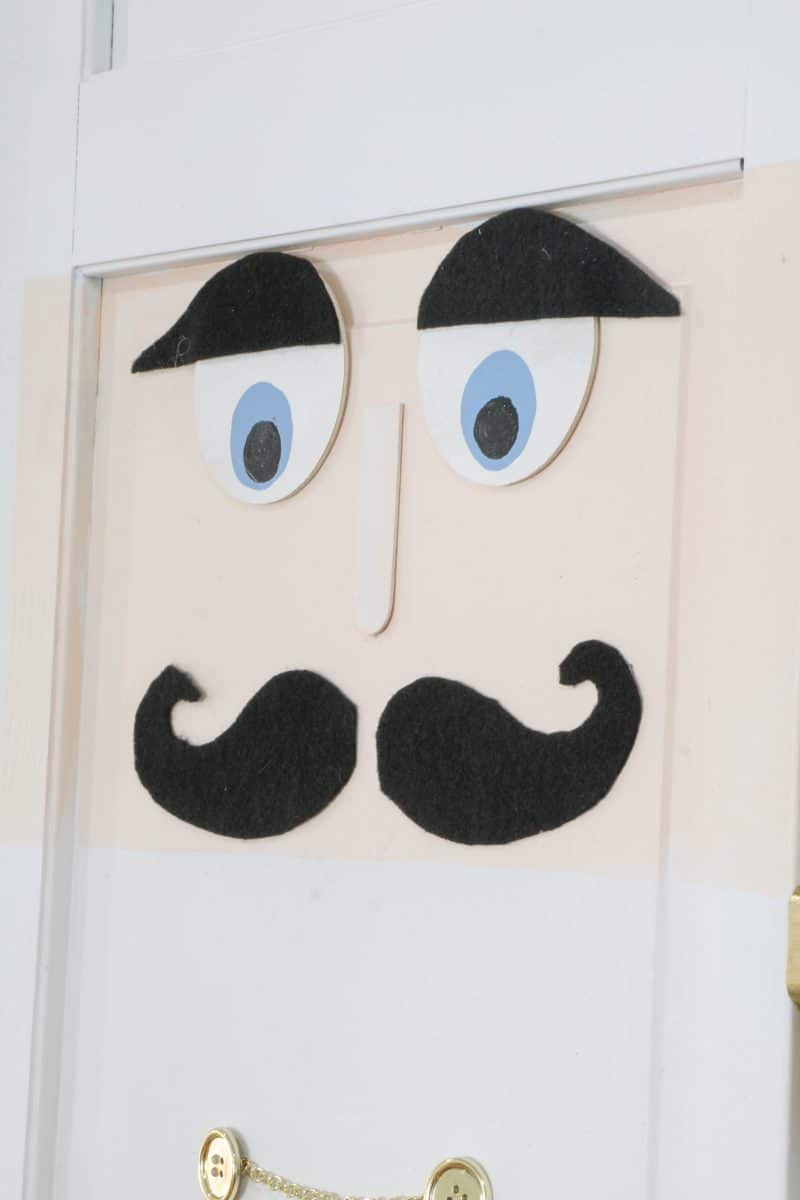
Attach the Face
Now the fun part is happening and the DIY nutcracker soldier project is starting to take shape.
Download this mustache and print it on regular size paper. Make sure it fits the whole sheet of paper
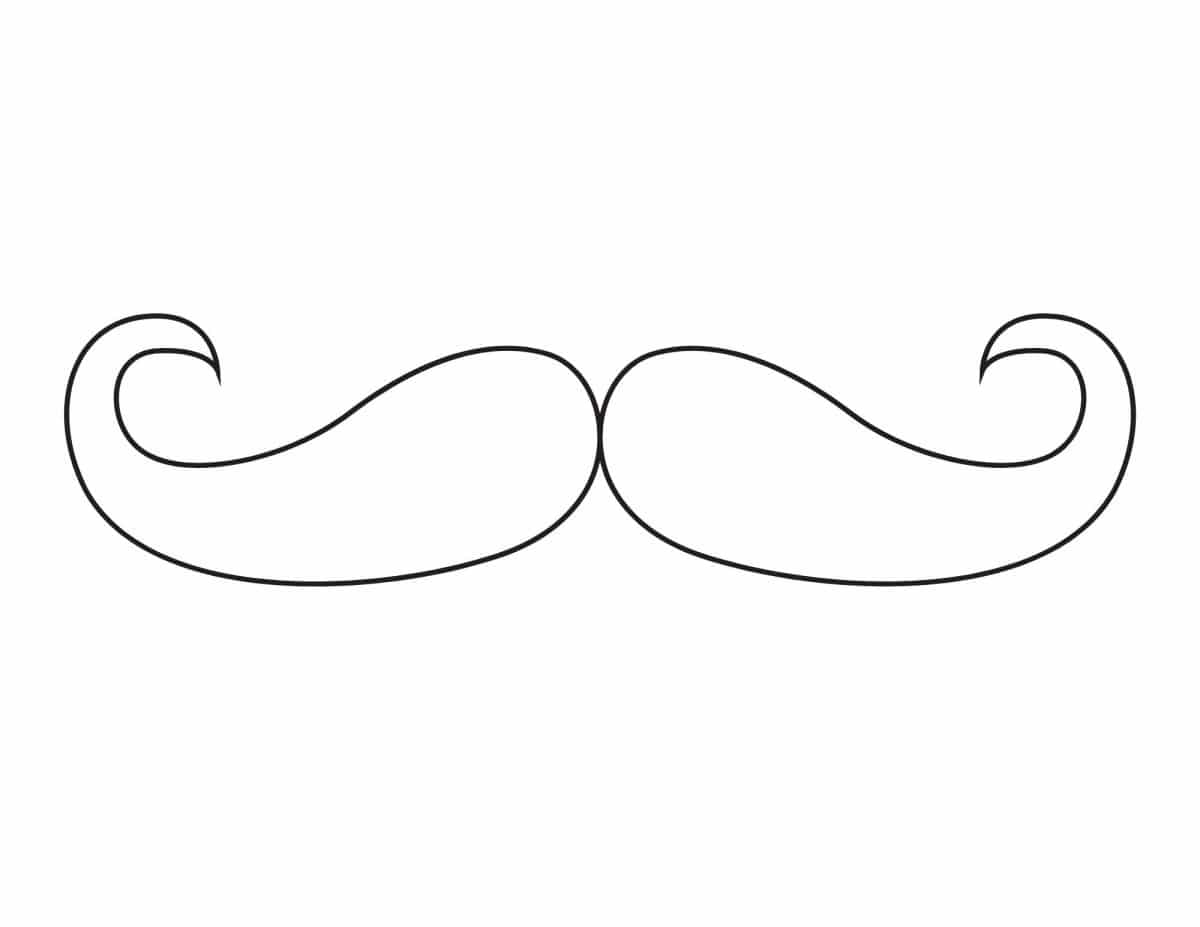
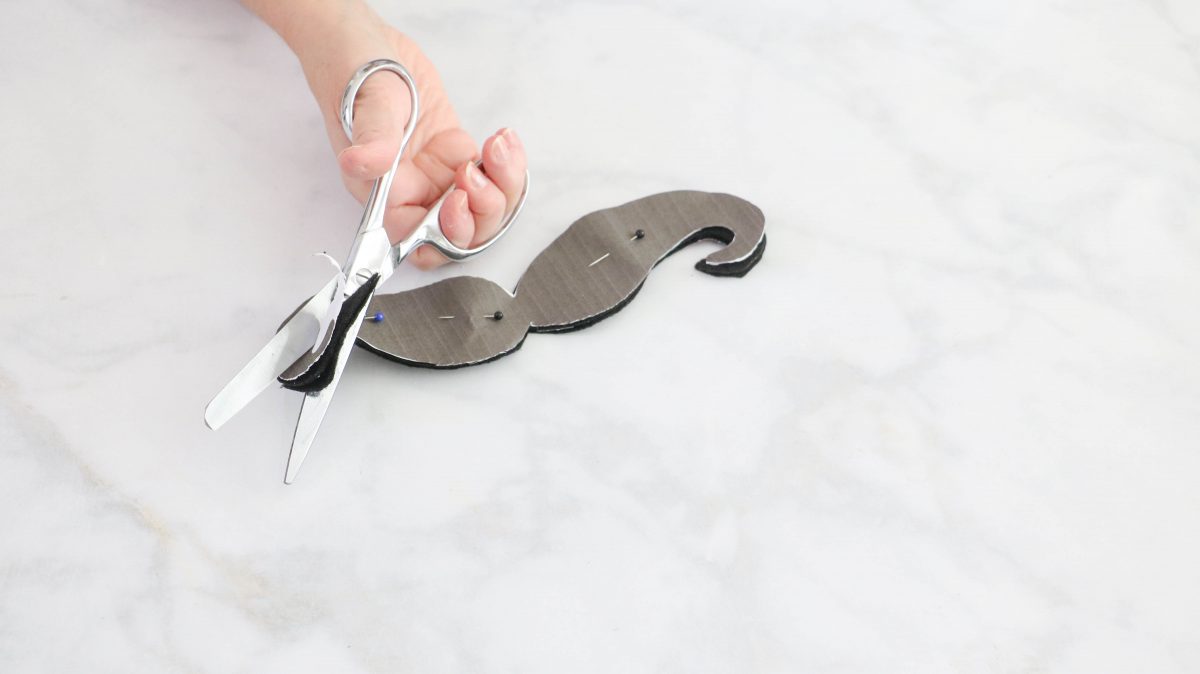
Next, sit the pattern down on the black felt pin it down and cut it out into two pieces.
For the next step, you will freehand the eyebrows. They are basically straight across on the bottom and then round at the top then come down to a point on the side. I would make one eyebrow and then use it as a template to cut the other eyebrow.
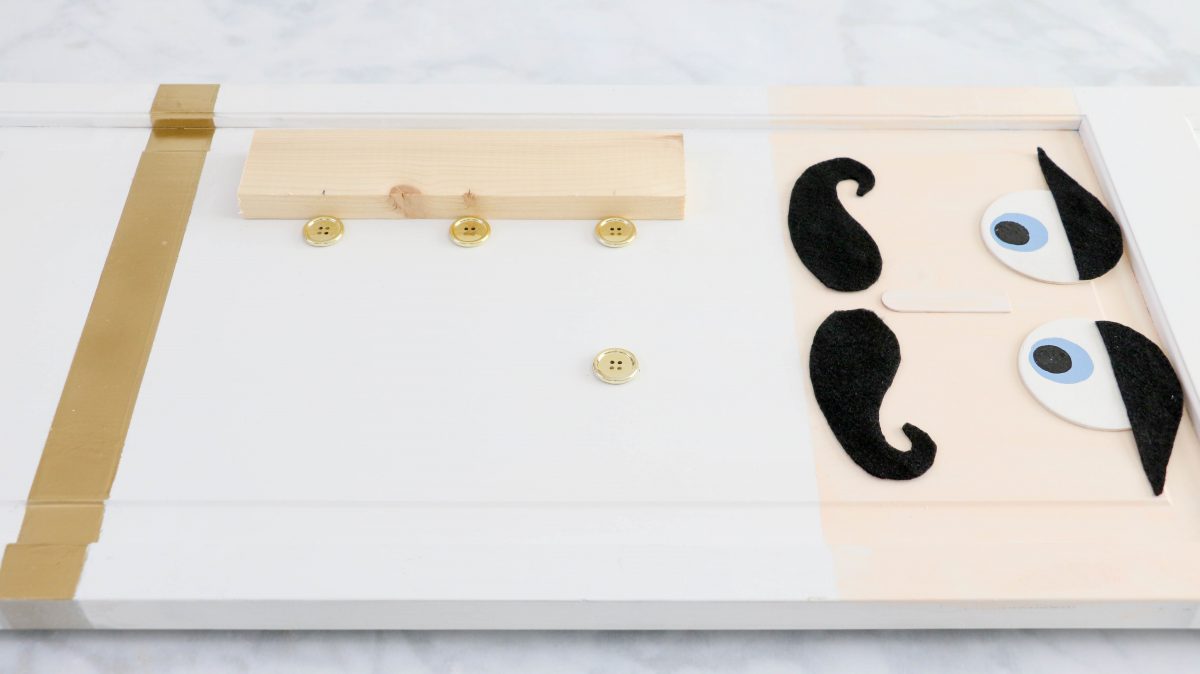
Then start sitting the eyes, mustache, nose, and brows on the face.
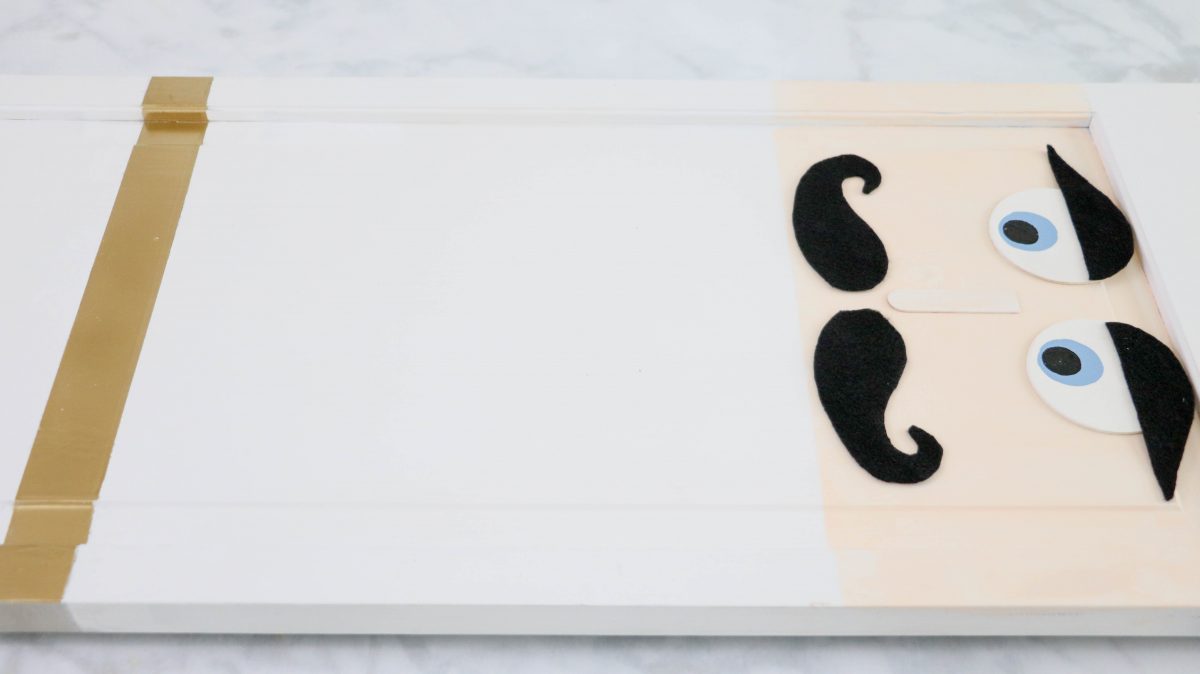
Warm up the glue gun and start applying the eyes, nose, eyebrows, and mustache to the face.
And while you are at it go ahead and apply the fleur de lie at the very top of the hat in the center.
Attach the Buttons and Chains
Next, follow these measures and place the buttons on the bodice. Measure from the outside in on each side 5″ and make a faint pencil mark then measure 3 1/2″ from the face down and place the first buttons.
Do not glue them down yet. We are going to place all of them first.
Next, measure down 2 1/2″ for the second row of buttons and then another 2 1/2″ for the third row of buttons.
Now that all the buttons are in place grab your gold chain and place it flat across along the bottom of the buttons and cut it.
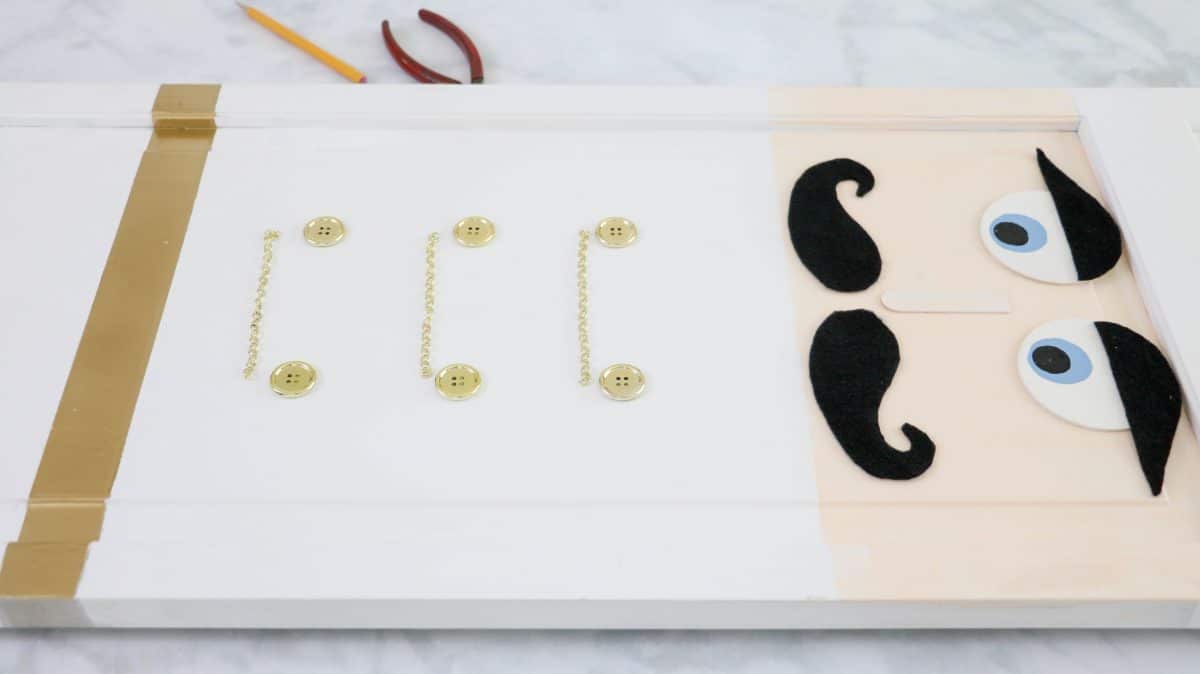
Make sure the chain is long enough to go under each button.
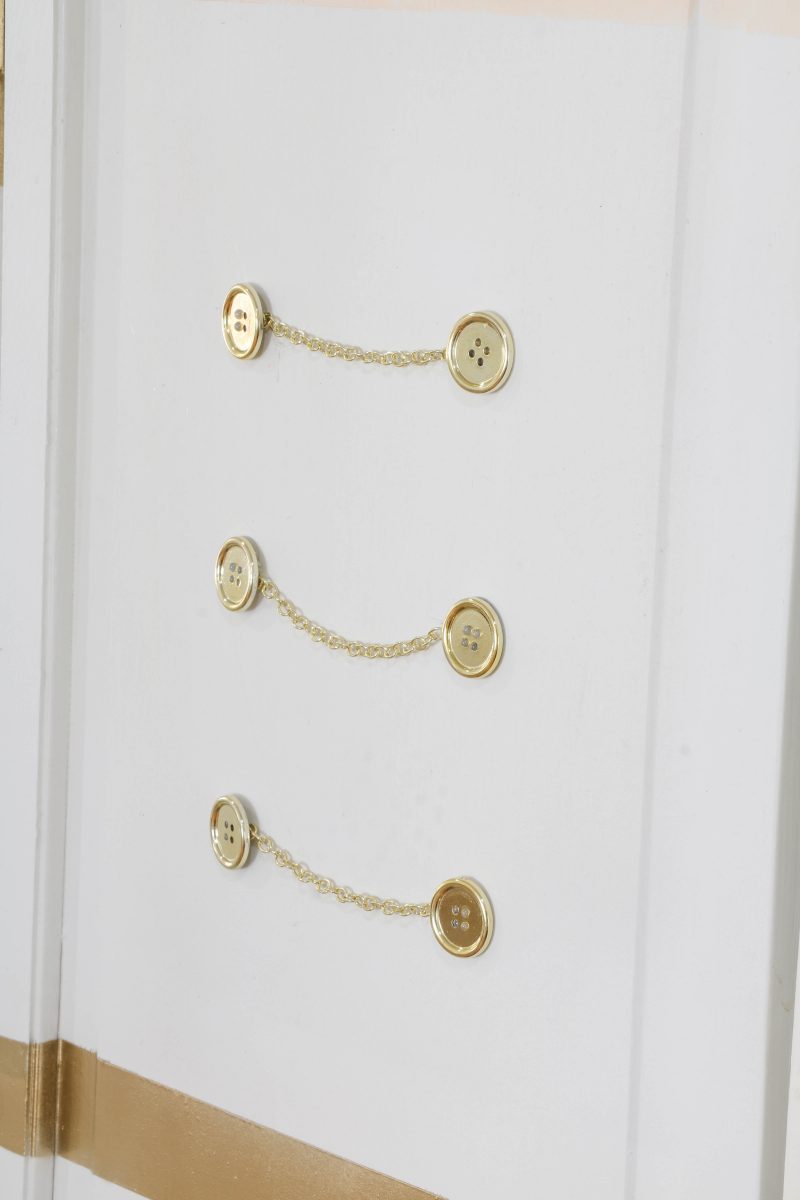
Once you have all the chains measured and cut place a dab of glue under a button then site one end of the chain in the glue and then place a button over the glue and chain.
The button will not lay flat but that is okay.
Follow by gluing down all the chains and buttons.
This DIY life size nutcracker soldier is really coming together!
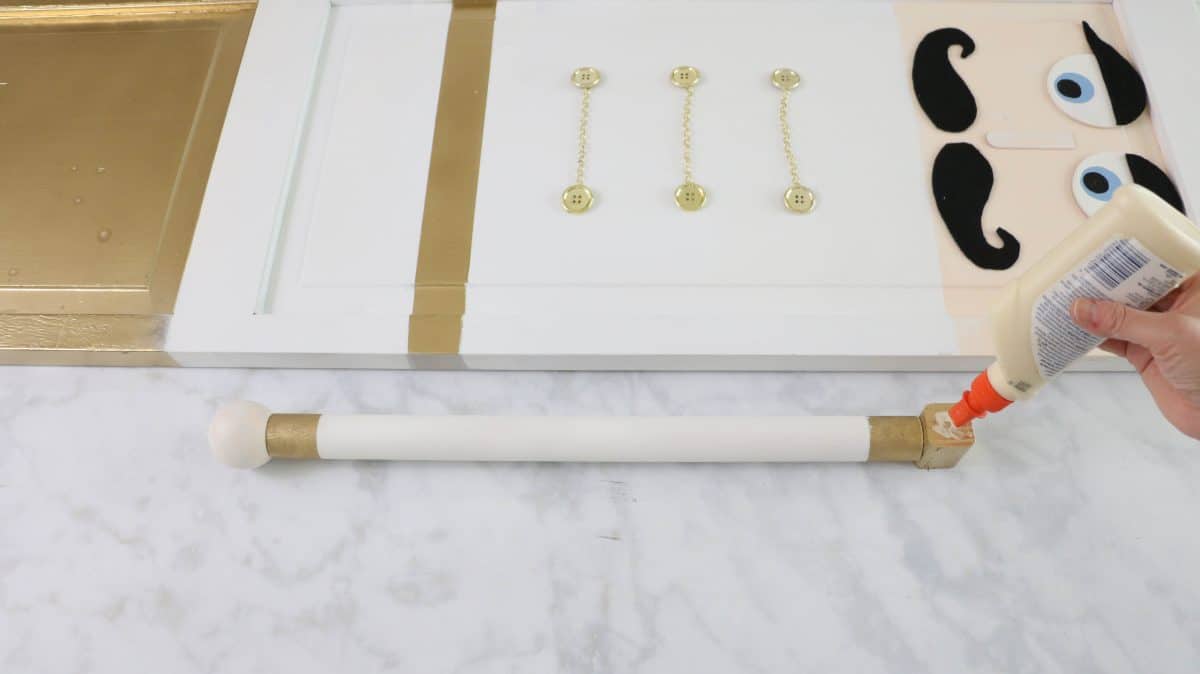
Attach the Arms
It is time to attach this giant nutcracker soldier's arms. First, put some glue on one end of the dowel and on the flat part of the round wooden ball. Place then together and stick a heavy book on each end. This will hold them tight for 30 minutes while it drys.
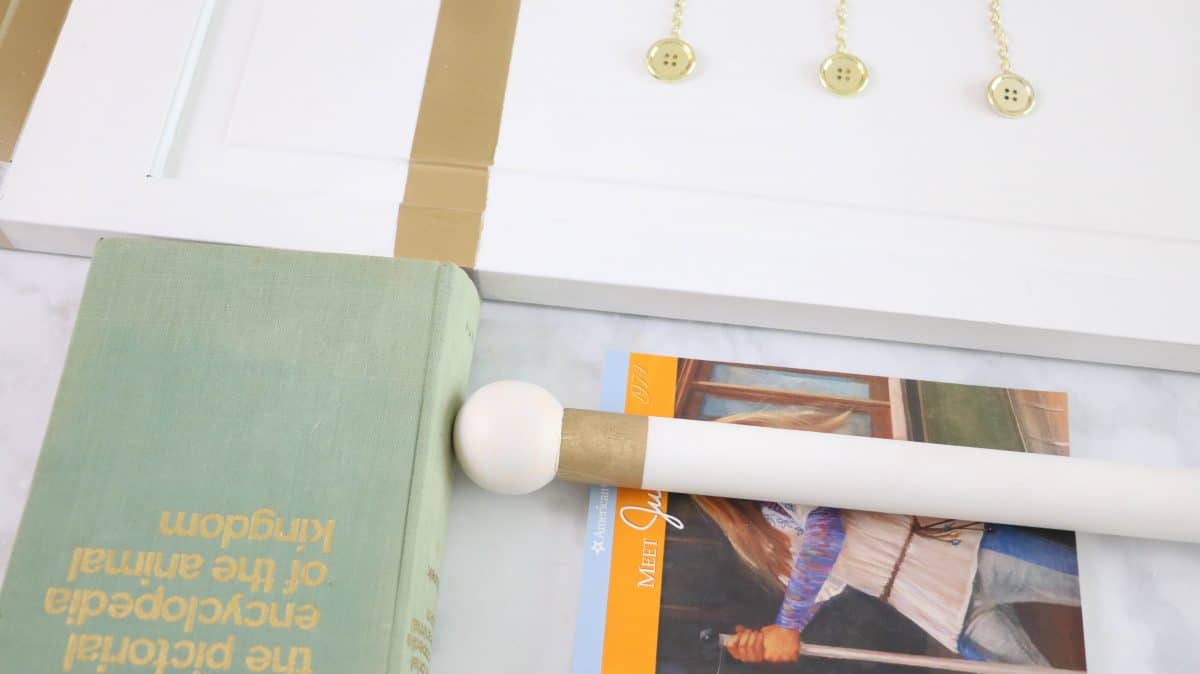
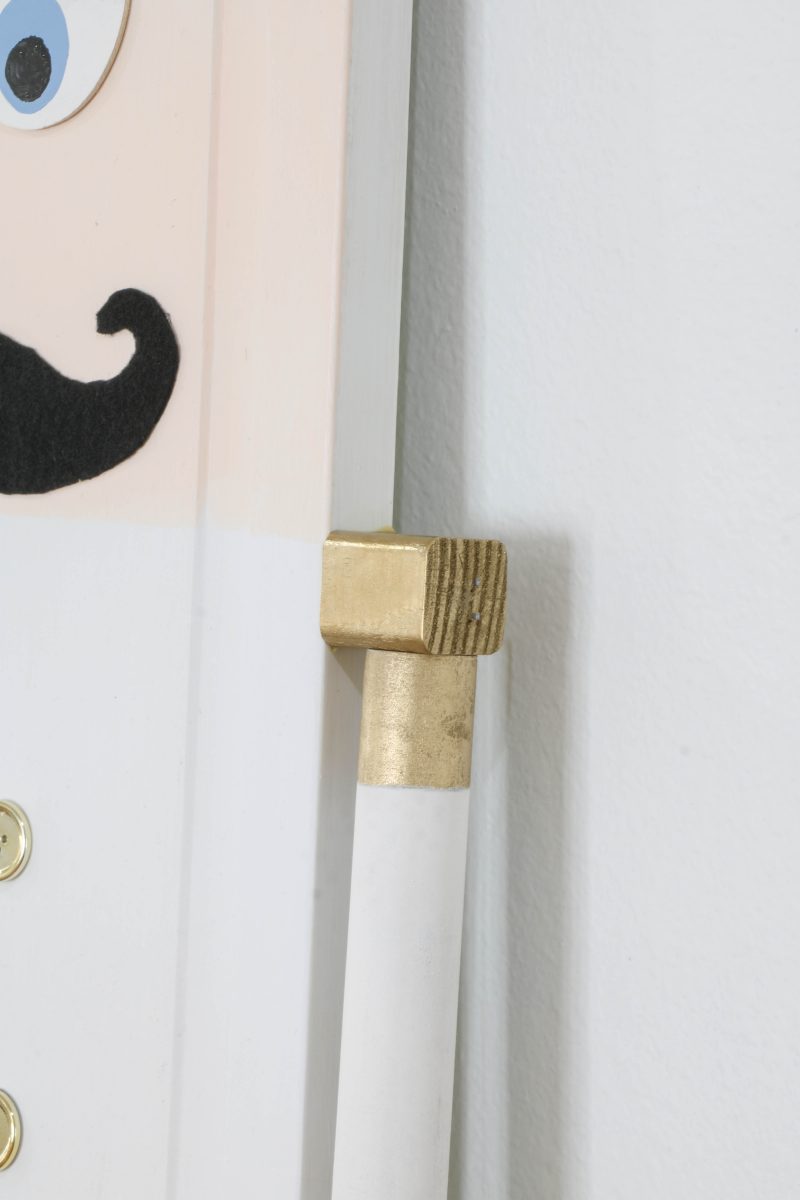
Next, repeat the process but with the shoulder. The nice thing about the should is that you can put a nail down through the shoulder into the dowel with the nail gun. This will really secure it into place.
After another 30 minutes place some wood glue on the shoulder and the hand and then again on the closet door side and push them together. Make sure to place the shoulder just under the face.
Shoot a nail into the shoulders and sit a heavy book up again the hand so the wood glue will harden the hand and door together. Let it sit for 30 minutes and you are almost finished.
This may seem like a large project this DIY life size nutcracker is pretty easy if you look at it in smaller steps.
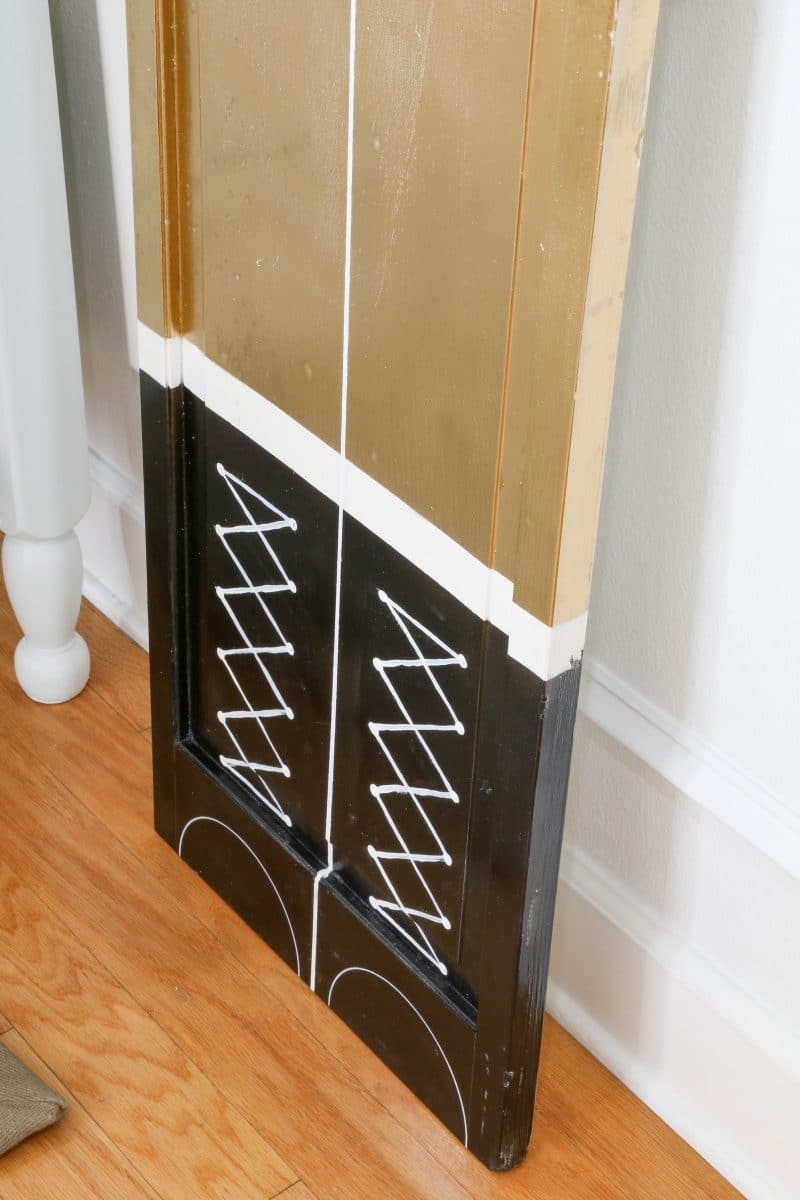
Paint between the Legs and Boots
This next step is fairly easy. Find the center and run two rows of painters tap about 1/4″ apart. Make sure to score the tape and then paint the white acrylic paint all the way down.
You might need to do two coats. To make the paint dry faster I used a blow dryer in between and at the end. This way I could go ahead and remove the tape and start on other projects near this paint.
Paint the Laces
Next, it is time to draw the laces onto the boots. I started to use the paint pen but it seems to be to thin so I went with a thin artist brush and some white acrylic paint. So it is up to you but I recommend a paintbrush a white acrylic paint.
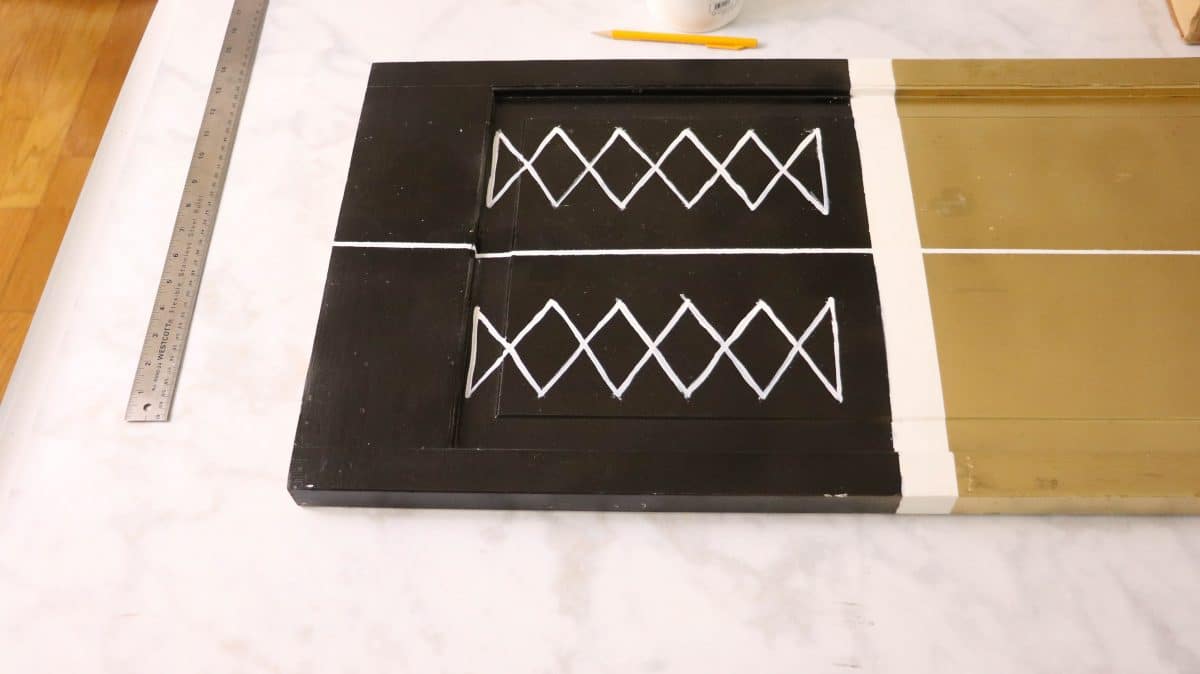
However, I have to warn you that it is not going to come out perfect. You are basically freehanding but it still looks good. If you are not confident try doing the paint pen in three rows to get the look.
Okay now, about 2″ up from the feet you just drew and about 3″ wide make two marks with a pencil. Then go up about two inches and make two more marks. Repeat this process four more times.
Next, take a ruler and either draw the laces or if you are using the paint pin go ahead and paint. But if you are going to do a paintbrush and paint go ahead and draw all the laces.
Make sure you draw a line across the top dots and the bottom dots too.
After you have painted all the laces it is time to make some dots on the points. Use the new pencil with a fresh new eraser and drop a little white paint onto a paper plate. Dip the pencil into the paint, just a tiny bit, not too much, and then dab the paint onto the point where the laces meet.
Draw the Feet
This is probably the easiest part. Take a berry bowl or anything round that is about 6″ in diameter and place half of it at the bottom of the boots. Then take a white paint pin and draw around the bowl.
This will make the front of the boots where the toes go.
Guess what? You are finished. Yay!!!!!
Now all you need is a great place to stand your life size nutcrackers.
Conclusion
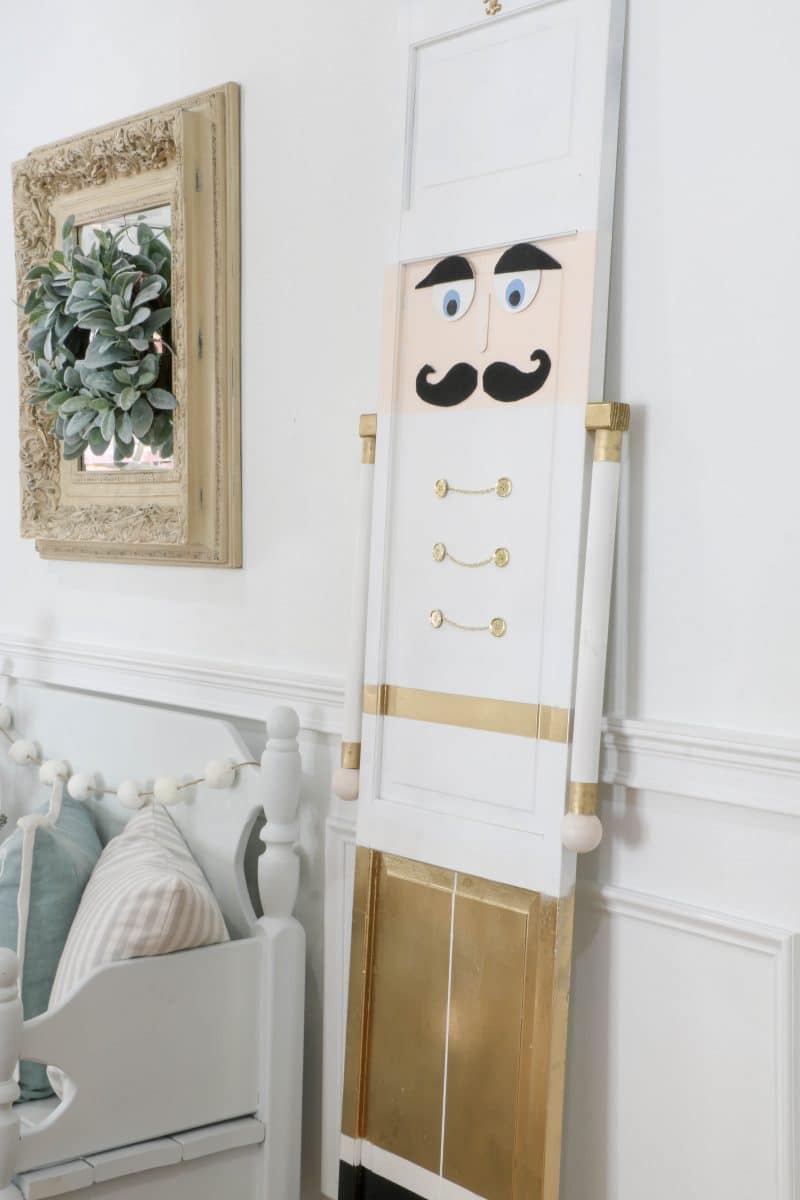
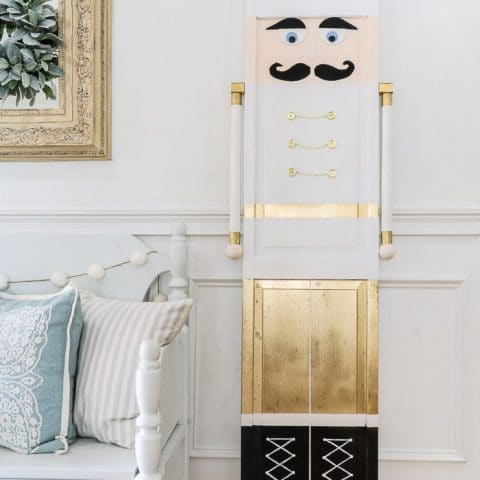
You are finished with your DIY life size nutcracker soldiers! You can personalize your nutcracker by adding a belt buckle, a red jacket, different designs, or even fairy lights to light up your front porch display. Here are some other styling ideas for the easiest way to add the holiday spirit to your home. You can put them in your entryway as I did. I placed mine by the bench.
Another fun place would be on a small front porch by your front door. Just like the soldiers at Buckingham Palace. Wouldn't that be cute!
Another great place to position the toy soldiers would be on each side of your fireplace. How cute would that be?
But my favorite of all places would be in a children's playroom. Wouldn't it be adorable to have these oversized toy soldiers watching out for the children while they play? You can also add Christmas lights to the back of the display to be used as a night light in the playroom.
Once I finished these nutcrackers I decided they needed a name so I asked on my Instagram for suggestions. After collecting some fabulous names I did a vote and everyone pics Ben and Gerry.
Aren't those fitting names? Ben and Gerry have been keeping watch on our home ever since.
What would you name your nutcracker toy soldiers if you made some?
Happy Decorating!

DIY Life Size Nutcracker
Life size nutcracker soldier made from an old or new closet door.
Materials
- Bi-fold door or doors (repurposed closet doors work great and save money)
- Black shiny spray paint
- Gold spray paint
- Kilz spray paint
- White spray paint
- Skin colored acrylic paint
- Blue acrylic paint for the eyes
- White acrylic paint
- White paint pen
- Two sheets of black felt
- 3″ wood rounds
- Large wood popsicle sticks
- Six gold buttons
- Gold chain (I found mine in the jewelry making area)
- 1 1/4″ dowel
- Painters tape
- Roll of craft paper
- Fleur de Lis to the top of the hat
- 1″ x 1″ wood for his shoulders (you will only need about 4 inches)
- Round wooden balls for hands (I found ones that had one flat side and are wider than the dowels at hobby lobby.)
- Ruler
- Pencil with an unused eraser
- Craft paintbrush
- 1/2″ round sponge brush
- Wood glue
Instructions
1. Clean and paint doors white
2. Tape, cover and spray paint black boots
3. Tape, cover and spray paint gold legs
4. Tape, cover and spray paint gold belt
5. Tape and paint the face, nose, and hands
6. Cut the arms, shoulders, and nose.
7. Paint the eyes and arms white.
8. Paint gold on arms, shoulder and small embellishment
9. Paint the eyes
10. Cut the mustache and eyebrows.
11. Hot glue the eyebrows to the eyes.
12. Glue the eyes, nose, mustache to the face.
13. Glue the small embellishment to the top of the hat.
14. Place the buttons and then the chains.
15. Glue the buttons and the chains.
16. Wood glue the hands to the arms.
17. Wood glue the shoulders to the arms and then nail them in.
18. Wood glue the shoulder and hands to the body and nail them in.
19. Tape a thin line between the legs and the boots and paint it white with acrylic paint.
20. Measure, draw and paint the shoelaces.
21. Use a small berry bowl and trace the front of the shoes with a paint pen.
Notes
You can do this project with regular paint and not spray paint. Follow all directions as normal but brush the paint on. This video is a quick step by step of the project. Better details are in the post.


What a fabulous idea!
What do you mean by score the tape?
Thank you for asking. You will need to score the tape meaning press down on the edge so the paint doesn’t bleed under the tape. You can use something like a credit card or your fingernail to make sure the edge of the painters tape is nice and snug.
My doors do not have the big width horizontal band. How far from the top do you start the face?
It all depends on the height of your doors but I would guess around 10 to 12″ if it is a standard size door.
What size buttons did u use? The link no longer works. Luv this idea. Going to try it!
I am so excited you are going to give it a try. If my memory serves me correct I think they were 1″ or 1 1/2″ buttons. Good luck!