
I was looking for some inspiration for a fall wreath project and came across a child's bicycle and there began the wheels turning (no pun intended) for the bicycle wreath. I can't wait to walk you through the step by step transformation for a well loved bicycle into a stunning fall wreath.
Goodwill is one of my favorite places to be inspired when working on projects. I can usually keep things inside a budget and who doesn't love giving new life to old objects. This fall bicycle wreath came together piece by piece and I'm so happy with how it turned out and hope it inspires you.
Rather Watch Than Read?
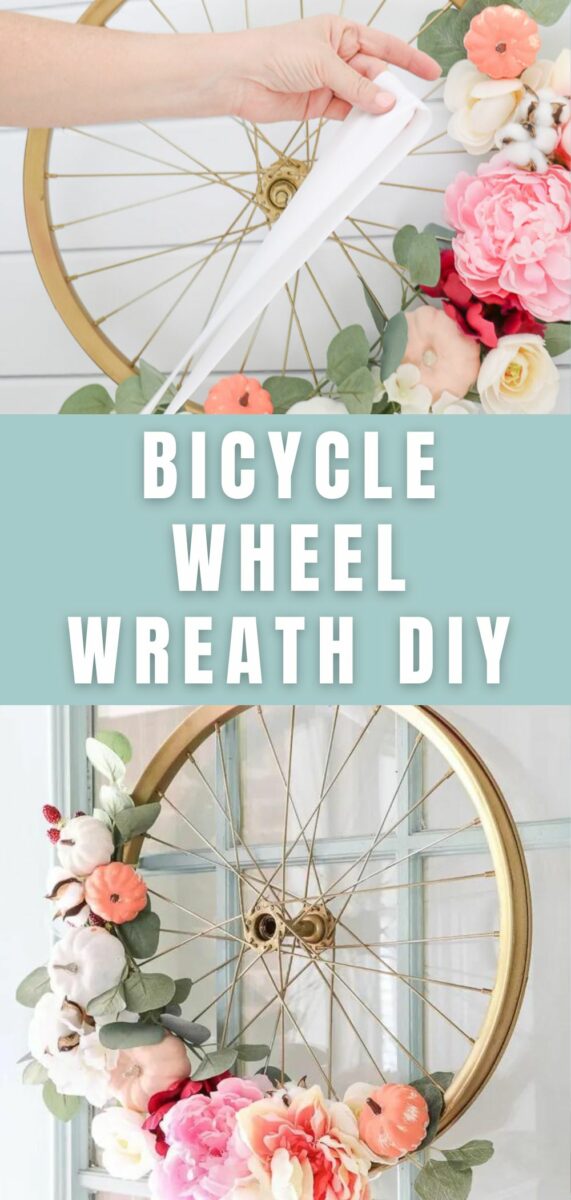
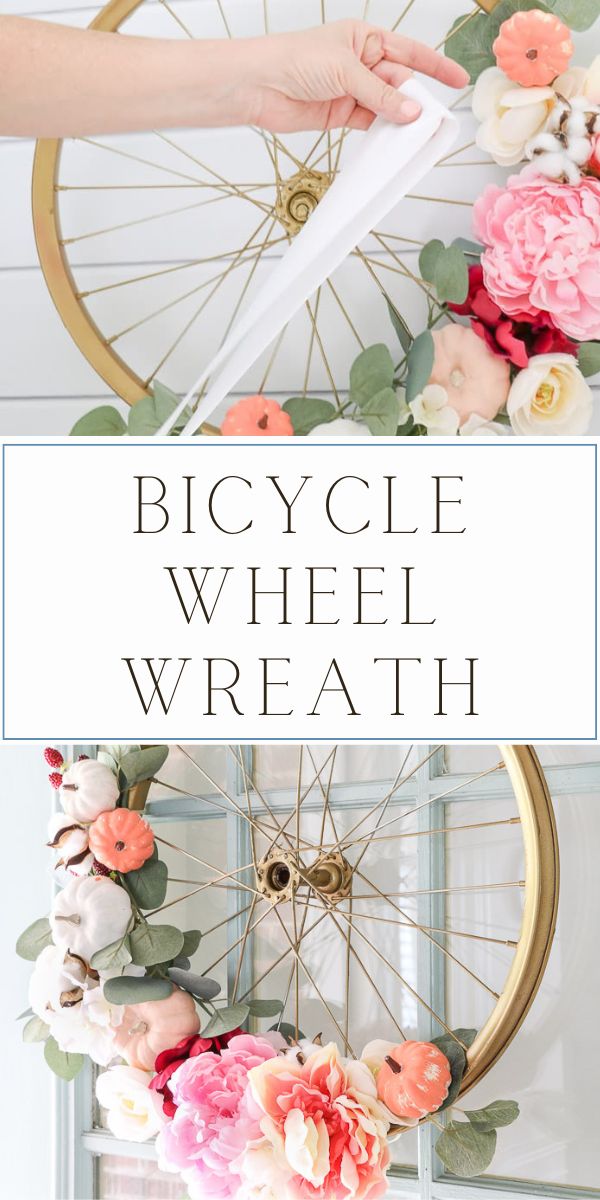
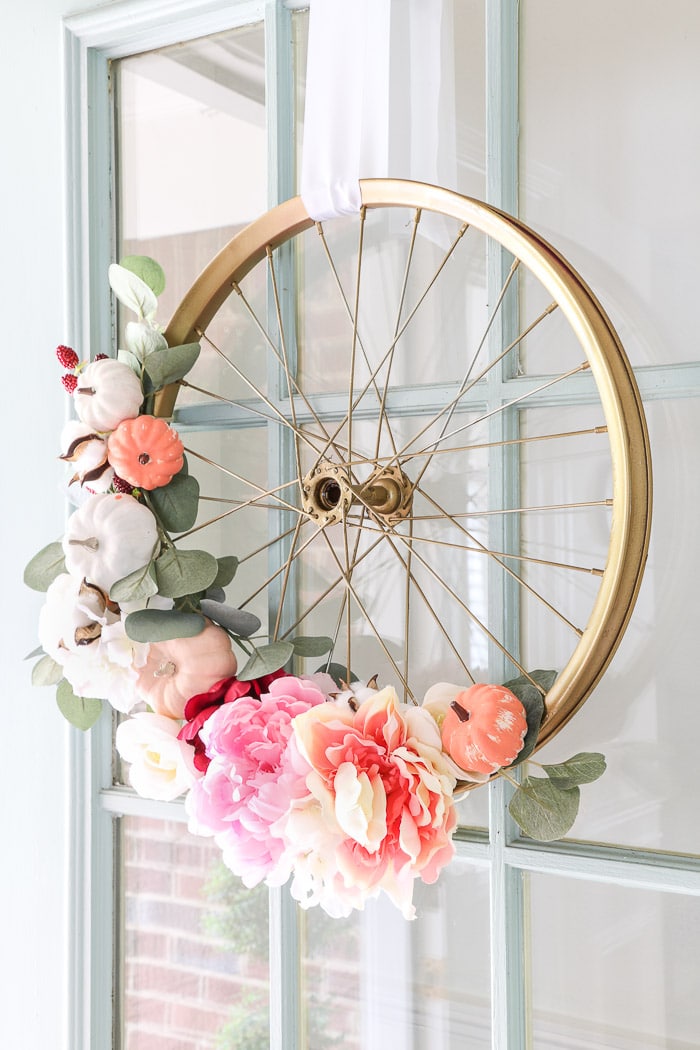
Bicycle Wreath
Do you have your child's bicycle in the garage. The one that they've outgrown and you just don't have the heart to get rid of it? The one they learned how to first ride on? This is a great new life for the bicycle. One that will allow you hold onto those sweet memories in an unexpected way.
Disassembling
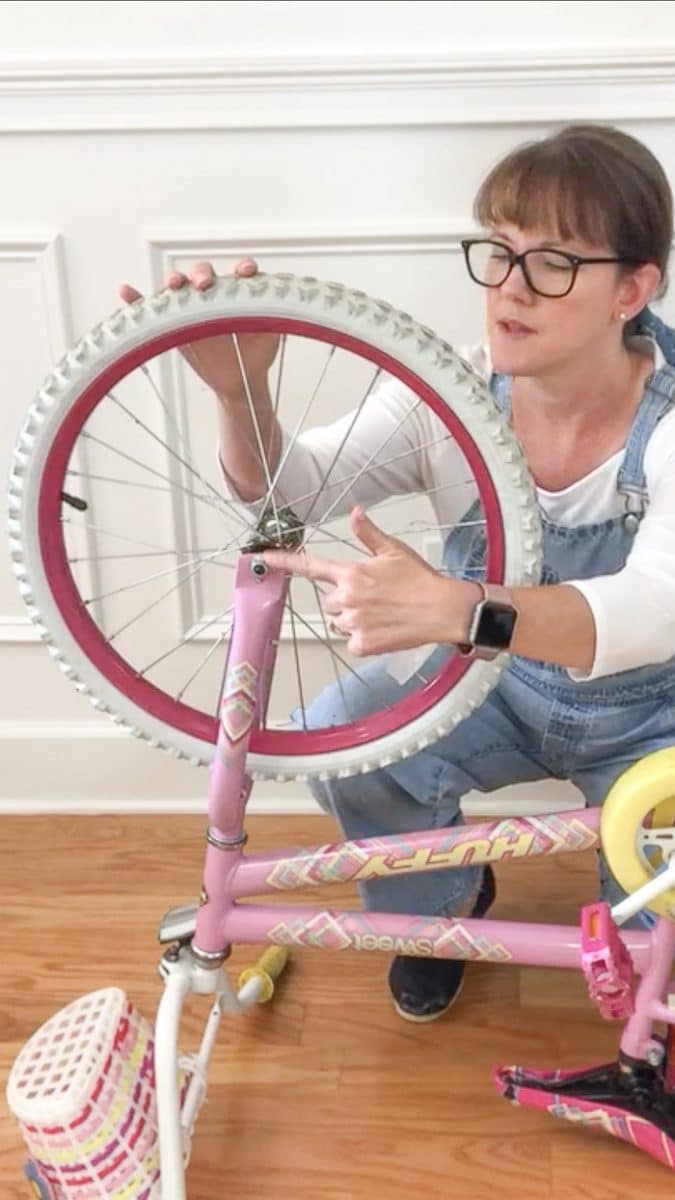
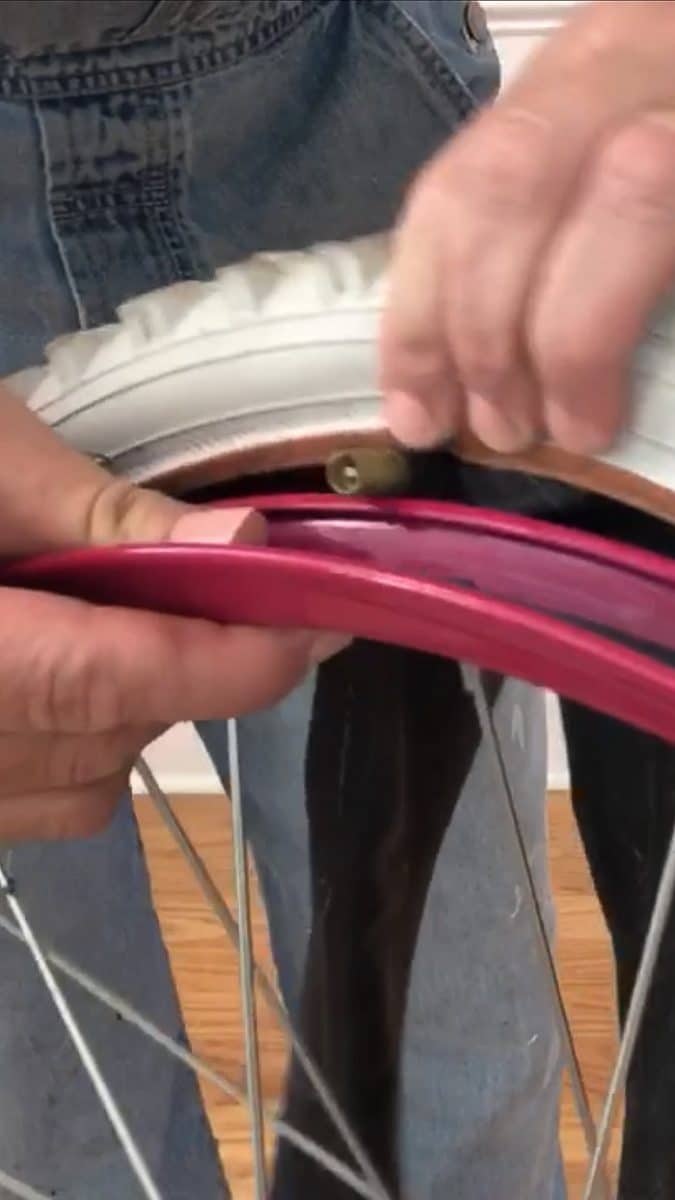
To get started, you'll need to remove the tire from the bicycle. I used a pair of vice grips and removed the nut from the bike.
Make sure to remove the piece in the center part of the rim. I didn't realize this needed to be removed until after I finished the wreath and tried to hang it on my door. (You will notice in the photos that the piece is in the center and then at the end, it is gone.) The wreath will not lay flat against the door unless you remove the center.
I unscrewed the nuts from the bolt and pulled out the center. I used two vice grips attaching them to the nuts and then turning in opposite directions. Make sure you have paper towels or something under it because there can be a great deal of grease inside.
Once the nuts are removed pull out the center. Clean away the grease.


Removing Tire From Rim
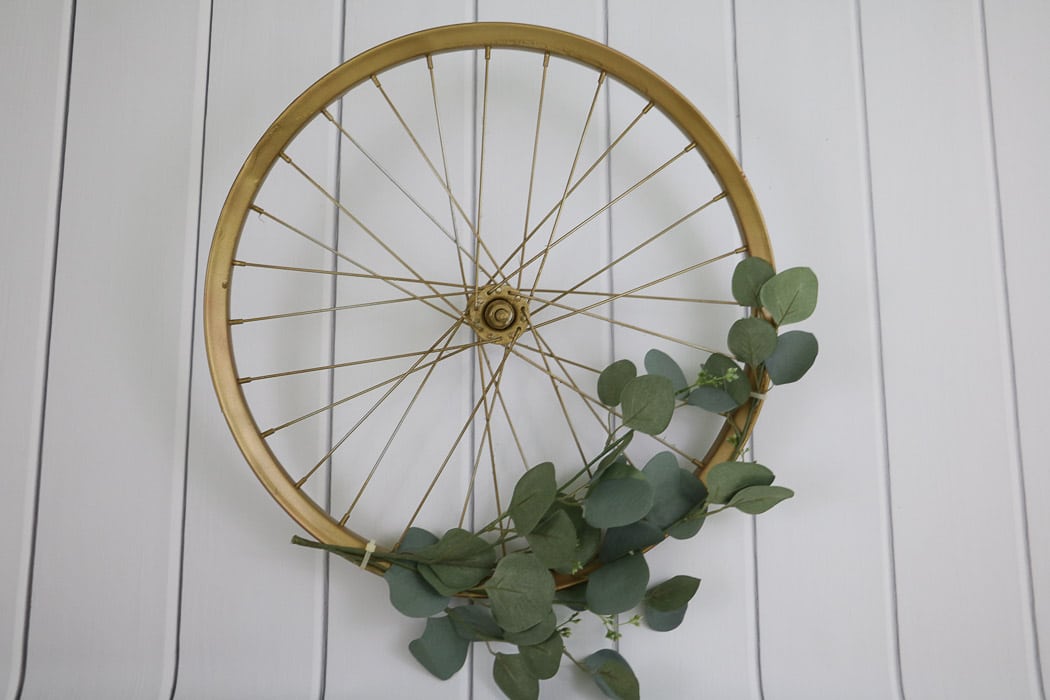
The next step is removing the bicycle tire from the rim. Once the rim is free, I cleaned it up with some TSP Cleaner and sprayed it with some gold spray paint.
Adding Greenery
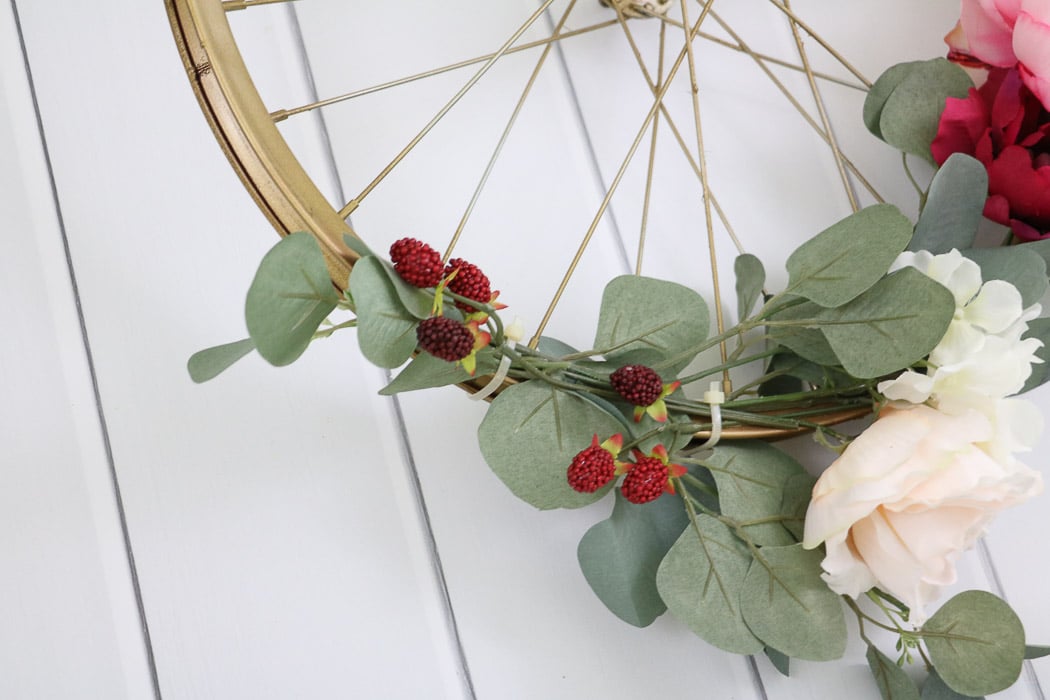
Now's the fun part! Adding greenery with zip ties is how I began assembling the bicycle wreath.
Adding Artificial Flowers
I began adding artificial flowers with longer stems by zip tying them as well.
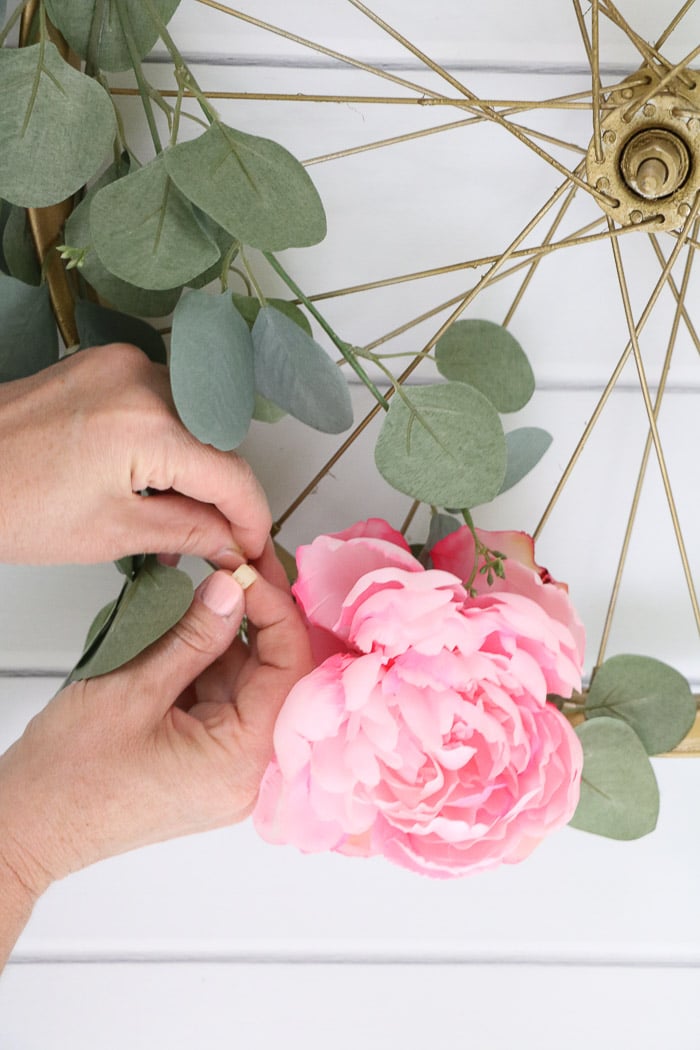
Choosing the colors for this wreath inspired me to step away from the traditional fall color schemes. I choose pinks, reds, creams and peaches.
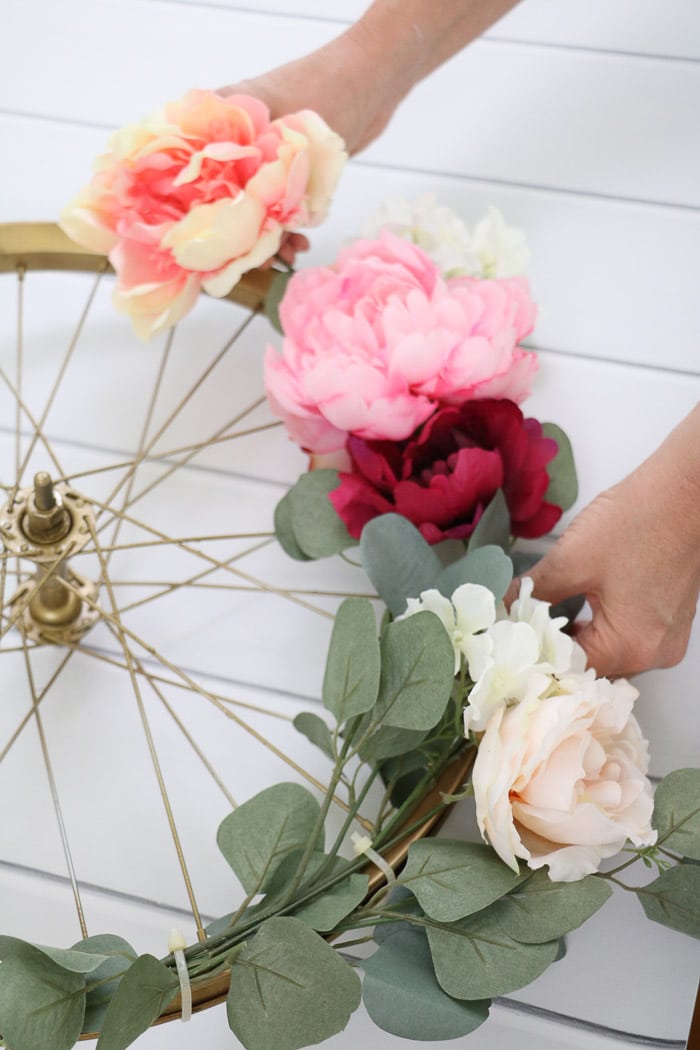
I also added some berries to bring some warm colors to this fall bicycle wreath.
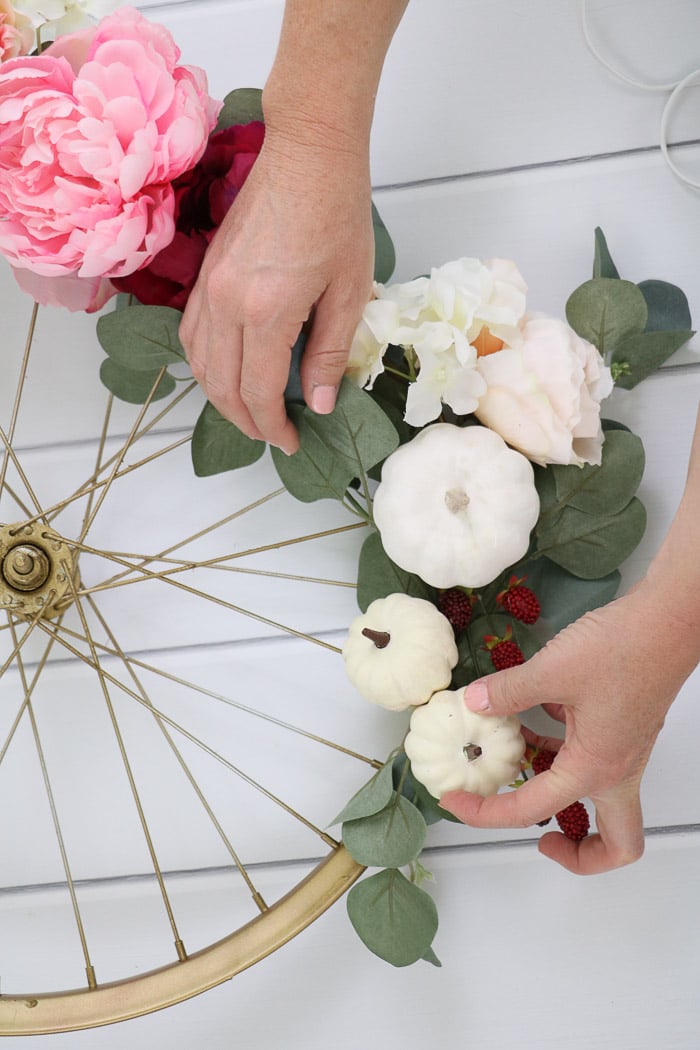
Add Pumpkins
Once I got enough flowers onto the wreath, I added a few pumpkins on with some hot glue. They seemed like the perfect touch on this fall wreath.
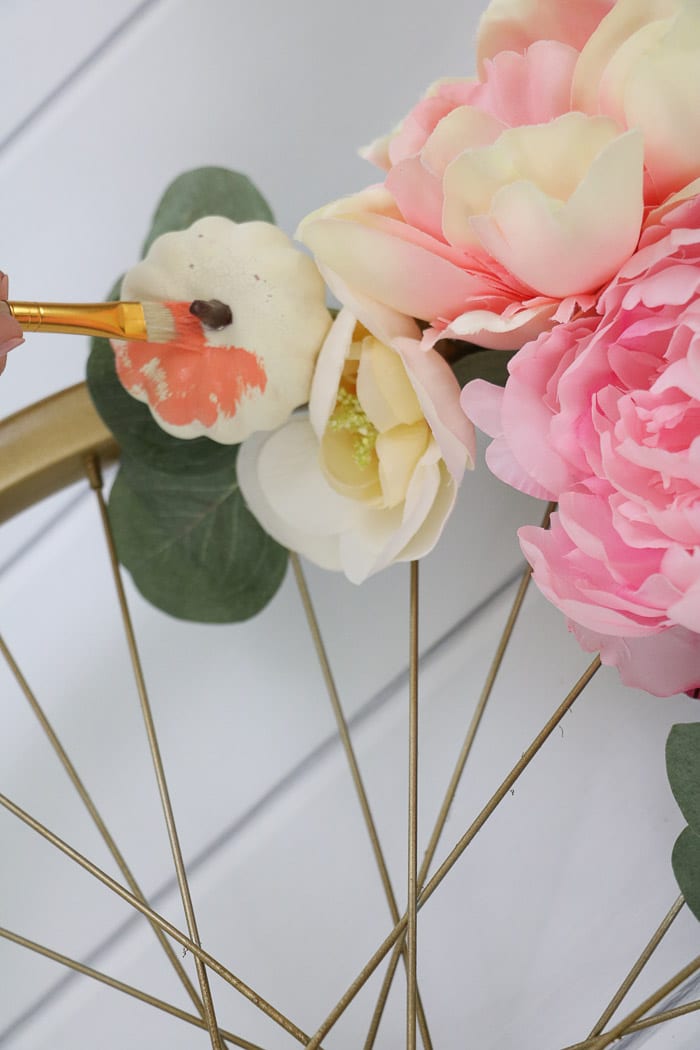
Painting Pumpkins
I had cream colored pumpkins, but wanted to pull together the colors in the flowers. I painted a couple of the pumpkins this perfect peachy pumpkin color.
Adding The Ribbon
Now that the wreath had come together, it was time to add the ribbon. The easiest way I have found, is to take the ribbon and fold it in half.
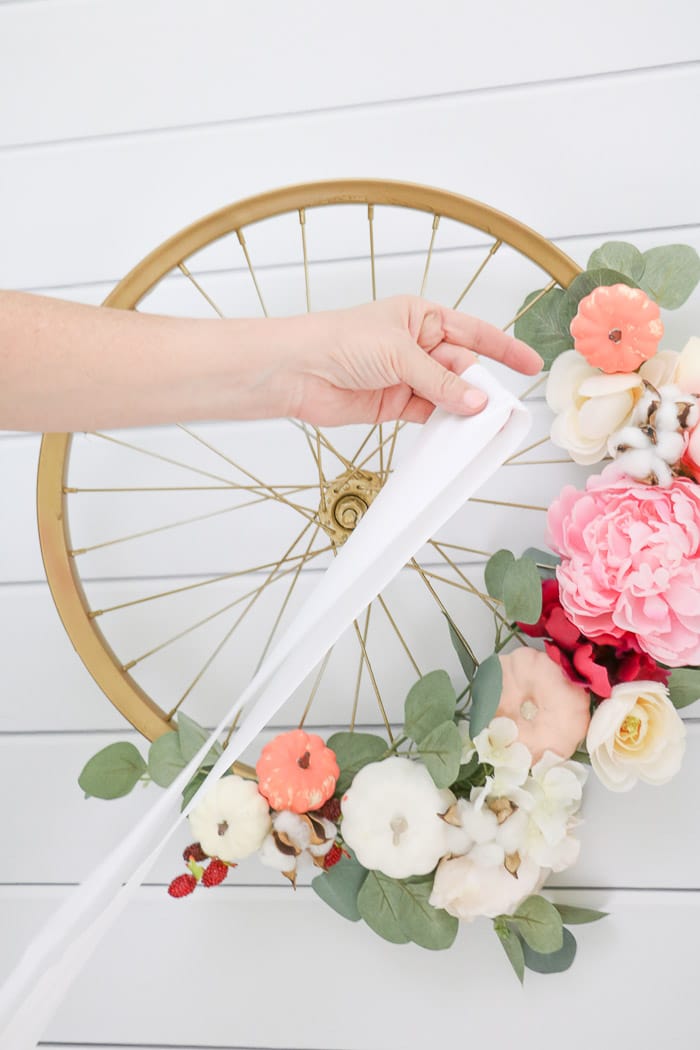
I then laced it through the bike spokes and now the bicycle rim wreath is ready for the best part!
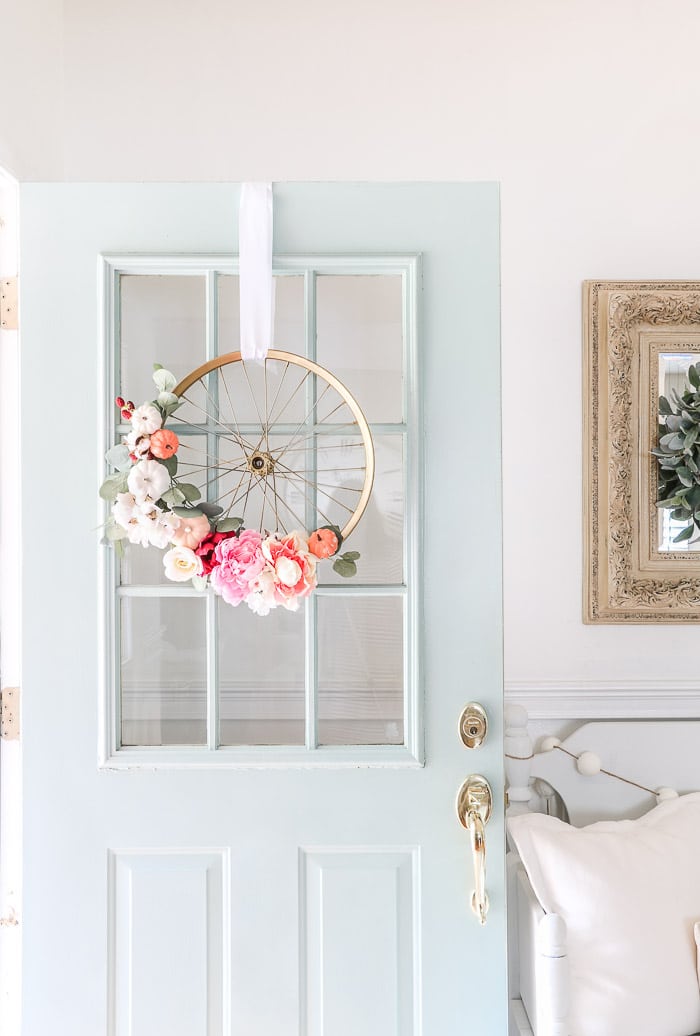
Hanging The Wreath
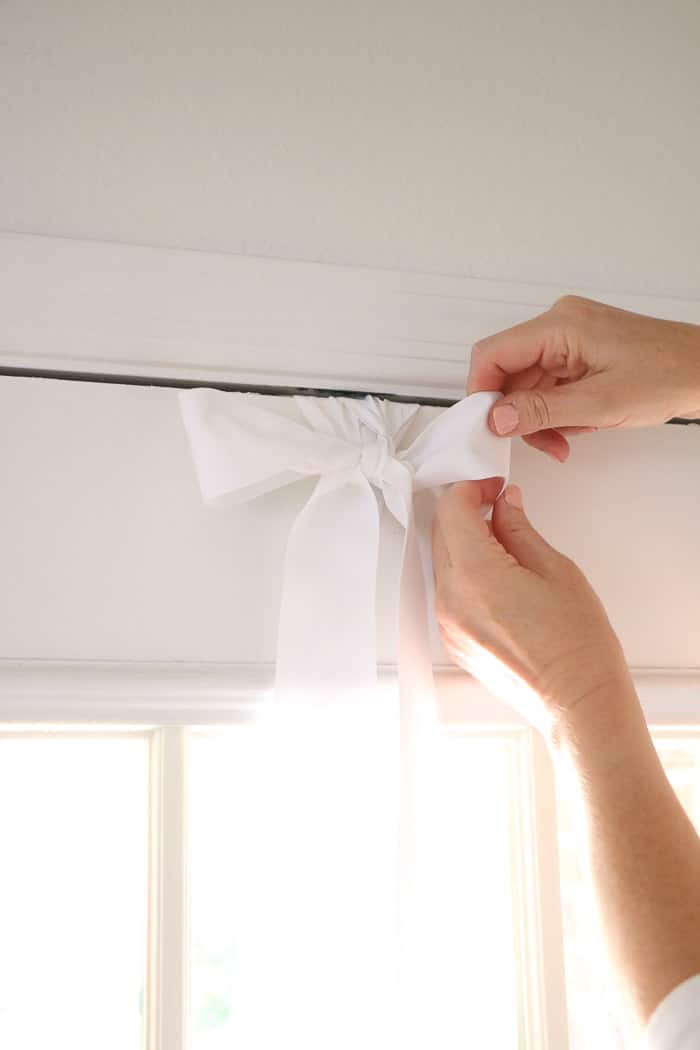
Finding the perfect place for the bicycle wreath to hang, I pull the ribbon over top of my front door.
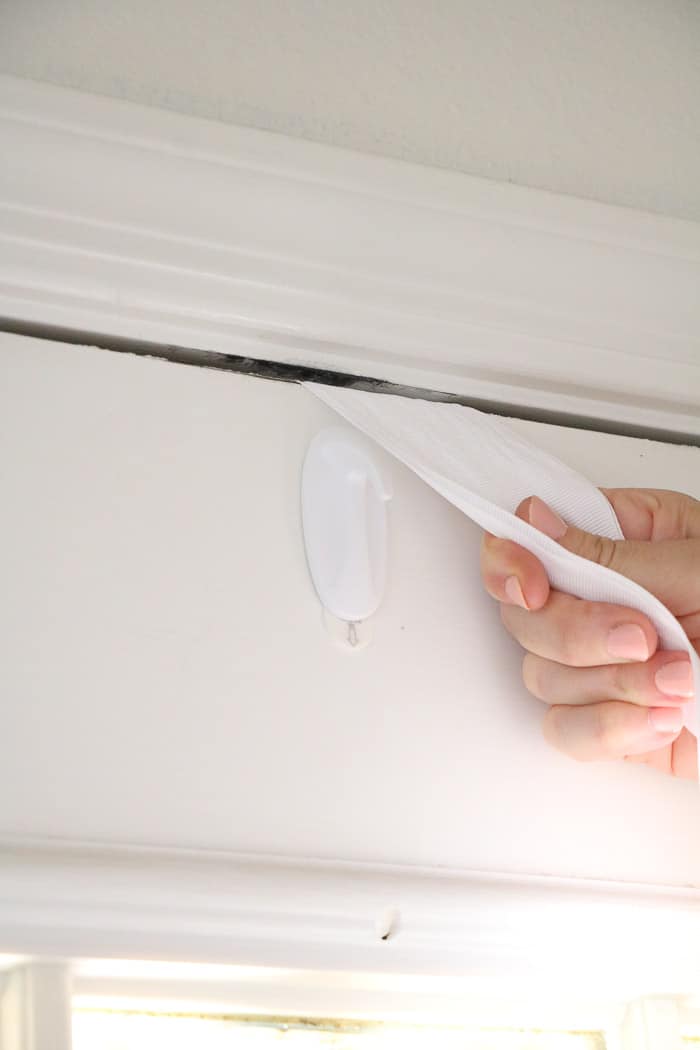
The next step is to tie the ribbon around the command hook on the door. I love to take my time and make the bow look just as nice on the back of the door as the wreath looks on the front of the door. If you'd like better step by step directions on how I hang my wreath, hop over to my post How To Hang A Wreath With Ribbon On The Front Door.
Conclusion
This was not a difficult project at all. It's so much fun to be inspired and have your idea come together with ease.
Making a fall bicycle wreath can tie in memories or can just be a new to you piece for your home fall decor.
If you'd like to see more fall decor inspiration check out our easy Wheat Wreath DIY and Fall Decor We Love From Our Cottage Farmhouse post. You should also check out my other great ideas for decorating with wreaths.
Happy Decorating!

Linda, I love this!! I was thinking of making one now I definitely will!! Thank you for the inspiration!
I am so glad! Good luck! I would love to see a photo when you are done.
That is TOTALLY BEAUTIFUL!!!!! How creative you are!!!! Love your projects- thank you so much for teaching those like me who have never had an original creative thought EVER!!!
You’re message made my day! I am so glad you are inspired!
This is a fabulous idea!!! Thank you for sharing! I can’t wait to try this!
Susan
I am so glad you like it! Good luck on trying it. You will love it!
This wreath is pure inspiration for me as there is a bicycle rim that I got for a dollar. I wasn’t sure what I wanted to do with it and now I know. Thank you!
Your comment has made my day! Your dollar rim is going to look like a million bucks.
I made a bicycle wreath but when I hung it on the door it rocked from the center not sitting flat. Any recommendations?
Hi Charlene! I had the same problem as you when I finished the wreath. I had to remove the centerpiece from the bike wheel. You will notice there is a nut screwed on each side of the piece that sticks out. Remove those nuts and pull out the center. If my memory serves me correctly I used two vice grips and attached them to the nuts on each side. Then I turned them in opposite directions. Make sure you have a paper towel or something under it because there can be a lot of grease inside. Thank you for asking this question because I went back and added it to the post under the disassembling section.
Love this idea as I have a spare rim handing around, my question is…how do you prevent the centre metal piece from scratching and banging against the glass on the door to have it not break. Especially on windy days, which we get quite often
Are you talking about the piece in the very center of the wheel? If so, look back at the post under “Disassembling.” There is a couple of paragraphs that talk about removing that centerpiece piece. Let me know if you have any more questions. I hope this helps!