

Get creative with these fun and easy air dry clay ideas for adults. Perfect for gifts, decor, or just a relaxing DIY project.

If you're looking for a relaxing, fun, and creative way to spend your time, air dry clay might become your new best crafting buddy.
Air dry clay is my favorite type of clay for easy DIY projects that last. It's easy to use, requires no kiln, and the possibilities are endless.
These ideas are simple and really let you dig into your creativity. Let’s dive into some charming and practical DIY projects you can make right at home!
Why Air Dry Clay is Perfect for Adult Crafting
There's something so soothing about working with clay—it's like therapy, but you get a cute decor piece out of it! Air dry clay is beginner-friendly, affordable, and perfect for crafting without the need for fancy equipment.
In fact, you only need a few essential tools and materials to work with air dry clay. Grab some air dry clay, a rolling pin, cookie cutters, sandpaper, a little paint, and a possible sealer.
Oh, and don’t forget your imagination!
Air Dry Clay Ideas for Adults
Now, let's jump into the perfect projects for adults using air dry clay.
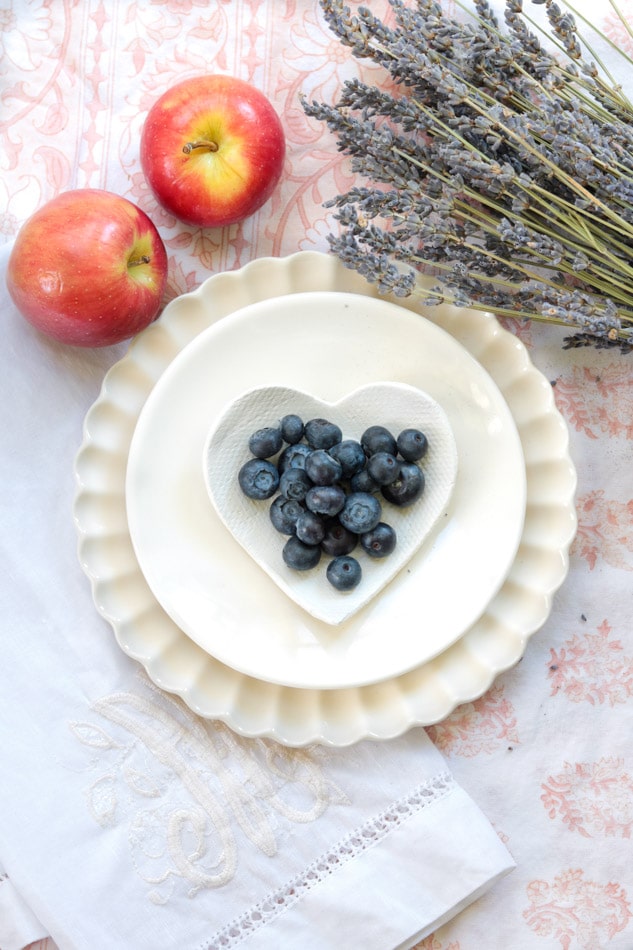
Heart Bowl: A Sweet and Functional Piece
Here’s a super fun project that's perfect for beginners: an air-dry clay heart bowl!
It’s as simple as rolling out the clay and using cookie cutters to shape it however you like. Whether you stick with hearts or get creative with your own shapes, the possibilities are endless!
Shaping the Perfect Heart Bowl by Hand
Roll out your clay, cut a heart shape, and gently mold it into a bowl. You don’t need perfection—imperfections give it character!
Adding Texture or Designs for a Unique Look
Try pressing lace, leaves, or even a fork into the clay before it dries for a cool effect.
Best Ways to Use and Display Your Heart Bowl
Perfect trinket dishes for holding jewelry, keys, or little items on your nightstand.
Check out my post How to Make Clay Bowls for detailed instructions and all my tips and tricks on this project.
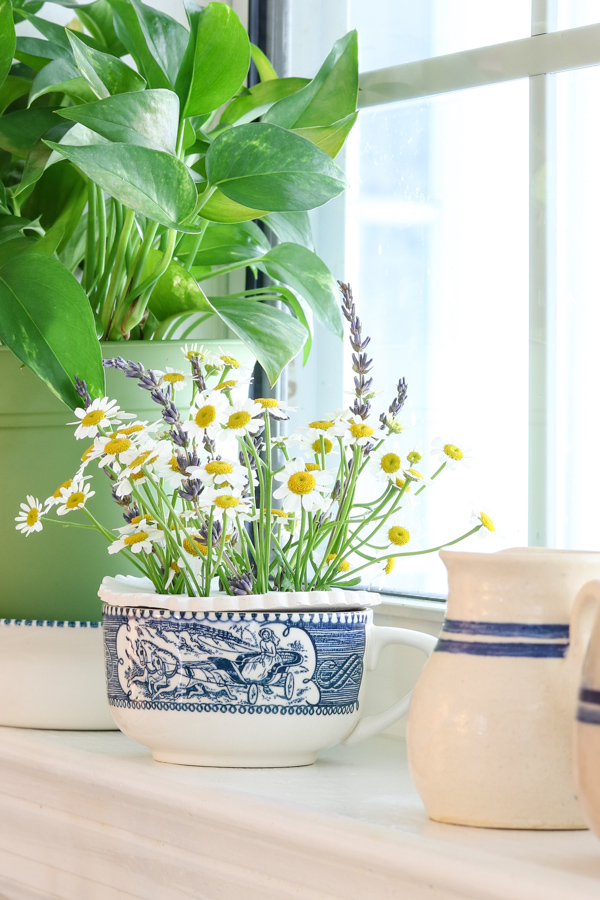
Flower Frog: A Stylish Way to Arrange Blooms
This air-dry clay project will elevate your flower arrangements like never before! But wait—you're probably wondering, What exactly is a flower frog? Well, let’s dive into this floral tool and see how it can transform your blooms into something truly special.
What is a Flower Frog and Why You Need One
A flower frog is a little clay piece with holes that keeps flowers standing in place. It’s a game-changer for floral arrangements!
Molding and Creating Holes for Stems
Shape a dome or disc, then poke holes into it before the clay hardens.
How to Decorate and Paint Your Flower Frog
Go classic with neutrals or add a pop of color—whatever suits your style! And remember to seal it because it does come near water.
Check out my post Craft Your Own Air Dry Clay Flower Frog: A Fun DIY for All Ages for a detailed step-by-step guide.
Mushrooms: Whimsical Decor for Any Space
The charming, whimsical allure of mushrooms has completely transformed the world of decor, so I knew they’d be the perfect addition to my daughter’s bridal shower centerpiece!
I decided to craft a few adorable air-dry clay mushrooms, and let me tell you, they’re a blast to make. The best part? Kids will love getting in on the fun, too!
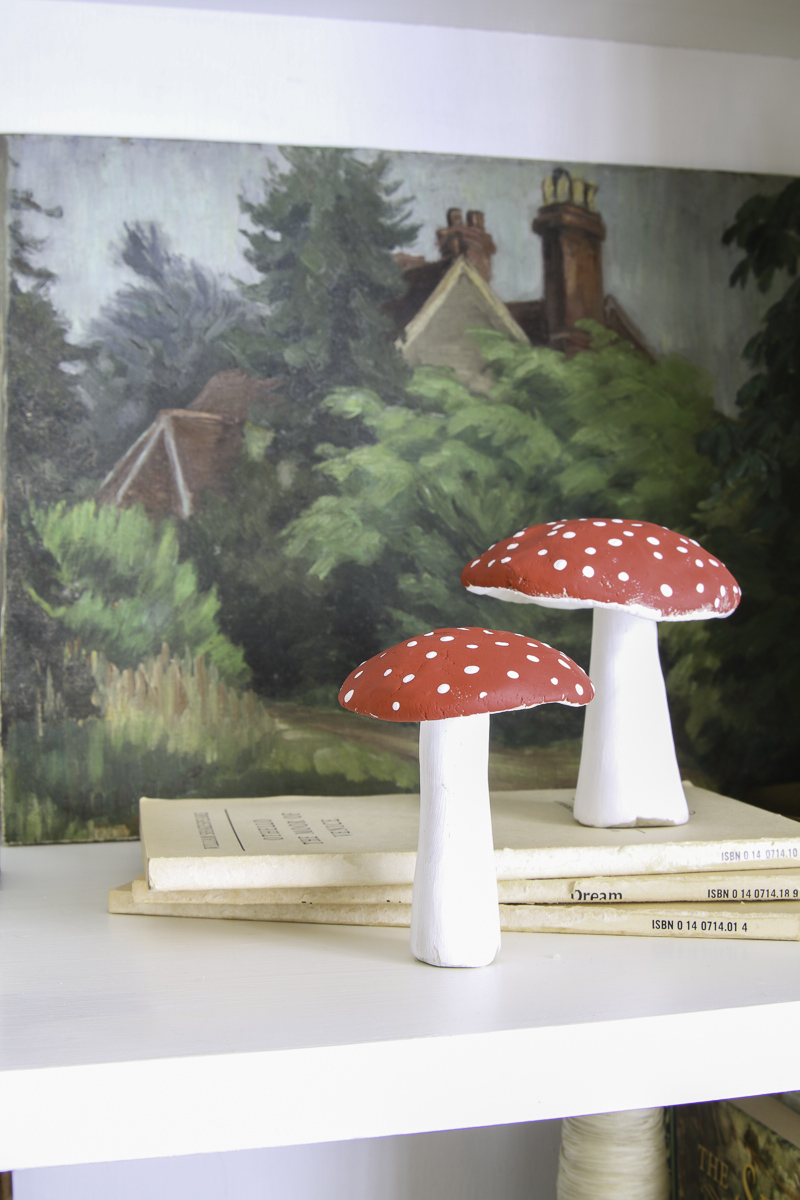
Crafting Realistic or Fantasy-Inspired Mushrooms
Whether you want cottagecore vibes or fairy-tale charm, mushrooms are a must-make.
Painting Techniques for a Natural or Playful Look
Go for earthy reds and browns or fun pastels for a magical touch.
Creative Ways to Display Clay Mushrooms in Your Home
Scatter them on shelves, place them in planters, or create a little woodland scene.
Check out my post Crafting Magic: How to Make Clay Mushrooms for my best tips and tricks on this clay mushroom decoration project.
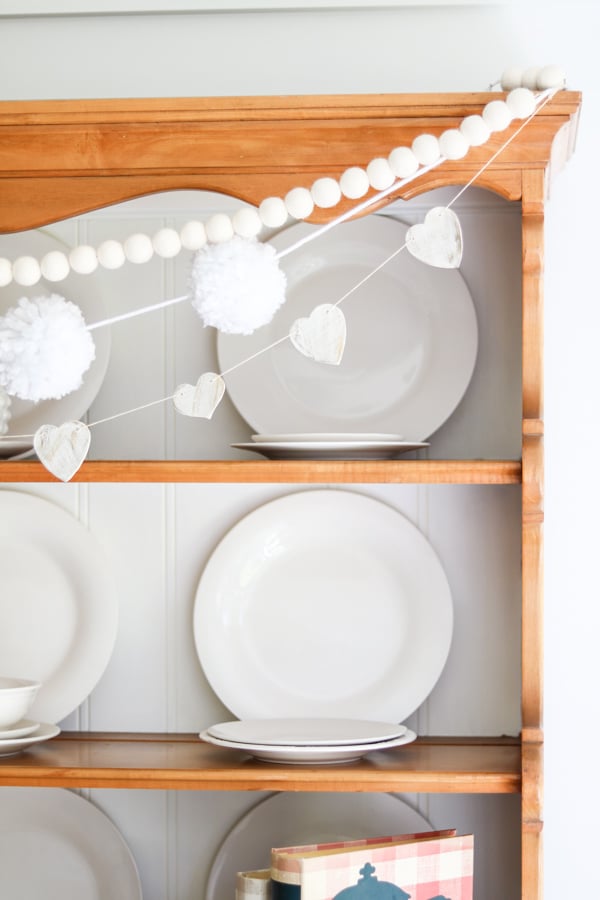
Heart Garland: A Handmade Touch for Every Season
Here’s another fun and simple air-dry clay project that’s perfect for beginners: a heart garland! While it’s ideal for Valentine’s Day, it’s so charming you’ll want to keep it up all year round. A sweet little touch to brighten any space!
Keep in mind that you can use this technique to make any kind of garland, from gingerbread men to stars.
Rolling and Cutting the Perfect Clay Hearts
Use a cookie cutter or freehand some hearts from air dry clay—both ways work beautifully.
Stringing and Hanging Your Garland with Ease
Thread twine through tiny holes and drape it across your mantle, headboard, or window.
Ideas for Personalizing with Stamps, Paint, or Gold Leaf
Press in some words, add metallic accents, or paint delicate florals. I used rub n buff for these hearts.
Don't miss my post Easy Vintage Heart Garland DIY to get my guide.
Garden Markers: Beautiful and Functional for Every Gardener
Garden markers seem like a fun and easy air dry clay project and are simple enough for a beginner.
Recently, while looking at Pinterest, I came across these garden markers and thought this would be a great air dry clay project but look at all the detail of these designs. They are so pretty!
The best part about these garden markers is that they are for sell on Etsy here. You can buy them or try making your own.
Shaping and Stamping Words for Plant Labels
Roll out some clay, cut rectangles with a point at the end, and press in plant names.
Sealing Your Garden Markers for Outdoor Use
A waterproof sealant will keep them looking great through the seasons.
Fun Ways to Customize with Colors and Designs
Match them to your garden aesthetic—rustic, modern, or colorful!
Wall Sconce for Candle: Handmade Lighting
This air-dry clay wall candle sconce project is a bit more advanced, but the possibilities are endless! You can get creative and add intricate art designs, or keep it simple and let the clay speak for itself—just like I did.
The beauty is in the freedom to make it your own!

Designing a Simple Yet Stunning Wall Sconce
Mold your clay in your desired shape and let it dry.
How to Attach and Secure a Candle Holder
Use strong adhesive or hot glue to add a candle holder.
Painting and Sealing for a Beautiful Finish
A coat of paint and sealant makes it durable and oh-so-pretty. You can use acrylic paint, watercolor, chalk paint, and more. See my post How to Paint Air Dry Clay: A Step-by-Step Guide Using 4 Different Paints for all the details.
That's it! Your air dry clay candle holder is ready for display.
Light Switch Plate: Small Detail That Makes a Big Impact
Consider creating a switch plate using air-dry clay! You can shape the edges into a delicate scallop or paint a beautiful design to match your style.
I spotted a design idea on Pinterest from Anthropologie and was inspired to make my own with elegant gold edging in the future.
If you'd rather buy a scalloped switchplate, you can find one here at Anthropologie! They even have matching electrical outlet covers to complete the look. But if you want to make your own, here are a few details to get you started.
Measuring and Cutting Clay for a Perfect Fit
Trace an existing plate, or use a pattern to cut out a design. Then cut out holes for switches.
Adding Textures, Patterns, or Pressed Botanicals
Use leaves, stamps, or hand-drawn designs for a special touch.
Sealing for Durability and Everyday Use
A clear sealant will keep it looking fresh for years.
Ghosts: Cute or Spooky, You Decide
Here’s a spookier, more advanced air-dry clay project: small luminary ghosts! These little guys add a magical glow and bring your Halloween decor to life. Perfect for creating a bewitching ambiance all season long!

Shaping Playful or Haunting Ghost Figures
Roll out a circle of clay and cut eyes and mouth. Then, curve the edges into a cone, cut the bottom flat, and let it dry.
Ideas for Painting Faces or Adding Glow Effects
Paint designs or leave them unfinished, or give them a paint that glows in the dark.
Creative Ways to Display Your Clay Ghosts
Stand them on a shelf, tuck them into plants, or make a spooky centerpiece.
Don't miss my post Glowing DIY Air Dry Clay Ghosts for Halloween for all the details of this fun DIY.
Air Dry Clay Ornaments: Handmade Holiday Keepsakes
These simple to make air dry clay Christmas tree ornaments are perfect to mark special occasions or give as gifts.
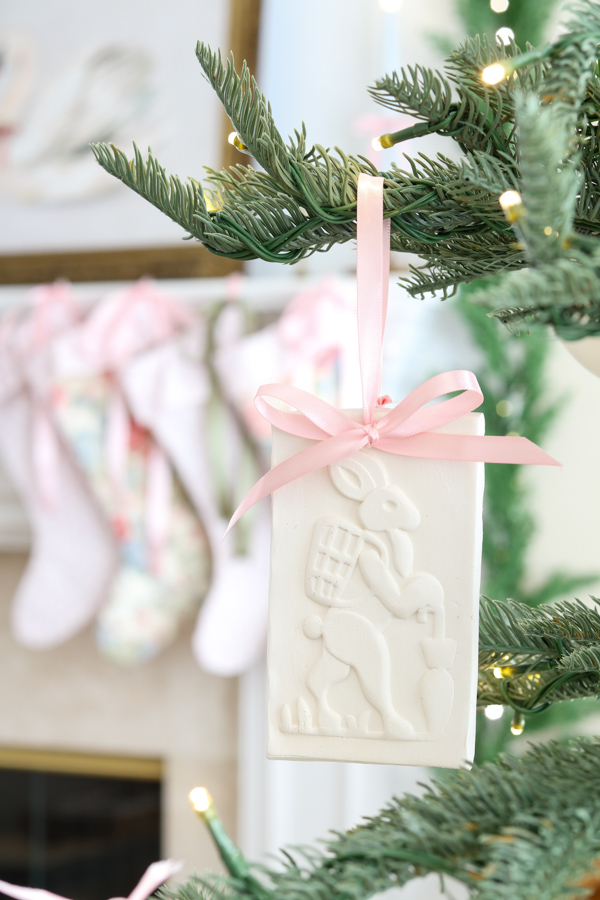
Cutting and Molding Unique Ornament Shapes
Use cookie molds or cutters on rolled out air dry clay. Consider hearts, stars, initials—you name it! I particularly love the wooden cookie cutter designs on Amazon, like this bunny and this windmill.
Adding Personal Touches with Paint
Give them a coat of paint or details with Rub n Buff and give them a coat of sealant for longevity.
Best Ways to Hang
Use ribbon or twine and then hang them on Christmas trees, display them on a wall, or hang them on Christmas stockings.
This is one of my favorite Christmas decorations. See my post How to Make DIY Air Dry Clay Ornaments for all the festive fun!
Coasters: Stylish and Practical for Everyday Use
My friend on Instagram, Heidi, created the cutest air dry clay coasters that look like a house with a heart cut out of it. I love this idea and can't wait to try it!
She shares step-by-step instructions on how to create easy DIY air-dry clay coasters here. This project makes a wonderful housewarming gift or a stylish addition to your own home. Here are a few tips to help you make your own!
Rolling and Cutting the Perfect Coaster Size
A cookie cutter or a glass makes the perfect round, square or any shape.
Decorating Techniques for a Personalized Look
Paint marbling, geometric patterns, hand-drawn designs, or leave it in the natural air dry clay color.
Sealing to Protect Against Water and Heat
A water-resistant sealant keeps them functional and beautiful.
Pro Tips: How to Bake Air Dry Clay for Faster Drying Time
What Temperature and Time Work Best
A super low oven (around 200°F) for 20 minutes helps speed up the drying process. But be sure to read my blog post on how to bake air dry clay, to make sure you are doing it exactly right.
Avoiding Cracks and Over-Drying
Slow and steady wins the race! Keep an eye on it.
When to Air Dry vs. When to Bake for Best Results
Thin pieces can bake, but thicker ones should air dry to prevent cracking. However, I have still baked thicker pieces but only for 20 minutes. It helps speed up the drying time a little.
Pro Tips: How to Seal Air Dry Clay for Longevity
Best Sealants for a Matte or Glossy Finish
Choose a matte finish for a natural look or glossy for shine. My two favorites are clear acrylic spray sealer and decoupage. Make sure to read my blog post on how to seal air dry clay for my pro tips so your sealant step will be a success.
Protecting Your Pieces from Water and Wear
A durable sealant keeps your air dry clay crafts safe from moisture.
How to Apply Sealant for a Smooth, Lasting Effect
Use thin, even coats for the best results.
Conclusion
So, are you ready to roll up your sleeves and get crafting? Air-dry clay projects are seriously addicting, and once you start, you won’t want to stop. Have fun, experiment, and create something you love!
Do you have any air dry clay craft ideas you love? Please share them in the comments!
Happy Decorating!
