
Here are instructions on how to create a dreamy vintage village Christmas tree centerpiece. This fun idea will bring smiles to children and adults with all the little details in this winter tablescape.
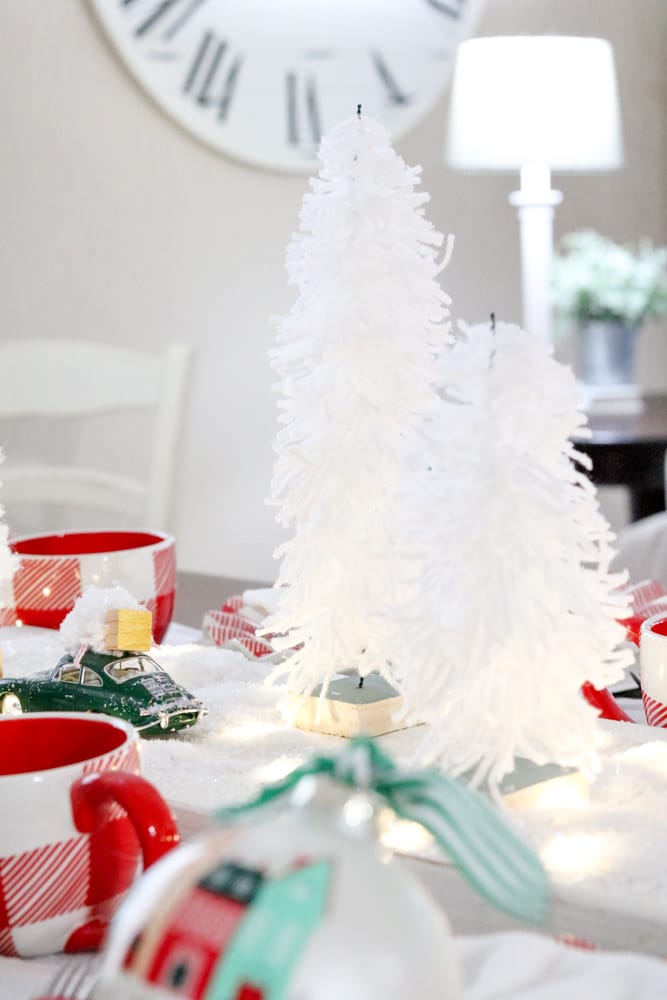
This year we fell in love with these DIY bottle brush trees made of yarn. All you need is some yarn, wire, some little pieces of wood, and some hot glue!
The Christmas decorating possibilities are endless but when we created this artificial Christmas tree centerpiece we knew this design would bring joy and holiday cheer to all who came for dinner during this holiday season.
Once we had the Christmas centerpieces idea in mind I knew exactly who could finish this magical tablescape and Coton Colors came to the rescue.
I will share more about each place setting after we break down an easy way to create a centerpiece for your table.
CHRISTMAS TREE CENTERPIECE
When creating a festive centerpiece I recommend starting with some inspiration and the yarn bottle brush trees are where it all started for this table setting.
You can also use more natural elements and or pine cones to give your centerpiece more of a natural color scheme. Once you have your inspiration it is time to start building a mini Christmas tree centerpiece.
Prefer Watching Over Reading?
Table Cloth
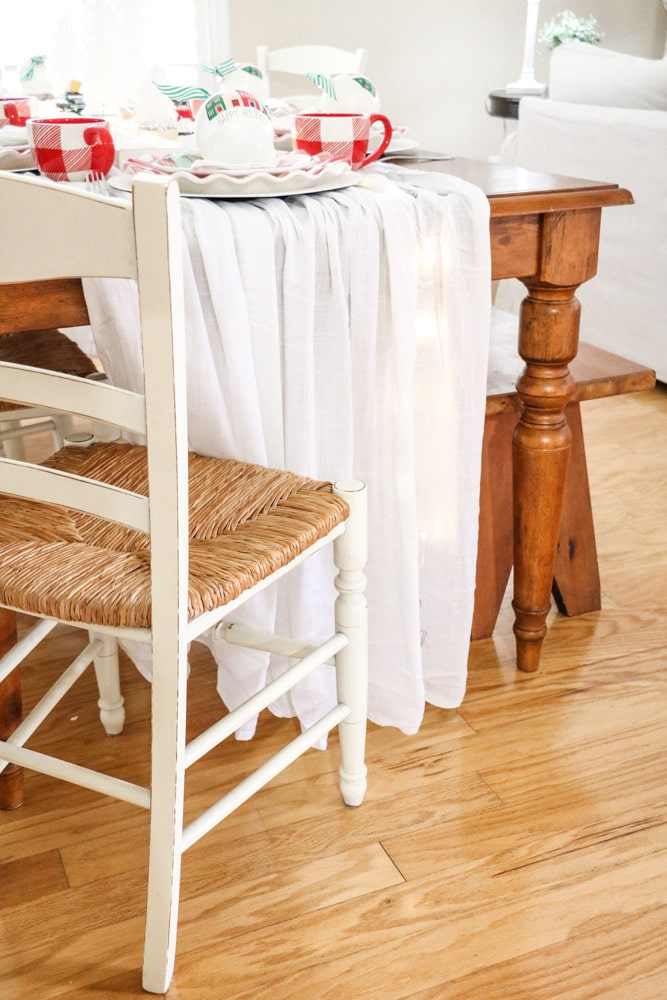
The first thing you need to do is determine if you want a tablecloth or not. For this Christmas table centerpiece, I knew I wanted battery-powered lights so I needed a tablecloth that would help hide the cords.
You can find these battery-powered lights at any crafts store or even at the Dollar Tree.
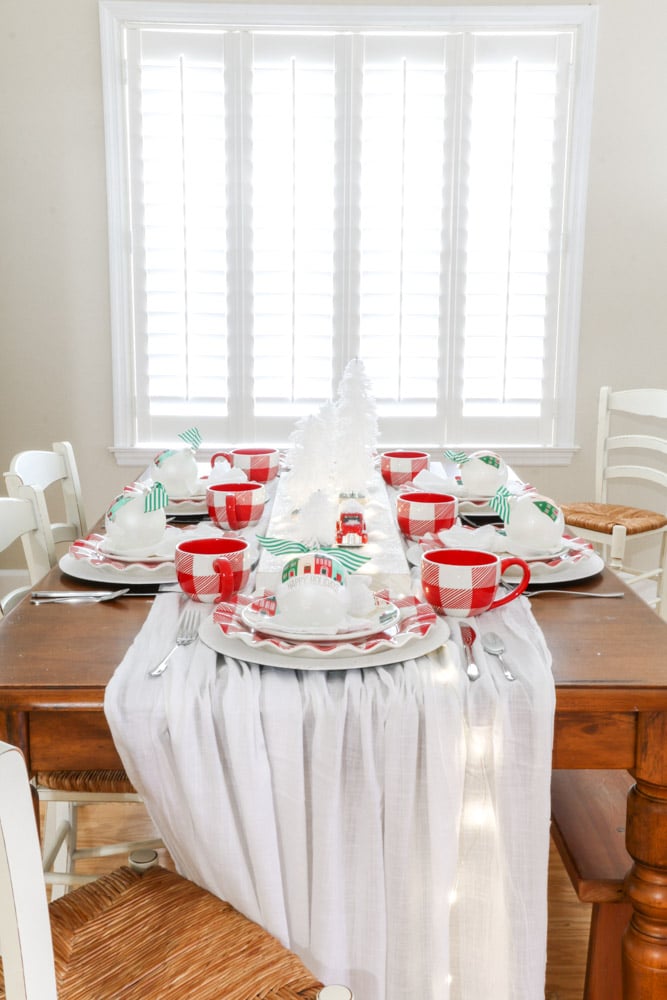
I bought a long linen tablecloth and bunched it onto the center of the table like a table runner with the ends hanging way down on each side. I will show you how I hide the battery pack later.
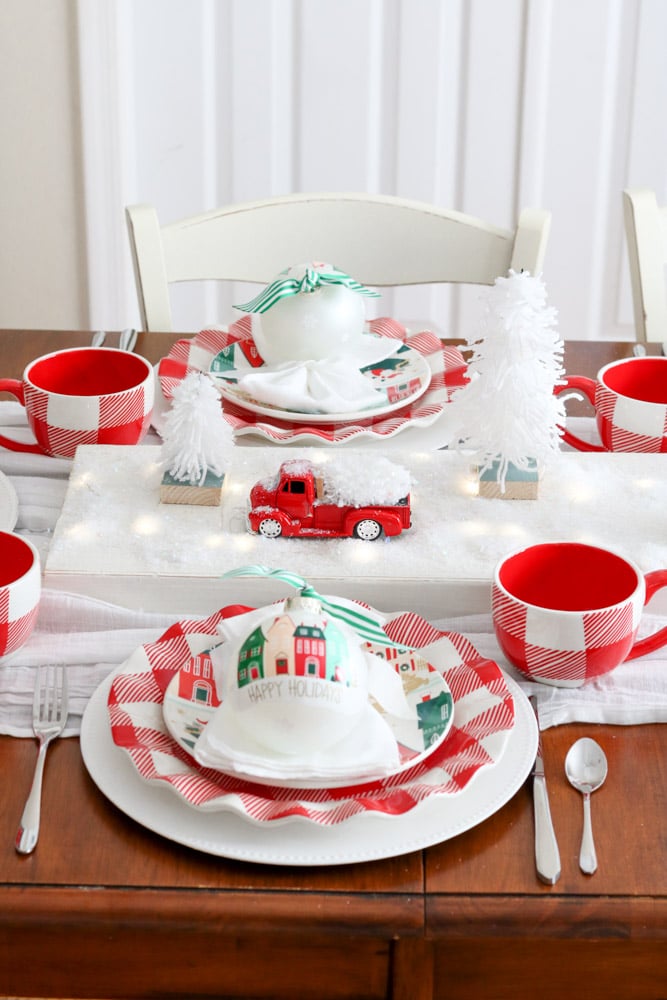
Once I had the tablecloth set I grabbed my white chalk painted board and placed it in the center. A board like this is a great way to elevate your design if it is low and it gives everything something stable to sit on. Especially if your tablecloth is bunched up like this one.
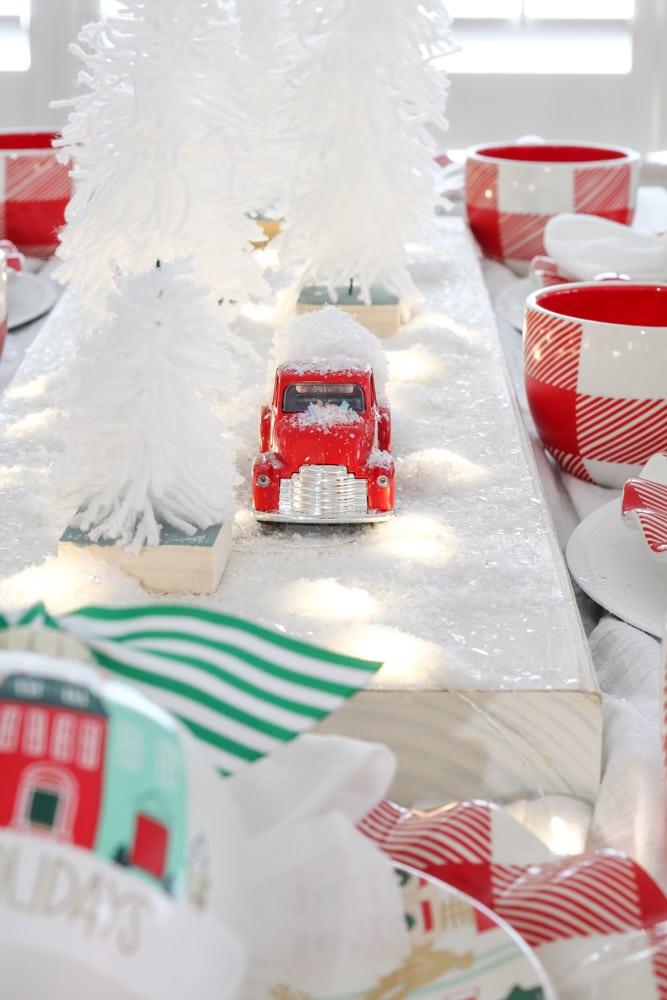
STEP ONE: PLACE TALL ITEMS
When creating Christmas centerpieces, begin by placing the tallest item first.
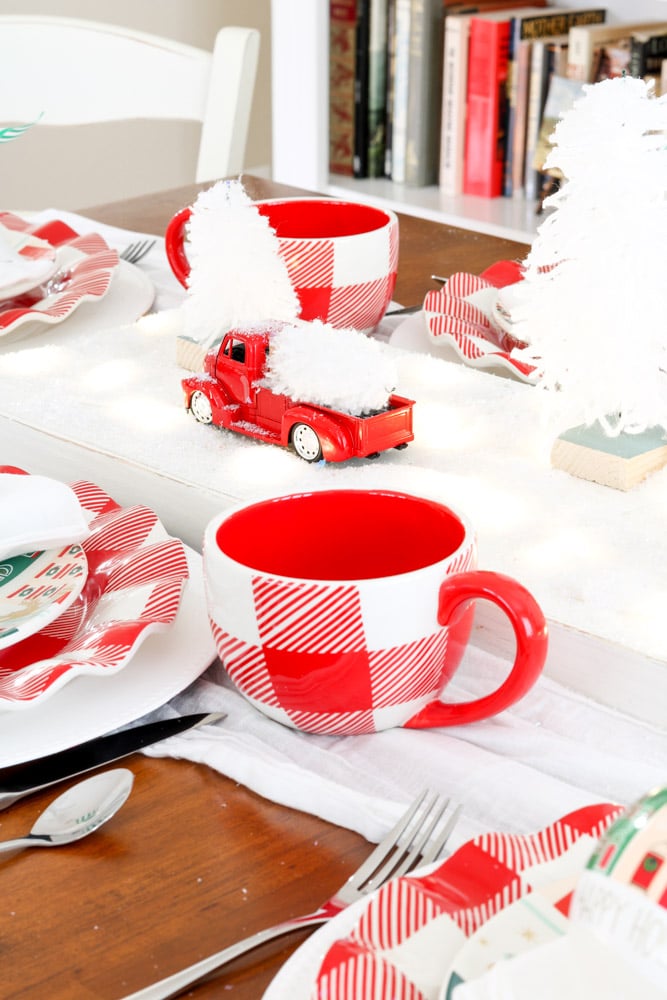
On our table, we have one yarn tree that is taller than all the others. If you have one item for your centerpiece then place it in the center but if you have multiple items like these yarn Christmas trees then place the tallest in the center or just off the center.
Step Two: Create a Triangle
Next step, create an imaginary triangle on your table and place all the other accessories within the triangle. See how the shorter trees are on the ends.
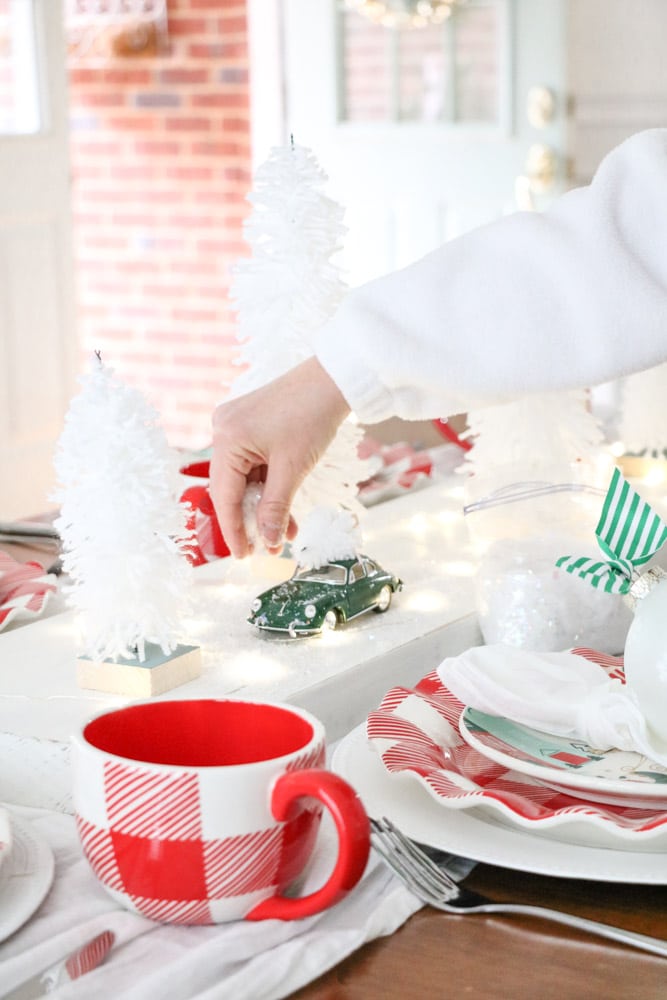
STEP THREE: ADD DETAILS
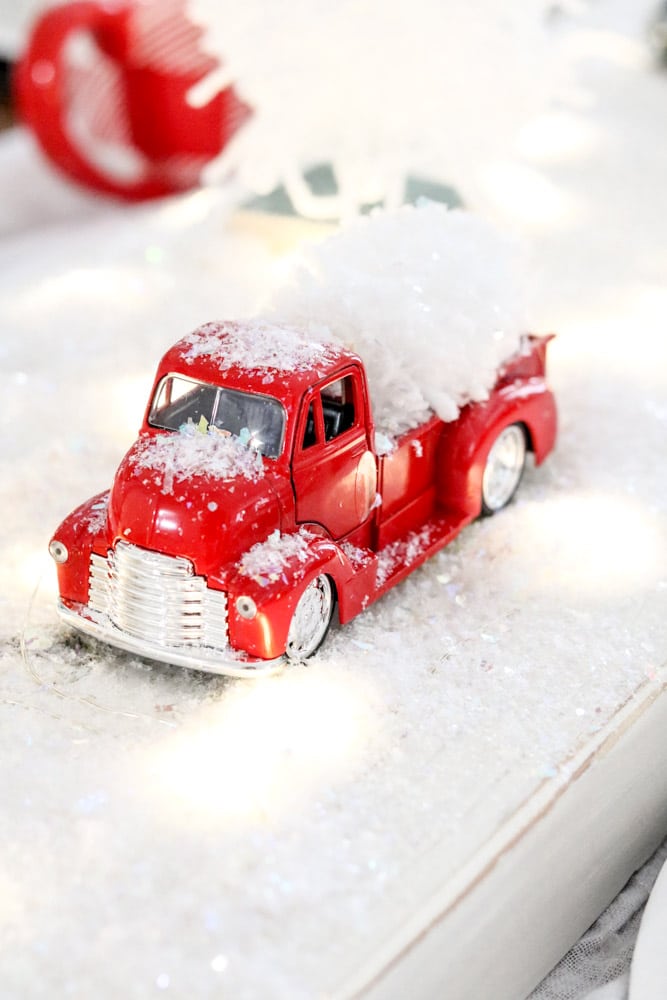
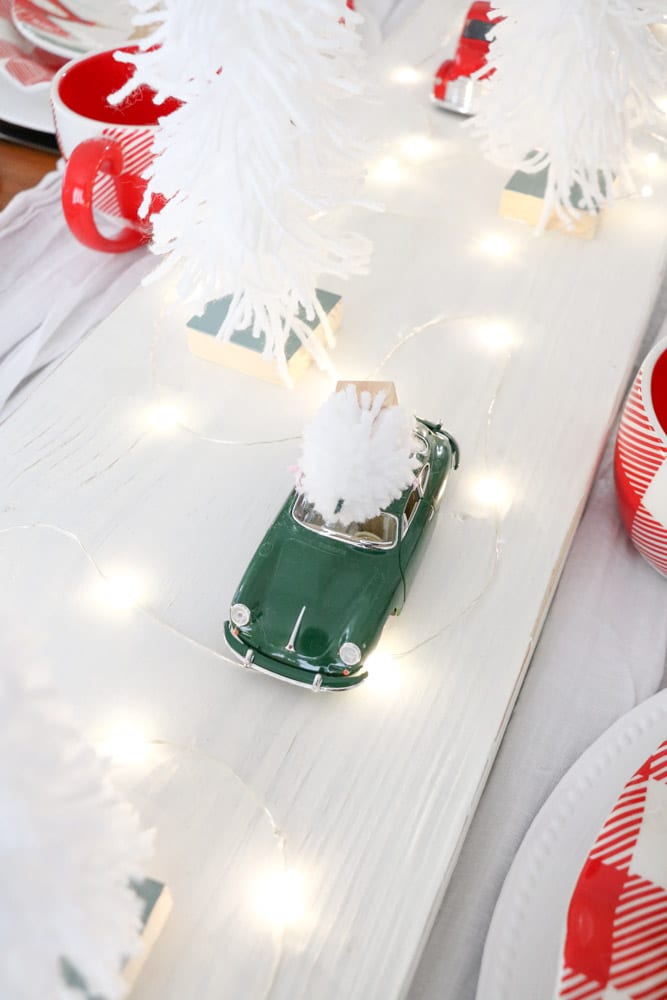
Great designs are in the details which is why I made added yarn trees to these cars and trucks. Little children love tiny anything which makes this centerpiece fun for them but adults like this too. LOL!
So think about details when creating your Christmas tree centerpiece. You can find all sorts of Christmas decorations at a craft store or even big box stores like Michaels stores.
STEP FOUR: LIGHTS
Here is the magical part. Add lights along the bottom of your centerpiece. Here is how I added these lights to the Christmas tree winter tablescape.
First I used a piece of wood as a base and layout the battery-operated Christmas lights.
For my table, I didn't want the box of batteries to show so I place the box on one end of the table on the floor. Then brought the lights up the side and tucked it under the charger plate.
Next, I began winding it around the trees and vehicles until I came to the other end and brought it down the other side of the table.
Now that I have the lights laid out I needed them to lay flat so I used clear tape to tape them to the piece of wood.
Next, I sprinkled faux snow over the lights making sure to cover the wire and bulbs.
Guess what? You have a magical winter centerpiece!
Let's talk about designing the rest of the table to compliment your Christmas tree centerpiece.
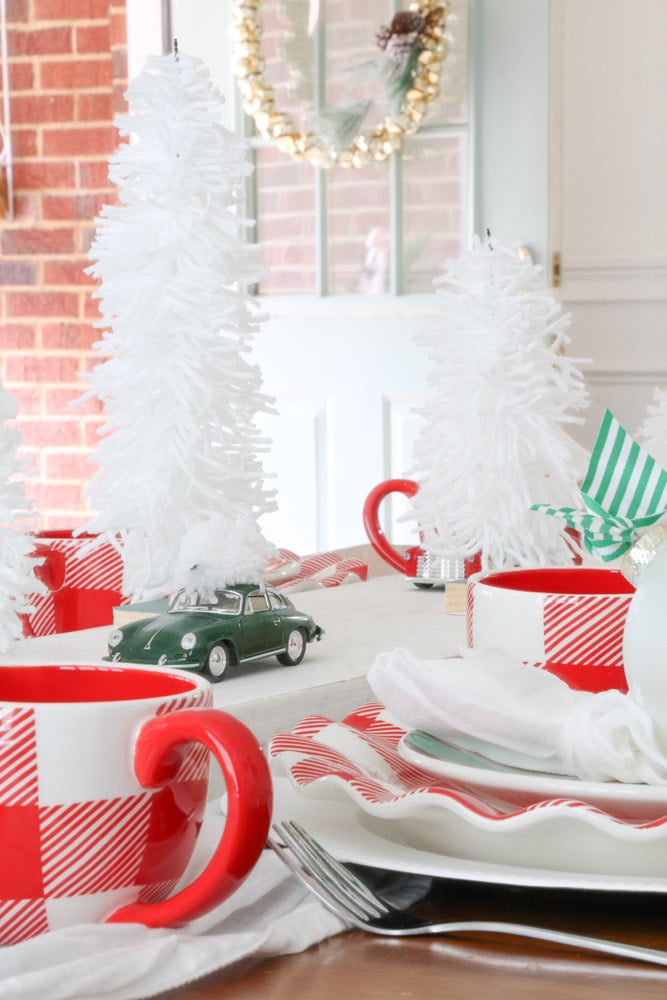
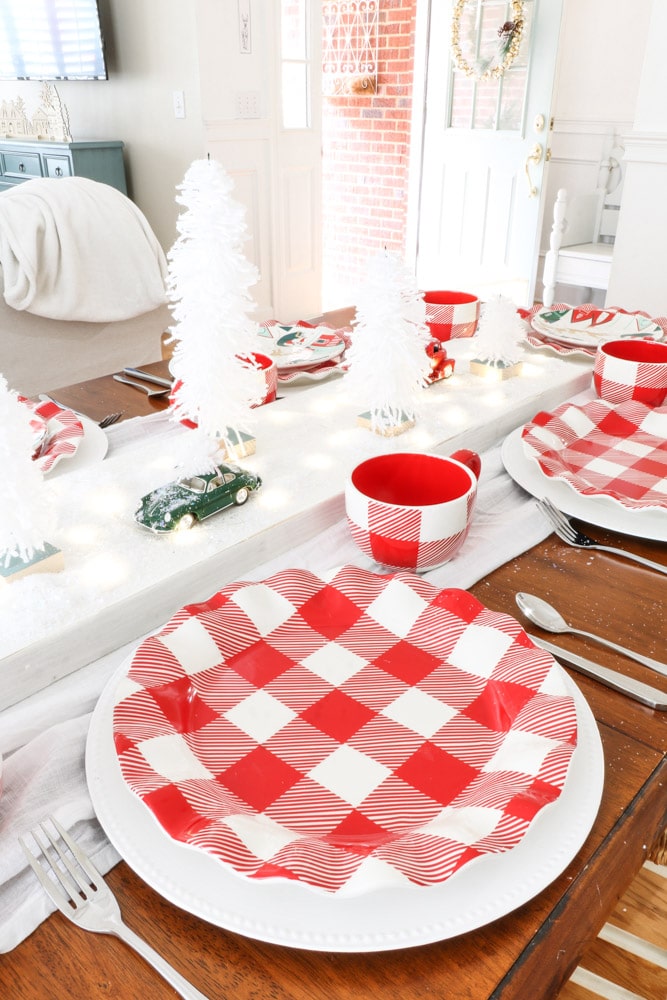
BUFFALO CHECK CHRISTMAS PLACE SETTING IDEA
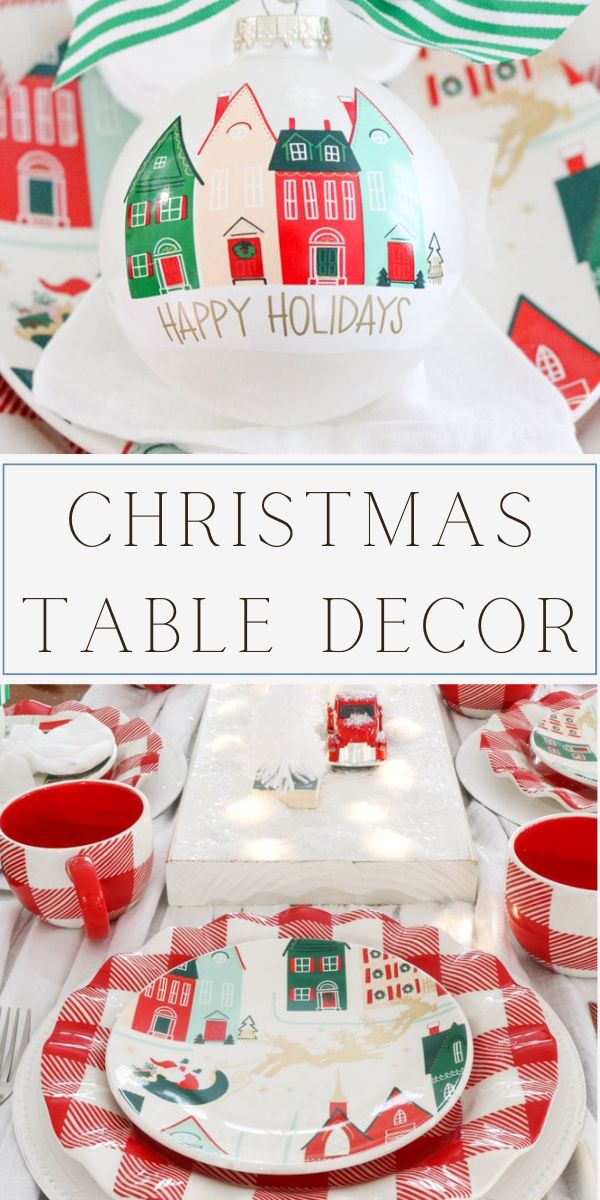
Because my centerpiece has minimal color I knew I could make this table more festive with color on the place settings. Coton Colors came out with buffalo check dishes that had fun written all over them.
CHRISTMAS PLACE SETTING CHARGER
I love to mix more expensive pieces with cheaper items so I took dollar store chargers and painted them with chalk paint then place the chargers in front of each chair.
BUFFALO CHECK DINNER PLATE
Next, I place this adorable Coton Color gingham ruffle plate. Out of all the holiday designs this plate caught my eye. I immediately thought about the other holidays I could use this piece.
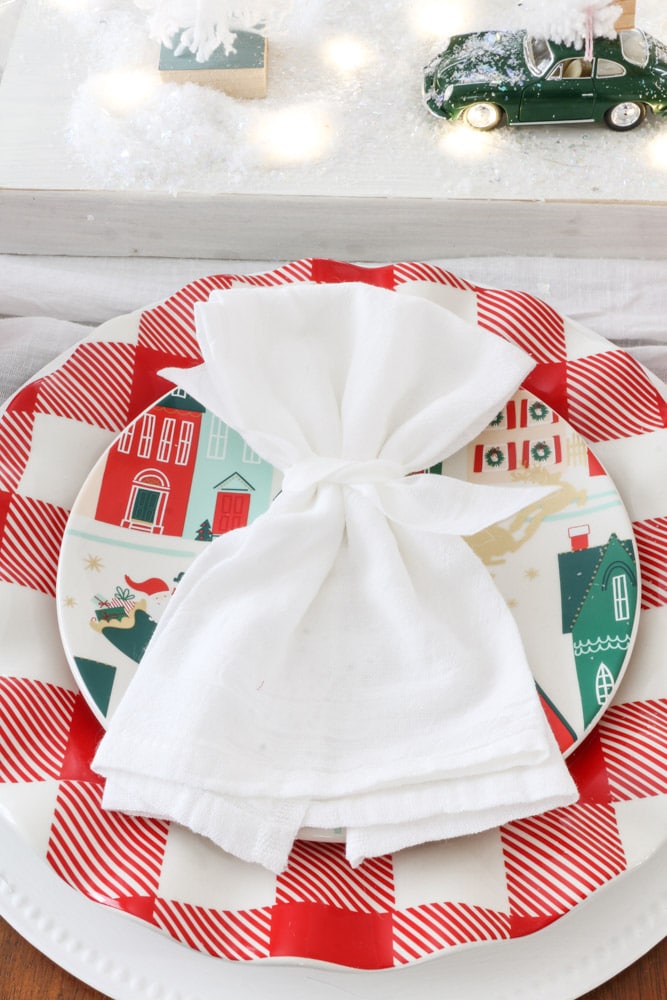
CHRISTMAS SANTA SCENE SALAD PLATE
After you place the dinner plate use a salad plate with a fun design like this Santa scene. Because my centerpiece has Christmas trees and cars in it I thought this piece would fit into a theme with all the house.
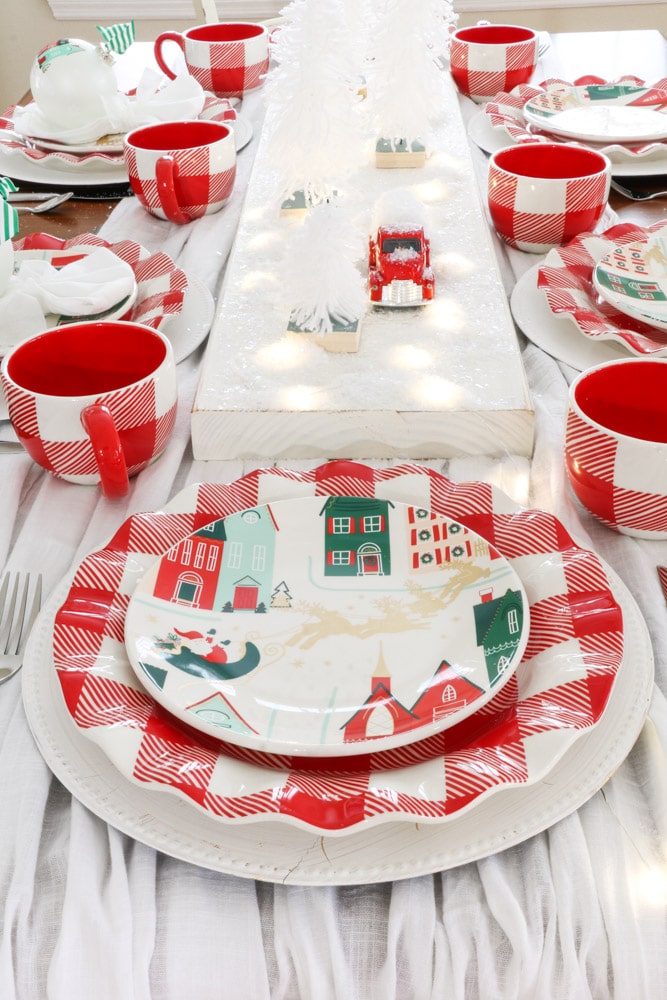
It is like I am creating a village in this winter tablescape.
CHRISTMAS PLACE SETTING GIFT ACCESSORY
One of my favorite things to do when planning a dinner party is to personalize each place setting. For this table, each guest will get to bring home a Coton Colors vintage village ornament.
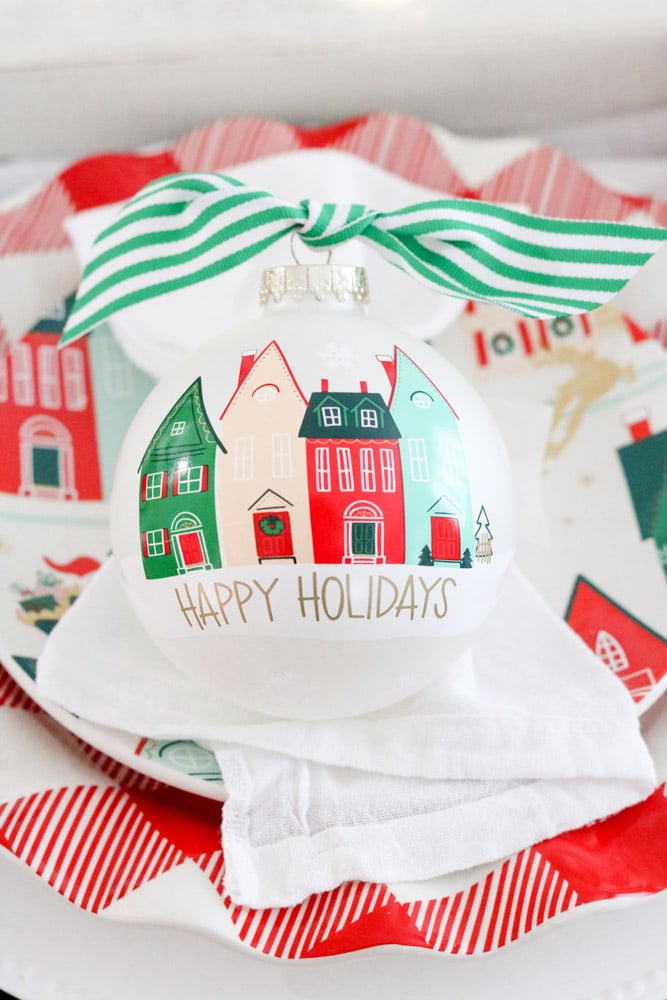
If are trying to save a few pennies you can give the salad plate as a gift or go with a white salad plate and give the ornaments.
Simply tie a ribbon about two-thirds up from the bottom of the dinner napkin and then place the ornaments on the bottom portion. The dinner napkin helps the ornament stand up.
The great thing about these ornaments is that they can be personalized with each guest's name.
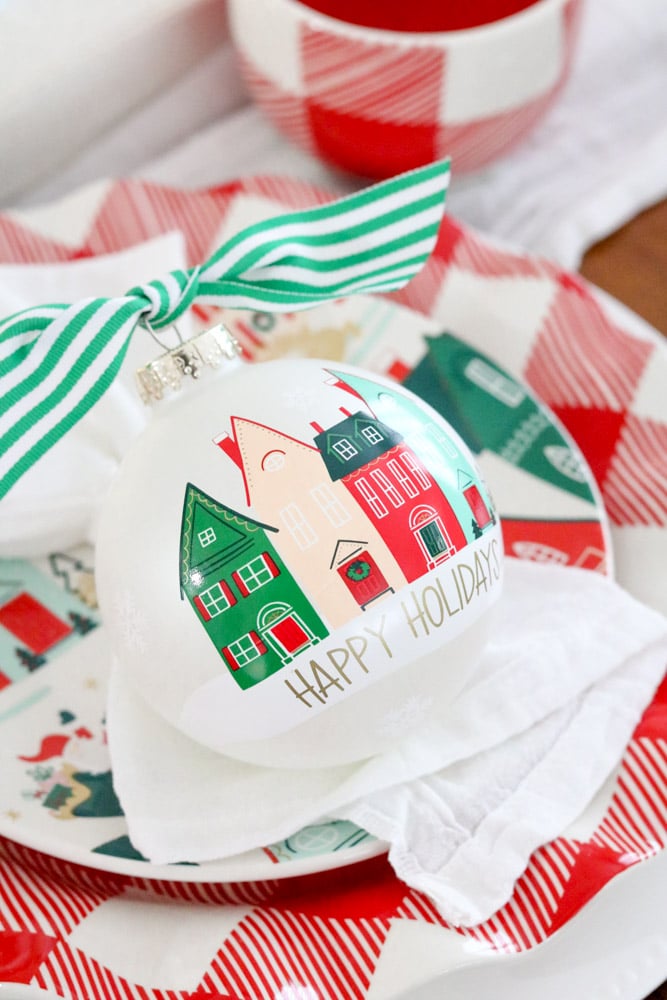
I didn't have mine personalized but your guests name will go on the back.
CHRISTMAS MUGS AND SILVERWARE
Last, add your Christmas mugs and silverware. This year I decided to purchase new silverware for this Christmas village tablescape. My everyday pieces are too ornate and my special silver that goes with my china has gold on it.
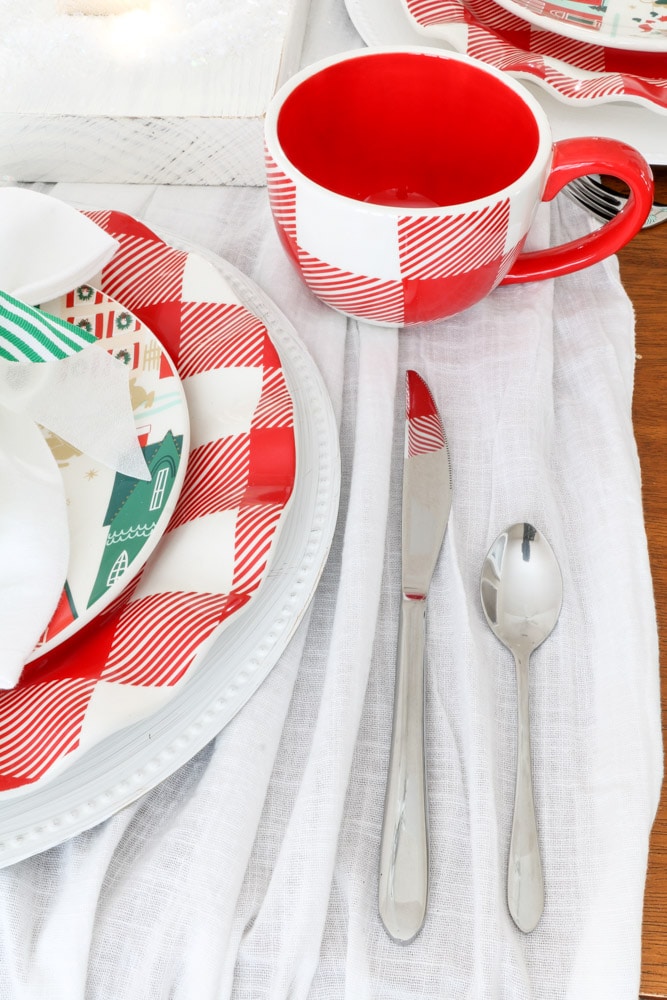
Because this table is more playful and less formal I went with this more modern silverware and aren't these buffalo check mugs scrumptious? Mugs make great practical gifts for busy moms. This calls for a fun hot cocoa and coffee bar.
Here are some fun Christmas hot chocolate and coffee bar ideas in my decorating with gingerbread houses post.
Guess what? We are all done with this Christmas village tablescape.

Do you know what else would be super cute to add to this Christmas buffalo check tablescape? I have directions on how to make a yarn winter hat Santa garland that would match perfectly and be so cute hanging on a piece of furniture, mantle, or anywhere nearby.
Shop Coton Color items:

CONCLUSION
Now that you have inspiration for a fun and easy centerpiece that your children and grandchildren will love as well as everyone in the family, let's start planning your table.
Begin by planning your holiday table with the DIY card below. It has a list of what pieces you will need along with step by step instructions.
You can create this table for as many people as you want or for two. Simply make the centerpiece smaller by cutting a smaller piece of wood and only making a few yarn trees. Then place each place setting on the table to complete your table for Christmas dinner.
If you're looking for more fun craft ideas, check out this post: Crafting Charming Advent Calendar Printable Stockings.
I hope you have enjoyed this Christmas village tablescape and Christmas tree centerpiece! Merry Christmas!!
Happy Decorating!


CHRISTMAS TREE CENTERPIECE DIY
Adorable vintage village Christmas tree centerpiece DIY and personalized place setting in red and which buffalo check.
Materials
Instructions
- Begin by placing a long tablecloth on the table gathered in the middle.
- Place a white chalk painted piece of wood down the middle (make sure the wood is cut short enough for place settings on the ends.
- Sit the bottle brush trees and cars on the table with the taller ones towards the center and graduating down from there.
- Lay battery powered lights all around the Christmas trees and vehicles with one end hanging down the tablecloth on one side and the other one hanging down the other side.
- Tape the wire down to the wood leaving no wire up.
- Sprinkle fake snow all over the wires, vehicles, and trees.
- Turn on the lights to enjoy the ambiance while you create the place settings.
- Next place chalk painted charges down in front of each chair,
- Then place red and white buffalo check plates.
- And a village design salad plate with Santa
- Next, fold a dinner napkin and tie a white ribbon on the top third of the napkins and place it on the vintage village salad plate.
- Last, sit a cute ornament on the napkins with the design facing forward.
- Add silverware and coffee mugs and you are finished!
Notes
To make entertaining much easier create this winter tablescape the night before.
Recommended Products
As an Amazon Associate and member of other affiliate programs, I earn from qualifying purchases.
4 thoughts on “How to Create a Magical Christmas Tree Centerpiece That Everyone Will Love”