
Have you ever wished you could keep pets or kids out of a room while still letting light and air flow through?
That’s exactly why I created this DIY interior Dutch door.
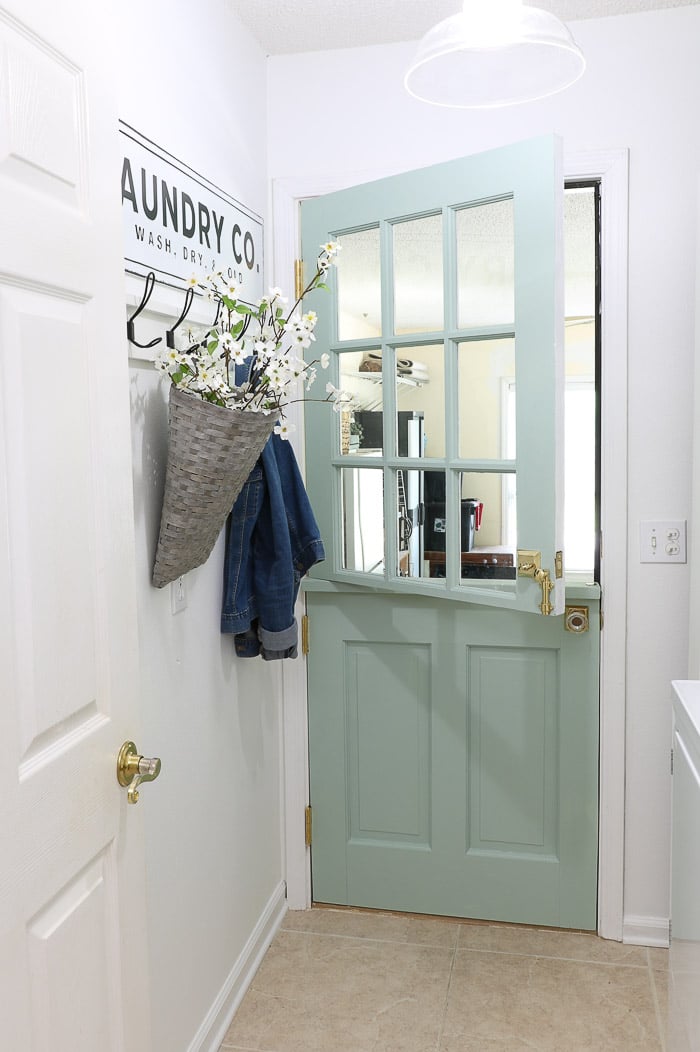
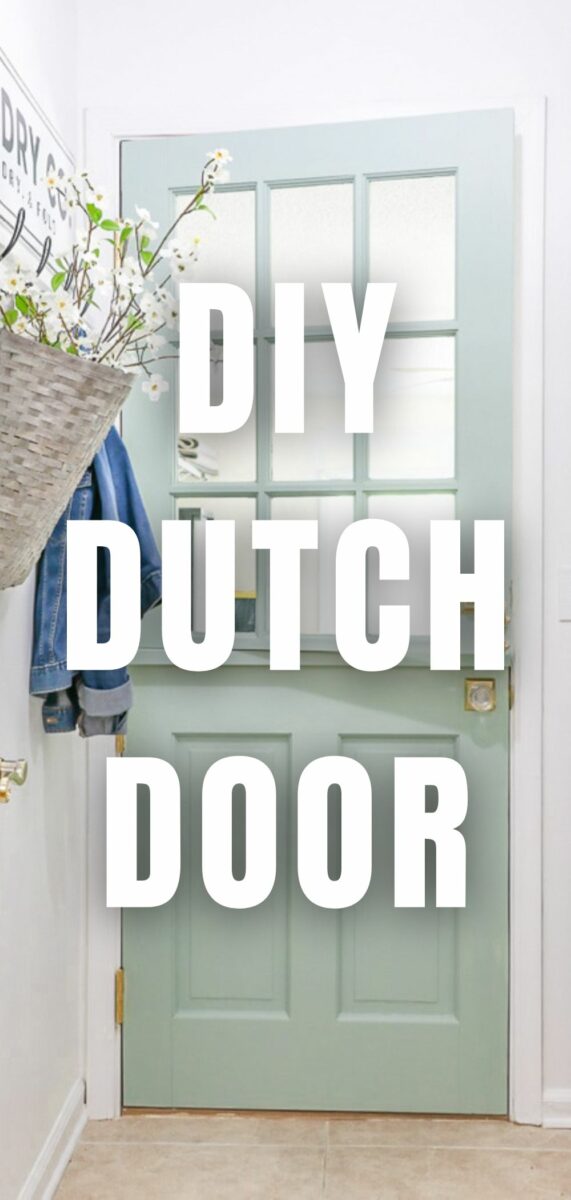
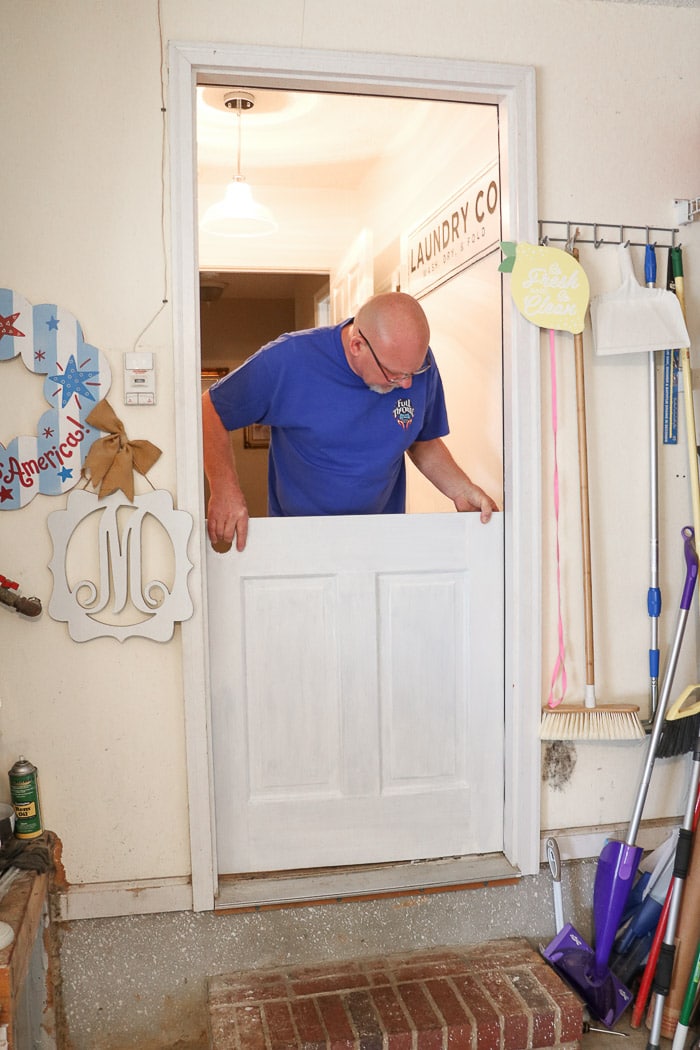
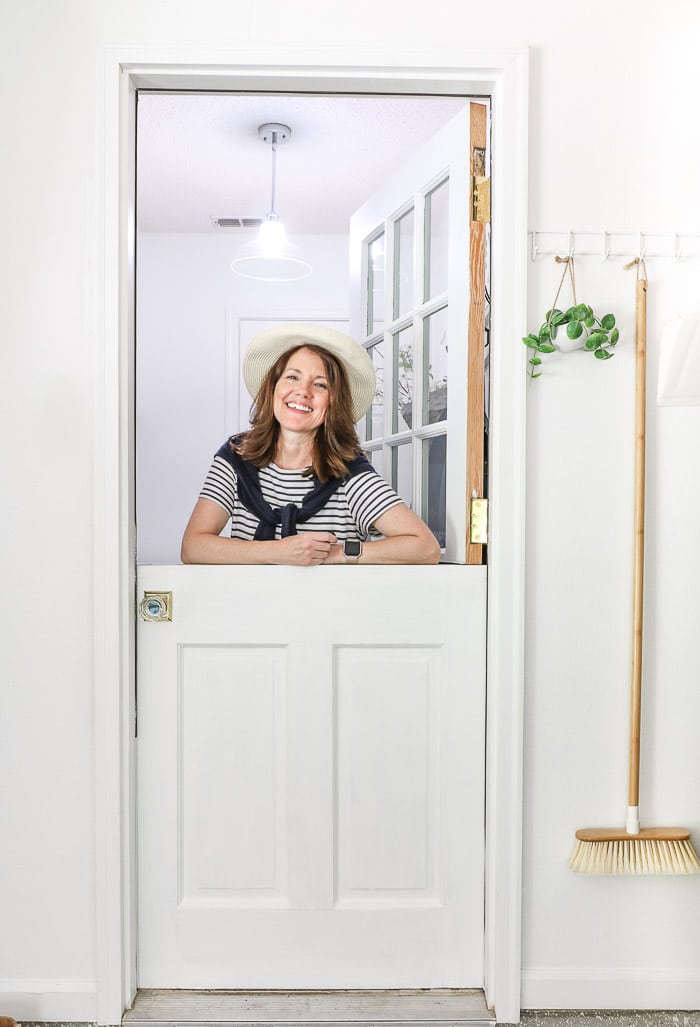
Using an old thrifted door, I turned a regular door into a charming split door that works perfectly between my laundry room and garage. It adds character, function, and a little storybook charm—all on a budget.
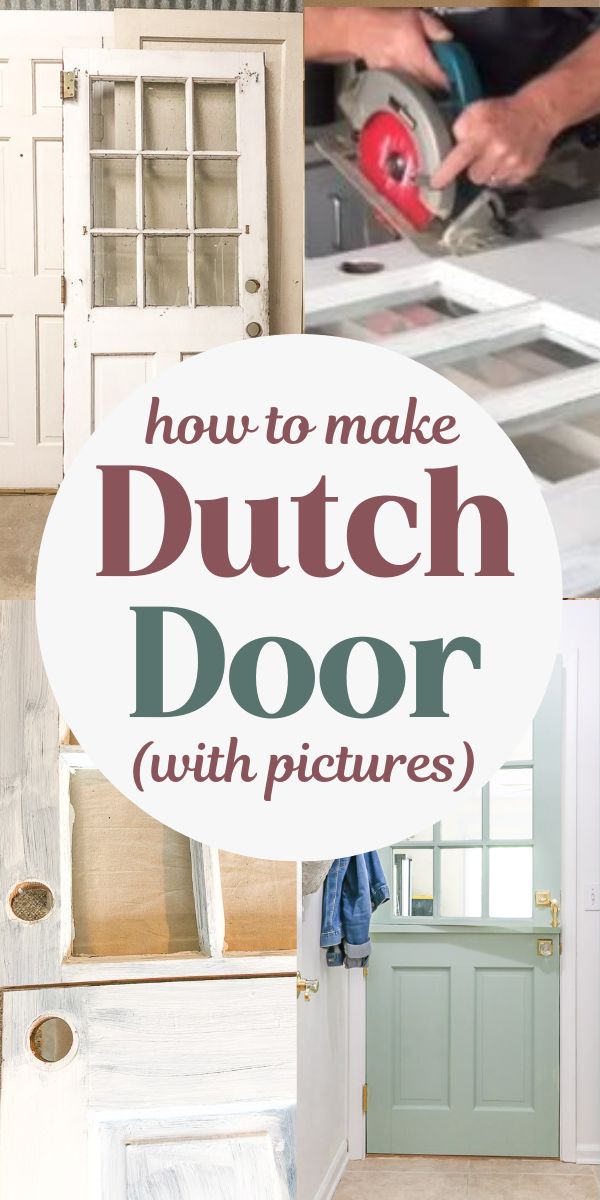
In this post, I’ll show you step by step how to make a Dutch door, along with tips to help you plan your own interior Dutch door project.
Designer Tip:
Interior Dutch doors are perfect for laundry rooms, mudrooms, and kitchens where you want separation without closing off the space.
Whether you're looking to add an interior Dutch door or double Dutch doors, this post is the perfect guide to take you through each step.
Here is a table of contents if you want to jump right into making your Dutch door. Simply click the content to go right to that spot.
DIY Dutch Door Interior (Budget-Friendly Project)
Dutch doors are a popular design for traditional and modern homes. After sharing some modern Dutch door ideas, I thought it would be nice to know why these split doors are so special, and whether you can turn a regular door into a Dutch door.
Interior Dutch doors are a beautiful and practical addition to many spaces in your home.
- Laundry room to garage
- Kitchen to mudroom
- Pantry doors
- Pet or baby gate solutions
- Home offices for flexible privacy
How to Make a Dutch Door Step by Step
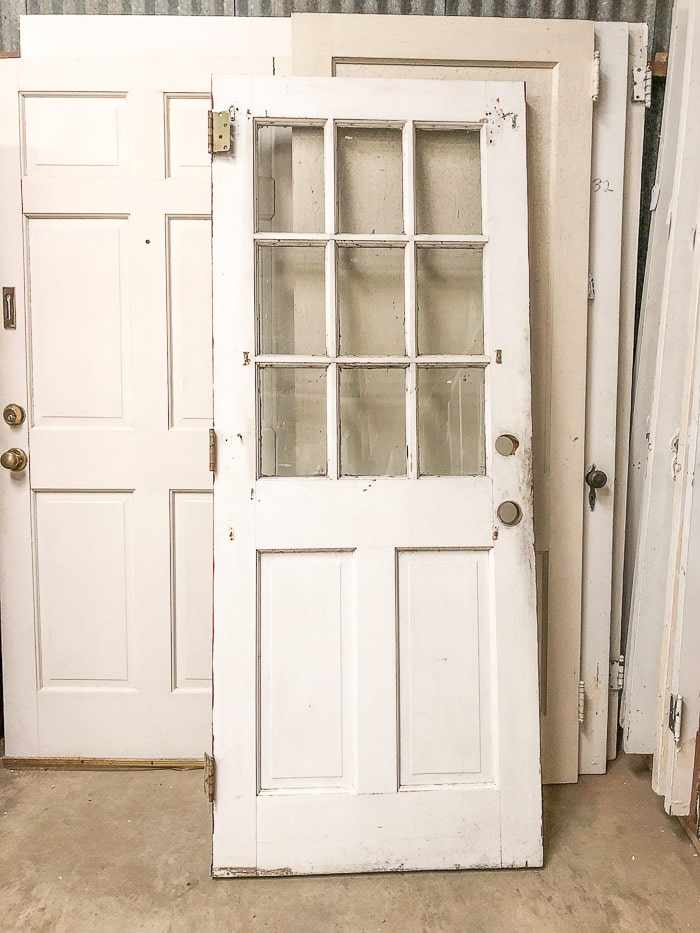
Let's begin with shopping for a used door. Look for a solid wood door with a wood-in-the-middle style. Remember the door functions where the top half of the doors is separated from the bottom half, so no glass or anything is in the middle.
Measure and Shop for a Dutch Door
The first step on how to build a Dutch door is to either use the door you currently have or measure and search for a door.
You will need to measure the height, width, and depth of the existing door. You will also need to know whether the door is a left- or right-hand swing.
Now that you have your measurement, do some shopping at local thrift stores or Facebook marketplace, to name a few.
When shopping, search for a door that can be cut in half without any raised panels, doorknob holes, or glass windows being in the way. You want the cut to be around 36″ or higher, so look for a door with a clean spot for the half door cut.
Clean, Sand, and Paint
If you are using your current or new old door, take it down from the hinges, remove all the hinges, and give it a good cleaning.
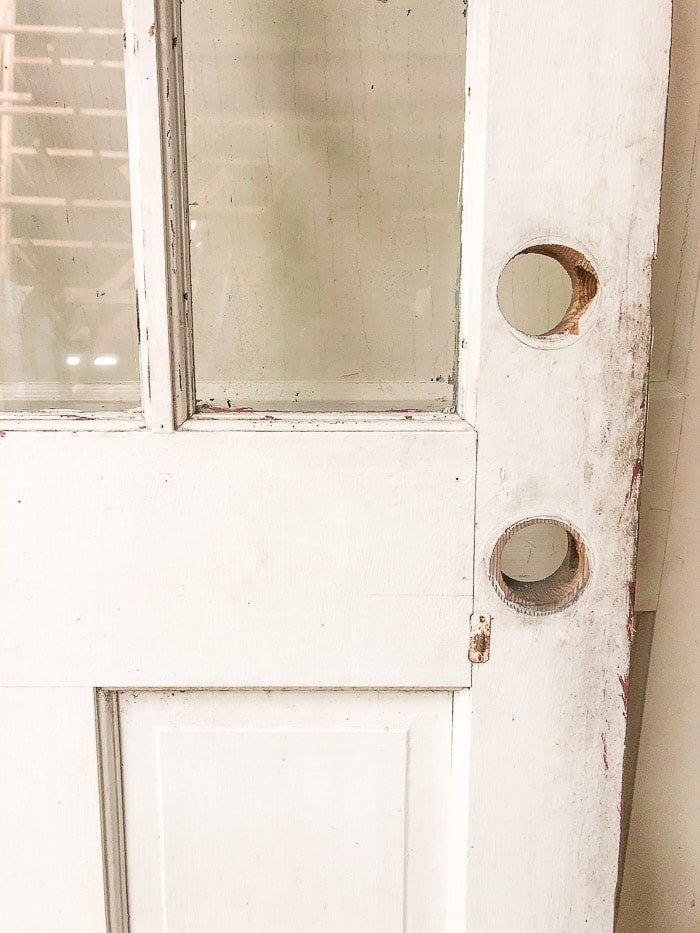
As you can tell, this door needed some tender loving care in the form of a good bath. LOL!
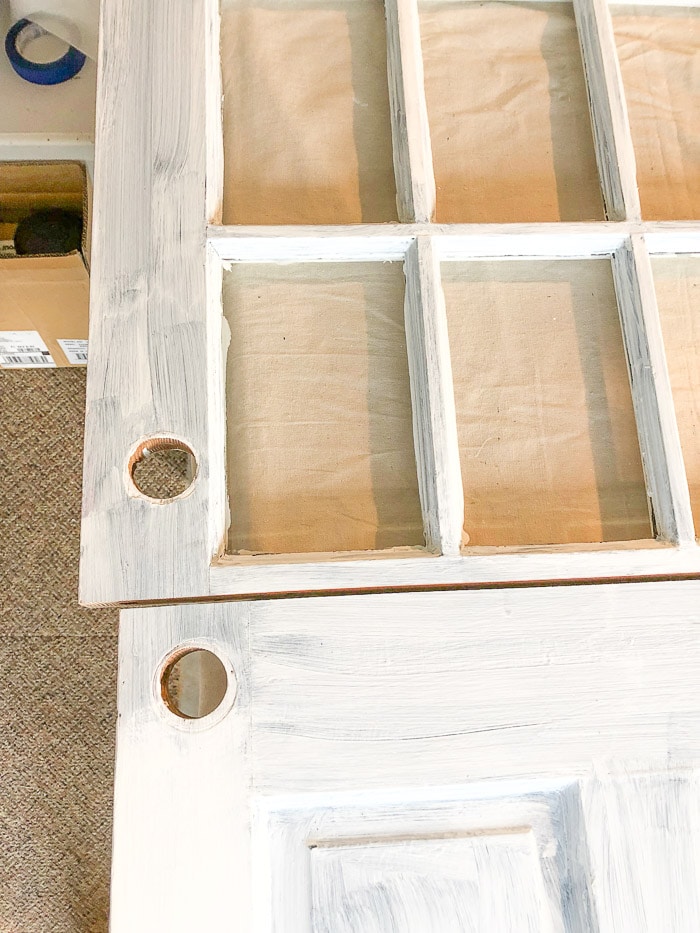
Next, patch any holes with spackle, sand it down, and apply primer if needed, then paint. For tips on painting, check out my Paint like a Pro post.
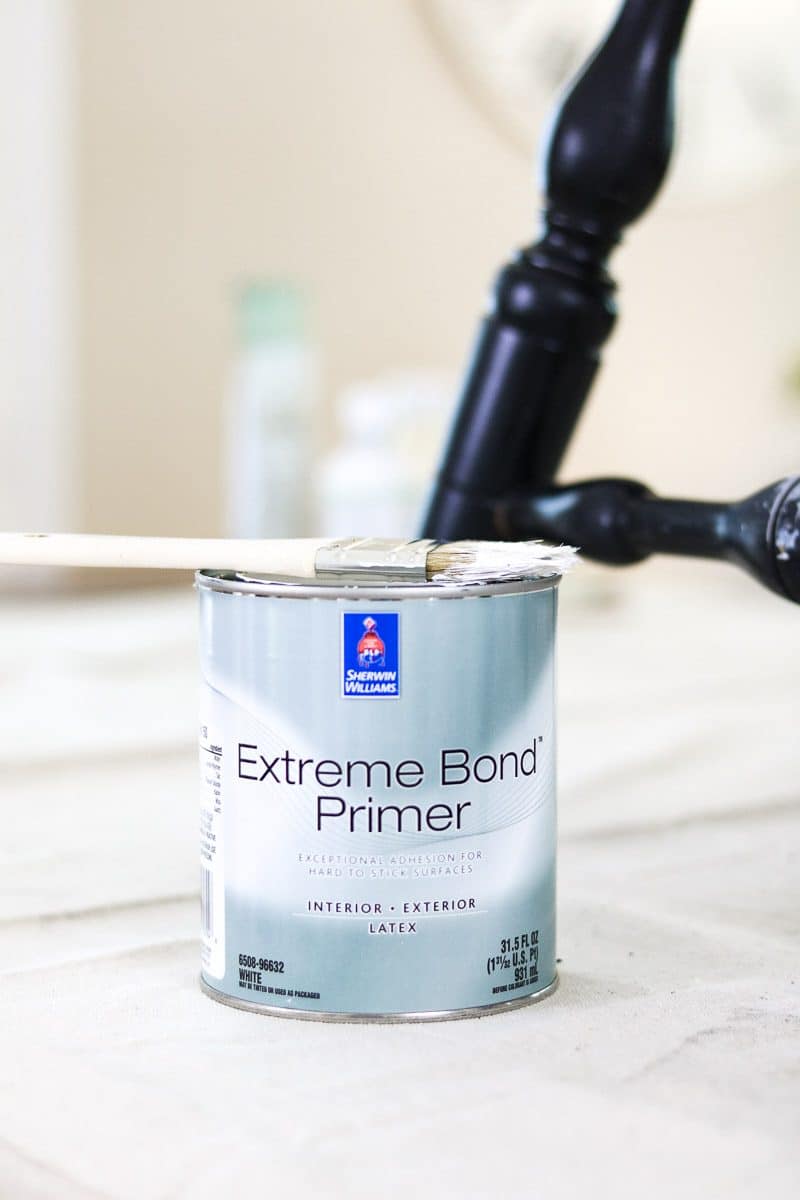
There are two primers that I prefer. One is this extreme bond primer by Sherwin-Williams and Kilz 2, which is another great latex primer. After you prime the door, paint it with exterior paint.
I used Sherwin Williams extra white on the outside and Fusion Mineral Paint color Inglenook on the inside. I like to purchase my Fusion paint from Amazon. They ship quickly and is very helpful if you have any questions when you start your project.
Because this door had some lovely imperfections, the Fusion mineral paint was a fabulous fit because of its self-leveling qualities and chalky farmhouse finish.
Cut the Door in Half
Are you as shocked as I was that we are cutting this door in half right in the beginning? This was my favorite part.
Basically, you will need to determine a few things. Look at the door hardware that you plan to use and think through the size and placement.
Second, consider the window or raised panel design. Make sure you give yourself room under the window for the cut. You do not want the cut to be too close to the window.
So for this door, we made sure that once the doorknob was in place, there was some extra room above it and at least an inch under the window. Talk about a tight fit!
Once everything is figured out, make sure you have a nice, sharp blade on your saw and cut the door in half.
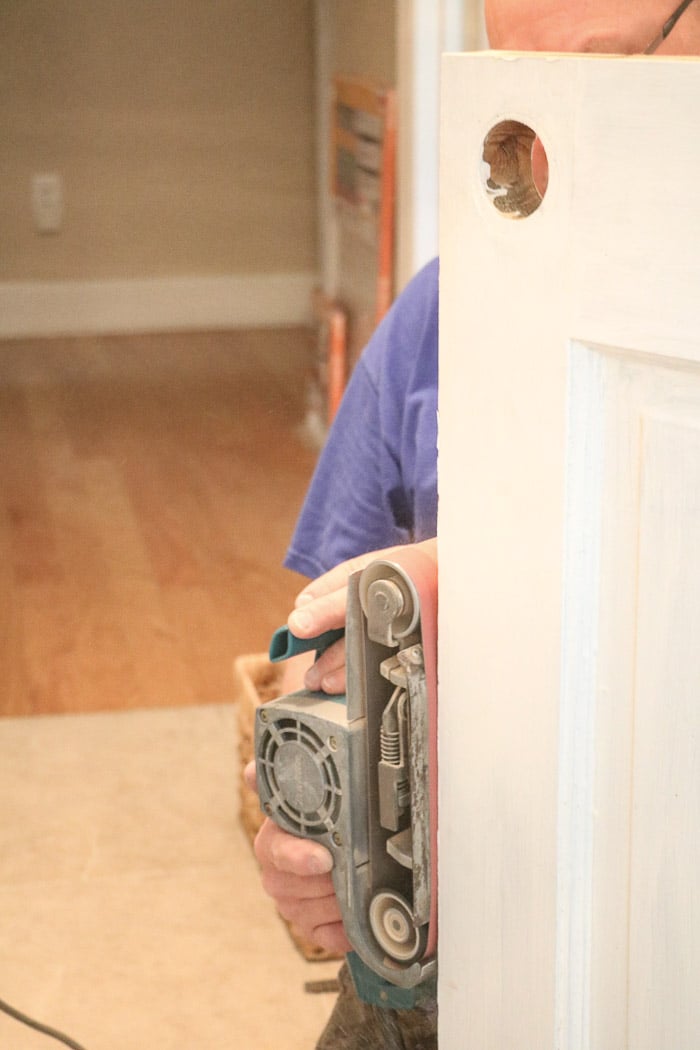
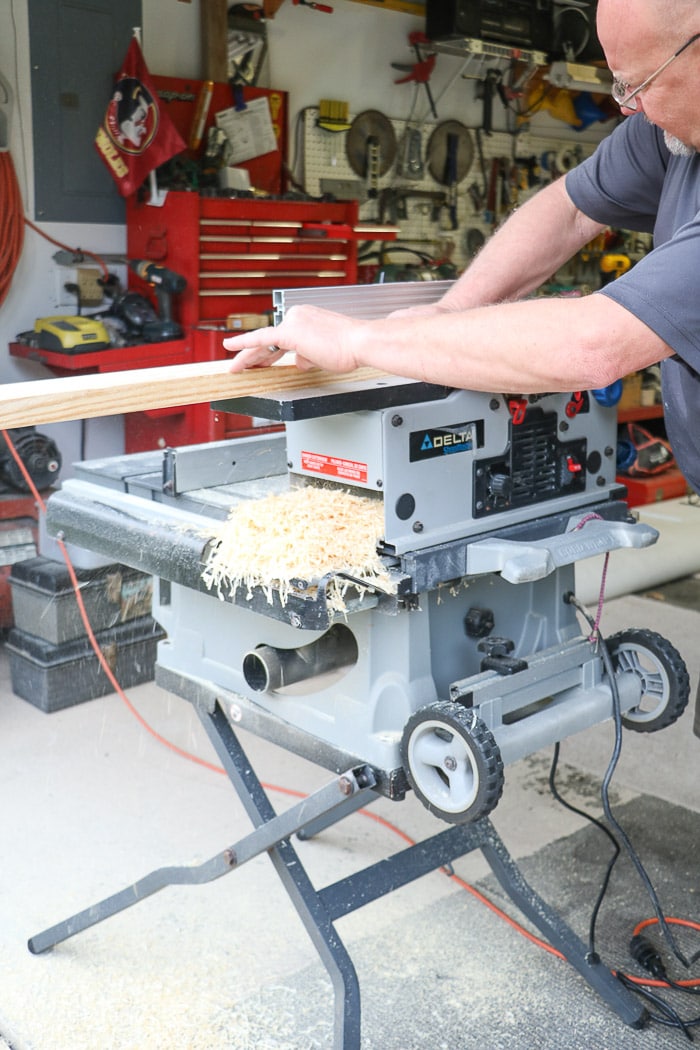
Plane and Sand the Sides
If you are using your current door, you can skip this step, but if you have a new or old door, you will need to plane and sand down the sides until it fits snug into the door opening.
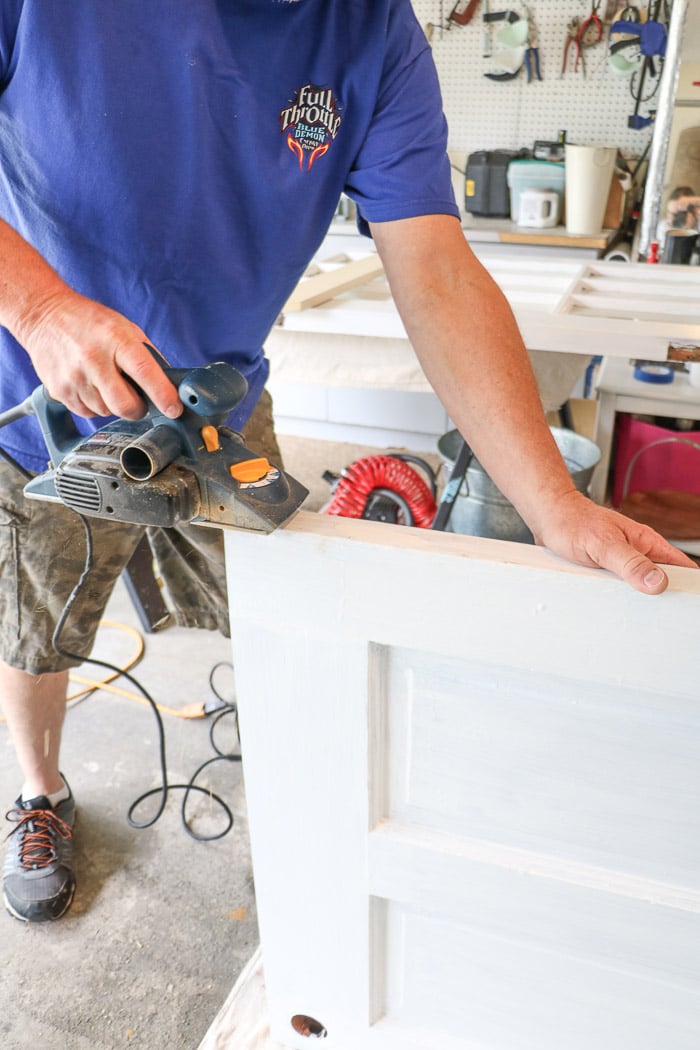
We started on the bottom half first by planning here and then, and then trying out the door in the opening.

Add the Hinges
Now it is time to install the hinges. The hinges, door hardware, and Dutch door hook all came from Emtek. They have a large selection of great quality hardware, and they have Dutch door pieces, too.
Thankfully, I went with a sturdier hinge for this half door, as this door is very heavy.
You will most likely be able to use one of the existing hinge locations, but you will need to create another. Each half of the door will need two hinges.
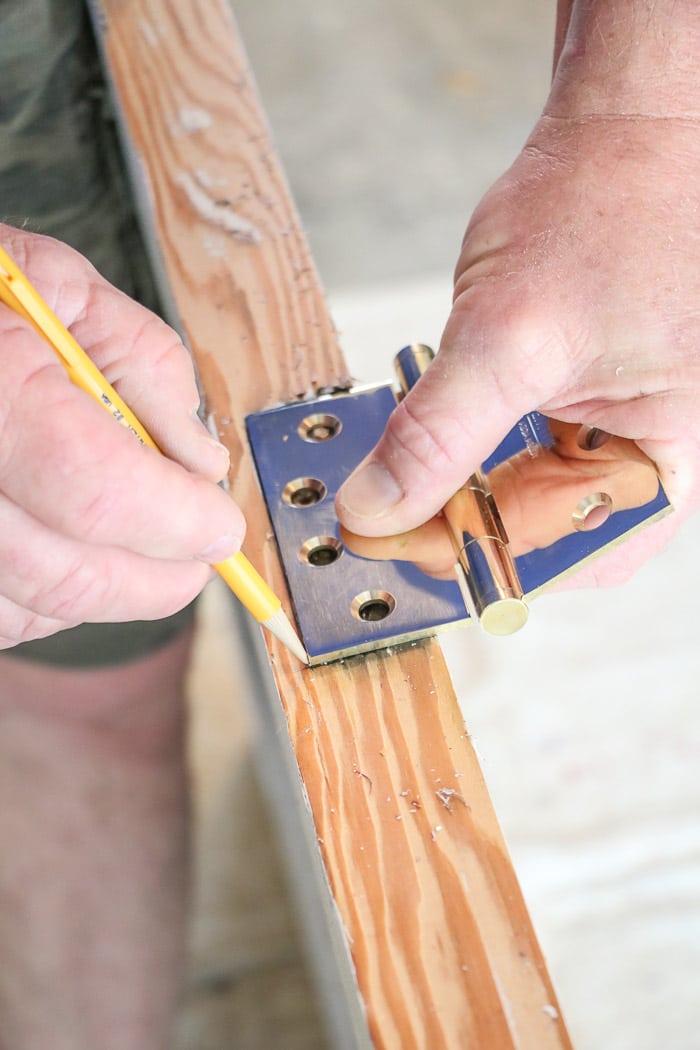
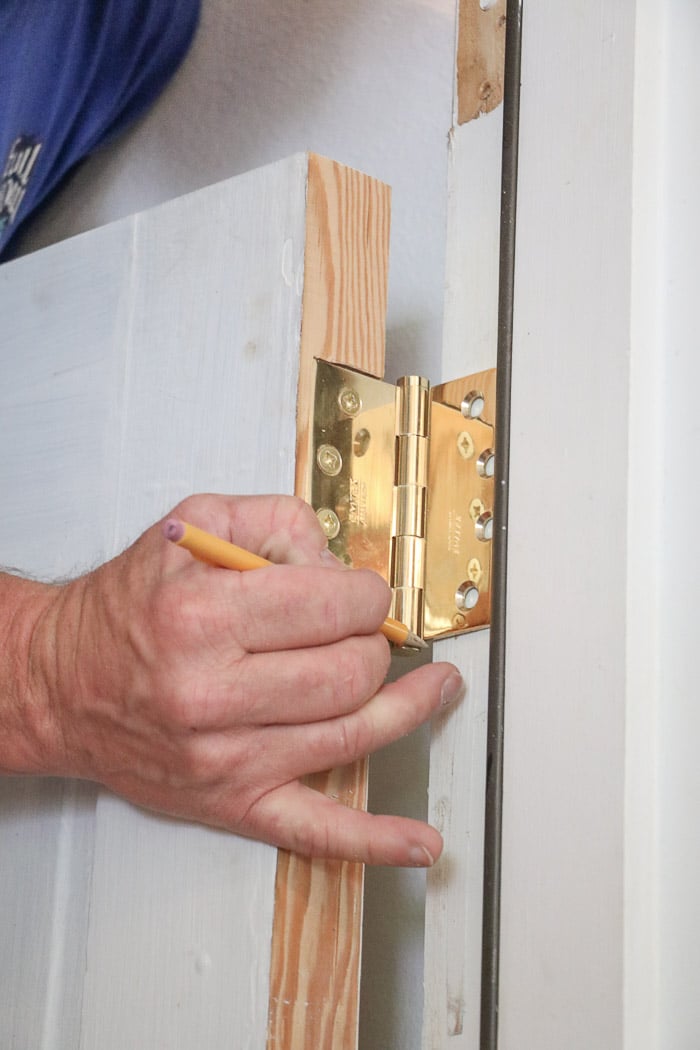
Set your hinge in place and draw around it where you will need to cut and carve out the wood.
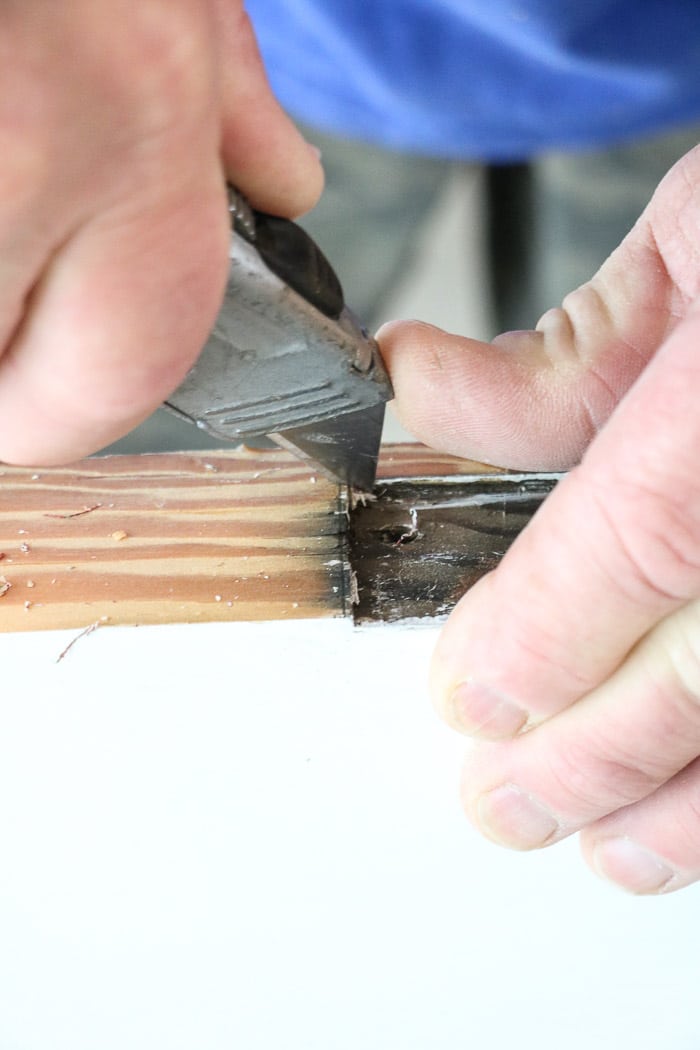
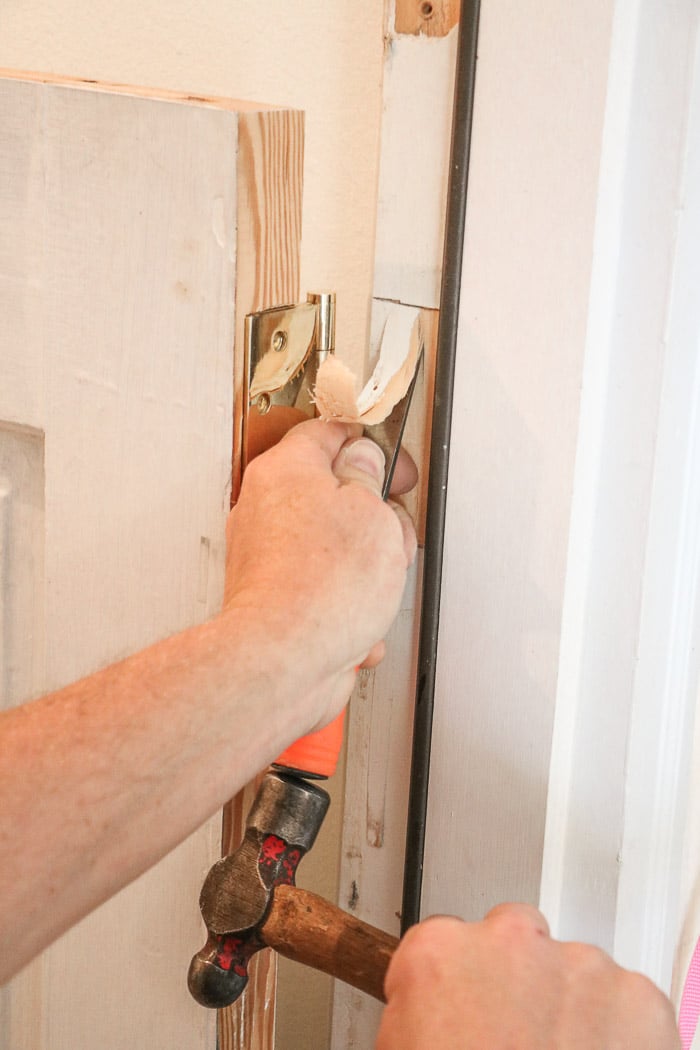
Now use a utility knife to cut out where you drew, and then use a chisel and hammer to weed out the rest inside.
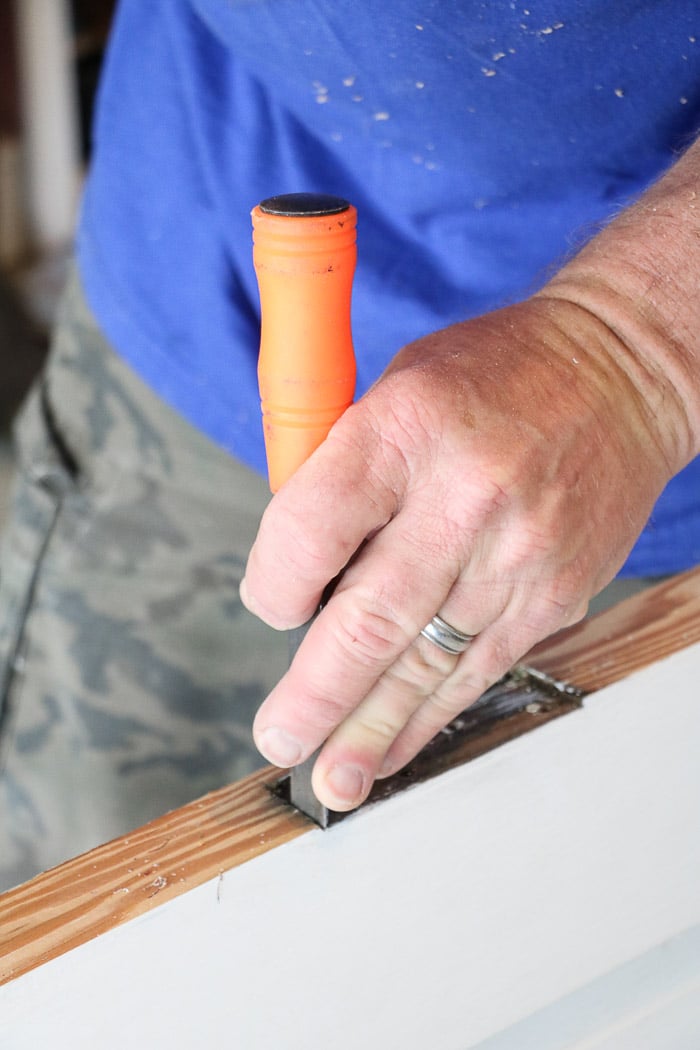
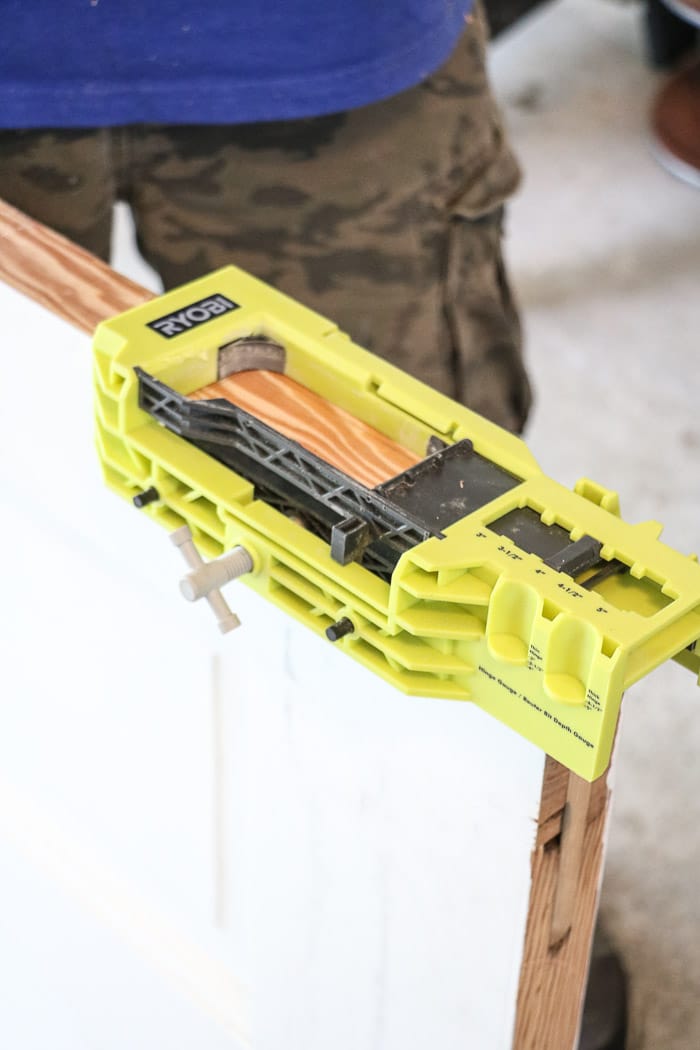
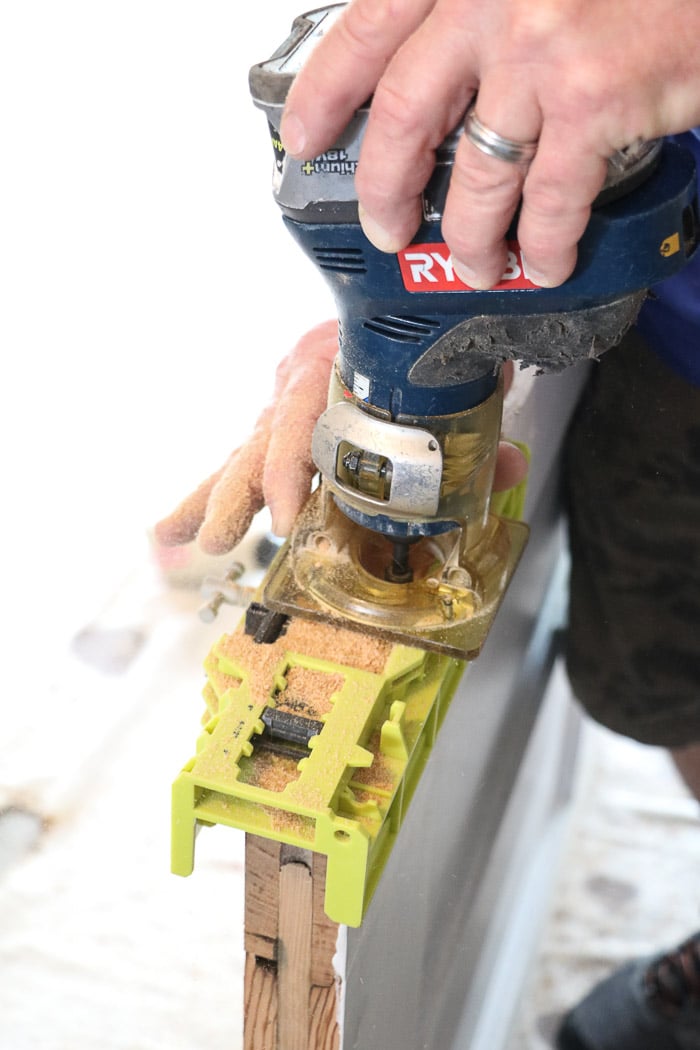
If you have this cool tool, it will make creating the hinge much easier for the one hinge hole that is brand new.
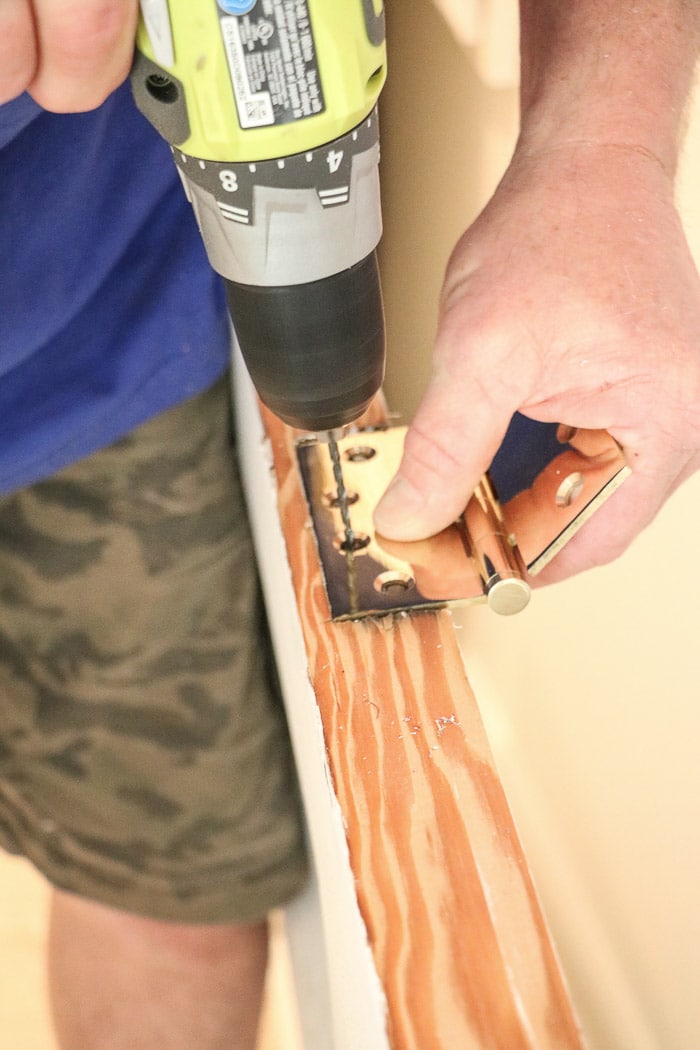
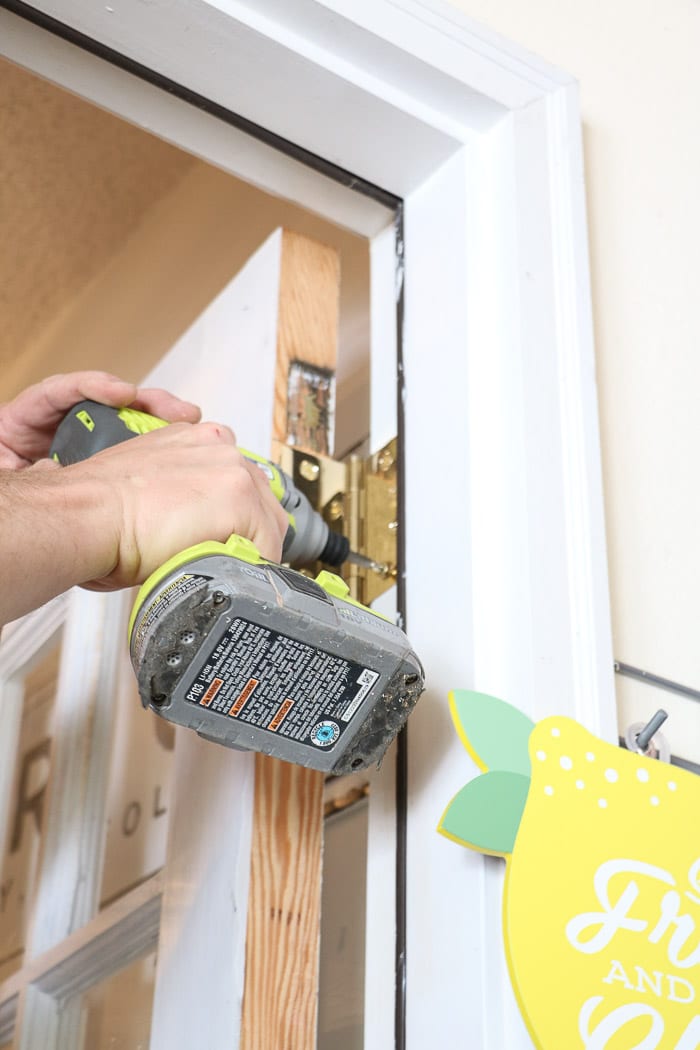
Next, screw in the hinges to the door.
And take the door back to the opening so that we can work on the hinge holes on the door frame, too.
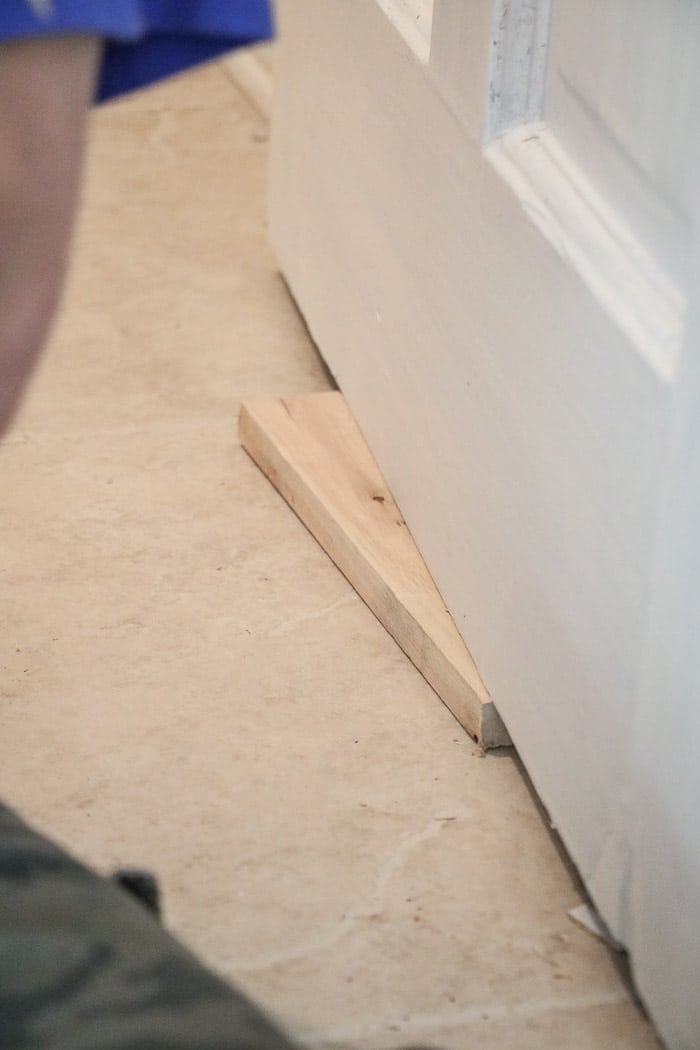
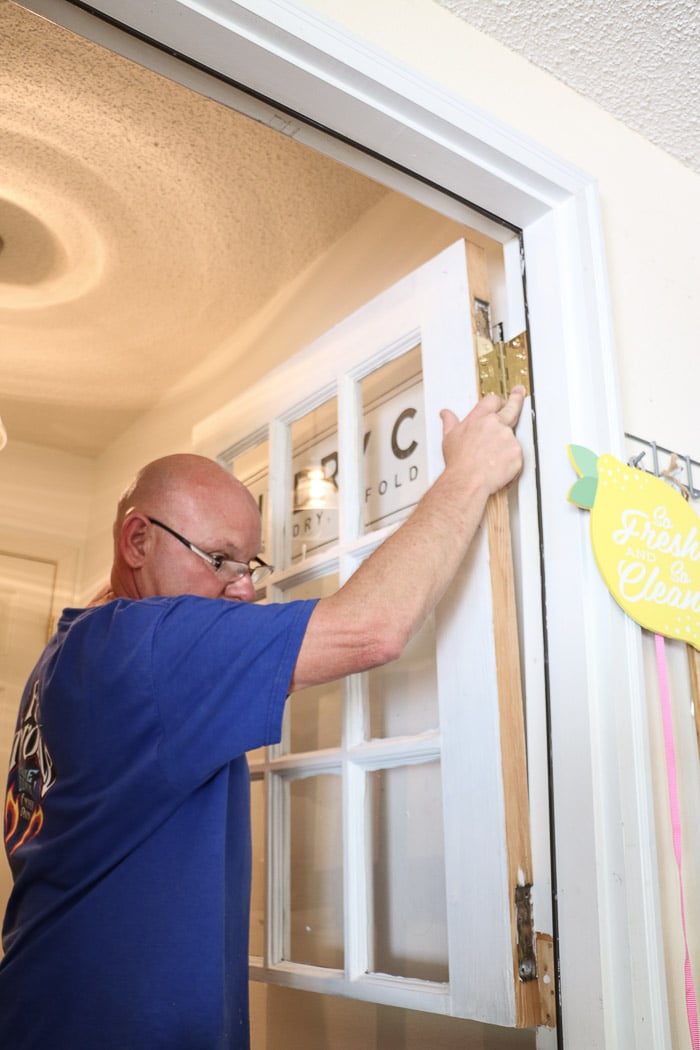
When you get the door in place, here is a handy tip. Use a 1 x 4 to prop the door up so that it is about level with where it will be when shut.
Place the hinge on the door frame and draw where each hinge needs to go.

On the existing hinge hole, use a straightedge to mark where the new hinge will go. My hinges were larger, so we had to enlarge the hole, but if yours are the same size, you can skip this step.
Now, place the other hinge on the door frame and draw around it where you will need to carve and chisel out the wood for the new hinge hole. Remember, this is the hinge we have to add because there needs to be two hinges per half of the door.
Once you think you have enough wood chiseled out, twist the hinge over and see if it fits inside the hole flush. If not, continue to chisel wood until the hinge is flush.

Now, screw in the hinges, and the bottom half of the door is installed. There will be lots of testing, then chiseling, then testing again before you get it just right. Be patient, and it will eventually work out.
If the door is not fitting right, sand down the side some more. Keep working on this until it fits perfectly.
Now repeat the hinge installation on the top half. Because most doors have three hinges, the top half of this door allowed us to use both hinge holes. All we had to do was adjust one of the hinge holes on the door frame.
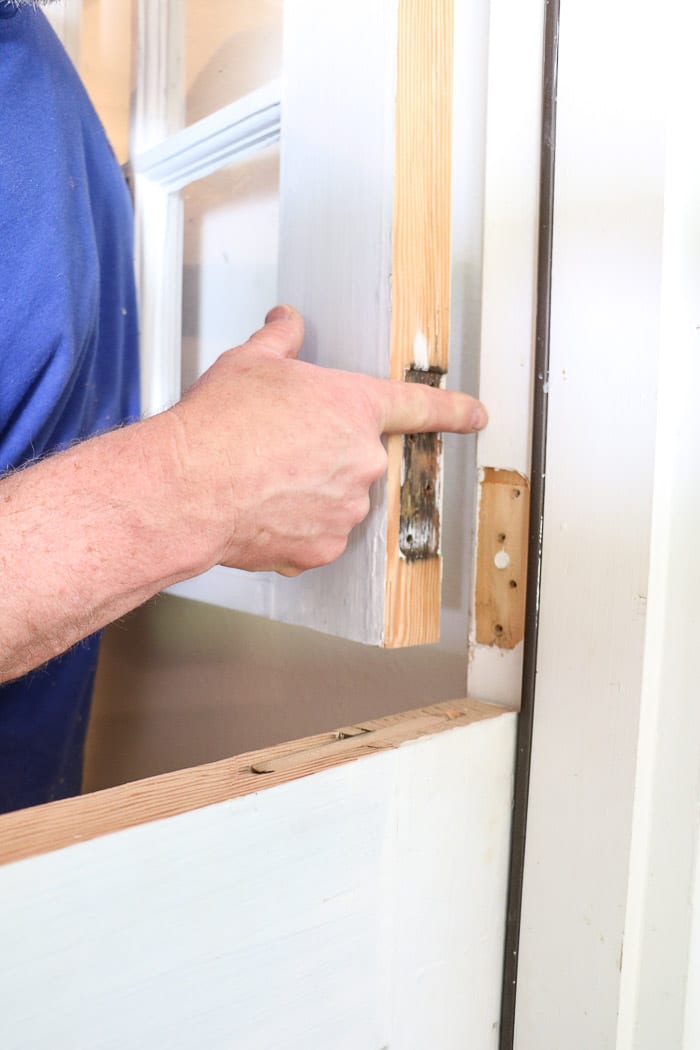
Look how far off the bottom hinge is on the top half of the Dutch door. But no worries, because now we know how to install new hinges.
Also, do you notice there is a pretty good size gap between the top door and the bottom door? Well, this is going to be a Dutch door with a shelf.
I have dreamed of a Dutch door since I was a little girl, and my vision had a shelf. Why do I keep thinking of placing home-baked pies on this shelf? Maybe it was in a movie when I was young.

Okay, so draw around that bottom hinge and repeat the process of chiseling out for the hinge to fit snugly.
Screw in the hinges to the top door, and you are finished with the hinges. Between planning, sanding, and hinges, it seems like forever to get the door to fit just right. But the time-consuming part is over, and now we are on to the final steps.
Add a Dutch Door with a Shelf
Let's talk about doing a Dutch door with shelf beginning with measuring.
Now that you have your two doors set, measure the height between the doors and the length. And let's start trimming down a 2 x 4 or 1 x 4 to fit.
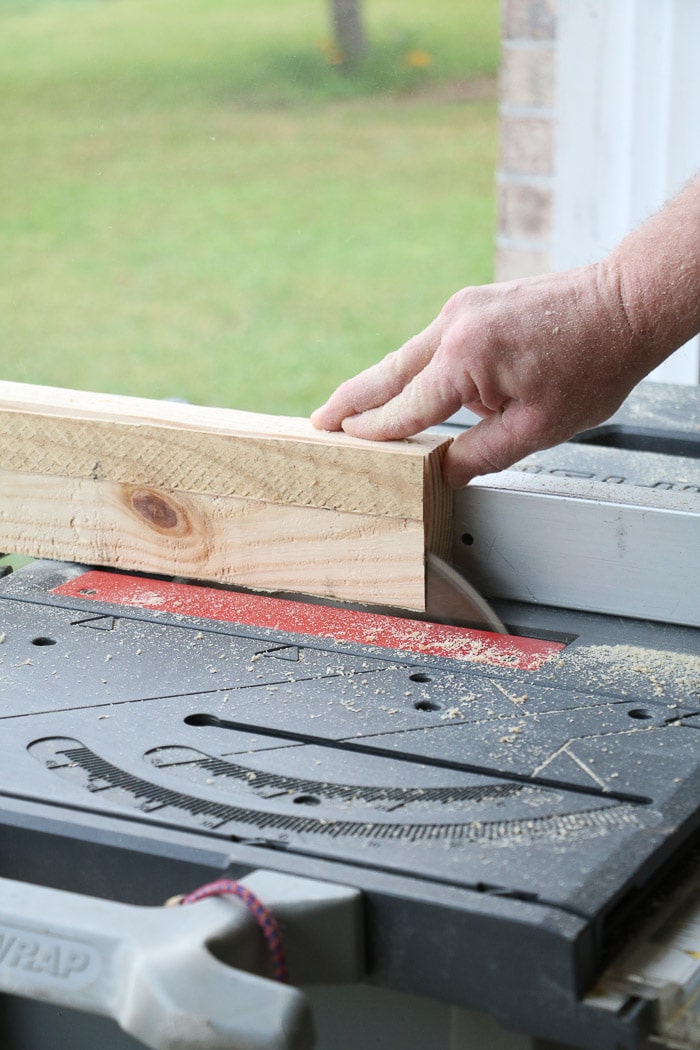
If you have a table saw, this is a great time to use it. If your piece of wood only needs a little removed, you may be able to do it with a planer or sander. But in my case, we needed a little more than a planer and a sander could do.
So we trimmed it to make it the right size and cut the end to match the width of the door.

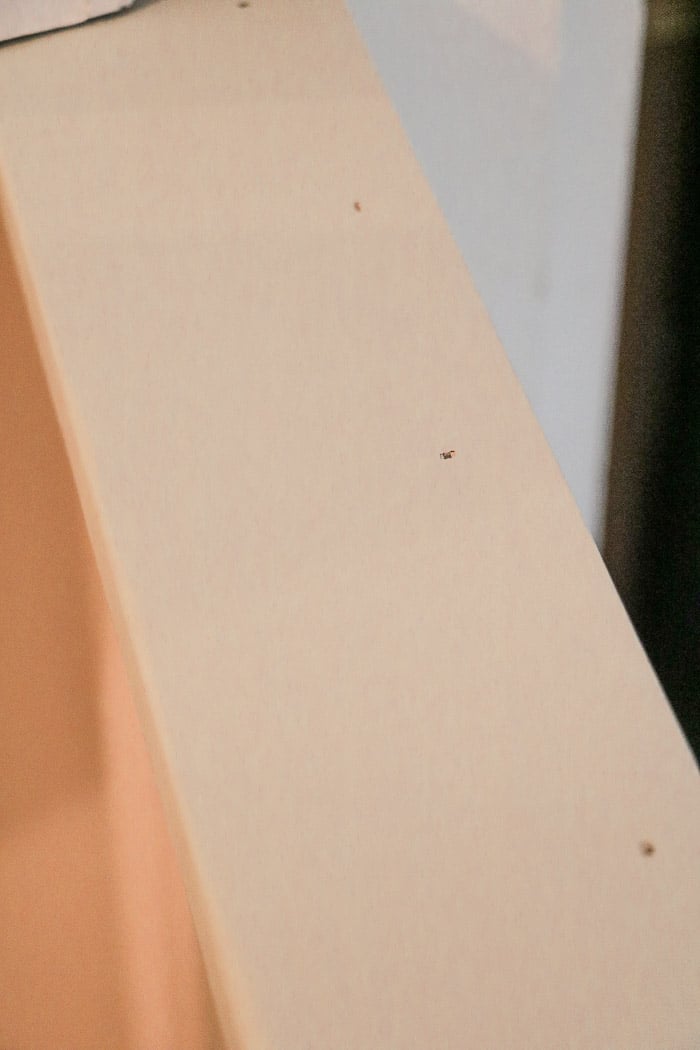
Next, it is time to do some more sanding. First, I sanded to get it as smooth as possible. Then sanded one top edge to a nice rounded feeling and sanded down the corners to take the edge off. I kept the bottom edges square.
Follow sanding by wiping off any debris, priming, and painting.
I used the Fusion mineral paint that matched the inside for the inside of the shelf. I used white on the outside.
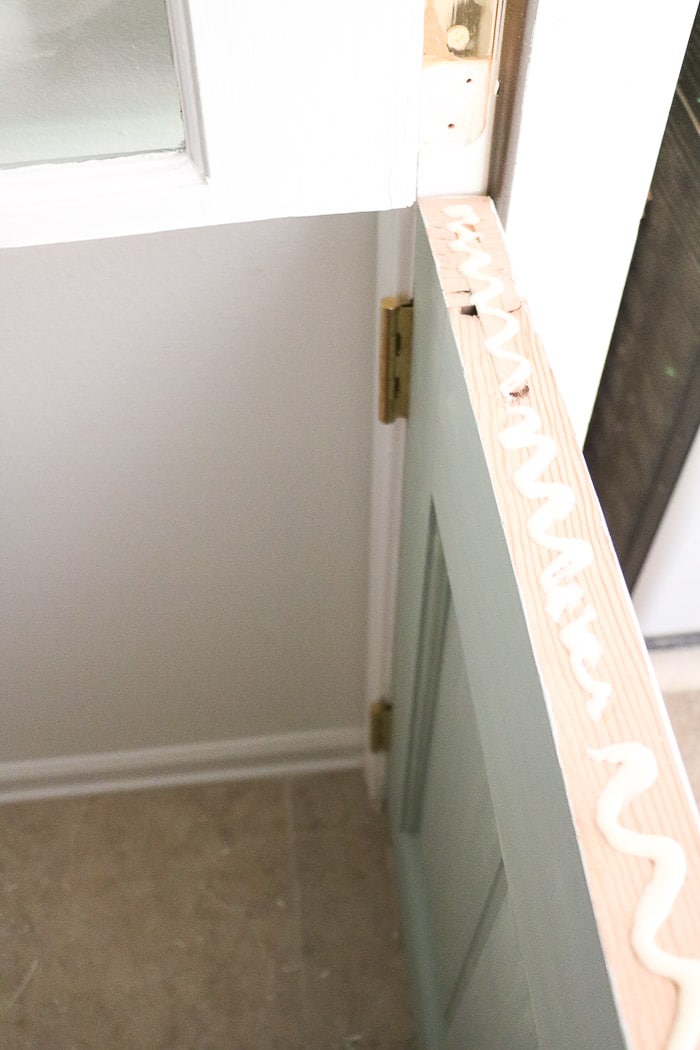
Next, grab some wood glue and drizzle it on the top edge of the bottom door.
Then, set the wood on top, lining it up on the outside edge, and shoot some finishing nails into the wood. You want the nails to go through the door below.
Next, spackle the holes and paint over the spackle once it dries.
Install the Dutch Door Hardware
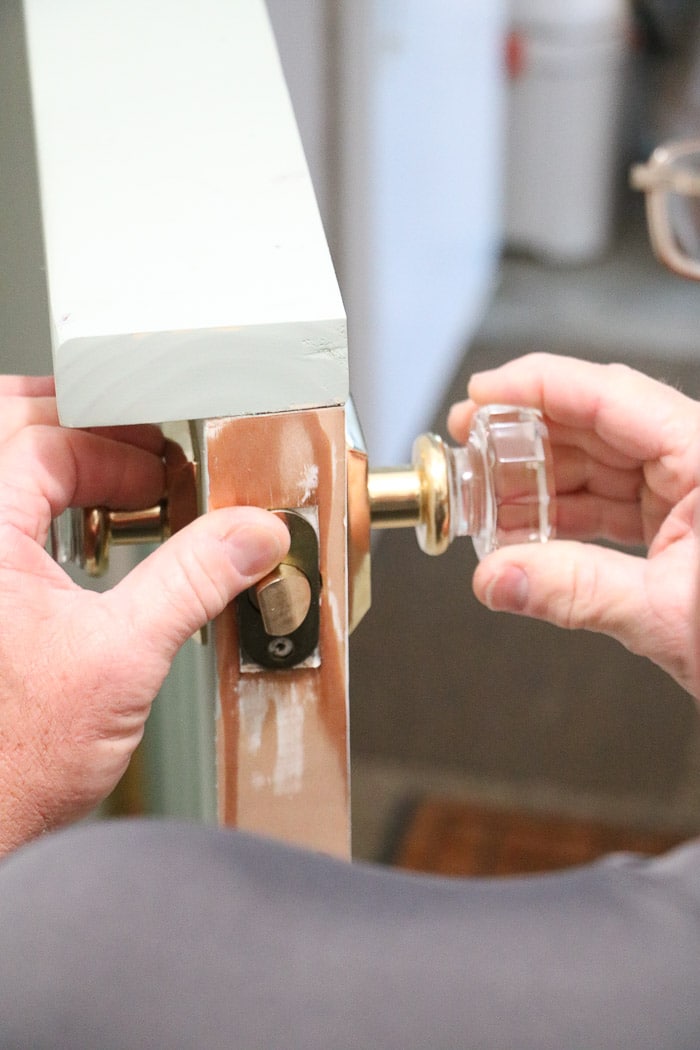
Now it is time to add the Dutch door hardware. I chose a beautiful crystal knob by Emtek. I wanted something that reminded me of my grandmother's old house back home.
Normally, you wouldn't go with a glass doorknob as an exterior door, but because my door is in the garage, I felt it would be fine.
The knob is a Lowell crystal knob with a quincy brass rosette.
So we are going to brush through this step pretty quickly. For more information on how to install door hardware, check out This Old House.
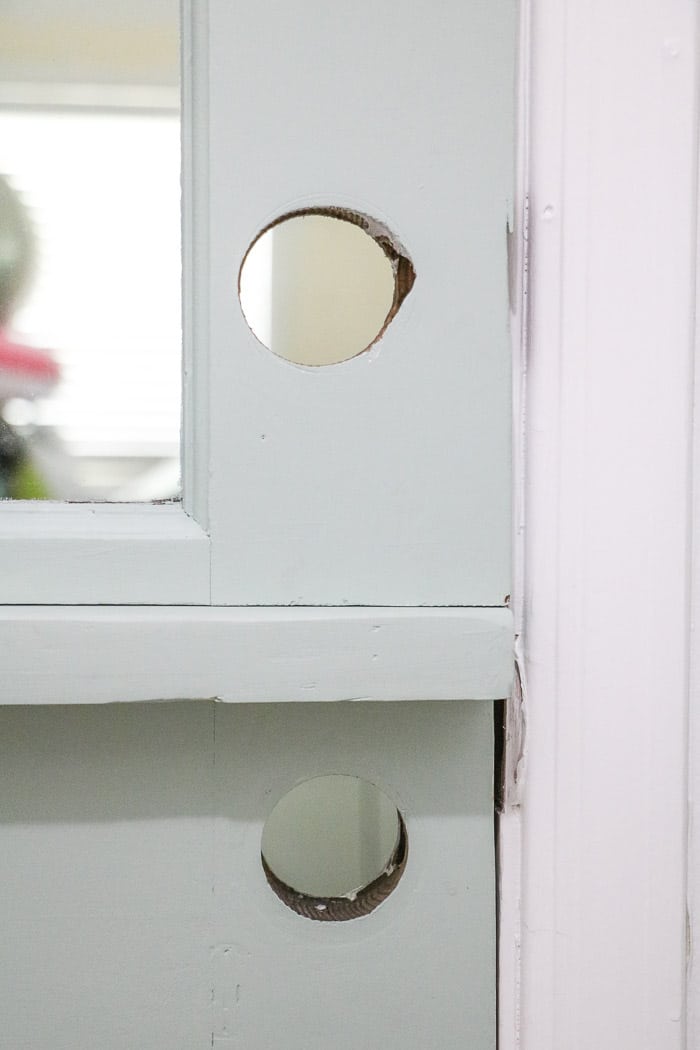
Start with your deadbolt and install it according to This Old House directions. Next, you will need to move the strike plate to line up with the new top door.
And some patching will need to take place, also.
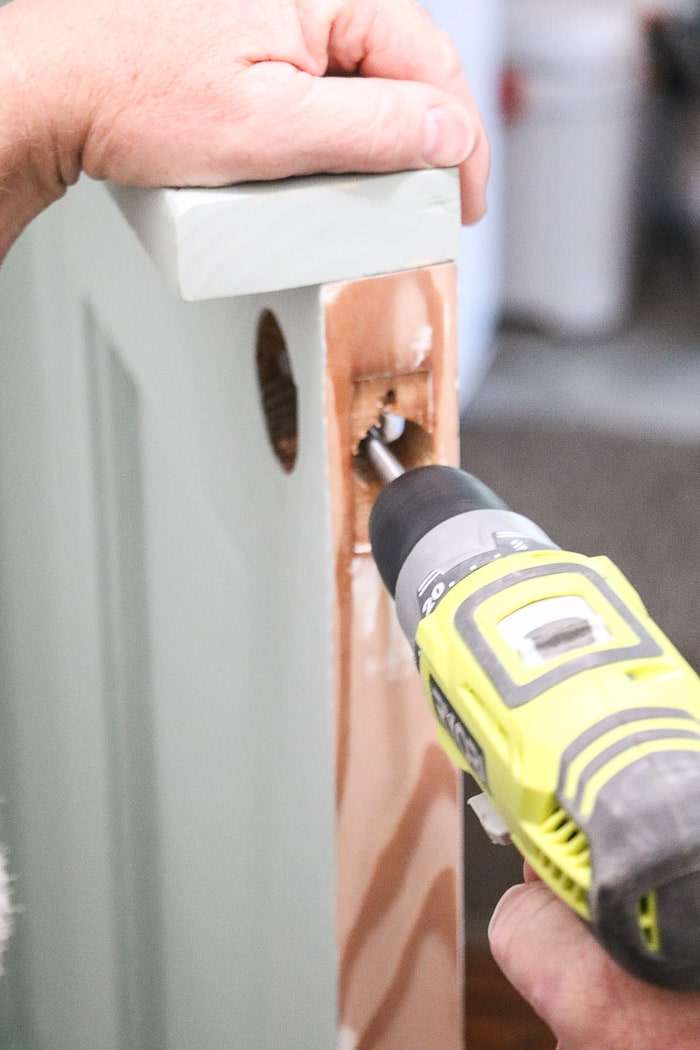
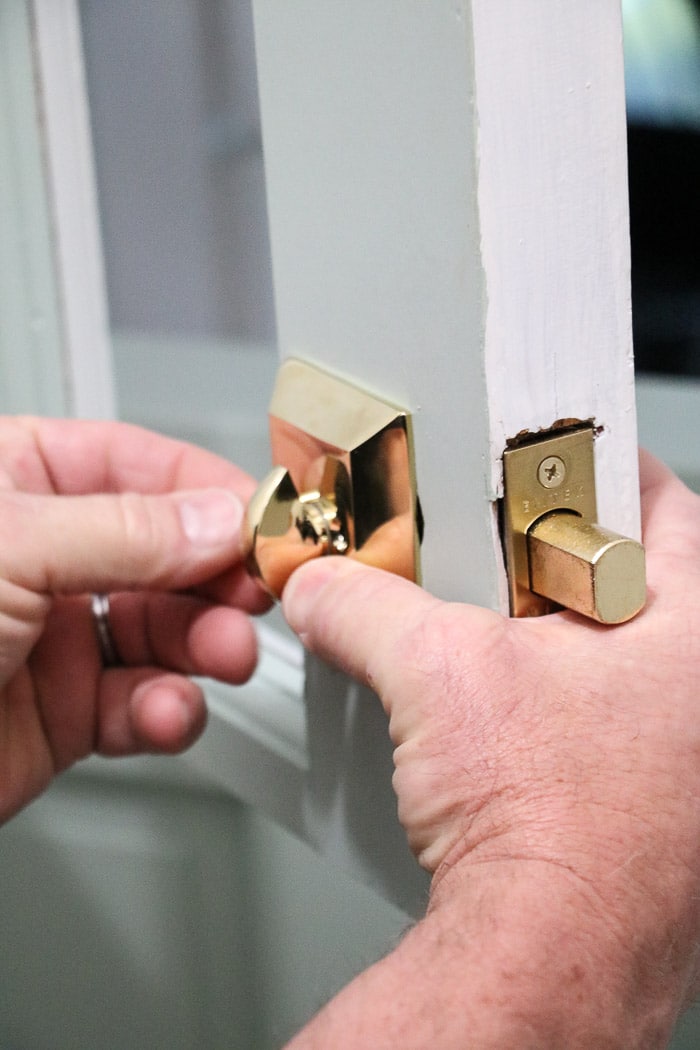
Next, drill out the hole more if needed and install the door knob.
Then it is time to install the Dutch door lock. There are about three kinds of Dutch door locks. On this door, we went with a downward sliding lock in the same color brass as the doorknob.
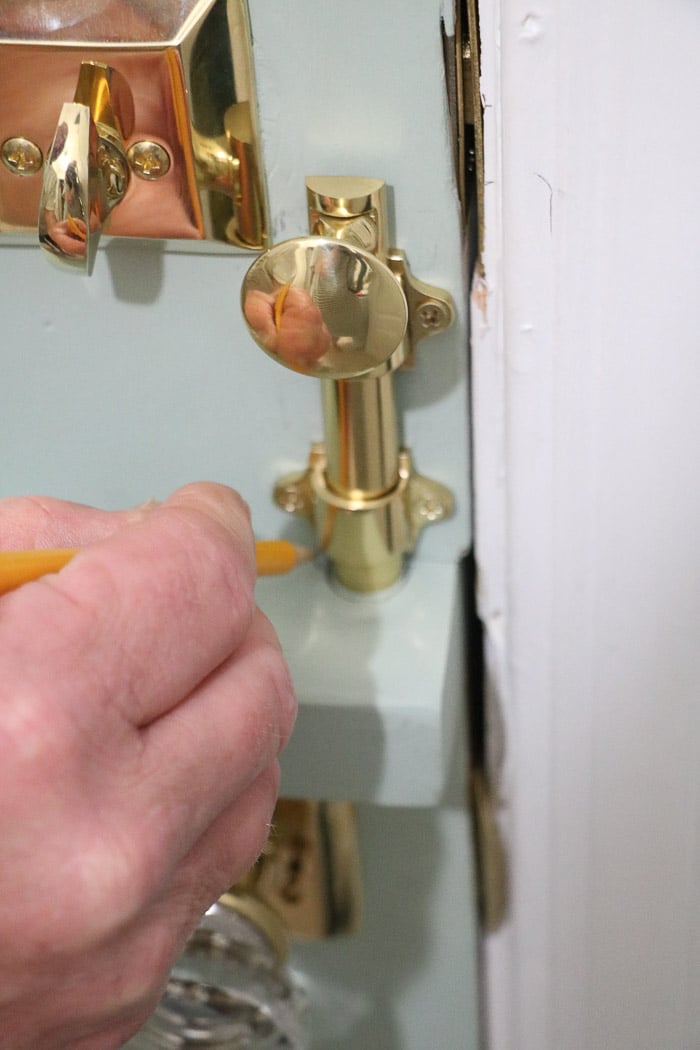
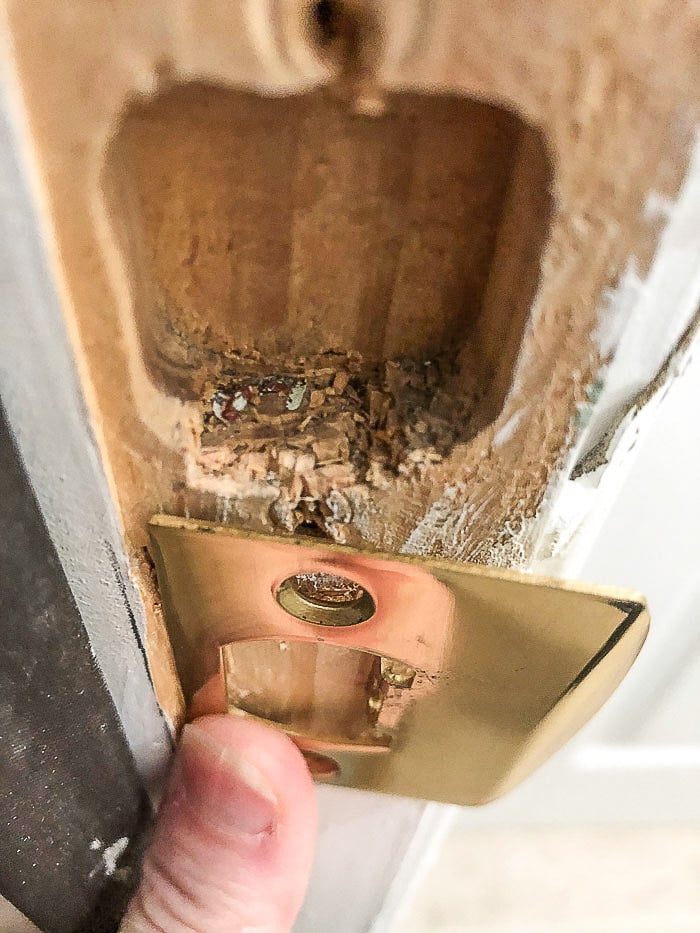
First, set the slider in place with the door shut and draw around it. Because we are working with an old door that already had doorknob hardware holes, we will need to in-set the brass piece into the shelf.
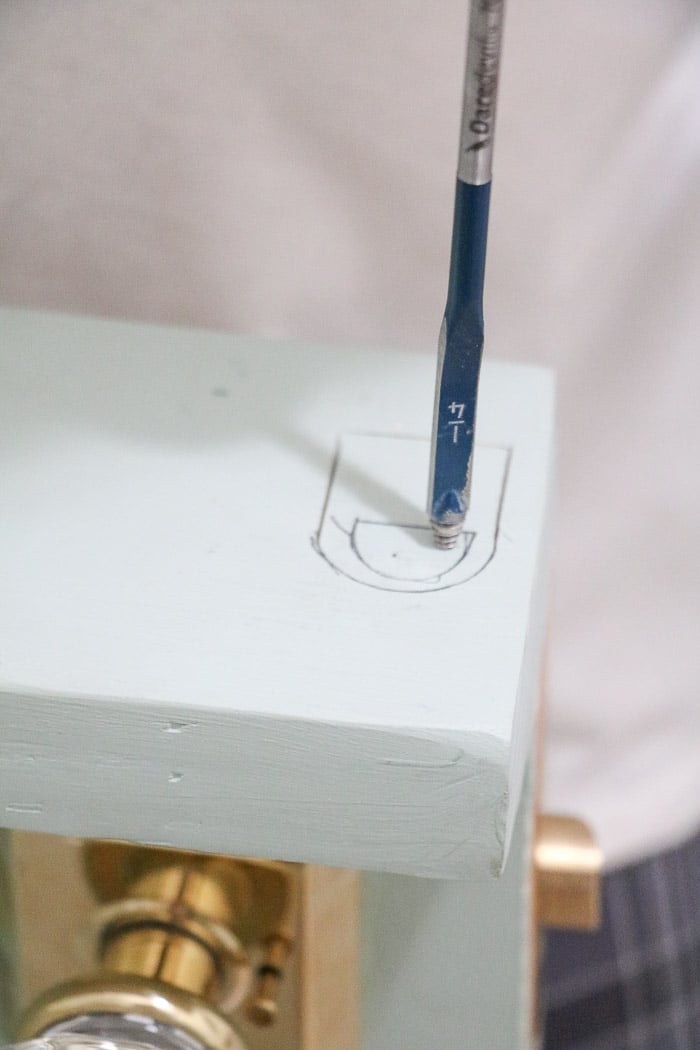
Now take a drill and carve out a place where the brass piece will be inlayed.
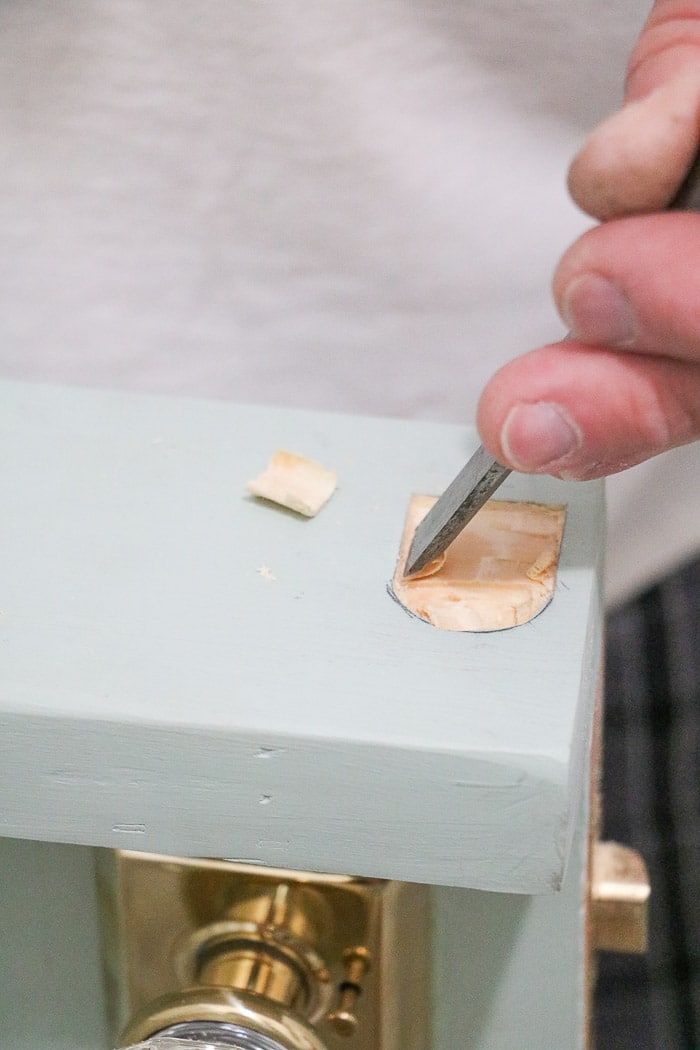
Use your chisel to get further down into the hole.
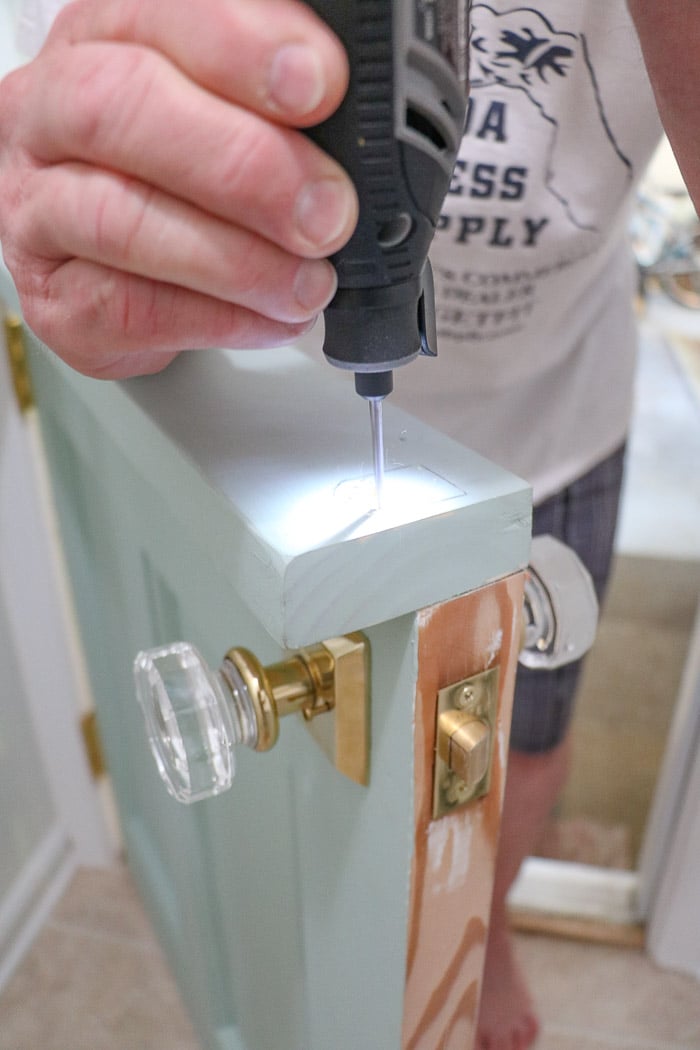
Followed by using a Dremel to carve out the hole even more. And last, set the piece down in the hole and screw it in.
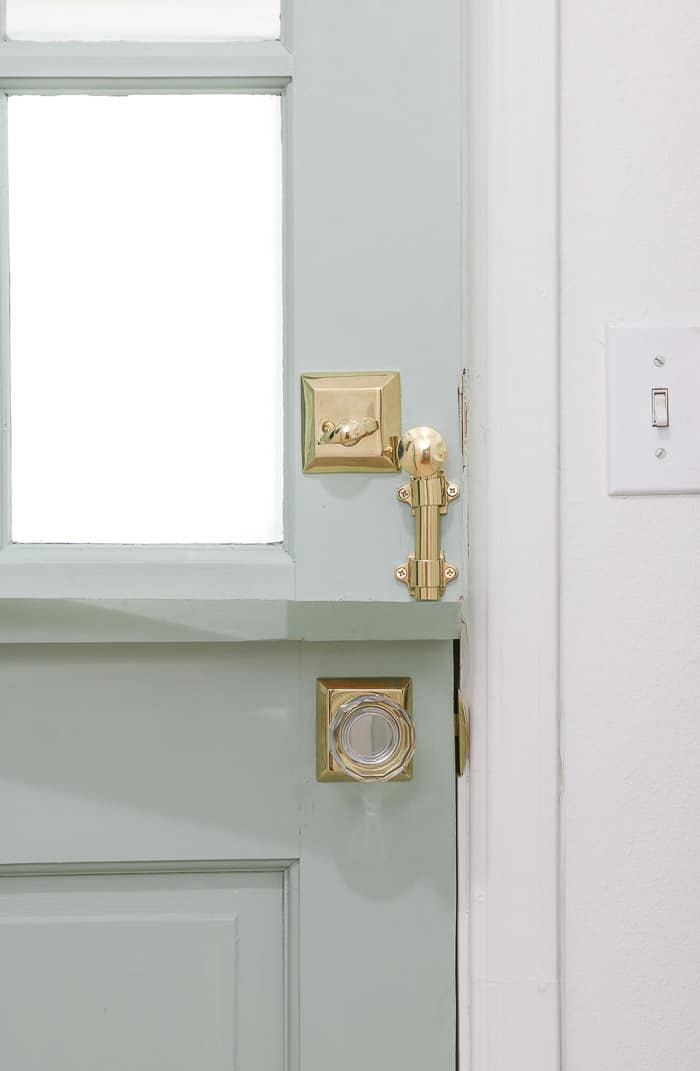
And there you have all the hardware set on the door.
Well, guess what? We are finished. This isn't a hard job, but having certain tools will make it much easier. I would say it is somewhere around the middle to advanced level project.
To wrap up this project, here is a checklist for when you make a Dutch door.
Dutch Door Interior DIY Checklist
Here’s a quick checklist to make things even easier…
- Measure door opening (only if purchasing a door)
- Purchase old, new or keep the existing door
- Clean, sand, prime and paint the door if needed
- Cut the door in half
- Plane down the edges to fit the bottom door
- Apply two hinges to the bottom door
- Plane down the edges to fit the top door
- Apply two hinges to the top door
- Trim down wood for shelf
- Sand, prime and paint the shelf
- Glue shelf onto the bottom door
- Nail shelf into the bottom door
- Fill holes and paint the shelf
- Install door hardware

How This Dutch Door Has Held Up
I’ve been using this Dutch door daily, and it has held up beautifully. It’s sturdy, functional, and still one of my favorite DIY projects.
FAQ: Dutch Door Interior
Can you turn an interior door into a Dutch door?
Yes, a solid wood door works best and can be cut in half to create a Dutch door interior.
Can you use a hollow core door?
Yes, but it requires extra support and reinforcement.
Are Dutch doors good for interior spaces?
Yes, they are perfect for adding airflow while keeping pets or children contained.
Where should you install an interior Dutch door?
Laundry rooms, kitchens, mudrooms, and garages are ideal spots.
Conclusion
I am so glad you came to join us here to learn how to make a Dutch door. This project was so fun! I love being able to open the top without worrying about Eugene, our rabbit, getting out.
Let's talk for a minute about places you can install a Dutch door. They are great for the exterior, but they can be functional and adorable on the interior, too.
Many people use them to keep children and dogs out of certain rooms of their home, making dutch door interior options great too. And some people only install half a door as pet gates. If you want to know how to make a half door follow the first part of this tutorial and only do the bottom door.
A few questions I have been asked are:
- Can you make an interior hollow-core door into a Dutch door? Yes
- Can you turn a barn door into a Dutch door? Yes, you will need a floor guard so the bottom can stay in place while you slide the top open.
If you want a Dutch door but would rather buy one, check out this one at Home Depot or these at Rustica Hardware.
If you are not a Dutch door kind of person and want some other front door ideas, check out my modern front doors post. There are some amazing ideas in this post.
So now that you know how to create a Dutch door for less, where are you thinking about adding some character to your exterior?
Happy Decorating!

If you enjoyed these ideas, please sign up for emails, so you don’t miss out on more fun decorating tips and ideas HERE.
Aha I am a Dutch door person. There was one from kitchen going down to basement or the back door. Murphy was little and I didn’t want him falling down the basement stairs. He would go to the door and wimpier so I could let him out. And the breeze was wonderful. In the new house I can do this to the garage door also. I love the color on the door.
I love this about Murphy and your Dutch door! Thank you so much for sharing! Dutch doors are much prettier to have than a baby gate. However, they are making some pretty amazing baby gates now. 🙂
Love the door we are building a small house front door will go out on a screened door. I want a Dutch door there. Thanks for the info
A dutch door for a front door will be adorable! Good luck on building!
Bonjour !
Superbe travail !
En France, nous appelons ce style de porte “porte fermière”. Elle sert à aérer la maison tout en empêchant les poules d’entrer.
Belle fin de semaine à vous !
Cordialement,
Agnès
Bonjour Agnès! Merci pour vos aimables paroles et votre partage sur les portes néerlandaises en France. J’espère vous aussi un bon week-end! Linda
What a beautiful door! I would love to try this – did you do anything to prevent draughts or movement noise? Or did the door fit perfectly? We are not the most apt at DIY so I would worry that I may need to add a little strip of something around the edge!
Congratulations thougs- it’s lovely!
I love your step by step instructions! We have two doors in our house that I would like to replace with older doors. I would like one to be a dutch door…so I am excited to share this with my husband and see when we want to tackle it. We have talked about if for years and I have browsed local resale stores and such and have found wonderful old doors, but passed on purchasing them because I was unsure it was something we could do ourselves (even though I have searched your tube videos). Looks like I may have to go browsing again 🙂
A dutch door will look lovely in your home. Good luck!
Linda, I love the whimsical feel of the Dutch door. About the only place, we could have one is from our butler’s pantry to the garage. My hubby is handy, but not that handy. Put this on my wish list.
I love the idea of dutch doors but your step by step doesn’t include anything on keeping drafts out with the split. how do do that also can I screen the top half only?
This is a good question. When we cut our door it fits together almost seamlessly so there is almost no gap. As far as a screen I have never seen where someone screened the top half but I think it is a good idea. I would google and do a search to see if there are screen doors for dutch doors or if someone has done a DIY on screening the top half of a dutch door. Good luck!!!
What color is the green inside the door?
Curious as to how you plan to keep drafts and wet weather from getting through the two door pieces.
Good question. Our door is located between the laundry and the garage so we have not experienced any draft or weather. However, where the top and bottom meet is so tight until this should not be a problem. This is a great tutorial or anything indoor and outdoor under a porch or covering.
Very very thanks For the Quality of information.
You’re welcome!
I’m so glad I found this DIY ideas, it so informative and interesting. Great style and I think it is perfect for my home. Thank you very much.
Glad you like it!
Wish I could send a pic of the gate my husband made to keep our two young dogs out of the living/dining room.
I bought a wooden shelving unit and my husband concocted a swing out gate almost like a saloon would have. To lock it, he carved out the width of the gate on another piece of wood that he sanded down to a curved top.
Four hinges and the dogs don’t even bother to try to get in!!!
That sounds so cute! I can just imagine it from your description. Thank you for sharing.
One thing i dont understand. You have a shelf between the top & bottom door, however there was no gap. How does the shelf fit if the gap between the top & bottom door is so tight…..the top door wont close if there is now a shelf? Please explain? Did you cut some off the bottom of the door (near the floor) to compensate the size of the shelf? Thanks
This is a good question and thanks for bringing it to my attention that it is not in the post. I will go and update that part. We think we took some off the bottom door at the top just above the doorknob hole but not much because the door was shorter than the height of our door opening. However, you could easily remove some from the bottom of the lower door too if you don’t have the room between the glass and the doorknob.
What was the inside paint coke?
The inside color of the dutch door is Fusion Mineral Paint color Inglenook.
I really love your Dutch door project. It’s absolutely beautiful.
I do have one concern though; most community building codes require a metal door between a backdoor that connects to a garage as a safety feature.
Perhaps you could update your post to remind people to check their building codes, first? Safety from fire and fumes for as long as possible is the reason for fire rated doors in this location, it’s imperative and could save a life.
Thank you for sharing this really informative DIY Dutch door project, I can’t wait to try it out.
Hi! Love your Dutch door project! I’m painting mine soon and love your green color
I Meant to ask what color green did you paint your Dutch door?
Thank you for your kind words! The paint color on our dutch door is Fusion Mineral Paint – Inglenook.
Nice! Easy to follow and beautifully styled post. I will be installing a dutch door in the kitchen (opens onto the garden), and another for the exterior door to the mud room and laundry in the basement. Light, bright, and airy works. Thank you for making the job easier.
Thank you for sharing! This sounds like two great places to put your dutch doors.
Love the project and process! I would rethink the metal hanger on the wall behind a glass door window. if you have a kid (which is the purpose) then that door is gonna fly open some day and crash glass all over the child.
Thanks for the tip! I have a doorstopper to catch it first so the glass wont touch the hook.