
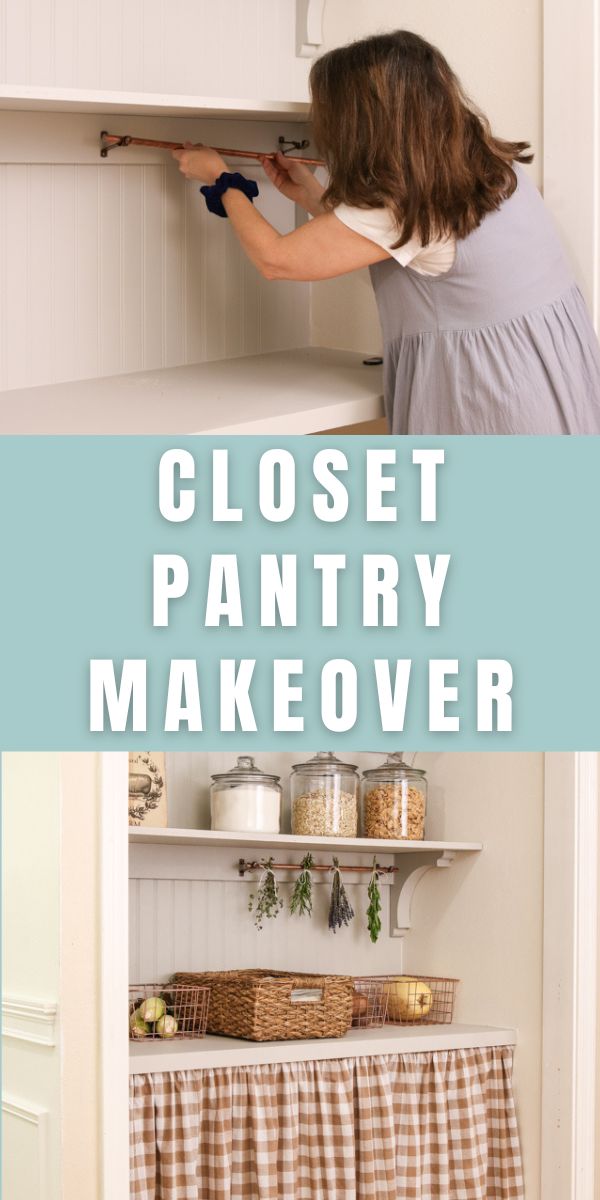
Recently I converted our hall closet into a beautiful pantry with the help of Home Depot and BEHR® Paint, and after so many people asked how I did this, I thought it was time to write a post. So here is how to turn a closet into a pantry.
Many years ago, our old coat closet was a mess. And my small kitchen pantry was always full to the brim with groceries. So one day, I got the idea to make my hall closet into our kitchen pantry. While not every home comes with a walk-in pantry, you'd be surprised what a difference this second pantry can make.
But years later, I found this large hall pantry closet to be an eye sore with scuffed-up walls, and the doors stayed open all the time. When Home Depot and BEHR® Paint reached out to do a project together, I thought this hard-working pantry was the perfect project. It needs fresh paint that can handle wear and tear and a beautiful pantry design without any doors.
So here is my secret on how to turn a closet into a pantry space the easy way, where it is functional, durable, and aesthetically pleasing.
This post is sponsored by The Home Depot. This post contains affiliate links, meaning I receive a commission at no cost to you if you purchase using the links below. All opinions are my own.
How To Turn a Closet Into A Pantry
1. Closet turned to Pantry Design Plan
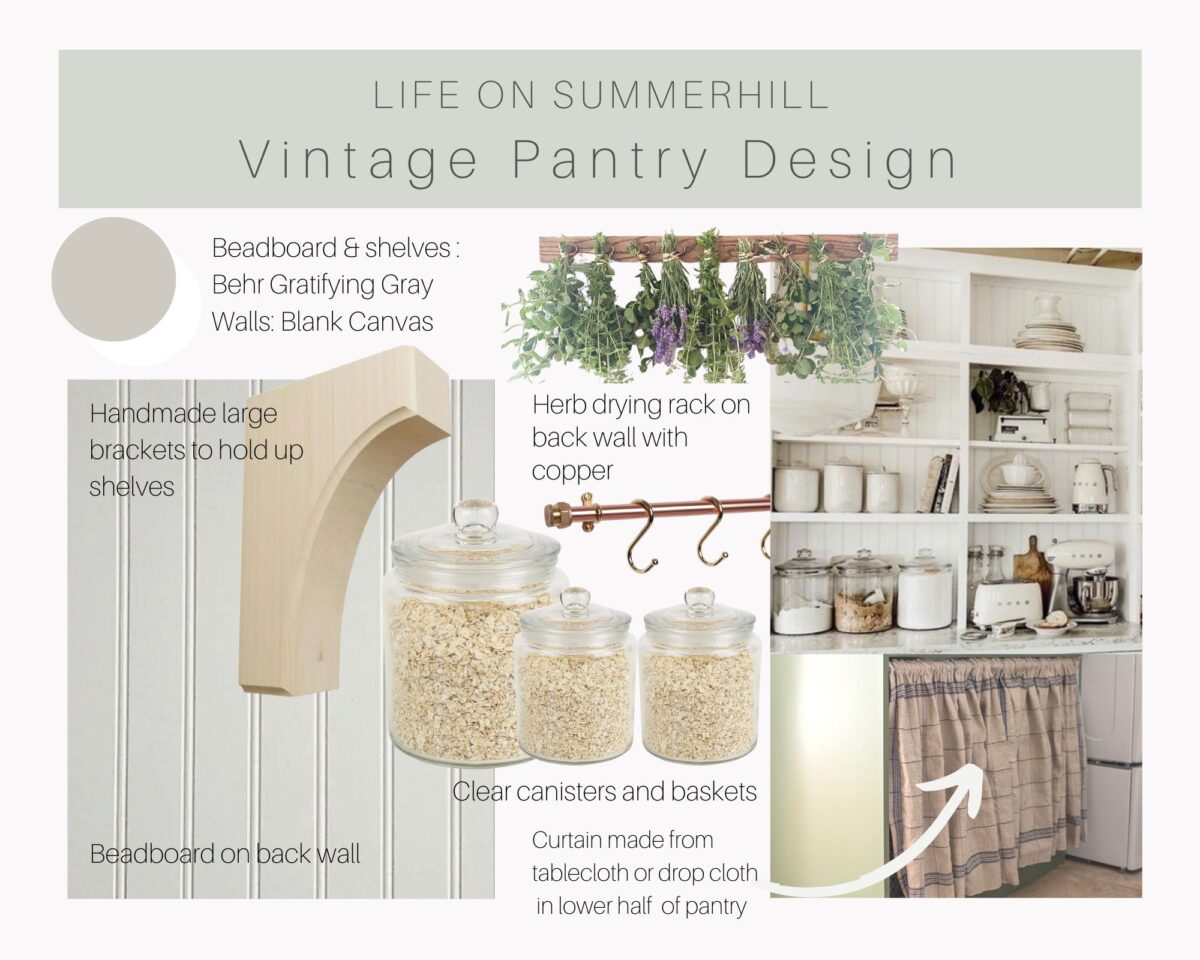
Before tearing everything out of the pantry, the first thing I do was create a design plan. Don't overlook this important step. As a designer, I know creating a design plan or mood board is worth the time to get a great look. You can create your plan digitally or cut and paste magazine pages onto a poster or foam board.
2. Shopping List for Closet Pantry
Once I had a design board planned, I started selecting items from the Home Depot's website or app for the project. This is a great place to create your shopping list for in-store shopping and online.
- Builders Choice 1 in. x 2 in. x 6 ft. S4S Poplar Board
- Columbia Forest Products 3/4 in. x 4 ft. x 8 ft. PureBond Birch Plywood
- 1 in. x 4 in. x 6 ft. Premium Kiln-Dried Square Edge Whitewood Common Board
- BEHR DYNASTY 1 gal. Designer Collection #DC-003 Blank Canvas Satin Enamel Interior Stain-Blocking Paint & Primer
- BEHR DYNASTY 1 gal. Designer Collection #DC-003 Gratifying Gray Satin Enamel Interior Stain-Blocking Paint & Primer
- 3M Pro Grade Precision 2-1/2 in. x 4-1/2 in. x 1 in. 220-Grit Extra Fine Block Sanding Sponge (2-Pack)
- DAP Patch-N-Paint 8 oz. White Premium-Grade Lightweight Spackling Paste
- DAP Alex Painter's 10.1 oz. White All-Purpose Acrylic Latex Caulk
- EUCATILE 32 sq. ft. 3/16 in. x 48 in. x 96 in. Beadboard White True Bead Panel
- RYOBI ONE+ 18V Cordless 3/8 in. Drill/Driver Kit with 1.5 Ah Battery and Charger
- Lintex Buffalo Check 60 in. x 104 in. Sand 100% Cotton Table Cloth for Any Table
- RYOBI 15 Amp 10 in. Corded Sliding Compound Miter Saw with LED Cutline Indicator
- BI 2.6 Amp Corded 5 in. Random Orbital Sander
- RYOBI ONE+ 18V Cordless 3/8 in. Drill/Driver Kit with 1.5 Ah Battery and Charger
- Mason Craft and More 2-Piece 5.7L Apothecary Glass Kitchen Canister Set
- RYOBI ONE+ 18V Cordless AirStrike 18-Gauge Brad Nailer (Tool Only) with Sample Nails
- OXO Good Grips 0.2 qt. Mini POP Container with Airtight Lid (4-Pack)
- OXO Good Grips 6.0 Qt. Big Square Tall POP Food Storage Container with Airtight Lid
- Waddell CR310 1-3/4 in. x 9-3/4 in. x 9-3/4 in. Solid Basswood Corbels
- 12 in. x 12 in. x 12 in. Tan Wicker Cube Storage Bins
- 1/2 in. x 8 ft. Copper Ground Rod
- RYOBI ONE+ 18V Cordless Reciprocating Saw (Tool-Only)
- Milwaukee 6 in. 24 TPI Thin Metal Cutting SAWZALL Reciprocating Saw Blades (5-Pack)
- BEHR PREMIUM 11 oz. SP-206 Antique Copper Metallic Gloss Interior/Exterior Spray Paint Aerosol
Project Tips:
- Design Plan or Mood Board: Canva or PicMonkey are great tools when digitally creating a design plan or mood board, but another fun idea is cutting ideas out of a home decor magazine. Simply cut and glue them to the board. Here are my top 10 home decor magazines and my Pinterest, which is another great place to curate ideas.
- Shopping list: create your supply list on the Home Depot website or app. Home Depot carries just about everything from paint to furniture to linens. When planning what you need at the store and online add each piece to your cart. This way your list is tidy in one place.
- Shopping at the store: When you get to the store, you can easily click on the item to see what aisle to find it and after you check out, anything they didn't have; you can order when you get home.
- Shopping online for paint: Did you know you can select your BEHR® Paint online and have it shipped to your door? If you plan ahead this will save you so much time because your paint will arrive in the mail. Consider purchasing other supplies like paintbrushes and trays at the same time.
- Shopping in the paint store: Here is a little secret I have only shared with my subscribers in my newsletter. Add the paint to your Home Depot cart on the app when you decide on your paint color. Order the paint on the app for car delivery at the store. You will save yourself so much time and frustration from waiting in line at the paint counter.
- Best paint sheen: For your pantry, I recommend a satin or semi-gloss finish in the BEHR DYNASTY® Interior Paint. My pantry has been finished for months in satin and performs beautifully.
3. Demo Closet
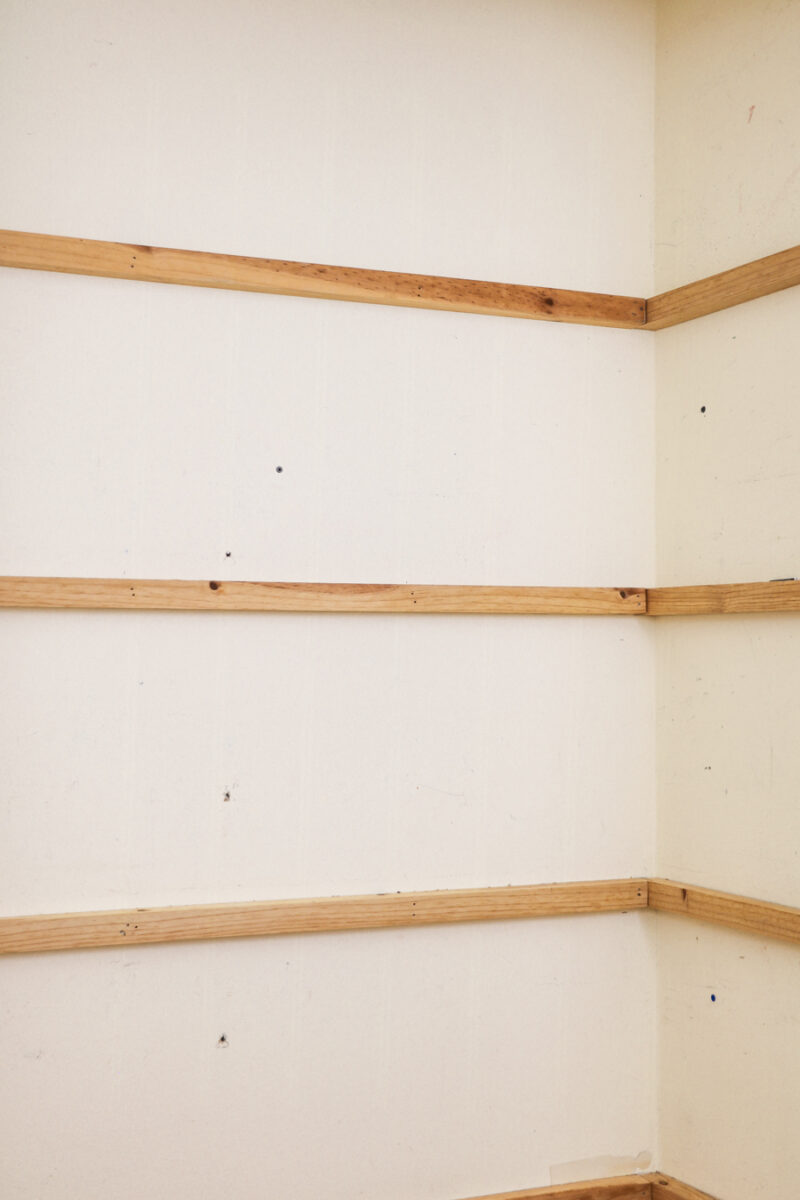
Next, remove everything from the inside of the closet. Here is what our pantry closet looked like before.

This is a great time to purge anything you haven't used in years or items past their expiration date. After you have removed everything, it is time to tear out everything and bring it down to bare walls.
I removed all the wood strips holding the old shelves in my closet except for the bottom two. You will see why soon.
Your can leave the existing door frame.
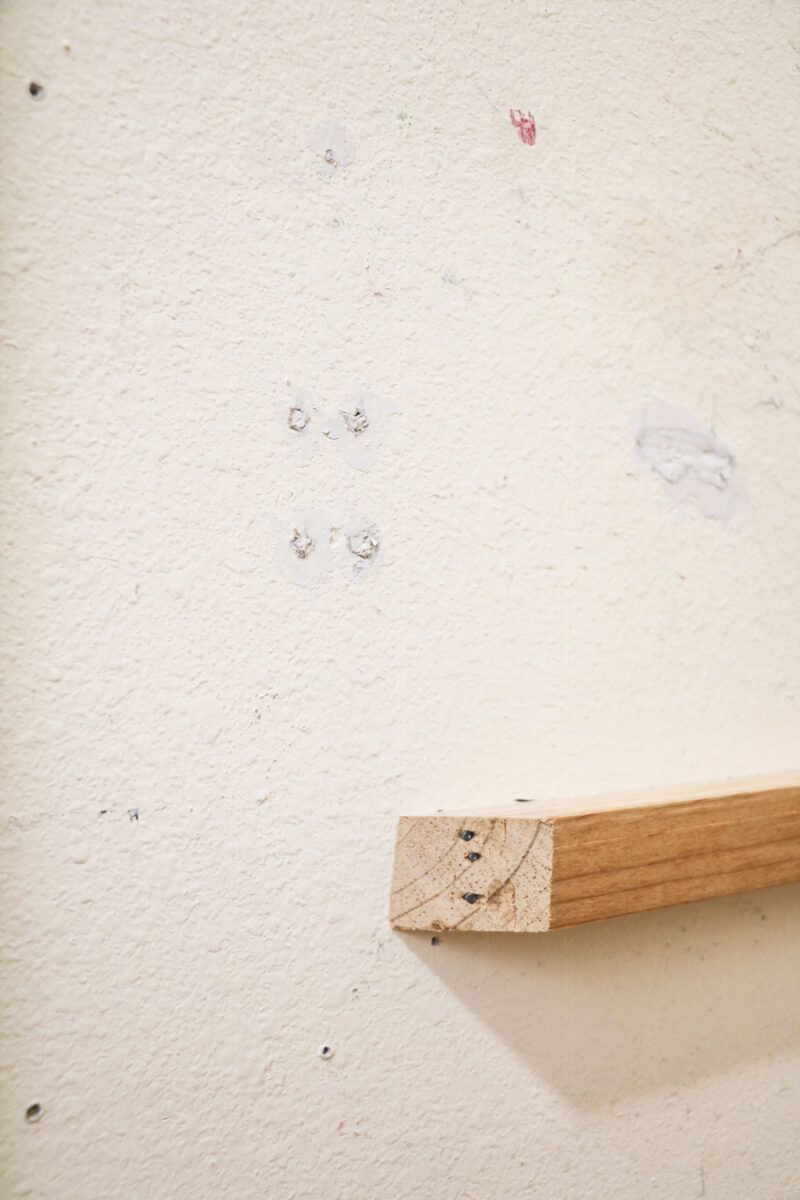
4. Repair the Sheetrock Walls
Next, repair any holes on the walls, except where the beadboard will go, with spackle. After the spackle has dried, sand it smooth.
5. Install Countertop Shelf
If you plan to make your pantry into a butler's pantry with a countertop, go ahead and cut a piece of wood and set it on the wood strips attached to the wall.
Next, use a 1 x 2″ and nail it to the front to give the countertop thickness and a lip underneath for a curtain rod to hide behind.

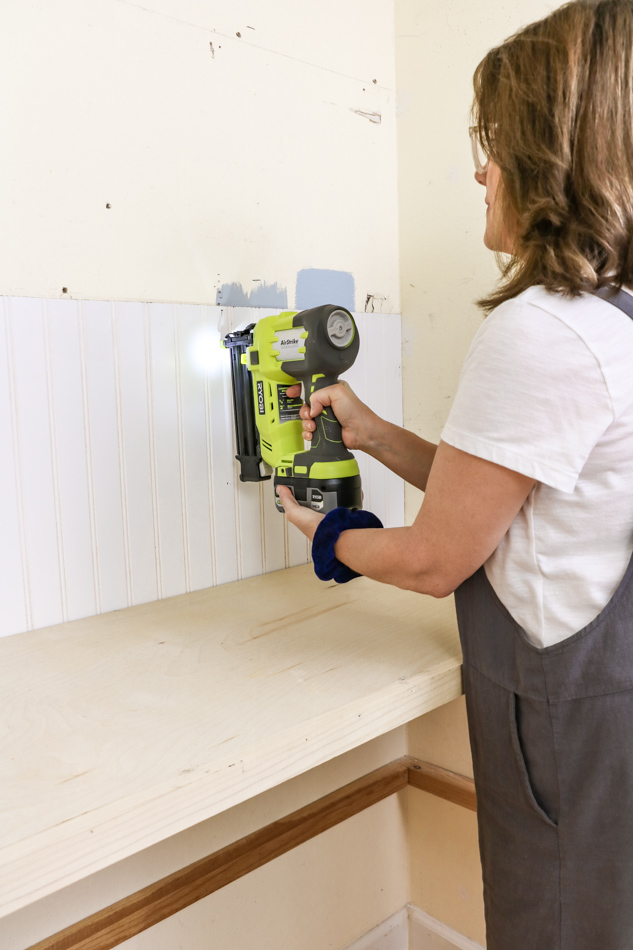
6. Install Beadboard
If you are planning to add decorative wood to the walls, this is when you will do that. We installed a beadboard on the back wall only. Measure each wall and cut your wood to fit. I attached my beadboard with my Ryobi brad nailer.
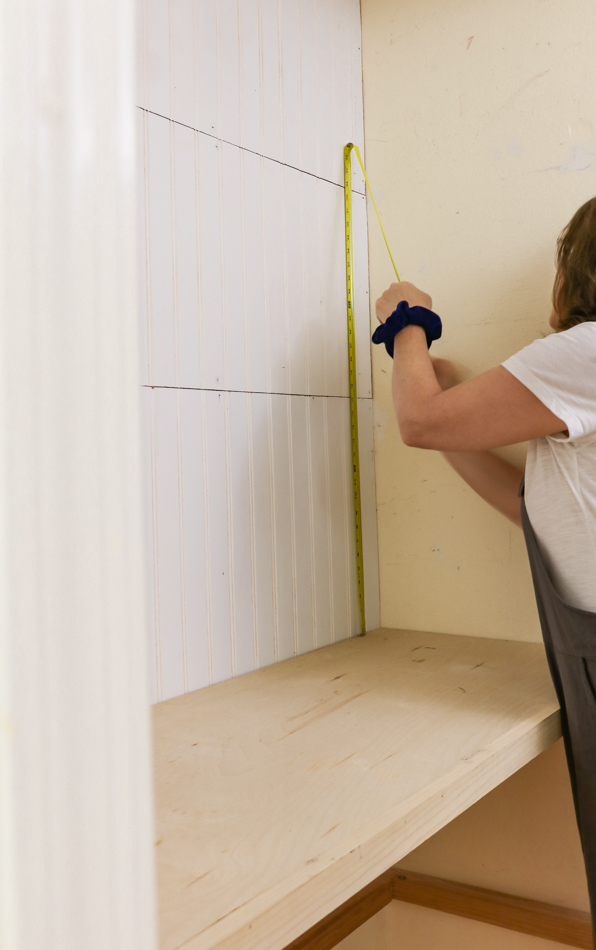
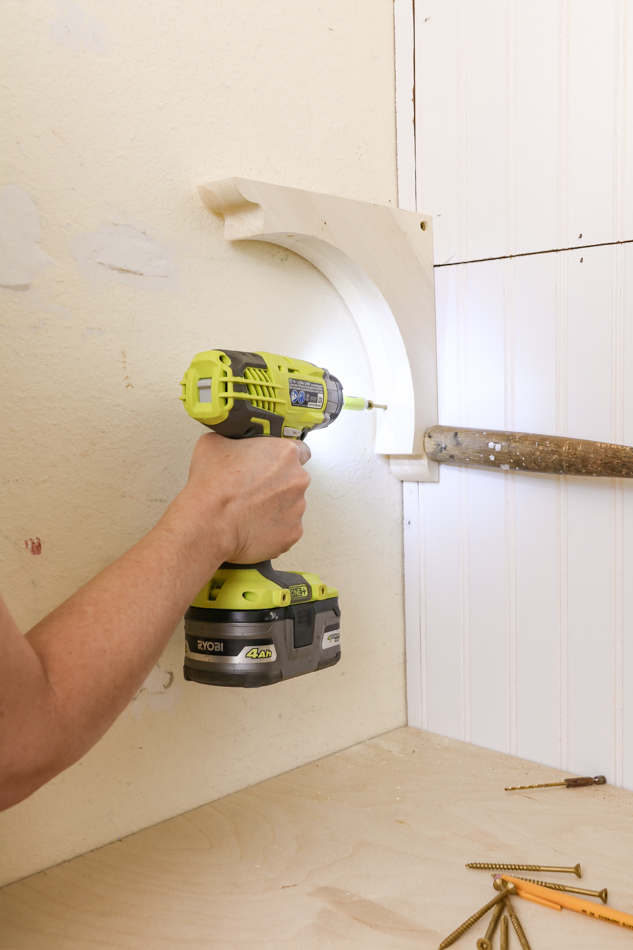
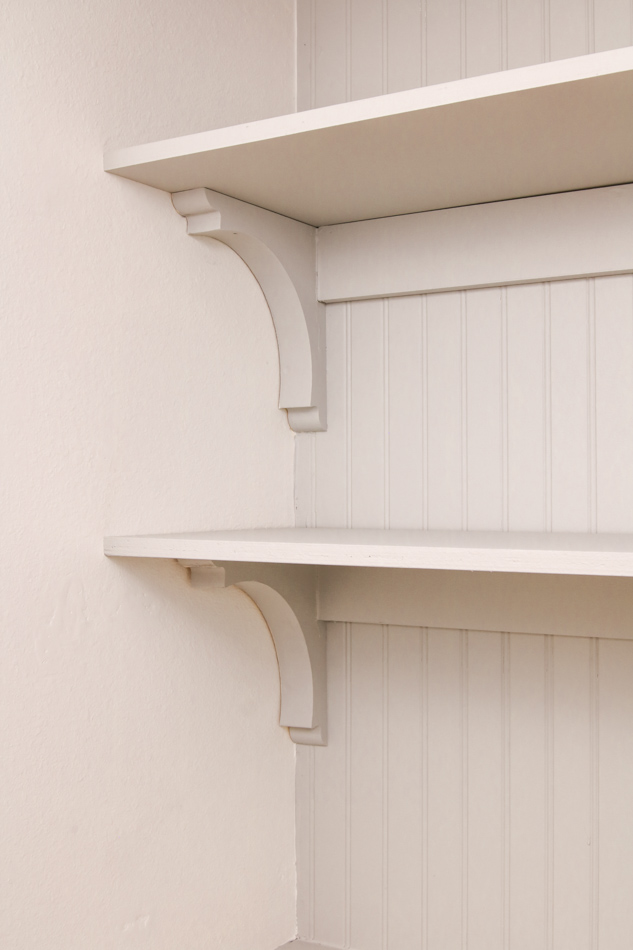
7. Install Brackets
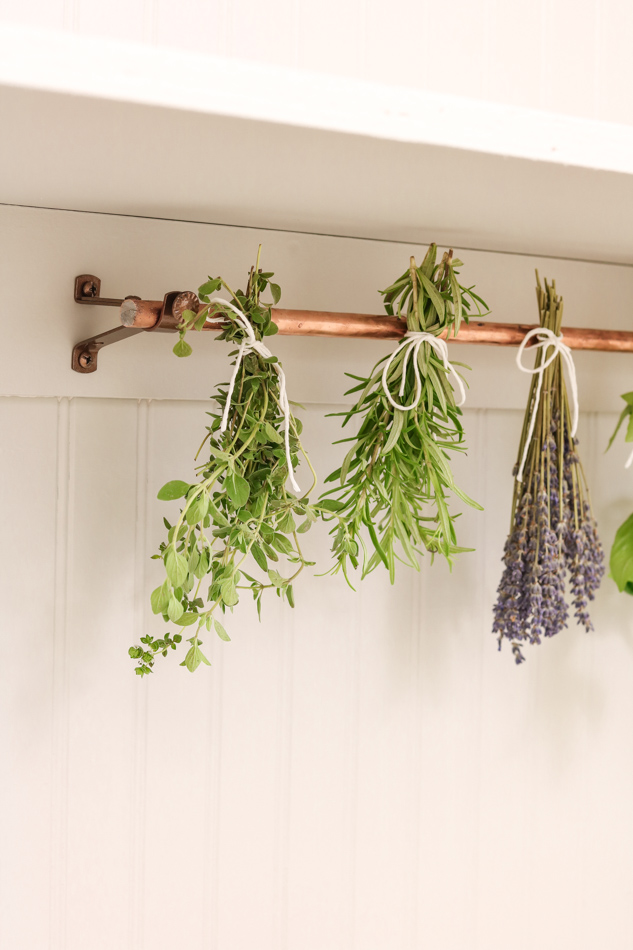
Once your beadboard is in place, measure where you want your shelves to go above the countertop. I added more height between the countertop and the first shelf because I plan to install a copper rod to dry herbs, so I needed extra space.
Mark where you want your brackets to go, and now let's drill holes in the side of your brackets. This will help us attach them securely where they sit on the wall. Only do this for the brackets that are in the corners.
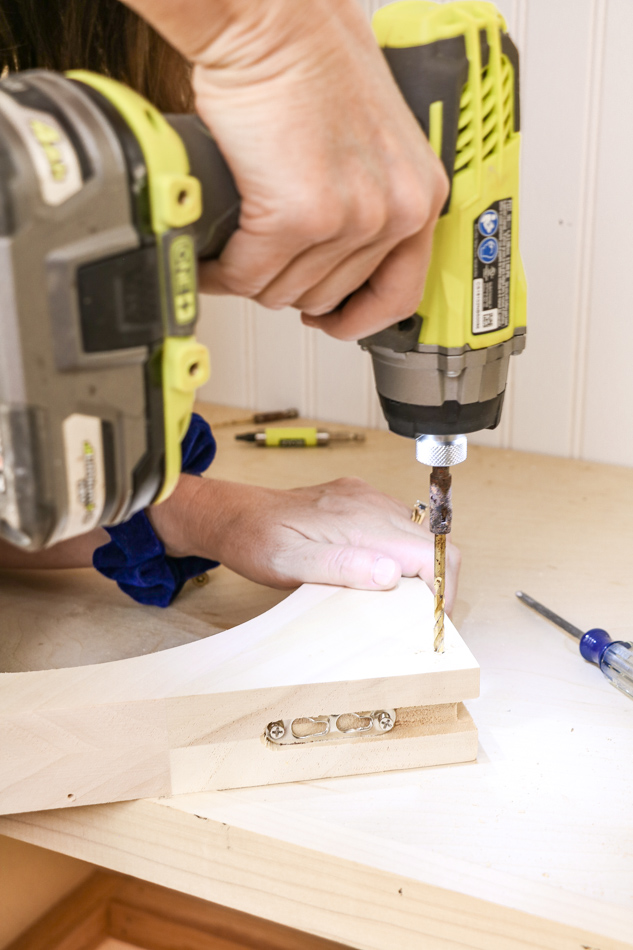
Now screw the bracket onto the walls, drill another hole at the bottom, and screw in the bracket on the bottom.
8. Install Shelves
Next, measure between the brackets for a 1 x 3 piece of wood.
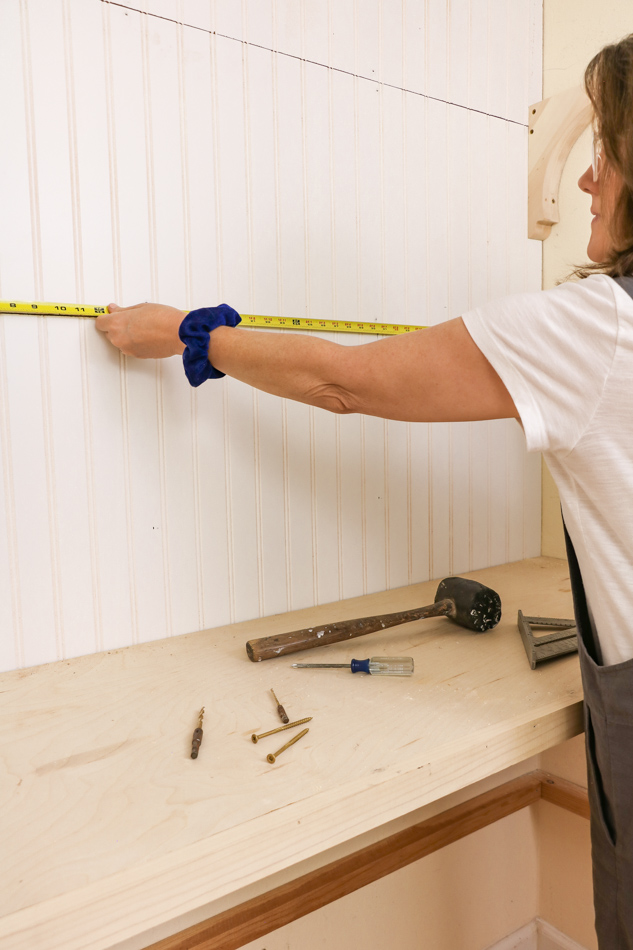
Cut the wood to fit and install with a brad nailer where the top of the wood is in line with the top of the bracket.
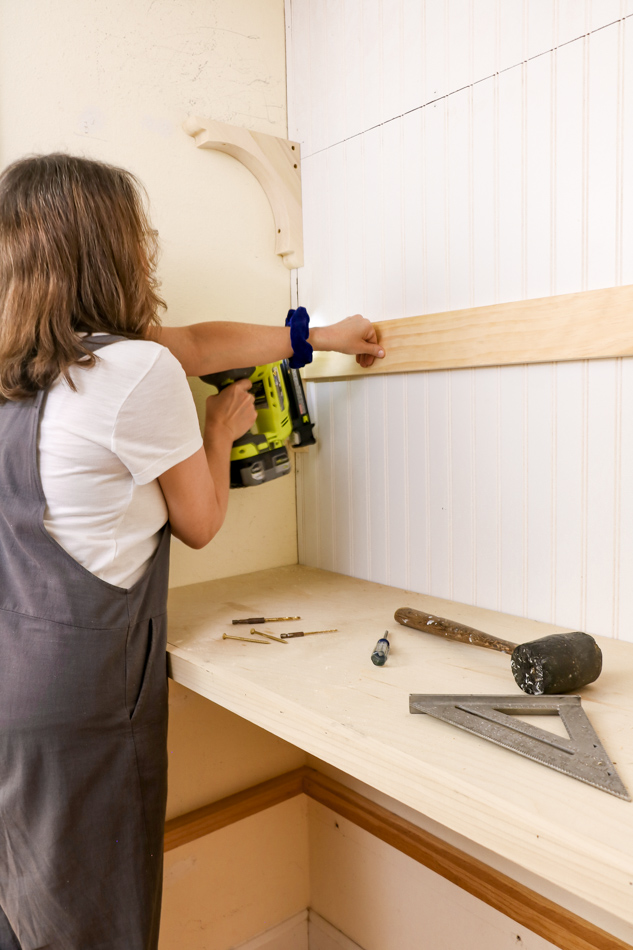
Add another piece of wood at the top of the wall against the ceiling to finish the beadboard. Next, cut the wood for the shelves, set it on the brackets, and support the wood in the back.
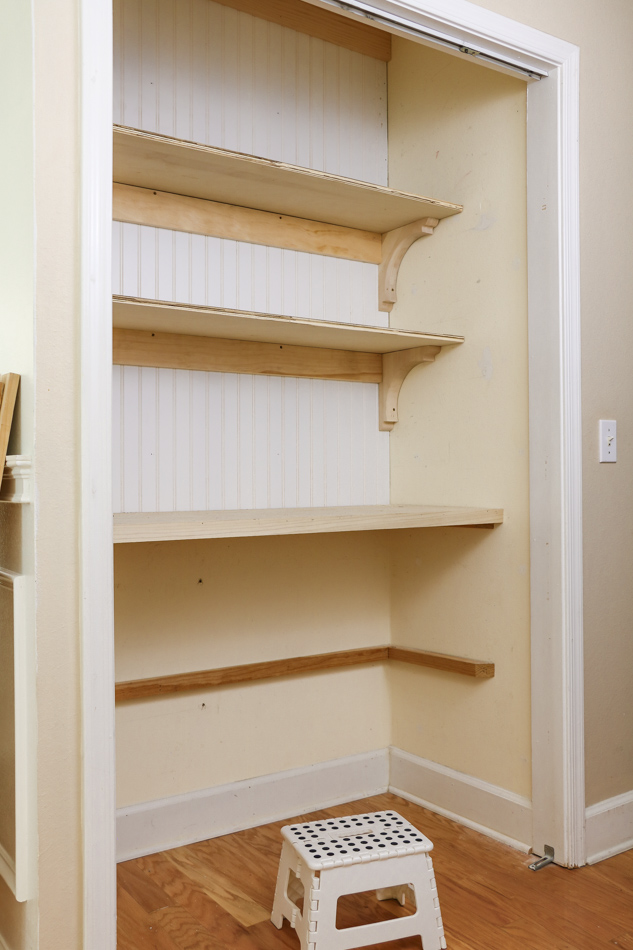
After your shelves are in place, cut screen trim and nail to the front of the wood to finish the edge.
9. Spackle and Paint Pantry with BEHR DYNASTY® Interior Paint
Can you start to see how all this is coming together? Next, spackle all the holes and caulk anything that is needed. Once all the spackle and caulk are dry, sand it smooth where needed.
Now it is time to start painting. First, pull the shelves out for easy painting. Paint the walls and the shelves. I painted the shelves on my table that I covered with a drop cloth, and while they were drying, I painted the walls inside the pantry. Here are the steps to painting the shelves.
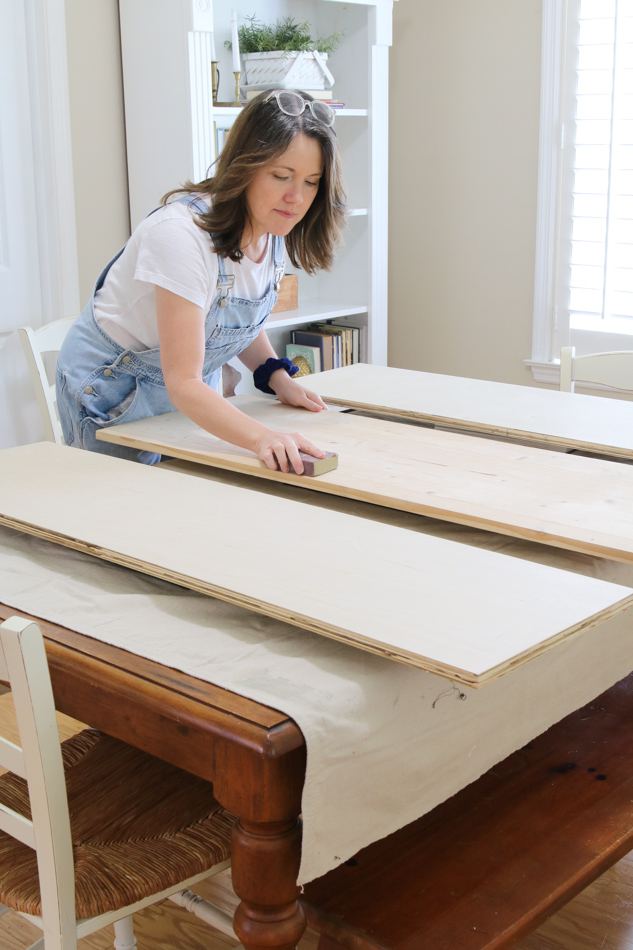
First, I sanded the shelves smoothly with a fine-grit sandpaper. Then I removed any dust with a damp paper towel.
Next, I applied BEHR DYNASTY® Interior Paint in color, Gratifying Gray (DC-008). This paint is fantastic! I used it on my board and batten fireplace surround, and it has held up beautifully.
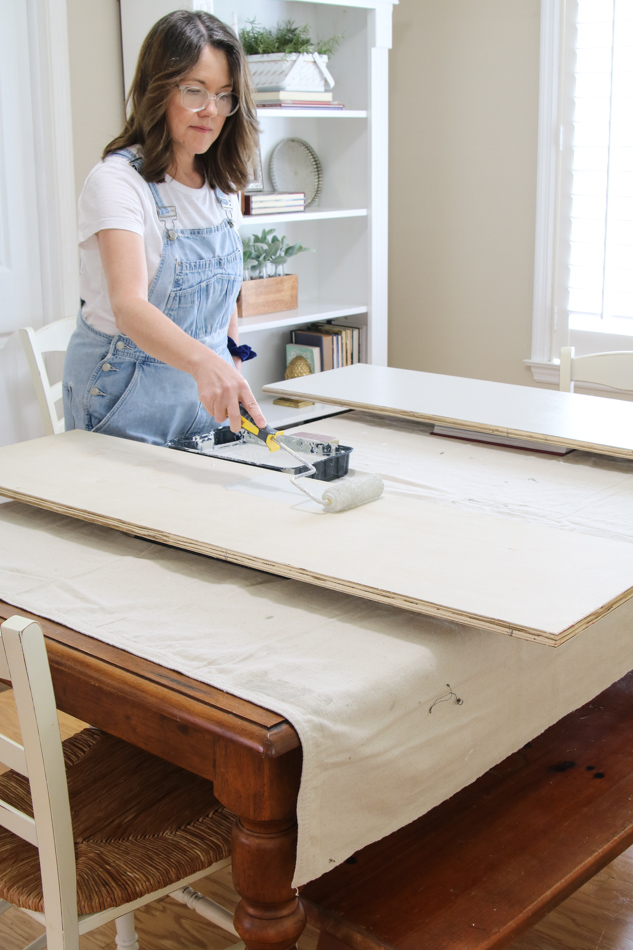
BEHR DYNASTY® Interior Paint is durable and perfect for a hard-working pantry where metal cans will be drug across it. This paint is stain-repellent, scuff-resistant, and fast drying. That is the recipe for the perfect paint for a pantry. Plus, all I needed was one coat of paint. BEHR DYNASTY® is a perfect paint.
While the shelves are drying, paint the walls inside your pantry. I painted the back wall and brackets Gratifying Gray (DC-008) and the side walls Blank Canvas (DC-003).
These paint colors are a part of the Designer Collection. BEHR® Paint developed a palette of paint colors based on the most used colors by interior designs. This is an excellent list of colors to choose from when picking interior and exterior colors for your home.
Once your shelves and walls are finished being painted, install your shelves. At this point, let the paint cure for a day before putting anything on the shelves. This is a good time to add something special to your pantry. So in the meantime, here is how to make a homemade herb rack here is how I did that too.
How to Make a Homemade Herb Drying Rack
About a year ago, my hubby planted an herb garden outside. Not all herbs last through the winter, so I needed a drying rack to store herbs.
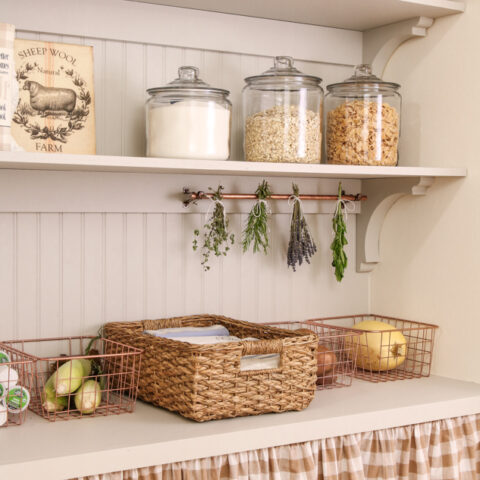
Our pantry is a great place to dry herbs because it is not exposed to the sun and is a well-ventilated area. Here are the simple steps to make a homemade herb drying rack with copper. It soon became one of my favorite things about my new pantry.
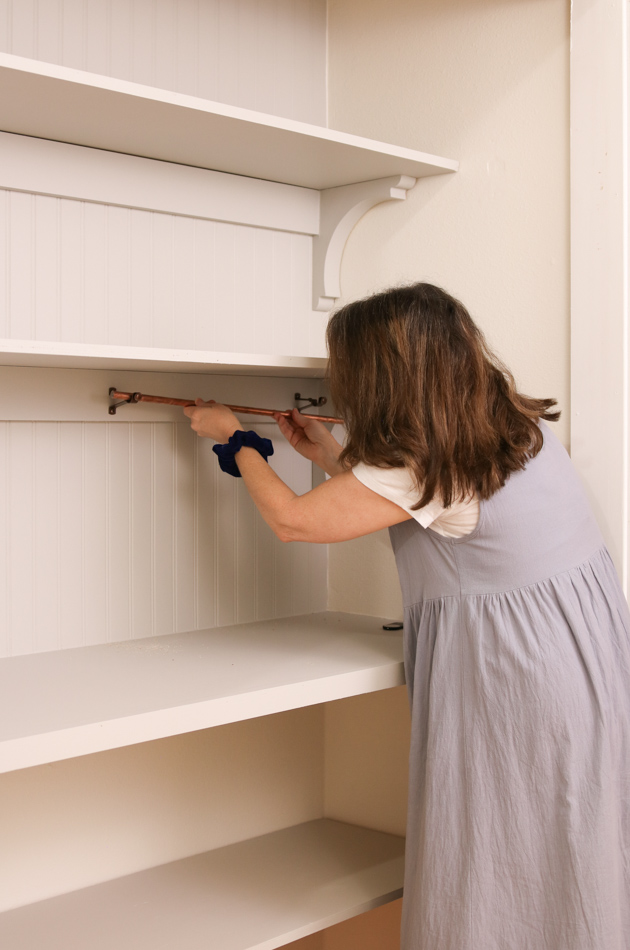
- Measure and cut copper pipe (I measured 1/3″ of the width of our pantry and used a reciprocating saw with metal cutting blade)
- Spray paint curtain rod brackets to match the rod (I used Behr spray paint color, Antique Copper)
- Screw the brackets into the wall leaving 1/2″ of rod hanging off on each side
- Screw the bracket screws into the copper pipe to make it snug
- Tie herbs to the rod upside down with twine, or you can purchase s-hooks and spray paint them too
10. Pantry Organizing
Now that your paint is dry, it is time to add your groceries. When I shared this completed pantry on Instagram, several people asked where all my groceries were. LOL! When I am finished, you will see how clever they are hidden.
Let's start from the bottom up, and I will share where I stored all our pantry items.
On the floor below the shelf, I installed large oversized baskets that I already had on hand. In these baskets are more oversized or bulk items. You could also use this space for small appliances you don't use often. Here is what we have in our baskets:
- brown paper bags for recycling
- plastic grocery bags to line smaller trash cans
- Cat food that comes in large bags
- Disposable cooking trays
- Lunch boxes
Next, let's store all your not-so-pretty food items below the countertop on the bottom shelf. These are all the groceries you use weekly.
- Cans neatly stacked in rows, and bottles lined up on the left
- Dry goods are stored in Oxo air-tight storage containers on the Home Depots' website on the right.
- Cookie jar in the middle to store small items or your individually wrapped favorite snacks like peanut butter crackers.
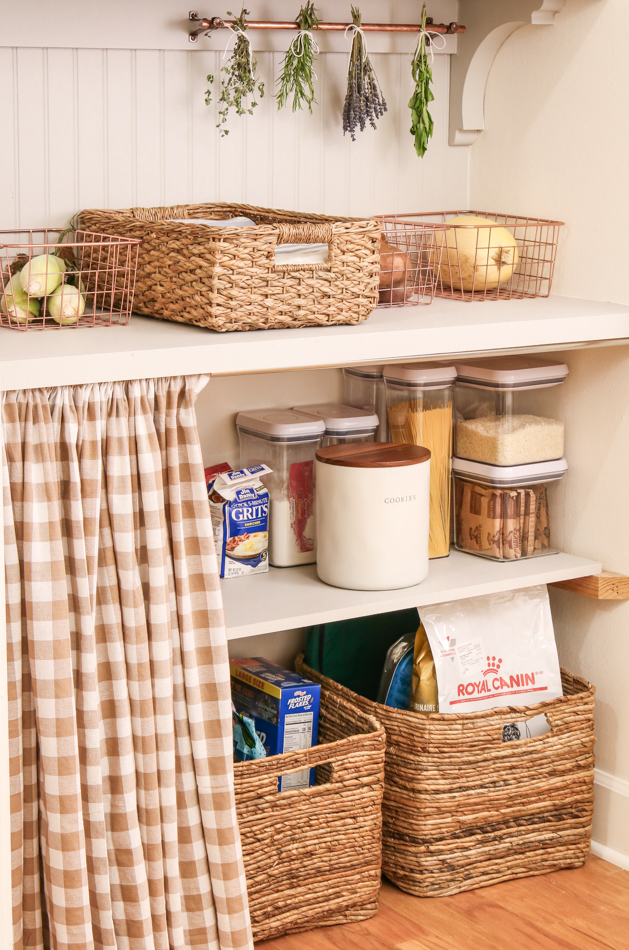
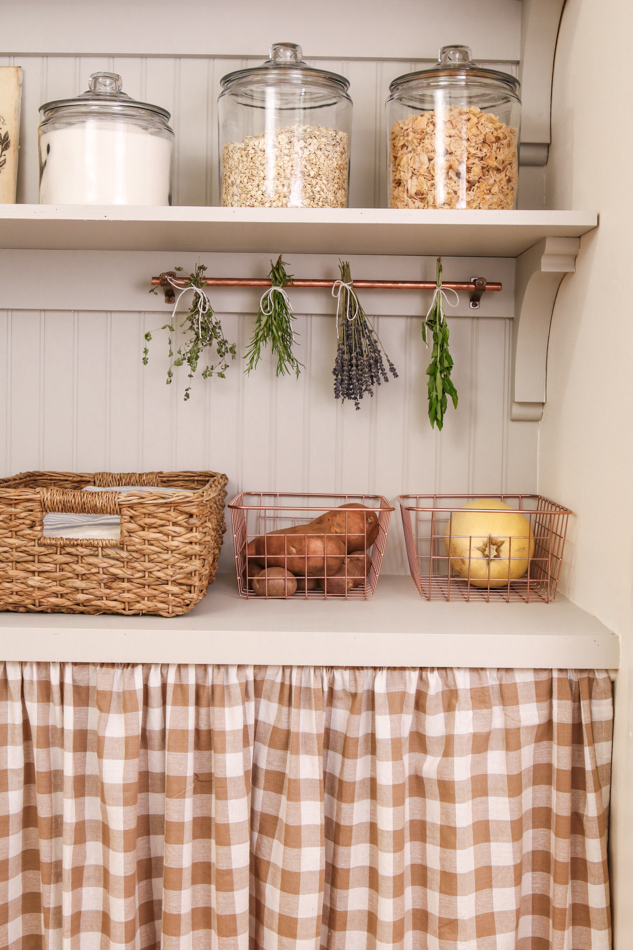
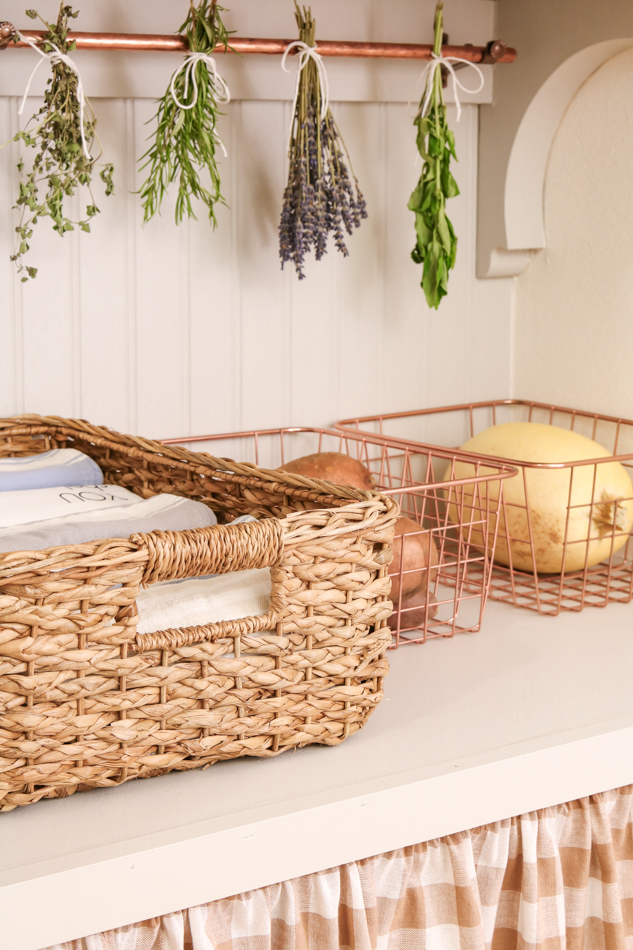
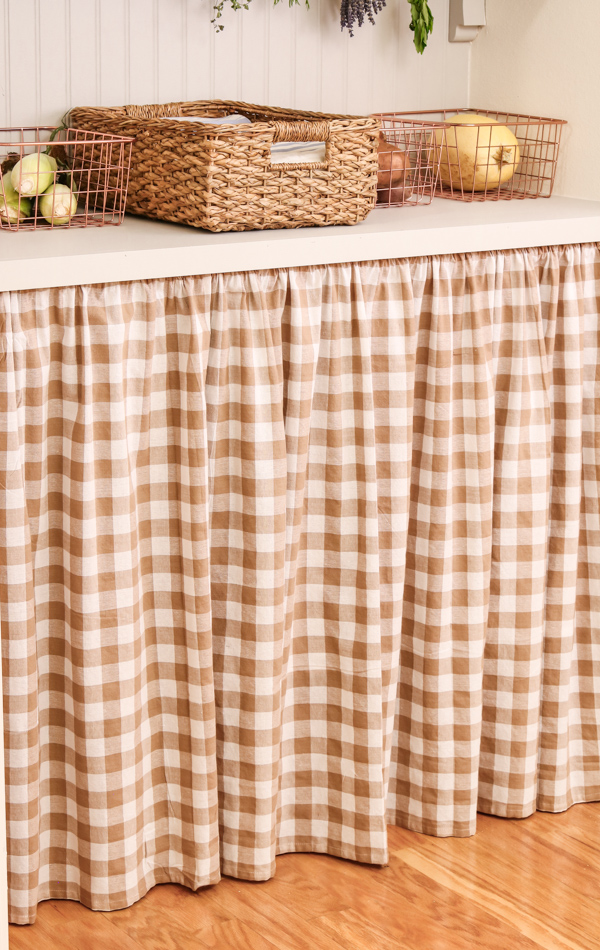
On the countertop are all the baskets for vegetables and fruits that last longer without refrigeration and the perfect place for a basket for linen kitchen towels.
When we closed in our refrigerator, I lost where my basket was being stored. So I rolled the towels neatly and stored them in the basket on the counter.
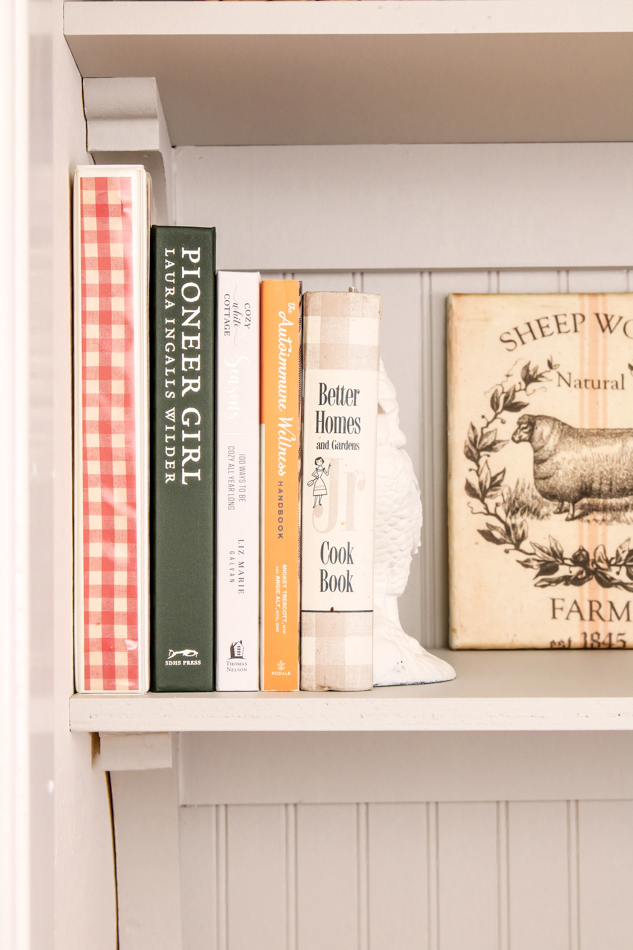
The next shelf up is cookbooks and old-fashioned jars to hold cereal, sugar, and oatmeal.
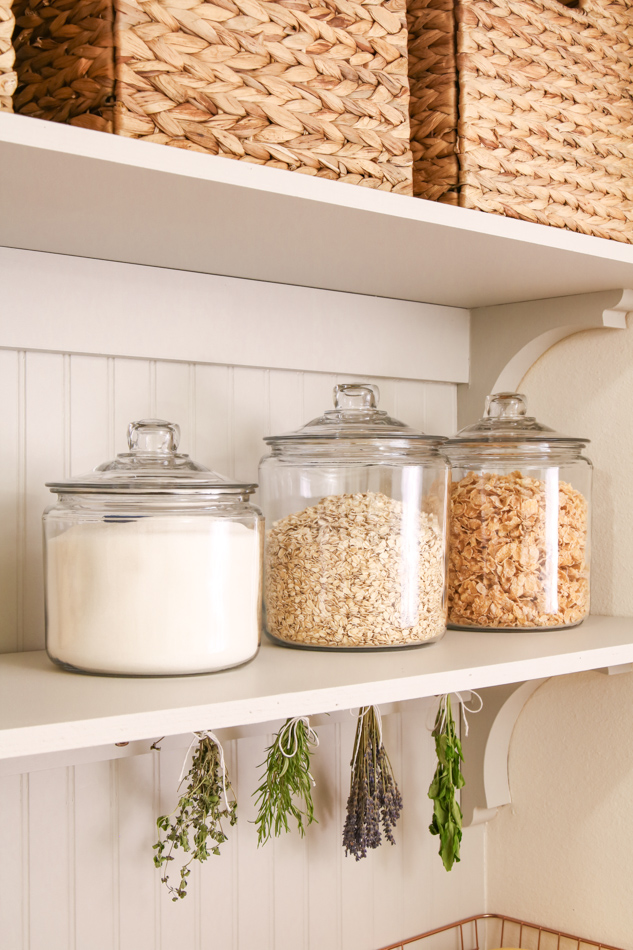
The cookbooks are on the left, and the jars are on the right.
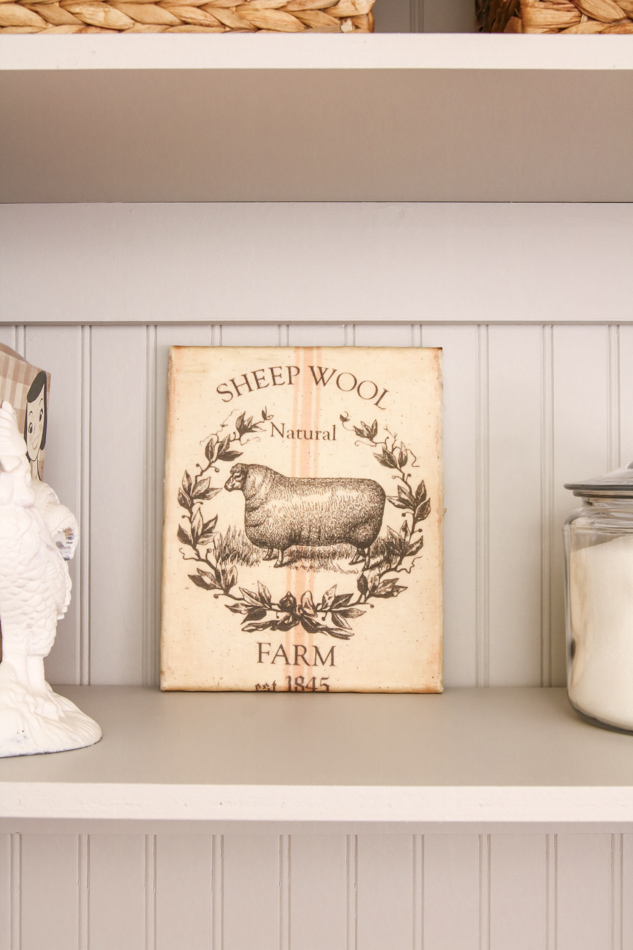
Add Decorative Touches
I added this wall decoration in the middle. I found this piece at an antique store, but I have many designs similar to it in my Etsy shop that are printable you can decoupage to canvas. This is a great way to personalize your pantry.
On a side note, after living with this arrangement, I moved the glass jars down to the countertop because they are easier to use in this location. Now the copper baskets are up higher next to the cookbooks. The important thing is to make sure it's a functional pantry for you and your family's needs.
On the top shelf of the pantry are three large wicker baskets. These are not as big as the baskets on the floor but are perfect for a little extra storage space. They are about 12 x 12. In these baskets, I stored items I use on occasion, like cookie cutters and cake decorating supplies.

11. Pantry Curtain
Now that all your groceries are stocked in your new pantry, you will need to add our curtain. Home Depot has you covered here too.
Simply install a spring curtain rod behind the lip of the countertop. Then drape a table cloth over the rod where the front of the fabric is off the floor 1/4″. To keep your rod in place, sew a rod pocket at the top by hand or on a sewing machine.
Well, guess what? This pantry project is all finished. You now have plenty of room for all your family's kitchen supply needs.
Final Thoughts
After completing the pantry, I was so happy with how it turned out that I decided not to put the closet doors back on. The best part is that it makes us all keep it tidy even more and provides easy access to anything we need.
Also, I didn't plan it this way, but it looks like a butler's pantry you find in old homes. I have always wanted a butler's pantry, and now I have one. I love how this pantry turned out. This will also be a great place to serve drinks or desserts when we have family or friends over for dinner or brunch.
You might be thinking this is not enough food storage for your family. But even a small closet turned food pantry can provide quite a bit of space.
In my kitchen, I am organized by zones. There are more details in my kitchen zone organizing post, but basically, you will discover a more efficient way to cook using this method and other places grocery items are stored.
Even a tiny kitchen will feel bigger and more organized with my method. You can also get my best organizing tips in my post Unlocking Order: How Amazon's Best Products Saved My Chaos.

This was easily one of my most satisfying DIY projects and the perfect solution for us. It could be a great solution for your family's kitchen. Here is a photo of the complete closet converted into a pantry or, maybe I should say, a butler's pantry. What do you think? Should I call it a fancy vintage pantry or a butlers pantry?
Happy Decorating!

How To Turn a Closet Into A Pantry
How to turn a closet into a functional, durable, and aesthetically pleasing pantry the easy way, with the help of Home Depot and BEHR® Paint.
Materials
- Builders Choice 1 in. x 2 in. x 6 ft. S4S Poplar Board
- Columbia Forest Products 3/4 in. x 4 ft. x 8 ft. PureBond Birch Plywood
- 1 in. x 4 in. x 6 ft. Premium Kiln-Dried Square Edge Whitewood Common Board
- BEHR DYNASTY 1 gal. Designer Collection #DC-003 Blank Canvas Satin Enamel Interior Stain-Blocking Paint & Primer
- BEHR DYNASTY 1 gal. Designer Collection #DC-003 Gratifying Gray Satin Enamel Interior Stain-Blocking Paint & Primer
- DAP Patch-N-Paint 8 oz. White Premium-Grade Lightweight Spackling Paste
- DAP Alex Painter's 10.1 oz. White All-Purpose Acrylic Latex Caulk
- EUCATILE 32 sq. ft. 3/16 in. x 48 in. x 96 in. Beadboard White True Bead Panel
- Lintex Buffalo Check 60 in. x 104 in. Sand 100% Cotton Table Cloth for Any Table
- Mason Craft and More 2-Piece 5.7L Apothecary Glass Kitchen Canister Set
- OXO Good Grips 0.2 qt. Mini POP Container with Airtight Lid (4-Pack)
- OXO Good Grips 6.0 Qt. Big Square Tall POP Food Storage Container with Airtight Lid
- Waddell CR310 1-3/4 in. x 9-3/4 in. x 9-3/4 in. Solid Basswood Corbels
- 12 in. x 12 in. x 12 in. Tan Wicker Cube Storage Bins
- 1/2 in. x 8 ft. Copper Ground Rod
- BEHR PREMIUM 11 oz. SP-206 Antique Copper Metallic Gloss Interior/Exterior Spray Paint Aerosol
Tools
- 3M Pro Grade Precision 2-1/2 in. x 4-1/2 in. x 1 in. 220-Grit Extra Fine Block Sanding Sponge (2-Pack)
- RYOBI ONE+ 18V Cordless 3/8 in. Drill/Driver Kit with 1.5 Ah Battery and Charger
- RYOBI 15 Amp 10 in. Corded Sliding Compound Miter Saw with LED Cutline Indicator
- RYOBI 2.6 Amp Corded 5 in. Random Orbital Sander
- RYOBI ONE+ 18V Cordless 3/8 in. Drill/Driver Kit with 1.5 Ah Battery and Charger
- RYOBI ONE+ 18V Cordless AirStrike 18-Gauge Brad Nailer (Tool Only) with Sample Nails
- RYOBI ONE+ 18V Cordless Reciprocating Saw (Tool-Only)
- Milwaukee 6 in. 24 TPI Thin Metal Cutting SAWZALL Reciprocating Saw Blades (5-Pack)
Instructions
- Create a design plan: You can create your plan digitally or cut and paste magazine pages onto a poster or foam board.
- Create a shopping List for Closet Pantry: Go to Home Depot's website or app for the project. This is a great place to create your shopping list for in-store shopping and online.
- Demo Closet: Remove everything from the closet.
- Repair the Sheetrock Walls: Repair any holes on the walls, except where the beadboard will go, with spackle. After the spackle has dried, sand it smooth.
- Install Countertop Shelf: Cut a piece of wood and set it on the wood strips attached to the wall. Next, use a 1 x 2" and nail it to the front to give the countertop thickness and a lip underneath for a curtain rod to hide behind.
- Install Beadboard: Measure each wall and cut your wood to fit. I attached my beadboard with my Ryobi brad nailer.
- Install Brackets: Once your beadboard is in place, measure where you want your shelves to go above the countertop. Mark where you want your brackets to go, and now let's drill holes in the side of your brackets. This will help us attach them securely where they sit on the wall. Only do this for the brackets that are in the corners. Screw the bracket onto the walls, drill another hole at the bottom, and screw in the bracket on the bottom.
- Install Shelves: Measure between the brackets for a 1 x 3 piece of wood. Cut the wood to fit and install with a brad nailer where the top of the wood is in line with the top of the bracket. Add another piece of wood at the top of the wall against the ceiling to finish the beadboard. Next, cut the wood for the shelves, set it on the brackets, and support the wood in the back. After your shelves are in place, cut screen trim and nail to the front of the wood to finish the edge.
- Spackle and Paint Pantry with BEHR DYNASTY® Interior Paint: Spackle all the holes and caulk anything that is needed. Once all the spackle and caulk are dry, sand it smooth where needed. pull the shelves out for easy painting. Paint the walls and the shelves. I painted the shelves on my table that I covered with a drop cloth, and while they were drying, I painted the walls inside the pantry. Here are the steps to painting the shelves: First, I sanded the shelves smoothly with a fine-grit sandpaper. Then I removed any dust with a damp paper towel. Next, I applied BEHR DYNASTY® Interior Paint in color, Gratifying Gray. Once your shelves and walls are finished being painted, install your shelves. At this point, let the paint cure for a day before putting anything on the shelves.
- How to Make a Homemade Herb Drying Rack: Measure and cut copper pipe (I measured 1/3" of the width of our pantry and used a reciprocating saw with metal cutting blade). Spray paint curtain rod brackets to match the rod (I used Behr spray paint color, Antique Copper). Screw the brackets into the wall leaving 1/2" of rod hanging off on each side. Screw the bracket screws into the copper pipe to make it snug. Tie herbs to the rod upside down with twine, or you can purchase s-hooks and spray paint them too.
- Pantry Organizing: Now that your paint is dry, it is time to add your groceries. On the floor below the shelf, I installed large oversized baskets that I already had on hand for oversized items. Store all your not-so-pretty groceries below the countertop. These are all the groceries you use weekly: Cans neatly stacked in rows, and bottles lined up on the left; dry goods are stored in Oxo air-tight storage containers on the Home Depots' website on the right; cookie jar in the middle to store individually wrapped items like peanut butter crackers. On the countertop are all the baskets for vegetables and fruits that last longer without refrigeration and a basket for linen kitchen towels. The next shelf up is cookbooks and old-fashioned jars to hold cereal, sugar, and oatmeal. The cookbooks are on the left, and the jars are on the right. On the top shelf of the pantry are three large wicker baskets for items I use on occasion, like cookie cutters and cake decorating supplies.
- Pantry Curtain: Install a spring curtain rod behind the lip of the countertop. Then drape a table cloth over the rod where the front of the fabric is off the floor 1/4". To keep your rod in place, sew a rod pocket at the top by hand or on a sewing machine.
Beautiful and I’m wanting this exact look. Curious to how far you placed brackets. 2 feet, 3 feet?
That is a very good question. Without measuring I think they are about five feet apart but if you look back at the photos in the blog post notice there is a 1×4 running across the wall between the brackets. The wood is resting on this piece of wood too. I hope this helps and good luck on your pantry project!
Such simple charm! Would you mind sharing the depth of the top two shelves? Thanks!
If I remember correctly I made them a few inches shorter than the bottom shelves.
What do you think? Should I call it a fancy vintage pantry or a butlers pantry?
I would have to say “fancy Vintage pantry” because a true butlers
pantry was usually in the basement of the house where they locked up and stored the fine silverware etc. after entertaining to keep it
safe! I would say your pantry is much cuter than silver stored under lock and key in a basement. 🙂 Lovely pantry with your touch!
Thank you for your kind words and the history lesson:) I just learned while visiting Colonial Williamsburg that the butlers pantry (what looked like an office) in the Governors Palace is where they locked up the silver. I share the pantry in this video if you would like to take a peek. https://www.youtube.com/watch?v=E44YHqbl2tw