
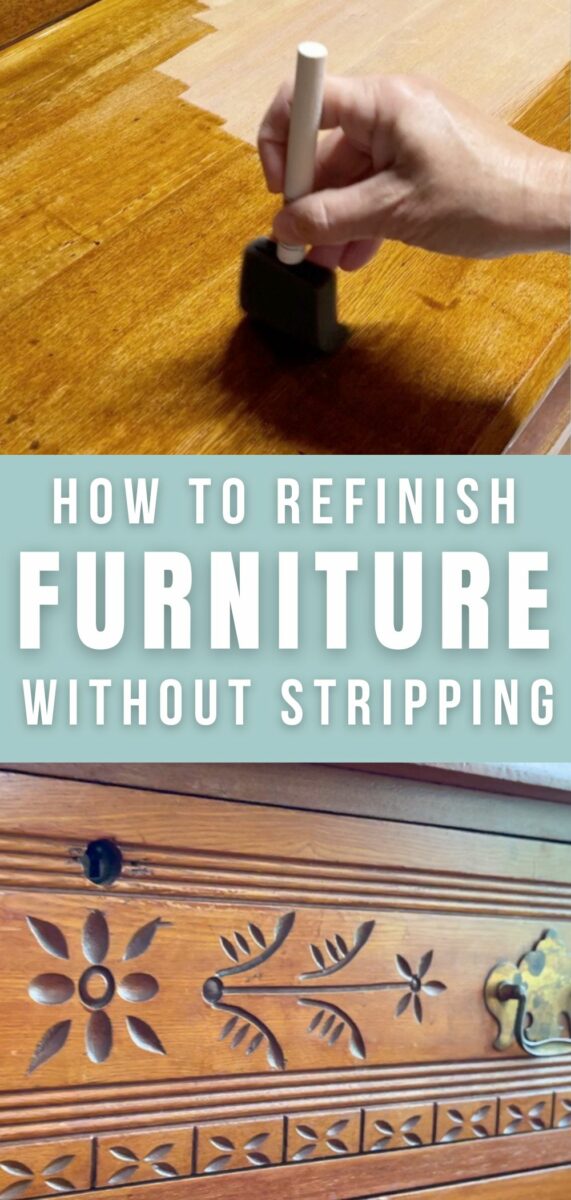
Tired of the laborious process of stripping wood furniture, but still longing to restore its natural beauty? Unlock the secrets to reviving your cherished pieces without the hassle. Discover the transformative art of restoring wood furniture without stripping and embark on a journey that breathes new life into your beloved treasures.
Recently while visiting my niece in Maine she shared with me how she restores wood furniture without stripping.
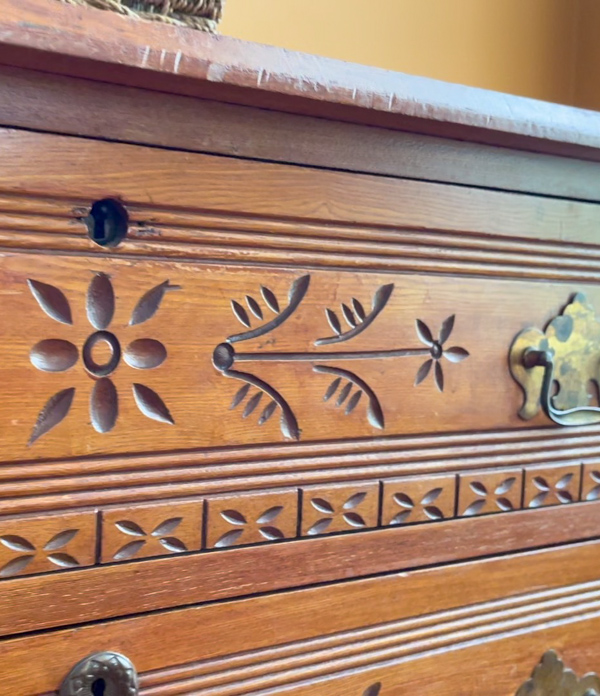
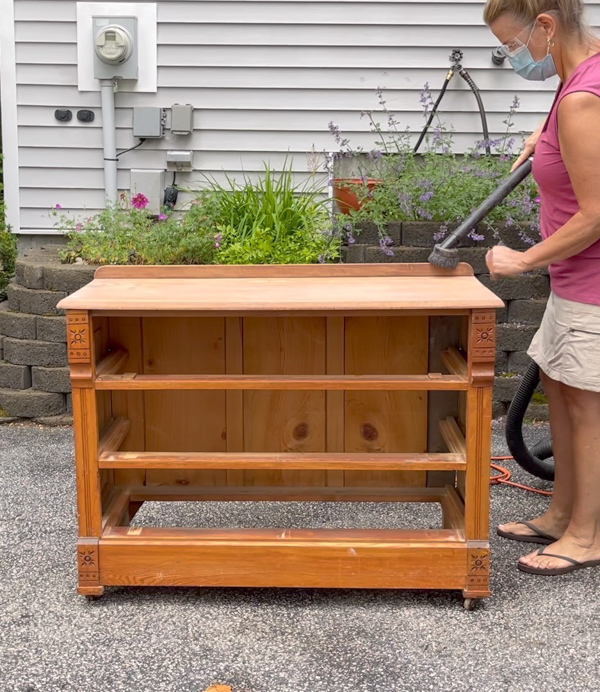
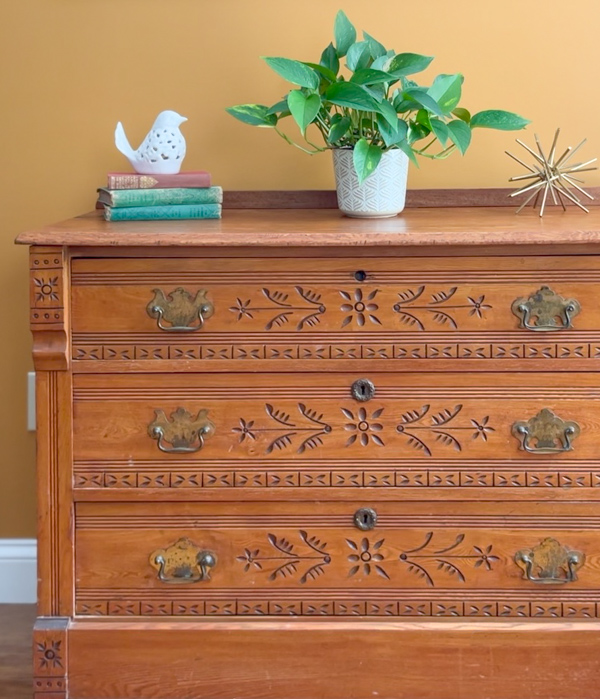
She had recently thrifted a beautiful Victorian Eastlake chest, but the top had seen its better days. So we decided to restore the wood to match the base, and we couldn't be more pleased.
In this blog post, we are taking you on the journey of restoring this gorgeous Eastlake chest without doing any stripping.
Disclaimer: We are not professional when it comes to furniture refinishing but Valerie, my niece, has worked on many pieces in her lifetime, so I was honored to get to watch her and share her years of experience.
Whether you're a DIY enthusiast or a beginner, the easy steps of this method will help you refinish your furniture without stripping, saving you time and effort.
Restoring Wood Furniture Without Stripping FAQs:
What Supplies Do I Need to Restore Wood Furniture Without Stripping?
The best thing to do when starting a new project is to gather your supplies. Here are the supplies we used for our project:
- Electric sander
- 100 grit sandpaper
- 600 grit sandpaper
- Tack cloth
- Foam paint brush
- Wood stain
- Sealant
- Clean rags
- Shop vac (optional)
What are the Benefits of Restoring Wood Furniture Without Stripping?
There are three reasons why Val and I decided to not strip the finish on this old piece of furniture. For these reasons we feel it kept the integrity of the piece and saved us some time.
But not all pieces of furniture can be done this way because some pieces will need the added step of stripping. Here are the three reasons why we choose not to strip.
- Finish can be sanded away: Luckily, this chest had its original old finish, which was very thin and almost gone on the top, so stripping was unnecessary – this was the first reason we didn't use a stripper.
- Save time: The second reason we chose not to strip this chest was to save time. Stripping an existing finish can take hours and hours and sometimes days. If sanding removes the finish, you might save yourself lots of time. It depends on the size of the furniture and the finish. Because our original finish was thin to almost gone, Val felt a simple sanding was all that it needed. However, you won't know until you try so she gave it a try.
- Less mess: If you are able to take your piece outside on a clear day then sanding may be less messy. We took the chest outside and started our project by removing the finish on top with sanding.
Now let me talk through the simple steps of restoring wood furniture without stripping.
Tip: Wear a mask and eye protection to protect your lungs and eyes while sanding.
Step 1: Assessing the Condition of Your Wood Furniture
Now that we have talked about the benefits of restoring furniture without stripping it's a good idea to assess the condition of the wood.
- Inspection and cleaning: Thoroughly examine the furniture for damage, loose joints, or previous finishes.
- Surface preparation: Remove dirt, grime, and old wax using appropriate cleaning methods.
- Identifying necessary repairs: Determine if any repairs or replacements are required before proceeding.
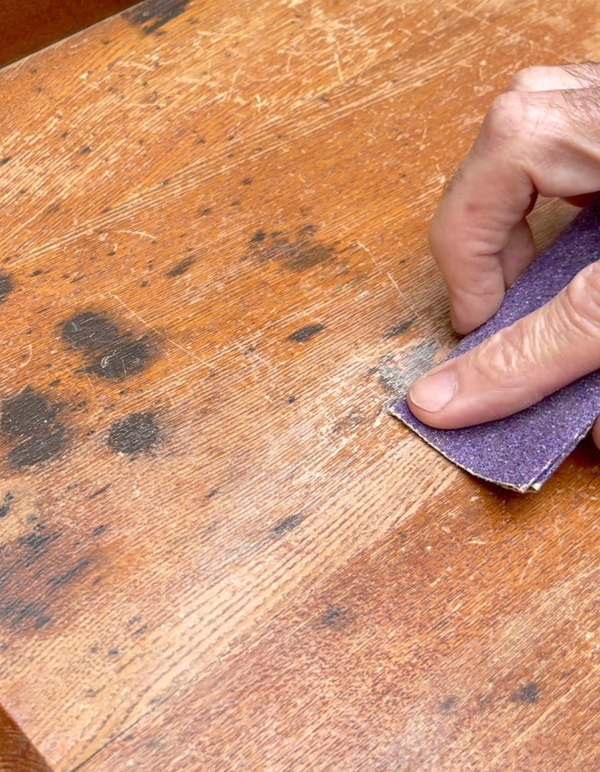
Before you begin a wood refinishing project, the first step should be to look carefully at the surface of the wood for any dents, water marks, stains, joints that need repairing, deeper scratches, damage or previous finishes. This Eastlake piece has what looked like an ink stain, water stain and some scratches.
But your piece may need more attention, so look carefully for any joints that need repairing, damage or previous finishes.
At this point, we had to decide our course of action based on this information. What did we decide? It was good news. We decided to go with what was there and only sand the top to remove the finish and see how much of the black spots, water marks and dents come out.
Because this furniture is an antique, we decided to keep some of its history by not trying to remove the marks. If you have ink and want to remove it, try this article about removing ink from furniture.
Step 2: Repairing and Prepping the Wood Surface
After you have accessed the piece of furniture, in your next step, you will need to clean and repair the wood.
First give it a good cleaning if necessary. Based on the amount of dirt, grime and old wax will determine your cleaning method but here is a simple technique Val has used on many pieces of furniture.
Val began with a damp clean cloth with a drop of Dawn and wiped the furniture down. Then she followed with a clean damp cloth to remove any Dawn. The furniture was already pretty clean so this was an easy job.
Luckily there was no grime or old wax to remove but here is a great article on how to remove furniture wax if you have some on your piece.
Now if you need to do any repairs this would be a good time to do them. Fill gaps and cracks with wood filler or epoxy putty to repair any imperfections in the furniture.
If you have any broken legs or joints that are coming apart, add wood glue and clamp them until it is dry and secure. This piece was in good condition so it did not require a lot of work besides a good cleaning.
Step 3: Removing Furniture Finish with Sanding
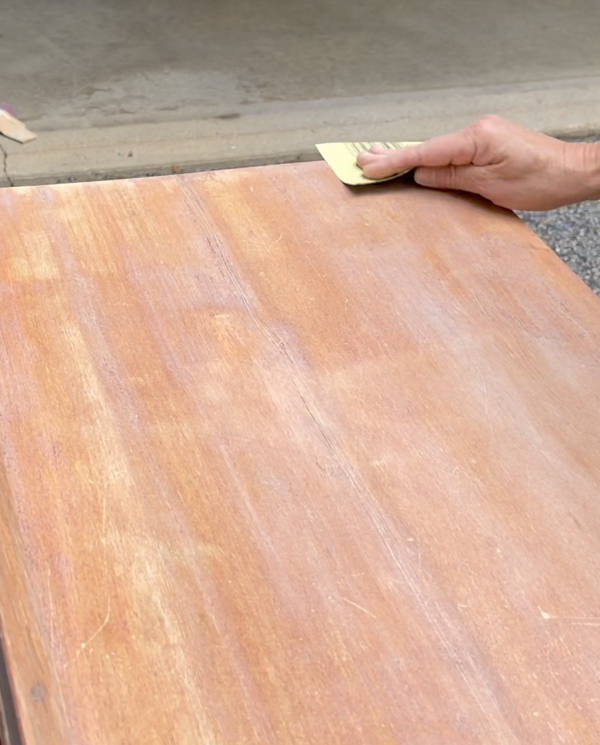
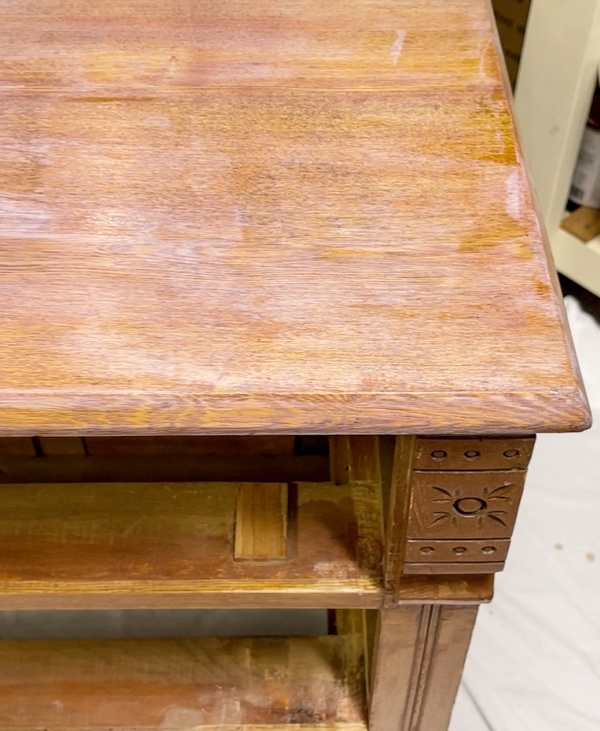
Now everything is clean and repaired it is time to remove the finish on top with sanding. Val began by using an electric sander with a course 100 grit paper and started sanding. The finish came off easy. Remember, it was a thin and almost gone finish in some places.

Val only used the electric sander on the flat surfaces. Anything rounded like the edge she sanded by hand using the same grit.
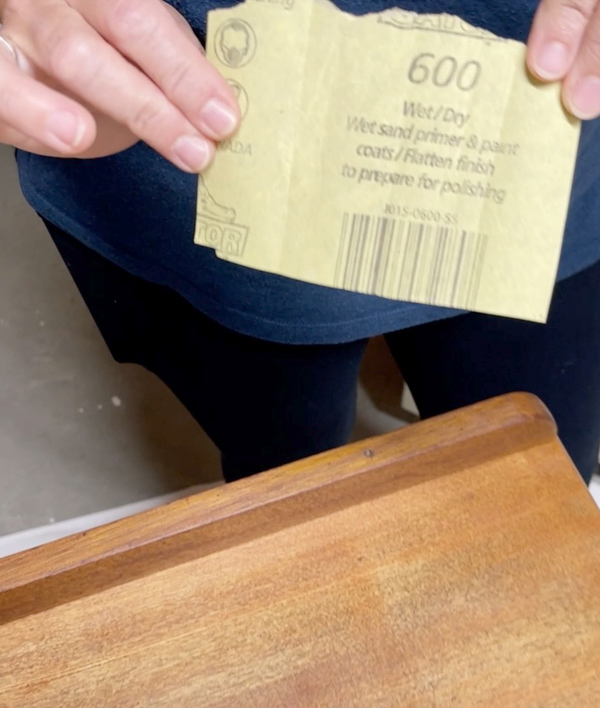
Next we changed to a smoother grain sandpaper of 600 and by hand went over the top. The smooth texture of this sandpaper gave the piece a silky smooth finish.
Once that step was finished she pulled out her shop vac and vacuumed all the debris and followed with a tack cloth removing all the excess dust. For best results you want your surface as clean as possible.
Now that the finish was gone on the top and the wood was smooth as babies skin we brought the chest back inside to start adding the stain.
Refinishing Techniques for Wood Furniture Without Stripping
There are many ways you can refinish wood. Here are a few ideas before we jump into how Val finished her Eastlake piece.
- Stain and seal: Apply a fresh coat of stain to enhance the wood's natural beauty, followed by a protective sealant.
- Chalk paint and distressing: Utilize chalk paint for a shabby chic look and distress the finish for added character.
- Varnishing or lacquering: Opt for a clear varnish or lacquer to provide a durable and glossy finish.
Step 4: How to Stain Wood
Now Val chose to use a stain. Matching an old stain when you already have a stain can be tricky. Val had an idea of what stain to use and she was spot on but if you need to match a stain use the same type of wood or the back of the furniture if it has the same wood to test out stains.
Also remember you can layer different color stains to get custom colors.
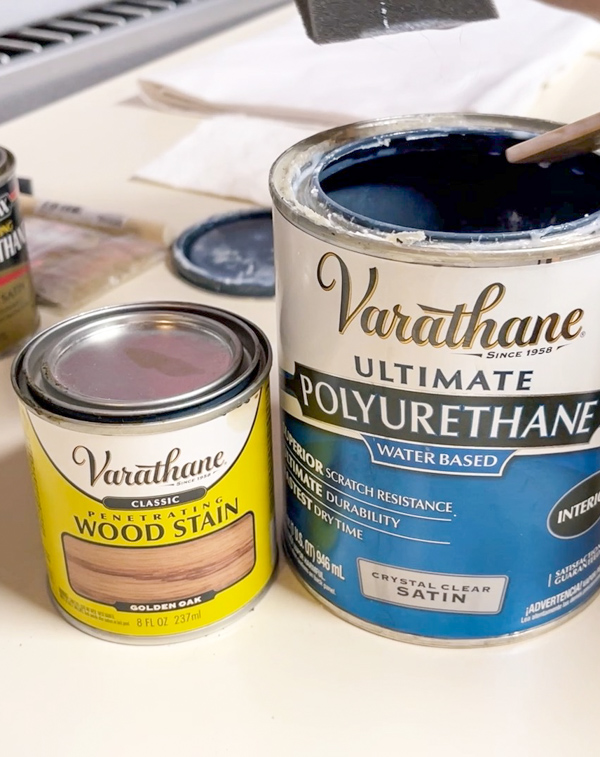
The stain we used on the furniture is Varathane classic wood stain in color golden oak. Give the stain a good stirring before applying it to the raw wood.
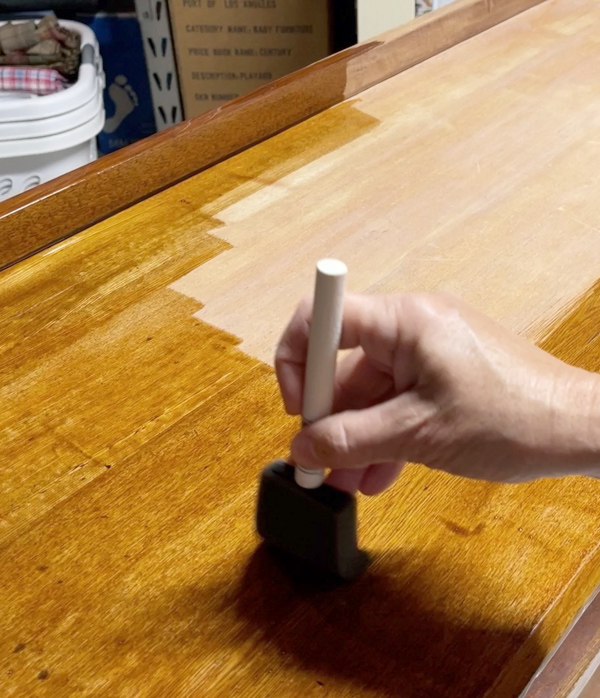
Be sure when you begin applying stain, ensure you're in a well-ventilated area. When Val started applying the stain she used a sponge brush and wiped it going in the direction of the grain. She was careful to make even strokes.
Next the directions say to leave the stain on for five minutes and then wipe it off and then reapply another layer of stain after two hours but we did not feel we needed a second coat.
After she applied the first coat of stain, she used a dry clean rag to wipe the excess off. She did this step of wiping off the stain a few more times over the next hour or two.
Once the stain was dry, Val lightly sanded it with 600 grit sandpaper by hand.
Now the stain is dry and ready for a sealant.
Step 5: How to Add Sealant to Stained Wood
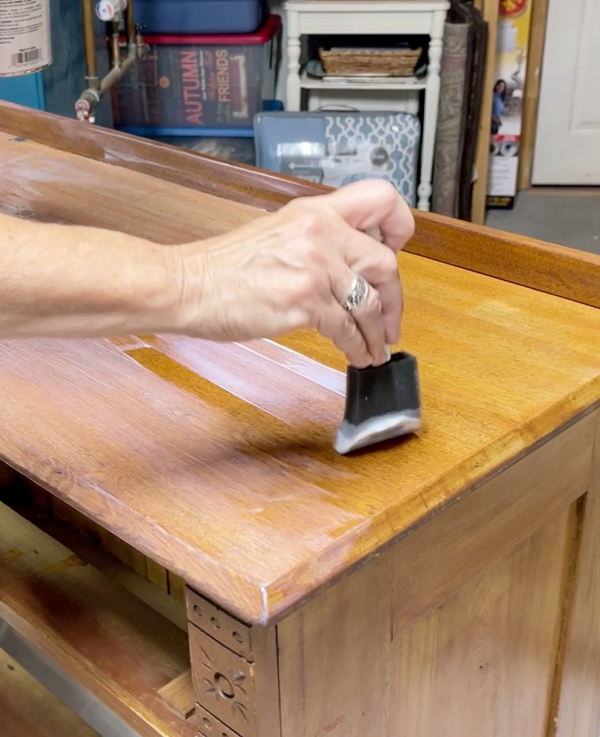
This final step was quick but the dry time took much longer. Val began by stirring the sealant first. She simply used a sponge brush and wiped it with the grain of the wood working in small sections.
Because this sealant dries fast, she had to move quickly. Once she had it all on the wood she left it for over two hours because of the humidity.
Later that evening Valerie sanded the sealant again with the 600 grit sand paper and then removed the grit with a tack cloth. Then she added the second coat of sealant.
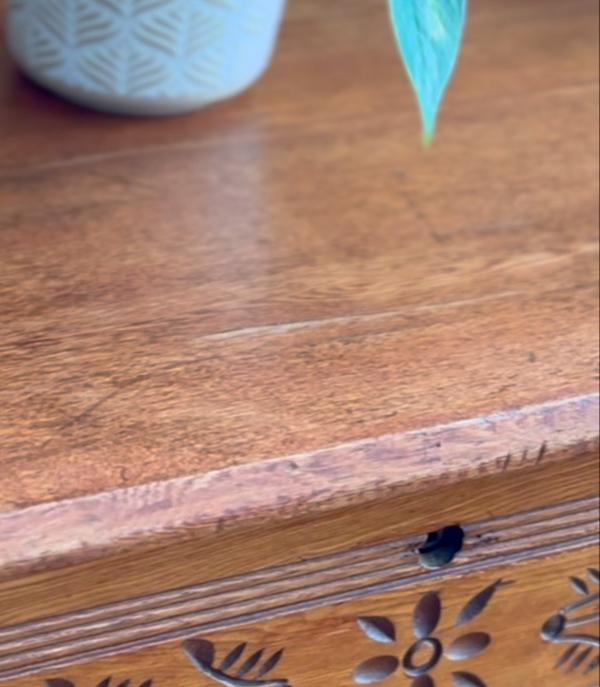
This photo shows what it looks like just after she finishes applying the sealant while it is still wet.
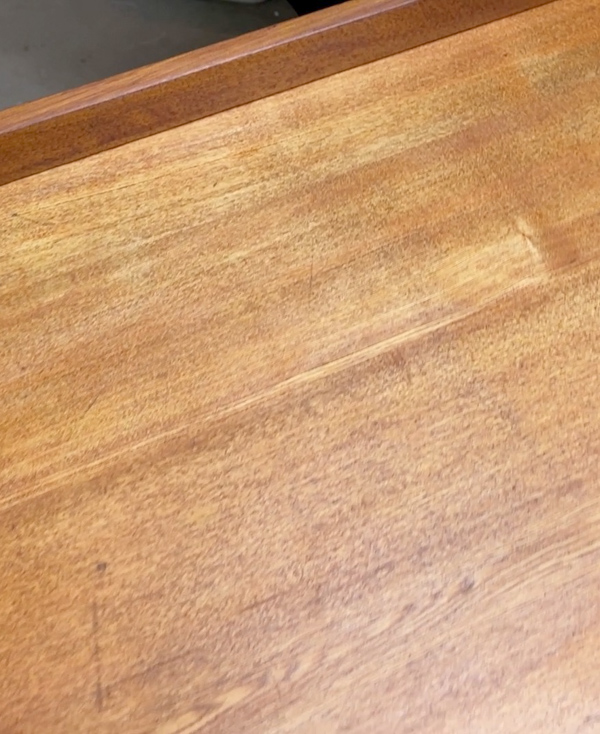
This photo shows the sealant and new finish all dry.
The next day Valerie used the 600 sandpaper one more time to give a silky smooth finish and then took the chest to her den.
Final Touches and Maintenance Tips
To ensure the longevity of your restored wood furniture, paying attention to the final touches and implementing proper maintenance practices is crucial. Once the refinishing process is complete, applying a layer of quality wax or polish can enhance the shine and protect the finish, providing an added layer of defense against everyday wear and tear.
Additionally, it's essential to practice proper care and maintenance, such as regular dusting, using coasters to prevent water damage, and avoiding direct sunlight to prevent fading.
By incorporating these simple yet effective measures into your routine, you can enjoy the beauty of your restored wood furniture for years to come. You now have a family heirloom for generations to enjoy.
Final Thoughts
Isn't restoring wooden furniture without stripping easier than you thought? No chemical stripper is required. You can bring your old wood furniture back to life with one easy project. Be sure to check out my YouTube video so you can watch the process as it happened.
What is Victorian Eastlake Furniture?
Before we go, I wanted to share information about Victorian Eastlake furniture. Victorian Eastlake furniture is named after Charles Eastlake. In his 1868 book Hints on Household Taste in Furniture, he rejected the notion of opulent furniture favored in the Victorian era for simple and sturdy artisan-crafted pieces. This style of furniture remained popular from 1870 until around 1890.
Characteristics of Victorian Eastlake furniture include:
- Spoon carvings in the form of flowers or leaves
- Horizontal or vertical incised lines
- Ornate hardware
- Geometric design elements
Now you know what to look for when you go antique furniture shopping. Do you have any Victorian Eastlake furniture? I'd love to hear about it, especially if you've had experience with a furniture restoration project. Put your story in the comments or on social media.
Happy Decorating!


Restoring Wood Furniture Without Stripping: A Step-by-Step Guide
Discover the transformative art of restoring wood furniture without stripping with step by step easy guide.
Materials
Instructions
Assessing the Condition of Your Wood Furniture
- Inspection and cleaning: Thoroughly examine the furniture for damage, loose joints, or previous finishes.
- Surface preparation: Remove dirt, grime, and old wax using appropriate cleaning methods.
- Identifying necessary repairs: Determine if any repairs or replacements are required before proceeding.
Repairing and Prepping the Wood Surface
- After you have accessed the piece of furniture next you will need to clean and repair the wood.
- First give it a good cleaning if necessary. Based on the amount of dirt, grime and old wax will determine your cleaning method.
- If you need to do any repairs this would be a good time to do them. Fill gaps and cracks with wood filler or epoxy to repair any imperfections in the furniture. If you have any broken legs or joints that are coming apart add wood glue and clamp them until it is dry and secure.
Removing Furniture Finish with Sanding
- Now everything is clean and repaired it is time to remove the finish on top with sanding. Use an electric sander with a course 100 grit paper and started sanding.
- Anything rounded like the edge sand by hand using the same grit.
- Change to a smoother grain sandpaper of 600 and by hand go over the top. The smooth texture of this sandpaper gives the piece a silky smooth finish.
- Clean all the debris and follow with a tack cloth removing all the excess dust.
How to Stain Wood
- Matching stains when you already have a stain can be tricky. If you need to match a stain use the same type of wood or the back of the furniture if it has the same wood to test out stains. Also remember you can layer different color stains to get custom colors.
- Use a sponge brush and wiped it going with the grain. Be careful to make even strokes.
- Let the stain dry as directed.
- After applying the first coat of stain use a dry clean rag to wipe the excess off.
- Once the stain is dry, lightly sanded with 600 grit sandpaper by hand.
How to Add Sealant to Stained Wood
- Stir the sealant first. Use a sponge brush and wipe it with the grain working in small sections.
- Because the sealant dries fast move quickly but carefully.
- Let the sealant dry thoroughly.
- Sand the sealant again with the 600 grit sand paper and then remove the grit with a tack cloth.
- Then add the second coat of sealant.
- Let the sealant dry thoroughly.
- Use the 600 sandpaper one more time to give a silky smooth finish.
Notes
Final Touches and Maintenance Tips
To ensure the longevity of your restored wood furniture, paying attention to the final touches and implementing proper maintenance practices is crucial. Once the refinishing process is complete, applying a layer of quality wax or polish can enhance the shine and protect the finish, providing an added layer of defense against everyday wear and tear.
Additionally, it's essential to practice proper care and maintenance, such as regular dusting, using coasters to prevent water damage, and avoiding direct sunlight to prevent fading. By incorporating these simple yet effective measures into your routine, you can enjoy the beauty of your restored wood furniture for years to come.
I just refinished a piece that has the same markings but with 2 small drawers and then open to the base of the unit but I can tell it used to have doors on it. I didn’t find any name on it but I knew it was really old due to nails being used instead of screws. I use it as an end table. And now I know it’s Victorian and an Eastlake piece!! I stained the top and painted the base using a dark wax that fell nicely into the crevices of the design. Thank you so much for your education article.
It sounds lovely and I love the idea of using it as an end table. You have given me an idea for my daughter’s old bedroom. My nieve found her Eastlake piece at Goodwill. Where did you find yours?
I have done some woodworking over the years and I would suggest that you should work with a couple more grits of sandpaper. After 100 grit, I would use a 220 and then a 320 before moving all the way up to 600 grit. In the end, you won’t be sanding as long to get the desired result.