
Here you will find a DIY barn quilt tutorial with step by step directions, easy barn quilt pattern information and where to buy a barn quilt.
Barn quilts are a new way to decorate your farmhouse style home which is why I decided to create a DIY barn quilt post so you can design one to fit the color scheme and style of your home.
But no worries if you are not crafty because I will share where you can buy a beautiful barn quilt already made.
DIY Barn Quilt
Years ago barn quilts were made to go on a person' barn but today we are bringing this charming quilt pattern design into the home.
There are so many different quilt patterns and it is easy to transfer one of those patterns onto wood with paint. So here are the supplies you will need to make a barn quilt.
- Wood
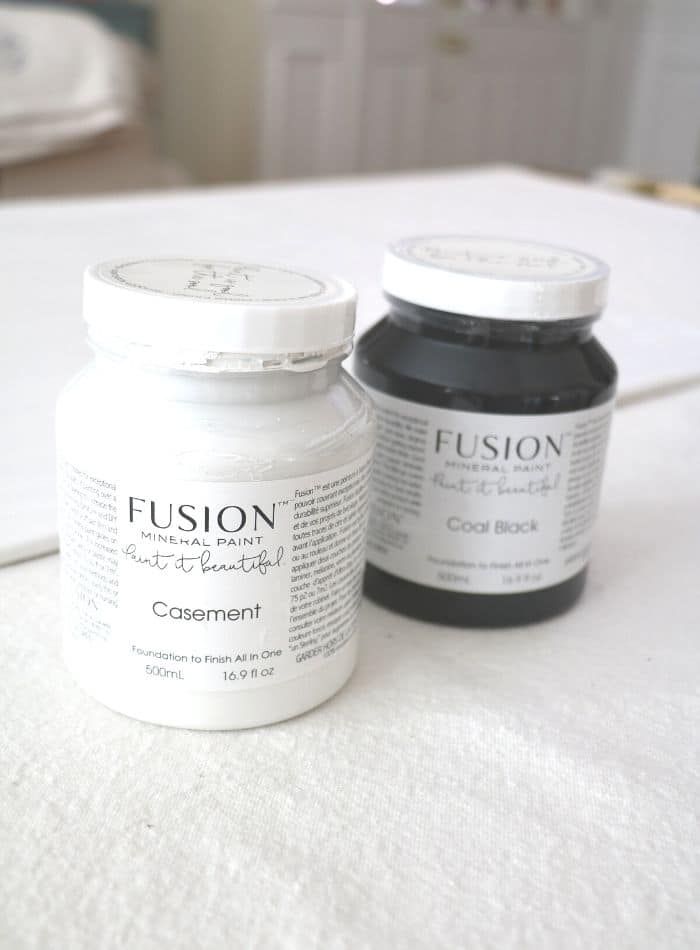
- Paint (I used Fusion mineral paint in color Casement and Coal Black)
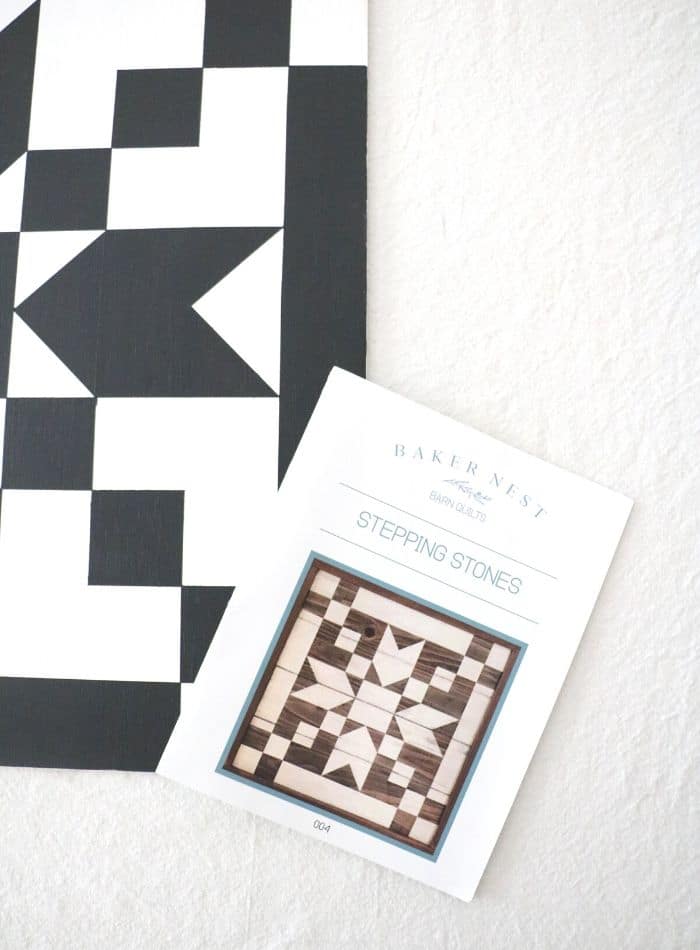
- Quilt pattern (I used the Stepping Stone pattern by Baker Nest)
- Frog tape
- Ruler
- Pencil and paper
- Electric sander
- Paintbrush
- Hairdryer
- Dropcloth
Products from Amazon.com
You do not need many things to make a barn quilt. So, let's get started.

How to Make a Barn Quilt
First, gather all your supplies to start the project. Think of DIY projects like baking a cake. It is good to collect all your supplies first so if something is missing you can run to the store or find it before you get knee-deep into the project.
Cut and Sand
Now that you have gathered your supplies cut your wood to the size you want for your home. I recommend finding a place for your barn quilt and then determining the size based on the wall where it will go.
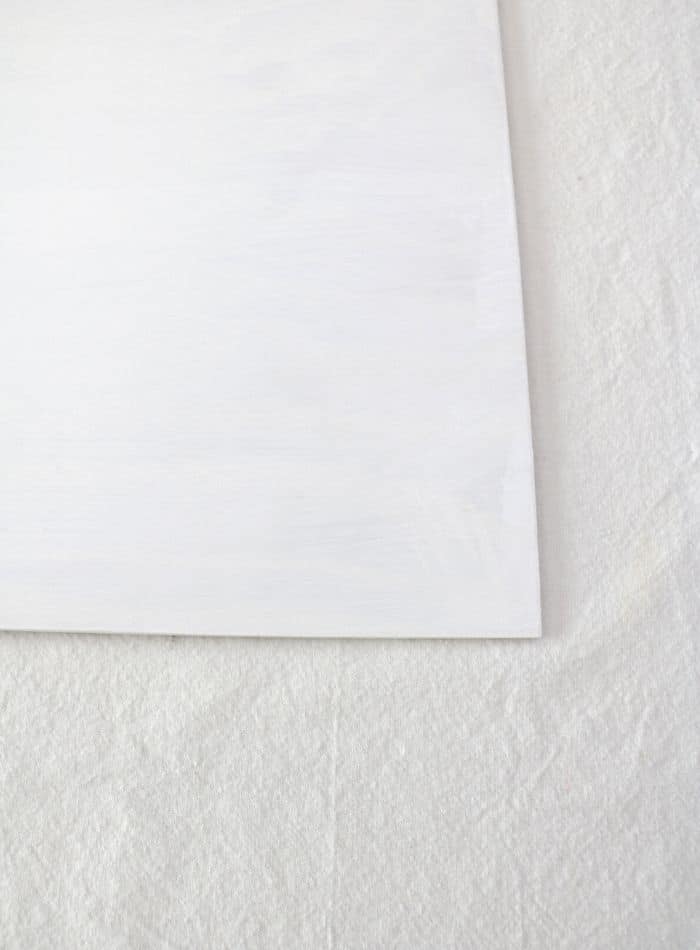
After you have cut your wood go ahead and sand it smooth and remove any sand from the wood with a damp cloth or tack cloth. Now it looks like you are ready.
Paint Background
Begin by painting the whole board one color unless your background color is the wood. My board is white and black so I painted the background white.
If your board has knots from a wood-like pine I recommend using some Kilz primer to bond the knots from bleeding through. Once you have painted your background use the blow dryer to dry the paint.
Grid
Grab your pencil and ruler and start by dividing your board into four quarters. Basically find the center and draw lines vertically and horizontally. This will make a cross on your board.
The next lines will make a 10 x 10 grid on your board. The pattern sold by Baker Nest is a 20″ x 20″ pattern so if your board is 20″ x 20″ then this will be easy math.

Next, divide each square with four vertical lines and repeat the process for each square. A short cut on this step is to go ahead and draw those lines all the way down and all the way across.
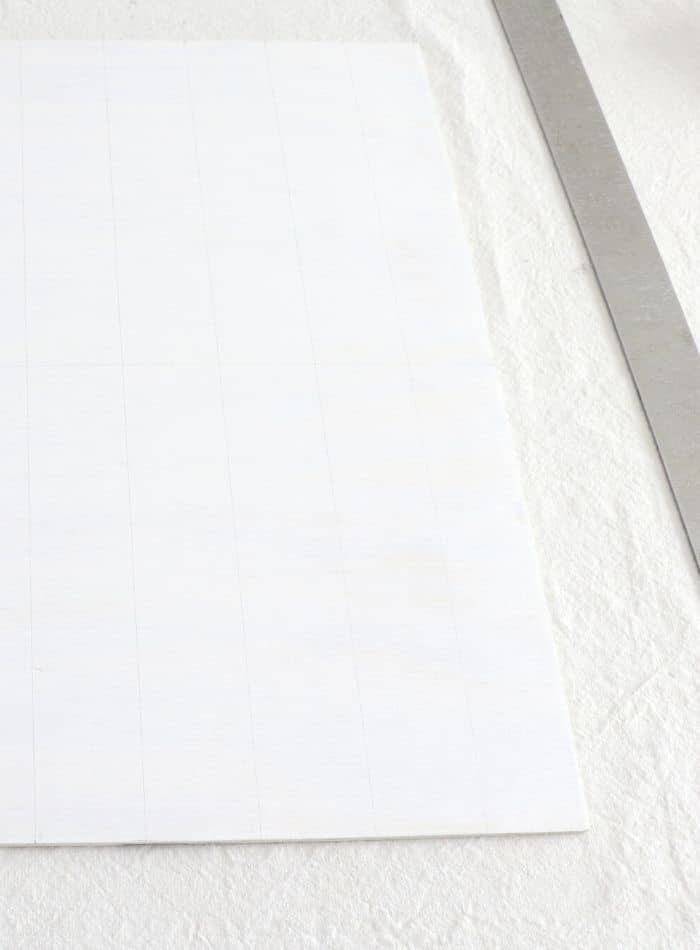
Now you should have 10 boxes across the top and 10 boxes down the side and so on.
Marking the Pattern
Now for the tricky part and this is where purchasing the barn quilt from Baker Nest comes in handy. Her pattern has it all written out for you to follow.
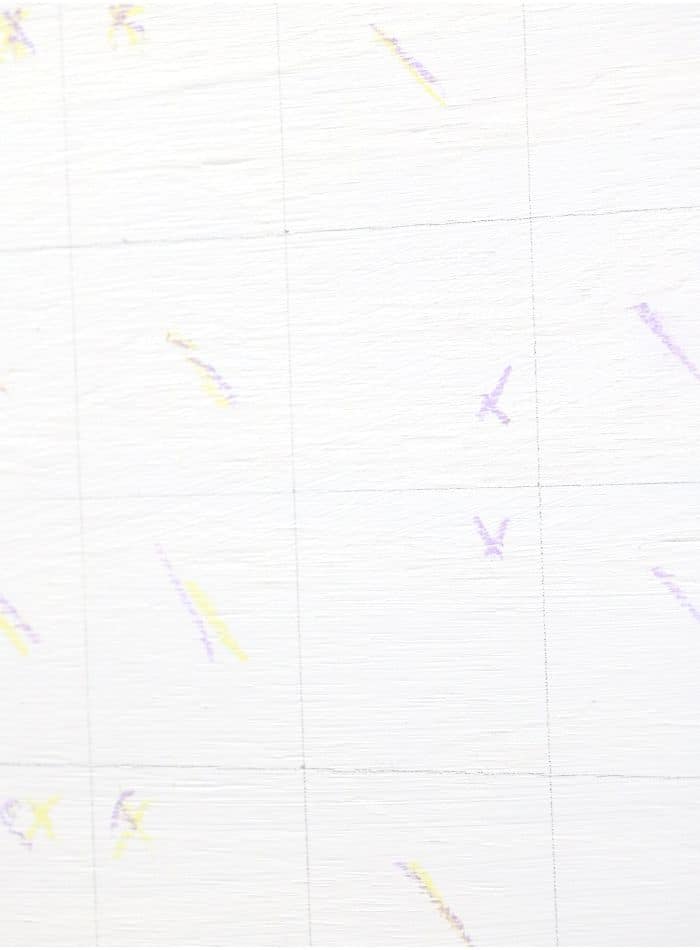
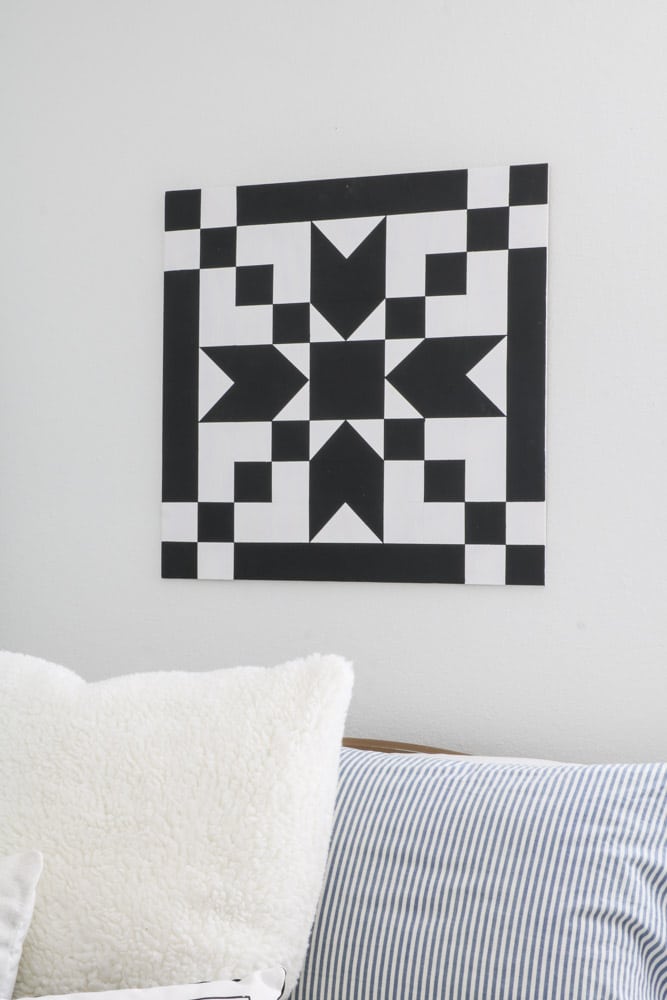
But basically make a mark on each box which ones will be black. Once you have all of them marked you will be able to see the stepping stone quilt design.
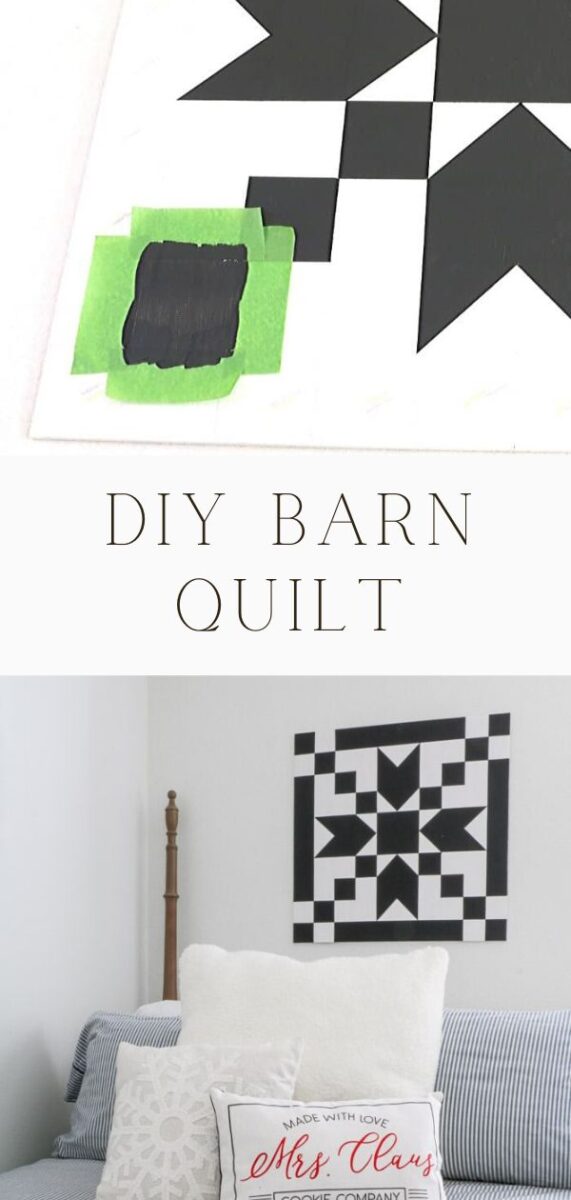
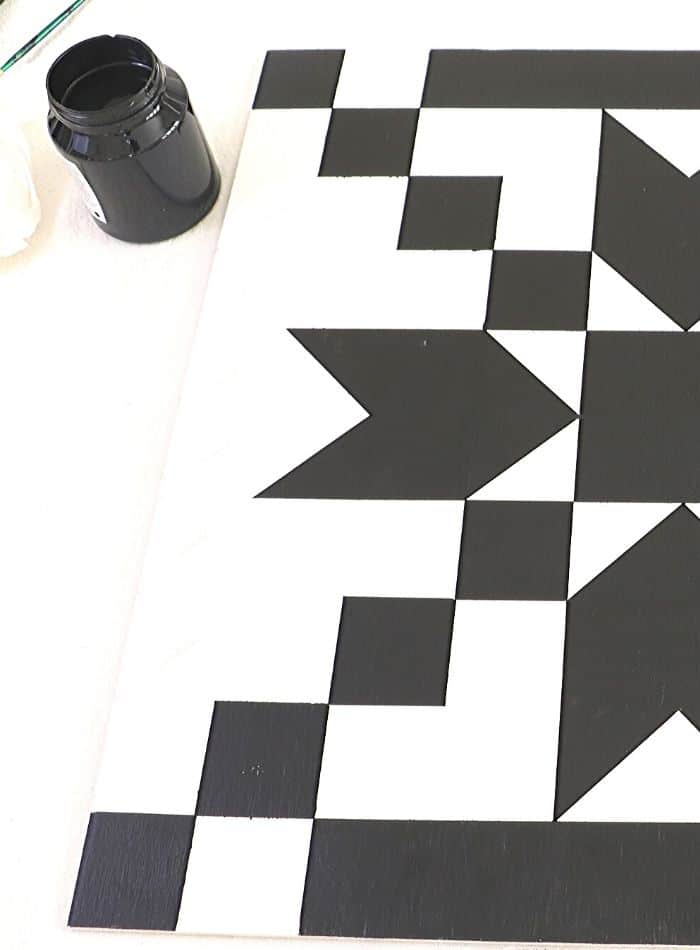
Tape and Paint
Now it is starting to get fun! I like to start in the middle so go ahead and tape off the four squares. Make sure to score the paint so no paint leaks under the tape.
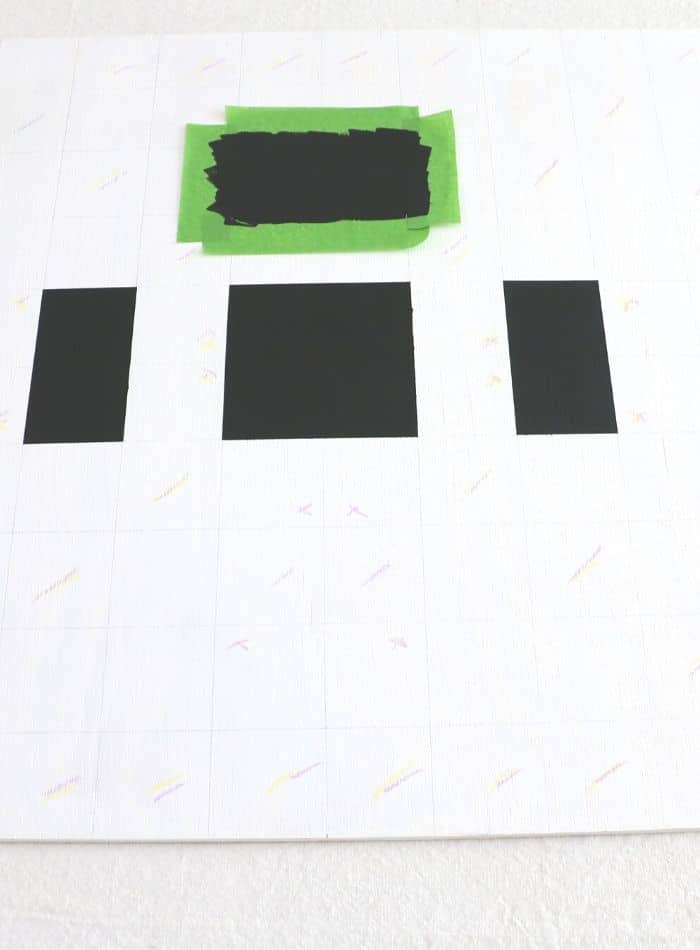
Next, shake up the fusion mineral paint and remove the lid. Then paint on a layer of the black fusion paint and blow dry it until you cannot see any shiny paint on the surface.
Repeat the Tape and Paint
Basically from here on out you are continuing to tape, paint, blow-dry and remove the tape. Keep doing these steps until you have finished all the squares.
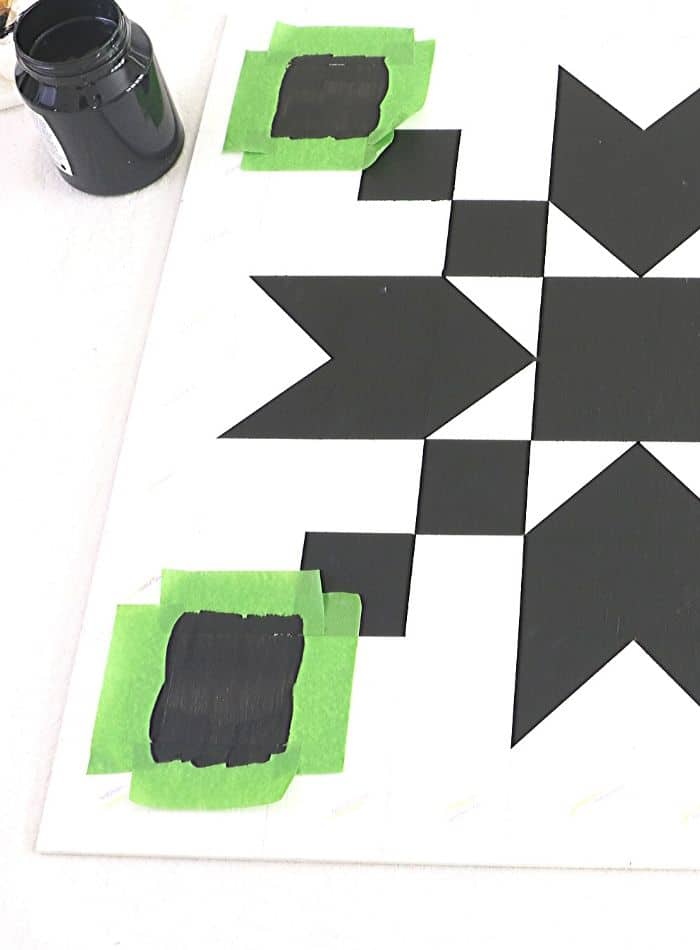
Remember to score the tape so the paint doesn't bleed and make sure to paint the squares that you have marked. Also I kept a trash can close by so when I removed the tape all I had to do was toss it in the trash.
When you get to the end you will be surprised at how beautiful your DIY barn quilt turned out.
How to Hang a Barn Quilt
This step is pretty simple. There are two ways to hang your barn quilt.
One barn quilt I made I hung on our little shed. You can use a nail gun and shoot the barn quilt into the wood but I wasn't sure I wanted this barn quilt to stay on the shed forever so I put a picture hanging hook on the back and hung it like a picture with a nail.

Once I had the nail in place I simply hung the barn quilt on the nail with the hook that is on the back of the quilt art.
Another way to hang your barn quilt indoors is to also hang it with a hook just like my second option. Or you can shoot brad nails into the wood and wall. If you are planning to hang your piece with a hook and nail then nail holes are not a big worry so why not grab your nail gun and shoot a few nails straight into the barn quilt.
And now you are all finished. Yay!! Here are a few styling ideas and tips for taking care of your barn quilt.
Products from Amazon.com
Where to Buy a Barn Quilt
If you are looking for a barn quilt to purchase then check my friend Kate at Baker Nest. She has many options to choose from and she comes out with holiday designs too.
In addition to selling barn quilts she also sells Fusion Mineral paint and barn quilt patterns. This last tidbit is in case you decide to craft your own barn quilt.
Conclusion
There are so many different sizes and patterns of barn quilts you can make. If you don't feel like making a barn quilt you can purchase one at Baker Nest.
Baker Nest has many DIY barn quilt patterns to choose from and barn quilts already made if you are not feeling crafty. One of my favorite patterns is on t-shirts you can purchase from Baker Nest. It has beautiful color ideas too!
So, let's talk about all the places you can hang your barn quilt.
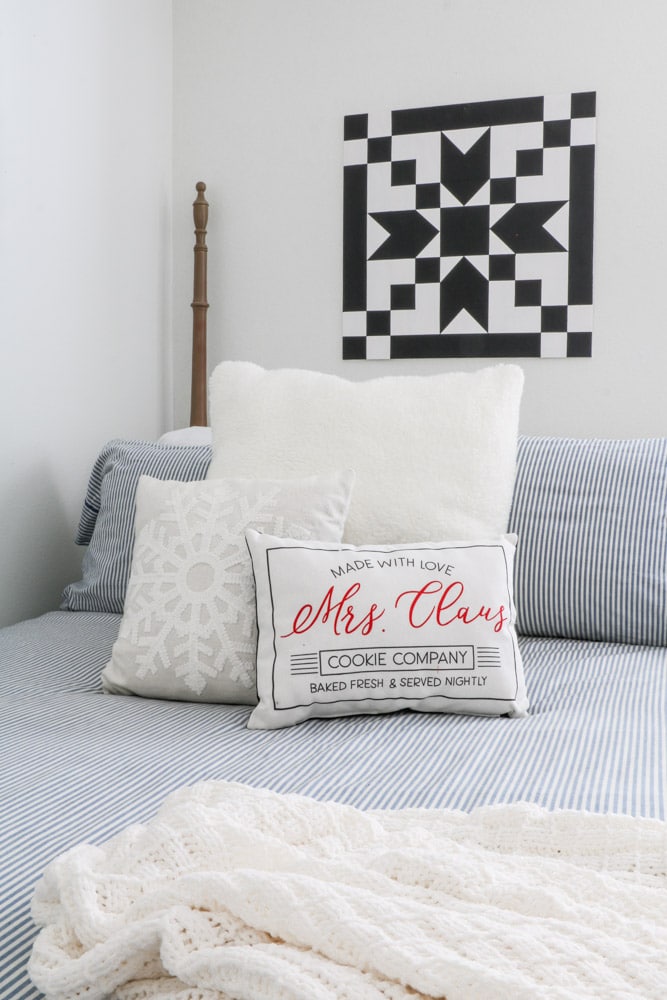
This barn quilt is made with love for my daughter. It is 23″ x 23″ so it will need a good size wall like a hall wall, over a larger piece of furniture like a sofa or bed, on a stairwell, porch and so on. The options are endless.
But if you are making a mini barn quilt then consider setting it on a piece of furniture, hanging it in a small spot on the wall or on a gallery wall. See what I mean about the options being endless?
If you had a barn quilt where would you hang your wooden quilt? We would love to know. And if you want some barn quilt inspirations try my decorating with barn quilts.
Happy Decorating!

1 thought on “DIY BARN QUILT”